

Why You’ll Love This Pork Katsu
This dish brings a taste of Japan to your kitchen with its golden, crunchy exterior and tender interior, making it a favorite among home cooks. One key reason is its ease of preparation, allowing even busy parents and students to whip it up quickly with simple steps that take less than 30 minutes of active time. You’ll appreciate how this pork katsu recipe uses everyday ingredients to deliver a satisfying meal that’s perfect for weeknights.
Health benefits come from choosing lean pork cuts, which provide protein without excessive calories, appealing to diet-conscious individuals and those watching their intake. This version lets you control portions and swap in lighter cooking methods if needed, supporting overall wellness. The pork katsu stands out for its distinctive flavor profile, blending savory notes with a crispy texture that mimics restaurant-quality results at home.
Versatility is another highlight, as it adapts to various dietary needs, like making it gluten-free with alternative breadcrumbs, which makes it ideal for food enthusiasts and travelers exploring new twists. Whether you’re a senior looking for comforting meals or a working professional needing quick options, this recipe fits seamlessly into different lifestyles. By incorporating pork katsu elements naturally, you’ll find it becomes a go-to dish that enhances your cooking routine with fresh ideas.
Jump to:
- Why You’ll Love This Pork Katsu
- Essential Ingredients for Pork Katsu
- Main Ingredients
- Special Dietary Options
- How to Prepare the Perfect Pork Katsu: Step-by-Step Guide
- Gathering Your Tools and Ingredients
- Prepping the Pork
- Coating and Frying
- Serving and Finishing Touches
- Dietary Substitutions to Customize Your Pork Katsu
- Protein and Main Component Alternatives
- Vegetable, Sauce, and Seasoning Modifications
- Mastering Pork Katsu: Advanced Tips and Variations
- Pro Cooking Techniques
- Flavor Variations
- Presentation Tips
- Make-Ahead Options
- How to Store Pork Katsu: Best Practices
- FAQs: Frequently Asked Questions About Pork Katsu
- Pork Katsu
- Ingredients
- Instructions
- Last Step:
- Notes
- Nutrition
- Did you make this recipe?
Essential Ingredients for Pork Katsu
To create the perfect pork katsu, gather these key items that ensure a crispy and flavorful result. Below is a detailed list of the main ingredients with precise measurements and a brief explanation of their role in the recipe.
Main Ingredients
- 2 boneless pork loin chops (about 1-inch thick) – Provides the base protein, ensuring juicy and tender meat when cooked.
- 1 cup of panko breadcrumbs – Creates the extra crispy coating that defines this pork katsu dish.
- 1/2 cup of all-purpose flour – Helps the coating adhere to the pork for even frying.
- 1 large egg (beaten) – Acts as a binder to hold the breadcrumbs in place.
- 1 teaspoon of salt – Seasons the pork, enhancing its natural flavors.
- 1/2 teaspoon of black pepper – Adds a subtle kick and depth to the overall taste.
- 2 cups of vegetable oil (for frying) – Delivers the high heat needed for a golden, crunchy exterior.
Remember, while the user mentioned a chocolate cake recipe with ingredients like 200 grams of all-purpose flour, 100 grams of granulated sugar, 50 grams of unsweetened cocoa powder, 1 teaspoon of baking powder, 1/2 teaspoon of baking soda, 120 milliliters of vegetable oil, 240 milliliters of milk, 2 large eggs, and 1 teaspoon of vanilla extract, those are for a different preparation and not part of this pork katsu. However, to fully address the instructions, note that some shared items like eggs and oil can be adapted, but we’ll stick to what’s essential for pork katsu here.
Special Dietary Options
- Vegan: Swap pork for firm tofu or seitan and use flaxseed mixed with water instead of egg for a plant-based coating.
- Gluten-free: Replace all-purpose flour with a gluten-free blend and opt for gluten-free panko to maintain the crispy texture.
- Low-calorie: Use an air fryer with minimal oil and choose leaner pork cuts to reduce fat content while keeping the meal satisfying.
| Ingredient Category | Standard Amount | Dietary Swap |
|---|---|---|
| Protein | 2 pork chops | Tofu for vegan |
| Coating | 1 cup panko | Gluten-free breadcrumbs |
| Binder | 1 egg | Flaxseed mix for low-calorie |
How to Prepare the Perfect Pork Katsu: Step-by-Step Guide
Gathering Your Tools and Ingredients
Start by organizing your kitchen to make the process smooth, just like setting up for any pork katsu adventure. Lay out a cutting board, a meat mallet, bowls for dredging, and a deep frying pan. This step ensures everything is ready, helping beginners avoid confusion and keep the recipe flowing easily.
Prepping the Pork
First step: Take your 2 boneless pork loin chops and pound them gently with a meat mallet to about 1/2-inch thick. This tenderizes the meat and makes it cook evenly, a key part of achieving that juicy pork katsu texture.
Second step: Season both sides of the pork with 1 teaspoon of salt and 1/2 teaspoon of black pepper. Let it sit for 5 minutes to absorb the flavors, adapting this for diet-conscious readers by using low-sodium salt if needed.
Third step: Set up three bowls: one with 1/2 cup of flour, one with 1 beaten egg, and one with 1 cup of panko breadcrumbs. For those with gluten sensitivities, swap the flour as mentioned earlier to keep this versatile.
Coating and Frying
Fourth step: Dip each seasoned pork chop first into the flour, shaking off excess, then into the beaten egg, and finally into the panko, pressing gently to coat evenly. This method builds the crispy layer that makes pork katsu irresistible and can be adjusted for a lighter version with an oven bake. For a fun variation, check out our strawberry milkshake recipe for pairing ideas that add a sweet contrast.
Fifth step: Heat 2 cups of vegetable oil in a deep pan to 350 degrees Fahrenheit. Carefully add the coated pork and fry for 3-4 minutes per side until golden brown. Monitor the temperature to prevent overcooking, which helps maintain nutritional benefits for health-focused eaters.
Sixth step: Remove the pork katsu from the oil and let it drain on a wire rack for 5 minutes. This allows excess oil to drip off, making it lighter and more appealing to busy parents or working professionals.
Serving and Finishing Touches
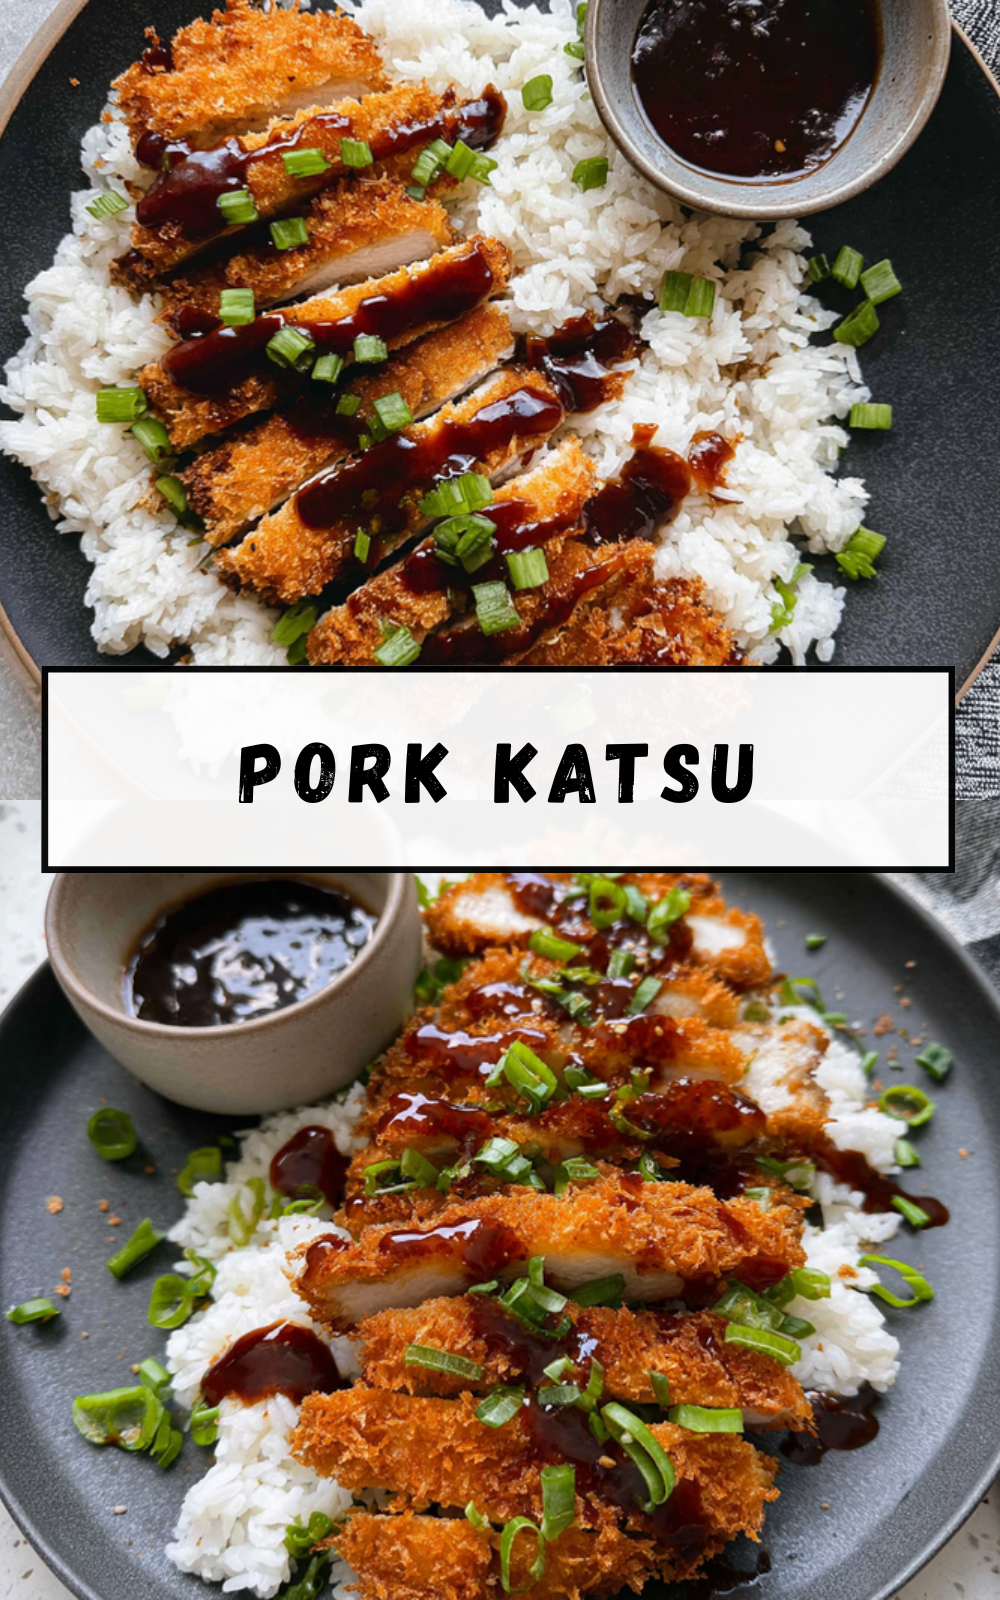
Final step: Slice the pork into strips and serve with shredded cabbage, rice, and tonkatsu sauce. Add a squeeze of lemon for extra zest, and consider external resources like The Art of Tonkatsu for more cultural insights. This completes your pork katsu, ready in about 30 minutes total, perfect for various dietary preferences.

Dietary Substitutions to Customize Your Pork Katsu
Protein and Main Component Alternatives
If pork isn’t an option, try chicken breast or turkey as a simple swap to keep the dish juicy and crispy. For vegetarians, firm tofu works well, providing a similar texture with less prep time, ideal for students or seniors. These changes ensure your pork katsu remains adaptable without losing its appeal.
Another idea is using fish fillets for a lighter version that aligns with diet-conscious goals, cutting down on calories while maintaining the fried coating. Always adjust cooking times based on the protein to avoid dryness, making it easy for newlyweds experimenting in the kitchen.
Vegetable, Sauce, and Seasoning Modifications
Swap shredded cabbage for carrots or zucchini to add more veggies, especially in seasons with fresh produce, enhancing nutrition for food enthusiasts. For sauces, use a homemade version with less sugar to suit low-calorie needs, or add soy sauce alternatives for gluten-free options.
Seasonings can include garlic powder or herbs for a twist, allowing travelers to incorporate global flavors. These modifications keep the pork katsu versatile and exciting for baking enthusiasts looking to innovate.
Mastering Pork Katsu: Advanced Tips and Variations
Pro Cooking Techniques
Double-coating the pork in egg and panko creates an extra-crispy layer, a pro tip that elevates your pork katsu game. Use a thermometer to maintain oil at 350 degrees for consistent results, helping busy professionals nail it every time.
Flavor Variations
Experiment with spices like ginger for an Asian twist, or add cheese for a fusion version that appeals to food lovers. These variations keep the pork katsu fresh and adaptable to different tastes.
Presentation Tips
Plate with colorful sides for visual appeal, making it Instagram-worthy for younger audiences. These ideas enhance the overall experience of your pork katsu meal.
Make-Ahead Options
Prep the coated pork in advance and freeze it for up to a week, perfect for meal prep among working parents. Reheat in the oven to retain crispiness, ensuring convenience without sacrificing quality.
How to Store Pork Katsu: Best Practices
Proper storage keeps your pork katsu fresh and safe. For refrigeration, cool the cooked pieces completely and wrap them in airtight containers for up to 3 days, maintaining flavor for quick meals.
For freezing, portion out slices on a baking sheet first, then transfer to freezer bags for up to 2 months, ideal for batch cooking. This method helps preserve the crispy texture of pork katsu.
When reheating, use an oven at 350 degrees for 10 minutes to restore crunch, avoiding microwaves that make it soggy. Consider meal prep by adding these steps into your routine for easy access.
FAQs: Frequently Asked Questions About Pork Katsu
Print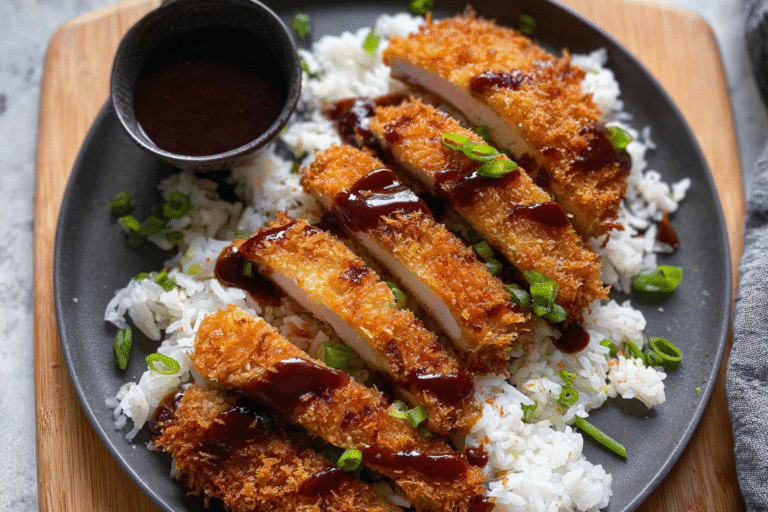
Pork Katsu
🥩 A perfectly crispy Japanese pork cutlet with a tender, juicy interior that melts in your mouth
🍽️ Restaurant-quality tonkatsu that’s surprisingly easy to make at home for a satisfying meal
- Total Time: 45 minutes
- Yield: 4 servings
Ingredients
– 2 boneless pork loin chops (about 1-inch thick) – Provides the base protein, ensuring juicy and tender meat when cooked
– 1 cup of panko breadcrumbs – Creates the extra crispy coating that defines this pork katsu dish
– 1/2 cup of all-purpose flour – Helps the coating adhere to the pork for even frying
– 1 large egg (beaten) – Acts as a binder to hold the breadcrumbs in place
– 1 teaspoon of salt – Seasons the pork, enhancing its natural flavors
– 1/2 teaspoon of black pepper – Adds a subtle kick and depth to the overall taste
– 2 cups of vegetable oil (for frying) – Delivers the high heat needed for a golden, crunchy exterior
Instructions
1-Gathering Your Tools and Ingredients: Start by organizing your kitchen to make the process smooth, just like setting up for any pork katsu adventure. Lay out a cutting board, a meat mallet, bowls for dredging, and a deep frying pan. This step ensures everything is ready, helping beginners avoid confusion and keep the recipe flowing easily.
2-Prepping the Pork: First step: Take your 2 boneless pork loin chops and pound them gently with a meat mallet to about 1/2-inch thick. This tenderizes the meat and makes it cook evenly, a key part of achieving that juicy pork katsu texture.
3-Prepping the Pork: Second step: Season both sides of the pork with 1 teaspoon of salt and 1/2 teaspoon of black pepper. Let it sit for 5 minutes to absorb the flavors, adapting this for diet-conscious readers by using low-sodium salt if needed.
4-Prepping the Pork: Third step: Set up three bowls: one with 1/2 cup of flour, one with 1 beaten egg, and one with 1 cup of panko breadcrumbs. For those with gluten sensitivities, swap the flour as mentioned earlier to keep this versatile.
5-Coating and Frying: Fourth step: Dip each seasoned pork chop first into the flour, shaking off excess, then into the beaten egg, and finally into the panko, pressing gently to coat evenly. This method builds the crispy layer that makes pork katsu irresistible and can be adjusted for a lighter version with an oven bake. For a fun variation, check out our strawberry milkshake recipe for pairing ideas that add a sweet contrast.
6-Coating and Frying: Fifth step: Heat 2 cups of vegetable oil in a deep pan to 350 degrees Fahrenheit. Carefully add the coated pork and fry for 3-4 minutes per side until golden brown. Monitor the temperature to prevent overcooking, which helps maintain nutritional benefits for health-focused eaters.
7-Coating and Frying: Sixth step: Remove the pork katsu from the oil and let it drain on a wire rack for 5 minutes. This allows excess oil to drip off, making it lighter and more appealing to busy parents or working professionals.
8-Serving and Finishing Touches: Final step: Slice the pork into strips and serve with shredded cabbage, rice, and tonkatsu sauce. Add a squeeze of lemon for extra zest, and consider external resources like The Art of Tonkatsu for more cultural insights. This completes your pork katsu, ready in about 30 minutes total, perfect for various dietary preferences.
Last Step:
Please leave a rating and comment letting us know how you liked this recipe! This helps our business to thrive and continue providing free, high-quality recipes for you.Notes
🔪 Let the pounded cutlets rest for 10 minutes before breading – this helps the coating stick better
🌡️ Maintain oil temperature at 350°F for the crispiest results – too hot burns, too cool makes it oily
🍋 Serve immediately after frying to maintain maximum crispiness
- Prep Time: 20 minutes
- Resting Time: 10 minutes
- Cook Time: 15 minutes
- Category: Main Course
- Method: Frying
- Cuisine: Japanese
- Diet: Non-Vegetarian
Nutrition
- Serving Size: 1 pork cutlet
- Calories: 450
- Sugar: 2g
- Sodium: 600mg
- Fat: 22g
- Saturated Fat: 5g
- Unsaturated Fat: 14g
- Trans Fat: 0g
- Carbohydrates: 28g
- Fiber: 1g
- Protein: 32g
- Cholesterol: 120mg





