

Why You’ll Love This Mochi Waffles
When I first discovered mochi waffles, I was instantly hooked by their incredible texture and how they transform a simple breakfast into something truly special. These Nian Gao Waffles bring together the best of both worlds: crispy, golden edges with a soft, chewy center that rivals any bakery treat. They’re a creative twist on traditional New Year’s cake, making them perfect for weekend brunch or any morning when you want to impress family and friends.
Here’s why this recipe deserves a permanent spot in your breakfast rotation:
- Ease of preparation: Despite their impressive texture, these waffles come together with basic pantry ingredients and a standard waffle iron. The par-cooking technique in the microwave simplifies the process, and you’ll have batter ready in minutes. No fancy equipment or advanced skills needed, just follow the straightforward steps for foolproof results every time.
- Unique texture and flavor: The combination of glutinous rice flour and coconut milk creates that signature mochi-like chewiness, while dark brown sugar adds deep caramel notes. Ground ginger brings a gentle warmth that pairs beautifully with the subtle sweetness, making each bite memorable and satisfying.
- Versatility for any occasion: Serve these waffles for breakfast with fresh berries and maple syrup, or dress them up with ice cream and chocolate sauce for dessert. They work equally well for lazy Sunday mornings or as a showstopping addition to holiday brunch spreads.
- Make-ahead friendly: These waffles maintain their crispness for hours at room temperature, and you can even par-cook the batter the night before. This makes them ideal for entertaining when you want to spend time with guests rather than hovering over the waffle iron.
Jump to:
- Why You’ll Love This Mochi Waffles
- Essential Ingredients for Mochi Waffles
- Main Ingredients
- Special Dietary Options
- How to Prepare the Perfect Mochi Waffles: Step-by-Step Guide
- First Step: Mix the Batter
- Second Step: Par-Cook the Batter
- Third Step: Complete the Par-Cooking
- Fourth Step: Cool the Dough
- Fifth Step: Cook the Waffles
- Sixth Step: Cool and Serve
- Nutritional Information Per Waffle
- Dietary Substitutions to Customize Your Mochi Waffles
- Protein and Main Component Alternatives
- Vegetable, Sauce, and Seasoning Modifications
- Mastering Mochi Waffles: Advanced Tips and Variations
- Pro Cooking Techniques
- Flavor Variations
- Presentation Tips
- Make-Ahead Options
- How to Store Mochi Waffles: Best Practices
- Refrigeration
- Freezing
- Reheating
- Meal Prep Considerations
- FAQs: Frequently Asked Questions About Mochi Waffles
- What’s the difference between mochi waffles and nian gao waffles?
- Why par-cook mochi waffle batter before waffle iron?
- Can I halve a mochi waffle recipe?
- Can you make mochi waffles ahead of time?
- Can you steam mochi waffle batter instead of microwaving?
- Mochi Waffles
- Ingredients
- Instructions
- Last Step:
- Notes
- Nutrition
- Did you make this recipe?
Essential Ingredients for Mochi Waffles
The magic of these mochi waffles lies in their carefully balanced ingredients. Each component plays a specific role in achieving that perfect chewy-crispy texture. Here’s everything you’ll need to make this recipe successfully:
Main Ingredients
- 2 cups plus 2 tablespoons (227g) glutinous rice flour – The star ingredient that creates the signature chewy texture. Make sure to use glutinous rice flour (also called sweet rice flour), not regular rice flour, as they behave very differently. This flour comes from long-grain glutinous rice, giving these waffles their distinctive bite.
- 2 1/2 teaspoons (6g) ground ginger – Adds warmth and a subtle spiciness that complements the sweet coconut flavors. Fresh ginger can be substituted, but ground ginger distributes more evenly throughout the batter.
- 1 teaspoon (4g) baking powder – Helps the waffles rise slightly and creates a lighter interior texture while maintaining that desirable chewiness.
- 1/2 teaspoon (2g) kosher salt or 1/4 teaspoon sea salt – Balances the sweetness and brings out the complex flavors of coconut and ginger.
- 3/4 cup plus 2 tablespoons (180g) packed dark brown sugar – Provides deep, molasses-like sweetness and helps create those gorgeous crispy edges. The moisture in brown sugar also contributes to the tender interior.
- 3/4 cup plus 2 tablespoons (200ml) full-fat canned coconut milk – Essential for richness and authentic flavor. The high fat content helps achieve the right consistency and adds subtle tropical notes. Don’t substitute with light coconut milk or the texture will suffer.
- 3/4 cup (177ml) water – Adjusts the batter consistency to the perfect thickness for par-cooking.
- 4 tablespoons (56g) unsalted butter, melted – Adds richness and helps create crisp edges. Unsalted butter lets you control the salt level precisely.
- 1 large egg – Binds the ingredients together and contributes to the tender crumb. Even if halving the recipe, use the whole egg for best results.
- Butter, oil, or cooking spray for greasing the waffle iron – Prevents sticking and helps achieve that beautiful golden-brown exterior.
Special Dietary Options
These waffles are naturally gluten-free when you confirm your glutinous rice flour is certified gluten-free. For dairy-free needs, substitute the butter with coconut oil or a vegan butter alternative. The recipe works well for those avoiding gluten while still delivering exceptional taste and texture.
How to Prepare the Perfect Mochi Waffles: Step-by-Step Guide
Making mochi waffles involves a unique par-cooking technique that sets them apart from traditional waffle recipes. Don’t worry, it’s simpler than it sounds. Follow these detailed steps for waffles with the perfect balance of crispy edges and chewy centers.
First Step: Mix the Batter
Start by gathering all your ingredients and a large microwave-safe bowl. Whisk together the glutinous rice flour, ground ginger, baking powder, salt, and dark brown sugar until well combined. This ensures the leavening and spices distribute evenly throughout the flour.
Next, add the full-fat canned coconut milk, water, melted butter, and egg to the dry ingredients. Stir everything together until the batter is fairly smooth. Don’t stress if small lumps remain; they’ll work themselves out during cooking. The batter should look thick and creamy, similar to pancake batter but slightly thinner.
Pro tip: Shake your canned coconut milk well before opening to incorporate the creamy layer that often separates at the top. This ensures consistent results every time.
Second Step: Par-Cook the Batter
This is where the magic happens. Place your bowl in the microwave and cook on high for 1 minute and 30 seconds. When you remove it, you’ll notice the edges have started to solidify while the center remains liquid. Use a spatula to loosen the solid dough from the edges without fully breaking it apart. This partial stirring helps the batter cook evenly.
Return the bowl to the microwave for another 1 minute and 30 seconds. Stir again, incorporating more of the cooked edges into the still-liquid center. The batter is transforming into something between a thick batter and a soft dough.
Third Step: Complete the Par-Cooking
Microwave the batter for a final 1 minute and 30 seconds. Now stir vigorously until a mostly solid dough forms. If the mixture still seems runny, continue microwaving in 30-second intervals, stirring after each burst, until the dough holds together cohesively.
The total microwaving time typically ranges from 4 to 5 minutes depending on your microwave’s wattage and the bowl size. The goal is a soft, pliable dough that you can scoop but isn’t liquid.
Fourth Step: Cool the Dough
Let the par-cooked dough cool uncovered for 10-15 minutes. This resting period serves two purposes: it allows the dough to firm up slightly for easier handling, and it prevents the waffle iron from cooling down too quickly when you add the dough.
During this time, preheat your waffle iron to medium heat. A too-hot iron will brown the outside before the inside cooks through, while too low means soggy waffles.
Fifth Step: Cook the Waffles
Generously grease your waffle iron with butter, oil, or cooking spray. The sticky nature of mochi dough means adequate greasing is essential for easy release. Scoop the dough using a greased large ice cream scoop or a 1/3 cup measure. Place portions onto the waffle iron, leaving space for spreading.
Cook for approximately 4 minutes, then check for color. The waffles should be starting to turn golden brown. Continue cooking for a total of 7-8 minutes until the waffles are deeply golden and crispy on the outside. The exact time varies by waffle iron, so watch the color and texture rather than strictly timing.
Sixth Step: Cool and Serve
Transfer each cooked waffle to a cooling rack rather than a plate. This allows air to circulate and keeps the crispy exterior intact. Let them rest for a minute or two before serving. The waffles will continue crisping as they cool slightly.
Repeat with remaining dough, greasing the waffle iron between batches as needed. You should get 8-9 waffles approximately 4 inches in diameter from this recipe.
Nutritional Information Per Waffle
| Nutrient | Amount |
|---|---|
| Calories | 265 kcal |
| Carbohydrates | 41.7g |
| Protein | 2.7g |
| Fat | 10.5g |
| Saturated Fat | 7.5g |
| Cholesterol | 34mg |
| Sodium | 82mg |
| Fiber | 0.7g |
| Sugar | 20g |

Dietary Substitutions to Customize Your Mochi Waffles
One of the best things about this mochi waffle recipe is how accommodating it is to dietary modifications. Whether you’re cooking for someone with specific restrictions or simply want to experiment with different flavors, these substitutions help you make the recipe your own.
Protein and Main Component Alternatives
The egg in this recipe can be replaced with a flax egg for a vegan version. Mix 1 tablespoon of ground flaxseed with 3 tablespoons of water and let it sit for 5 minutes until gelatinous. This substitution maintains the binding properties while making the waffles entirely plant-based.
For the butter, coconut oil works beautifully as a dairy-free alternative. Use the same amount (4 tablespoons) and melt it before adding to the batter. The subtle coconut flavor actually complements the existing coconut milk in the recipe.
If you want to add protein to these waffles, consider mixing in 2-3 tablespoons of vanilla protein powder. Reduce the brown sugar slightly to account for the added sweetness from the powder. This creates a more filling breakfast option for busy mornings.
Vegetable, Sauce, and Seasoning Modifications
The ginger in this recipe can be adjusted or replaced based on preference. For a different flavor profile, try 1 teaspoon of cinnamon and 1/4 teaspoon of nutmeg for a warming spice blend. Alternatively, add lemon or orange zest for a bright, citrusy note that pairs wonderfully with maple syrup.
For savory applications, reduce the brown sugar to 1/2 cup and skip the ginger entirely. Add 1/4 cup of chopped green onions and a teaspoon of sesame oil to the batter. These savory waffles work beautifully topped with a fried egg and sriracha for a unique brunch dish.
Sauce variations are endless. Try topping with fruit compote made from frozen berries simmered with a little sugar, or drizzle with sweetened condensed milk for an indulgent dessert-style waffle. A chocolate ganache made from equal parts chocolate chips and coconut cream creates a rich topping for special occasions.
Mastering Mochi Waffles: Advanced Tips and Variations
Once you’ve mastered the basic mochi waffle technique, you can start experimenting with variations and advanced methods to take your waffles to the next level. These tips come from extensive testing and will help you achieve consistently excellent results.
Pro Cooking Techniques
The par-cooking step is crucial, and mastering it means understanding your microwave’s personality. Lower-wattage microwaves need more time, while powerful ones may require shorter intervals. Watch the dough’s consistency rather than strictly following the timer. You want a texture that’s scoopable but not runny, similar to thick cookie dough.
Temperature control on your waffle iron makes a significant difference. Medium heat allows the waffles to cook through before the outside browns too deeply. If your waffle iron doesn’t have temperature settings, keep a close eye during cooking and adjust timing as needed.
For a quicker version, slice ready-made nian gao (Chinese New Year cake) into pieces and press into a greased waffle iron. This shortcut skips the batter-making entirely and still delivers that addictive mochi texture.
Flavor Variations
Chocolate lovers can add 1/4 cup of cocoa powder to the dry ingredients for chocolate mochi waffles. Reduce the ginger to 1 teaspoon and consider adding chocolate chips to the par-cooked dough just before waffling.
Matcha fans should whisk 1-2 teaspoons of culinary-grade matcha powder into the dry ingredients. The earthy tea flavor pairs wonderfully with the sweet coconut base. Top with whipped cream and a dusting of matcha for a cafe-worthy presentation.
For a tropical twist, fold 1/2 cup of shredded coconut and 1/2 cup of diced pineapple into the par-cooked dough. This variation tastes like a deconstructed piña colada and makes an excellent summer brunch treat.
Presentation Tips
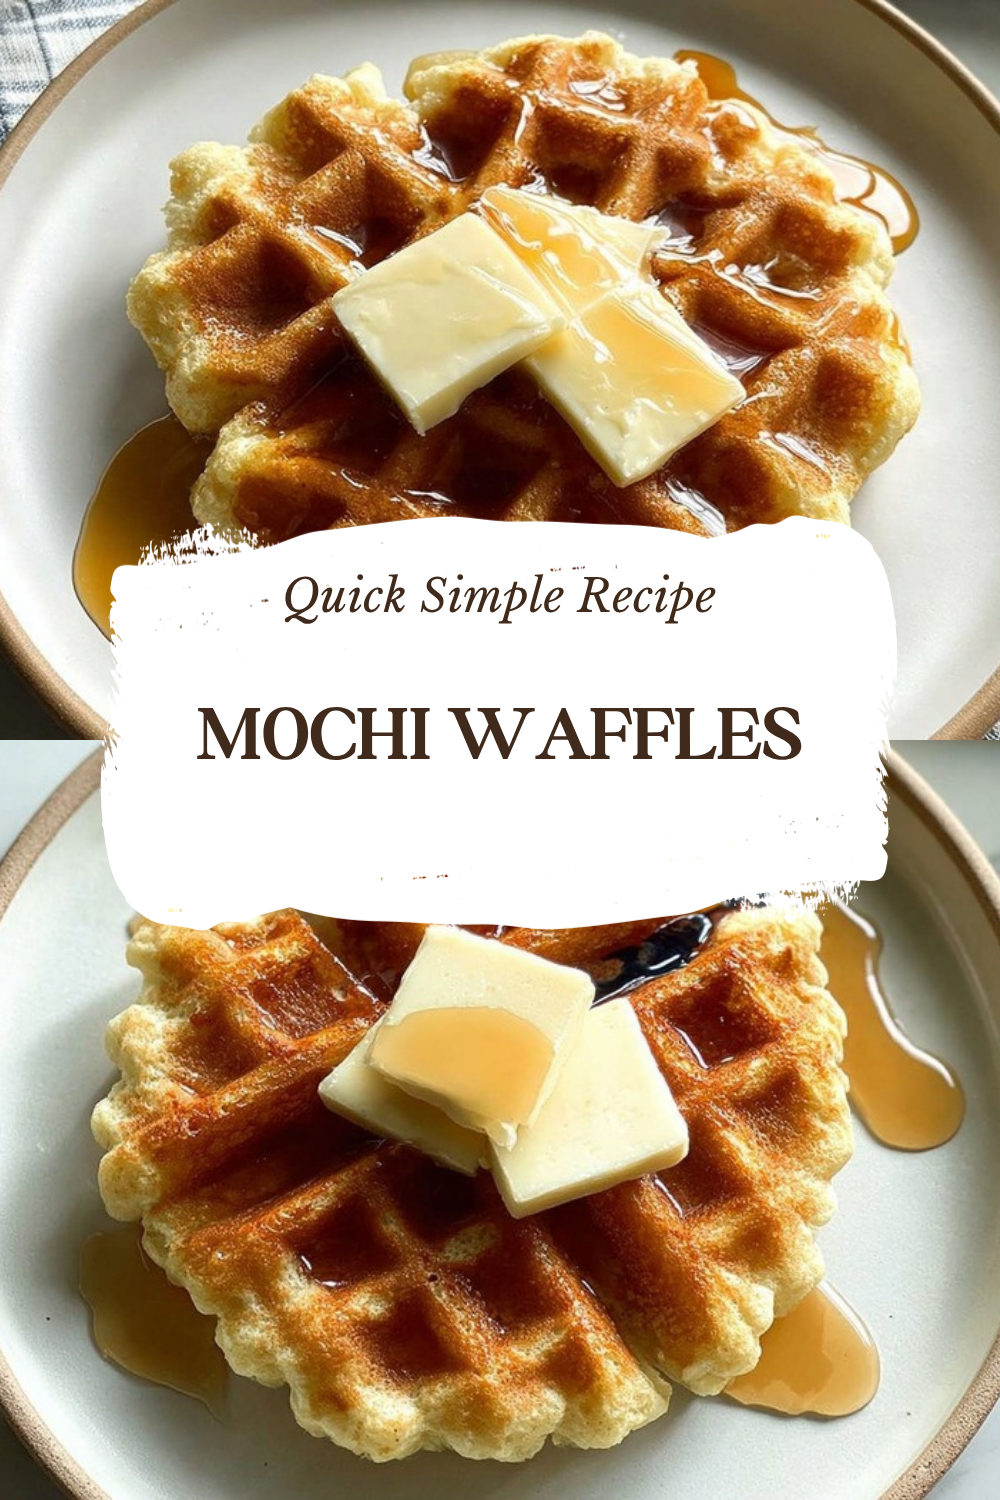
These waffles make a stunning presentation when you think about color contrast. Top with bright red strawberries or raspberries, a dollop of white whipped cream, and a drizzle of amber maple syrup. The visual appeal matches the incredible taste.
For entertaining, set up a waffle bar with various toppings in small bowls. Offer fresh fruits, different syrups, toasted nuts, and whipped cream so guests can customize their own creations. It’s interactive and memorable.
Make-Ahead Options
The par-cooked dough can be refrigerated overnight, covered tightly with plastic wrap. Let it come to room temperature for 15-20 minutes before scooping into the waffle iron. The texture remains excellent with this advance preparation.
Fully cooked waffles freeze beautifully. Arrange them in a single layer on a baking sheet and freeze until solid, then transfer to a freezer bag with parchment paper between layers. They’ll keep for up to a month and can be reheated directly from frozen in a toaster.
How to Store Mochi Waffles: Best Practices
Proper storage ensures your mochi waffles maintain their delightful texture for as long as possible. Whether you’re saving leftovers or meal prepping for the week ahead, these guidelines will help.
Refrigeration
Cooked waffles can be stored at room temperature for several hours thanks to their low moisture content. For longer storage, place cooled waffles in an airtight container with parchment paper between layers to prevent sticking. Refrigerate for up to 3 days. The texture will soften in the refrigerator, but a quick reheat restores the crispiness.
Freezing
For longer storage, freezing works excellently. Arrange completely cooled waffles in a single layer on a baking sheet and freeze until solid, about 2 hours. Transfer to a freezer-safe bag or container, separating layers with parchment paper. Properly stored, they maintain quality for up to one month, though they rarely last that long in my house.
Reheating
The toaster is your best friend for reheating mochi waffles. Pop them in on a light setting for 1-2 minutes, and they emerge warm and crispy, almost as good as freshly made. Avoid using the oven or microwave, as these methods tend to soften the exterior rather than crisping it.
For frozen waffles, toast directly from frozen without thawing. You may need an extra 30 seconds to a minute compared to refrigerated waffles.
Meal Prep Considerations
If you enjoy these waffles regularly, consider making a double batch on weekends. The par-cooking step is the most time-consuming, so having extra dough or cooked waffles ready to go makes weekday breakfasts effortless. The recipe halves easily too, though keep the whole egg even when reducing other ingredients for the best texture.
FAQs: Frequently Asked Questions About Mochi Waffles
What’s the difference between mochi waffles and nian gao waffles?
Mochi waffles and nian gao waffles share a signature chewy texture, but they differ slightly in ingredients. Mochi waffles use mochiko, a sweet rice flour made from short-grain sweet rice, which gives a soft, stretchy bite. Nian gao waffles rely on glutinous rice flour from long-grain glutinous rice for a similar chewiness. Both create that addictive mochi-like consistency when cooked in a waffle iron. If you’re following a mochi waffle recipe, stick with mochiko for authenticity. Experimenting with either flour works well, but expect minor flavor and firmness variations. This swap keeps the waffles gluten-free and perfect for breakfast or dessert. (92 words)
Why par-cook mochi waffle batter before waffle iron?
Par-cooking the batter in the microwave thickens it to a dough-like consistency, mimicking mochi’s chew. This lets you scoop generous amounts into the waffle iron for thick, fluffy waffles instead of thin, crispy ones from runny batter. Heat the batter in short bursts—stir every 30 seconds—until it pulls together solidly but remains scoopable, about 2-3 minutes total depending on volume. Skip this, and your waffles spread too thin and cook unevenly. It’s a simple step that boosts texture and portion size. Always grease your waffle iron well to prevent sticking. Test doneness by pressing; it should hold shape without cracking. (98 words)
Can I halve a mochi waffle recipe?
Yes, halve the mochi waffle recipe easily, but use one whole egg to maintain rich flavor and structure—avoid diluting with half. Reduce sugar and add-ins like ginger proportionally. Par-cooking time shortens to 1-2 minutes in the microwave; stir frequently until the batter forms a cohesive dough. Cook in your waffle iron as usual, aiming for golden edges. This yields 4-6 smaller waffles, ideal for solo servings. Batter scales perfectly, but don’t freeze halves—make fresh. Pair with fresh fruit or ice cream for best taste. Readers confirm great results with these tweaks. (92 words)
Can you make mochi waffles ahead of time?
Mochi waffles stay crisp for hours at room temperature, making them great for prep-ahead. Store in an airtight container; avoid stacking to preserve crunch. They soften overnight, but a quick toaster reheat revives texture better than an oven—test on low for 1-2 minutes. Par-cooked batter refrigerates overnight safely; cook fully the next day. Freeze cooked waffles up to a week in a single layer, then toaster-reheat straight from frozen. Serve with toppings like whipped cream or matcha syrup to refresh. Perfect for brunches without last-minute stress. (89 words)
Can you steam mochi waffle batter instead of microwaving?
Yes, steam mochi waffle batter if no microwave—it’s a reliable alternative. Place batter in a heatproof dish over boiling water, cover, and steam 15-20 minutes until partially set but still soft and scoopable. Stir midway for even cooking; avoid full setting. Proceed to waffle iron as usual. Leftover pre-cooked mochi (nian gao style) works too: slice into 1/2-inch pieces, grease iron, and cook until browned—texture will be denser. Steaming keeps it cleanup-friendly over stovetop simmering. Both methods deliver chewy results; adjust time based on batter amount. (91 words)
Mochi Waffles
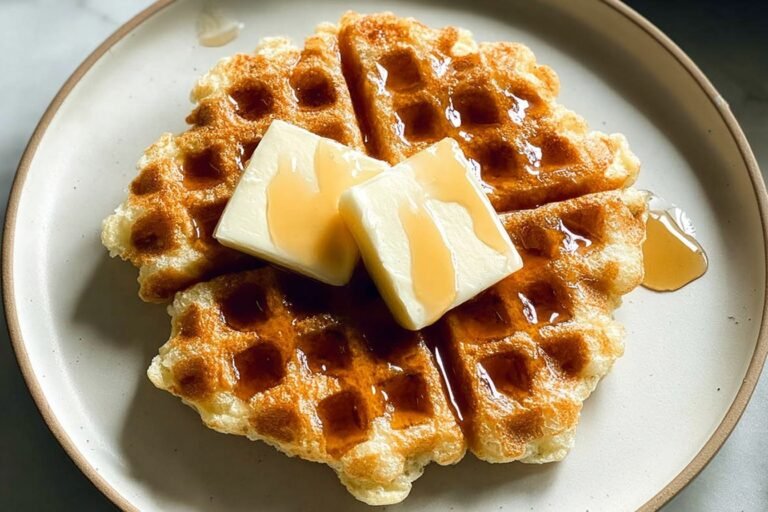
🧇 Crispy-edged nian gao waffles with chewy mochi centers burst with ginger warmth—brunch upgrade.
🍡 Effortless microwave trick yields perfect chew without steaming; stays crunchy for hours.
- Total Time: 1 hour 15 minutes
- Yield: 8-9 waffles
Ingredients
– 2 cups plus 2 tablespoons (227g) glutinous rice flour for chewy texture
– 2 1/2 teaspoons (6g) ground ginger for warmth and spiciness
– 1 teaspoon (4g) baking powder for rising and lighter texture
– 1/2 teaspoon (2g) kosher salt or 1/4 teaspoon sea salt for balancing sweetness
– 3/4 cup plus 2 tablespoons (180g) packed dark brown sugar for sweetness and crispy edges
– 3/4 cup plus 2 tablespoons (200ml) full-fat canned coconut milk for richness and flavor
– 3/4 cup (177ml) water for batter consistency
– 4 tablespoons (56g) unsalted butter, melted for richness and crisp edges
– 1 large egg for binding and tender crumb
– Butter, oil, or cooking spray for greasing the waffle iron
Instructions
1-First Step: Mix the Batter Start by gathering all your ingredients and a large microwave-safe bowl. Whisk together the glutinous rice flour, ground ginger, baking powder, salt, and dark brown sugar until well combined. This ensures the leavening and spices distribute evenly throughout the flour. Next, add the full-fat canned coconut milk, water, melted butter, and egg to the dry ingredients. Stir everything together until the batter is fairly smooth. Don’t stress if small lumps remain; they’ll work themselves out during cooking. The batter should look thick and creamy, similar to pancake batter but slightly thinner.
2-Second Step: Par-Cook the Batter This is where the magic happens. Place your bowl in the microwave and cook on high for 1 minute and 30 seconds. When you remove it, you’ll notice the edges have started to solidify while the center remains liquid. Use a spatula to loosen the solid dough from the edges without fully breaking it apart. This partial stirring helps the batter cook evenly. Return the bowl to the microwave for another 1 minute and 30 seconds. Stir again, incorporating more of the cooked edges into the still-liquid center. The batter is transforming into something between a thick batter and a soft dough.
3-Third Step: Complete the Par-Cooking Microwave the batter for a final 1 minute and 30 seconds. Now stir vigorously until a mostly solid dough forms. If the mixture still seems runny, continue microwaving in 30-second intervals, stirring after each burst, until the dough holds together cohesively. The total microwaving time typically ranges from 4 to 5 minutes depending on your microwave’s wattage and the bowl size. The goal is a soft, pliable dough that you can scoop but isn’t liquid.
4-Fourth Step: Cool the Dough Let the par-cooked dough cool uncovered for 10-15 minutes. This resting period serves two purposes: it allows the dough to firm up slightly for easier handling, and it prevents the waffle iron from cooling down too quickly when you add the dough. During this time, preheat your waffle iron to medium heat. A too-hot iron will brown the outside before the inside cooks through, while too low means soggy waffles.
5-Fifth Step: Cook the Waffles Generously grease your waffle iron with butter, oil, or cooking spray. The sticky nature of mochi dough means adequate greasing is essential for easy release. Scoop the dough using a greased large ice cream scoop or a 1/3 cup measure. Place portions onto the waffle iron, leaving space for spreading. Cook for approximately 4 minutes, then check for color. The waffles should be starting to turn golden brown. Continue cooking for a total of 7-8 minutes until the waffles are deeply golden and crispy on the outside. The exact time varies by waffle iron, so watch the color and texture rather than strictly timing.
6-Sixth Step: Cool and Serve Transfer each cooked waffle to a cooling rack rather than a plate. This allows air to circulate and keeps the crispy exterior intact. Let them rest for a minute or two before serving. The waffles will continue crisping as they cool slightly. Repeat with remaining dough, greasing the waffle iron between batches as needed. You should get 8-9 waffles approximately 4 inches in diameter from this recipe.
Last Step:
Please leave a rating and comment letting us know how you liked this recipe! This helps our business to thrive and continue providing free, high-quality recipes for you.Notes
🔥 Adjust microwave times for your wattage to par-cook batter perfectly thick.
🍪 Reheat in toaster for renewed crunch; oven softens them.
🛠️ Slice store-bought nian gao for a no-cook shortcut.
- Prep Time: 10 minutes
- Rest: 15 minutes
- Cook Time: 50 minutes
- Category: Breakfast
- Method: Waffle Iron
- Cuisine: Chinese
Nutrition
- Serving Size: 1 waffle
- Calories: 265 kcal
- Sugar: 20 g
- Sodium: 82 mg
- Fat: 11 g
- Saturated Fat: 8 g
- Unsaturated Fat: 3 g
- Trans Fat: 0 g
- Carbohydrates: 42 g
- Fiber: 1 g
- Protein: 3 g
- Cholesterol: 34 mg





