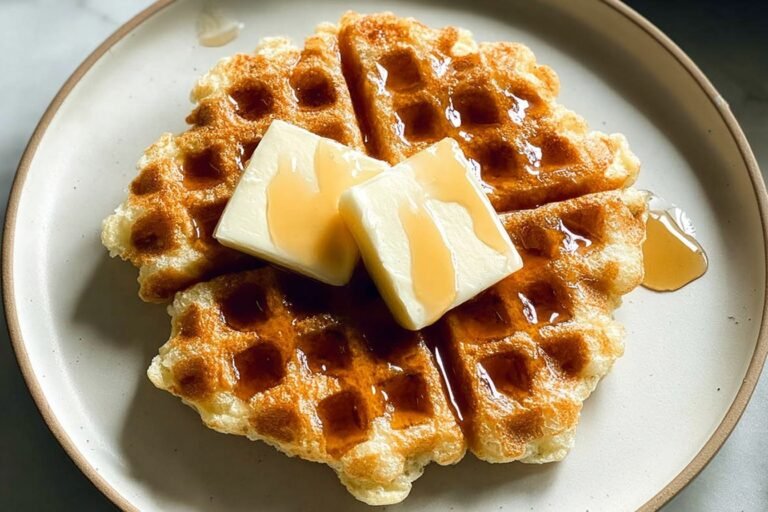
Ingredients
– 2 cups plus 2 tablespoons (227g) glutinous rice flour for chewy texture
– 2 1/2 teaspoons (6g) ground ginger for warmth and spiciness
– 1 teaspoon (4g) baking powder for rising and lighter texture
– 1/2 teaspoon (2g) kosher salt or 1/4 teaspoon sea salt for balancing sweetness
– 3/4 cup plus 2 tablespoons (180g) packed dark brown sugar for sweetness and crispy edges
– 3/4 cup plus 2 tablespoons (200ml) full-fat canned coconut milk for richness and flavor
– 3/4 cup (177ml) water for batter consistency
– 4 tablespoons (56g) unsalted butter, melted for richness and crisp edges
– 1 large egg for binding and tender crumb
– Butter, oil, or cooking spray for greasing the waffle iron
Instructions
1-First Step: Mix the Batter Start by gathering all your ingredients and a large microwave-safe bowl. Whisk together the glutinous rice flour, ground ginger, baking powder, salt, and dark brown sugar until well combined. This ensures the leavening and spices distribute evenly throughout the flour. Next, add the full-fat canned coconut milk, water, melted butter, and egg to the dry ingredients. Stir everything together until the batter is fairly smooth. Don’t stress if small lumps remain; they’ll work themselves out during cooking. The batter should look thick and creamy, similar to pancake batter but slightly thinner.
2-Second Step: Par-Cook the Batter This is where the magic happens. Place your bowl in the microwave and cook on high for 1 minute and 30 seconds. When you remove it, you’ll notice the edges have started to solidify while the center remains liquid. Use a spatula to loosen the solid dough from the edges without fully breaking it apart. This partial stirring helps the batter cook evenly. Return the bowl to the microwave for another 1 minute and 30 seconds. Stir again, incorporating more of the cooked edges into the still-liquid center. The batter is transforming into something between a thick batter and a soft dough.
3-Third Step: Complete the Par-Cooking Microwave the batter for a final 1 minute and 30 seconds. Now stir vigorously until a mostly solid dough forms. If the mixture still seems runny, continue microwaving in 30-second intervals, stirring after each burst, until the dough holds together cohesively. The total microwaving time typically ranges from 4 to 5 minutes depending on your microwave’s wattage and the bowl size. The goal is a soft, pliable dough that you can scoop but isn’t liquid.
4-Fourth Step: Cool the Dough Let the par-cooked dough cool uncovered for 10-15 minutes. This resting period serves two purposes: it allows the dough to firm up slightly for easier handling, and it prevents the waffle iron from cooling down too quickly when you add the dough. During this time, preheat your waffle iron to medium heat. A too-hot iron will brown the outside before the inside cooks through, while too low means soggy waffles.
5-Fifth Step: Cook the Waffles Generously grease your waffle iron with butter, oil, or cooking spray. The sticky nature of mochi dough means adequate greasing is essential for easy release. Scoop the dough using a greased large ice cream scoop or a 1/3 cup measure. Place portions onto the waffle iron, leaving space for spreading. Cook for approximately 4 minutes, then check for color. The waffles should be starting to turn golden brown. Continue cooking for a total of 7-8 minutes until the waffles are deeply golden and crispy on the outside. The exact time varies by waffle iron, so watch the color and texture rather than strictly timing.
6-Sixth Step: Cool and Serve Transfer each cooked waffle to a cooling rack rather than a plate. This allows air to circulate and keeps the crispy exterior intact. Let them rest for a minute or two before serving. The waffles will continue crisping as they cool slightly. Repeat with remaining dough, greasing the waffle iron between batches as needed. You should get 8-9 waffles approximately 4 inches in diameter from this recipe.
Last Step:
Please leave a rating and comment letting us know how you liked this recipe! This helps our business to thrive and continue providing free, high-quality recipes for you.Notes
🔥 Adjust microwave times for your wattage to par-cook batter perfectly thick.
🍪 Reheat in toaster for renewed crunch; oven softens them.
🛠️ Slice store-bought nian gao for a no-cook shortcut.
- Prep Time: 10 minutes
- Rest: 15 minutes
- Cook Time: 50 minutes
- Category: Breakfast
- Method: Waffle Iron
- Cuisine: Chinese
Nutrition
- Serving Size: 1 waffle
- Calories: 265 kcal
- Sugar: 20 g
- Sodium: 82 mg
- Fat: 11 g
- Saturated Fat: 8 g
- Unsaturated Fat: 3 g
- Trans Fat: 0 g
- Carbohydrates: 42 g
- Fiber: 1 g
- Protein: 3 g
- Cholesterol: 34 mg