

Why You’ll Love This Jam And Cheese Sandwich
Sometimes the best recipes are the ones that surprise you the most. I still remember the first time someone handed me a jam and cheese sandwich I was skeptical, to put it mildly. But one bite changed everything. The sweet-tart jam meeting the salty, creamy cheese creates something truly special. If you’ve never tried this combination, you’re in for a treat.
This jam and cheese sandwich isn’t just delicious it’s also one of the most practical recipes you’ll ever add to your repertoire. Here’s why it deserves a permanent spot in your kitchen:
- Ease of preparation: With just five minutes from start to finish, this recipe fits into even the busiest schedules. You only need four ingredients and a nonstick pan. No fancy equipment, no complicated techniques, and virtually no cleanup required. It’s perfect for those mornings when you’re running late or those afternoons when you need a quick energy boost.
- Health benefits: This sandwich delivers 13 grams of protein and 279 mg of calcium per serving, thanks to the cheese. While it’s certainly an indulgence with 479 calories, it also provides essential nutrients like Vitamin A (632 IU) and iron (2 mg). The combination of protein and carbohydrates makes it satisfying enough to keep you full for hours.
- Versatility: One of the best things about this recipe is how adaptable it is. Raspberry jam is popular, but strawberry, blueberry, or even fig preserves work beautifully. American cheese melts smoothly, but mild or medium cheddar brings a sharper edge. You can even experiment with different breads though I highly recommend sticking with soft, fluffy varieties for the best texture.
- Distinctive flavor: The magic lies in the contrast. Sweet jam cuts through rich, salty cheese in a way that hits all your taste buds at once. It’s that perfect sweet-savory balance that makes snacks like prosciutto and melon or salted caramel so addictive. This sandwich delivers that same satisfying contrast in a format that’s accessible and affordable.
Quick, satisfying, and surprisingly gourmet-tasting this sandwich proves that simple ingredients can create extraordinary flavors when combined thoughtfully.
Jump to:
- Why You’ll Love This Jam And Cheese Sandwich
- Essential Ingredients for Jam And Cheese Sandwich
- Main Ingredients
- Special Dietary Options
- How to Prepare the Perfect Jam And Cheese Sandwich: Step-by-Step Guide
- Step 1: Gather and Prepare Your Ingredients
- Step 2: Spread the Jam Evenly
- Step 3: Add the Cheese Layer
- Step 4: Complete the Sandwich
- Step 5: Grill to Golden Perfection
- Step 6: Serve and Enjoy
- Dietary Substitutions to Customize Your Jam And Cheese Sandwich
- Protein and Main Component Alternatives
- Vegetable, Sauce, and Seasoning Modifications
- Mastering Jam And Cheese Sandwich: Advanced Tips and Variations
- Pro Cooking Techniques
- Flavor Variations Worth Trying
- Presentation Tips
- Make-Ahead Options
- How to Store Jam And Cheese Sandwich: Best Practices
- Refrigeration Guidelines
- Freezing Considerations
- Reheating Best Practices
- Meal Prep Strategies
- FAQs: Frequently Asked Questions About Jam And Cheese Sandwich
- What is a jam and cheese sandwich?
- What ingredients do I need for a jam and cheese sandwich?
- How do you make a jam and cheese sandwich?
- Why does jam and cheese taste good together in a sandwich?
- Are there variations for a jam and cheese sandwich?
- Jam And Cheese Sandwich
- Ingredients
- Instructions
- Last Step:
- Notes
- Nutrition
- Did you make this recipe?
Essential Ingredients for Jam And Cheese Sandwich
The beauty of this jam and cheese sandwich lies in its simplicity. Each ingredient plays a specific role, and choosing the right ones makes all the difference between a good sandwich and a great one. Here’s everything you need to make one perfect serving:
Main Ingredients
- 2 slices of bread (milk bread recommended) The foundation of your sandwich. Milk bread, also known as Chinese-style fluffy bread or shokupan, offers a pillowy softness that crisps beautifully when grilled. Its subtle sweetness complements the jam without competing with it. Avoid dense, hearty breads like rye or sourdough for this recipe they can overpower the delicate sweet-savory balance.
- 2 tablespoons of jam (raspberry, strawberry, blueberry, or preferred type) The sweet element that transforms this sandwich. Raspberry jam is the classic choice, offering a bright tartness that cuts through rich cheese. Strawberry provides a sweeter profile, while blueberry adds deeper, more complex fruit notes. Use a jam with good body too runny and it will leak out during grilling. For more ideas on seasonal fruit spreads, check out Taste of Home’s collection of spring jams and fruity spreads.
- 1 slice of cheese (American or mild/medium cheddar) The savory counterpoint to your sweet jam. American cheese melts smoothly and offers a mild, creamy flavor that lets the jam shine. Mild or medium cheddar brings more personality with its slight sharpness while still melting well. Avoid aged or sharp cheddars they can overwhelm the delicate jam flavor.
- 1 tablespoon of butter (or oil) Essential for achieving that golden, crispy exterior. Butter adds richness and helps the bread brown evenly. If you prefer oil, use a neutral variety like canola or vegetable. Butter typically yields better flavor and a more appealing golden color.
Special Dietary Options
Vegan: Substitute dairy-free cheese slices made from cashews or coconut oil. Use plant-based butter or coconut oil for grilling. Many vegan cheeses now melt comparably to dairy versions just check the package for melting properties.
Gluten-free: Replace regular bread with your favorite gluten-free sandwich bread. Rice-based varieties tend to grill well. Just be aware that gluten-free breads may brown faster, so watch your heat carefully.
Lower-calorie: Use reduced-fat cheese and sugar-free jam. Apply butter sparingly, or use a light spray of cooking oil instead. You can also use thin-sliced bread to cut carbohydrates. According to WebMD’s guide to cheese health benefits, cheese provides calcium and protein even in reduced-fat forms.
How to Prepare the Perfect Jam And Cheese Sandwich: Step-by-Step Guide
Making a jam and cheese sandwich is wonderfully straightforward, but a few key techniques ensure the best results every time. Follow these steps for sandwich perfection.
Step 1: Gather and Prepare Your Ingredients
Before you start cooking, pull out all your ingredients and equipment. You’ll need two slices of milk bread, your chosen jam, one slice of cheese, and butter for grilling. Have a nonstick pan ready this is crucial for achieving an even golden crust without sticking. A butter knife and spatula complete your toolkit.
Take a moment to check your bread freshness. Slightly soft, fresh bread works best for this recipe. If your bread has been in the fridge, let it come to room temperature for about 10 minutes cold bread can tear when you spread the jam.
Step 2: Spread the Jam Evenly
Place one slice of bread on your work surface. Using a butter knife, spread exactly 2 tablespoons of jam across the entire surface, extending all the way to the edges. This even distribution ensures every bite has the perfect balance of sweet and savory.
Why 2 tablespoons? This amount provides generous jam coverage without creating a soggy mess. Too little jam and you’ll miss that fruity sweetness; too much and it will ooze out during grilling, potentially burning on your pan. For the best results, use jam at room temperature it spreads more smoothly than cold jam straight from the refrigerator.
Step 3: Add the Cheese Layer
Place one slice of cheese directly on top of your jam-covered bread. Position it carefully so it covers as much surface area as possible. If you’re using cheddar slices that are smaller than your bread, you can tear or overlap slightly to achieve better coverage.
The cheese acts as a barrier between the jam and the second slice of bread. This positioning helps prevent the jam from soaking through and making the top bread slice soggy. It also ensures the cheese warms evenly during grilling.
Step 4: Complete the Sandwich
Gently place the second slice of bread on top of the cheese to form your sandwich. Press down lightly just enough to help the layers adhere without squeezing the jam out the sides.
Now comes an important step that many people skip: buttering the exterior. Using about half of your tablespoon of butter, spread a thin, even layer across the top slice of bread. This buttered side will go down in the pan first. The remaining butter will go on the other side after you flip.
Some cooks prefer to melt butter directly in the pan, but spreading it on the bread gives you more control over coverage and helps achieve even browning.
Step 5: Grill to Golden Perfection
Heat your nonstick pan over medium heat. This temperature is crucial too high and the bread will burn before the cheese warms; too low and you won’t get that appealing golden crunch.
Once the pan is heated, place your sandwich buttered-side down. Listen for a gentle sizzle that’s the sound of proper heat. Grill for 1-2 minutes until the bottom is golden brown. You can peek by lifting the edge with your spatula.
While the first side grills, spread the remaining butter across the top slice of bread. Flip the sandwich carefully and grill the second side for another 1-2 minutes until golden.
The goal is to toast the bread and gently warm the cheese not to fully melt it into a gooey puddle. This sandwich works best when the cheese softens but still maintains some structure.
Step 6: Serve and Enjoy
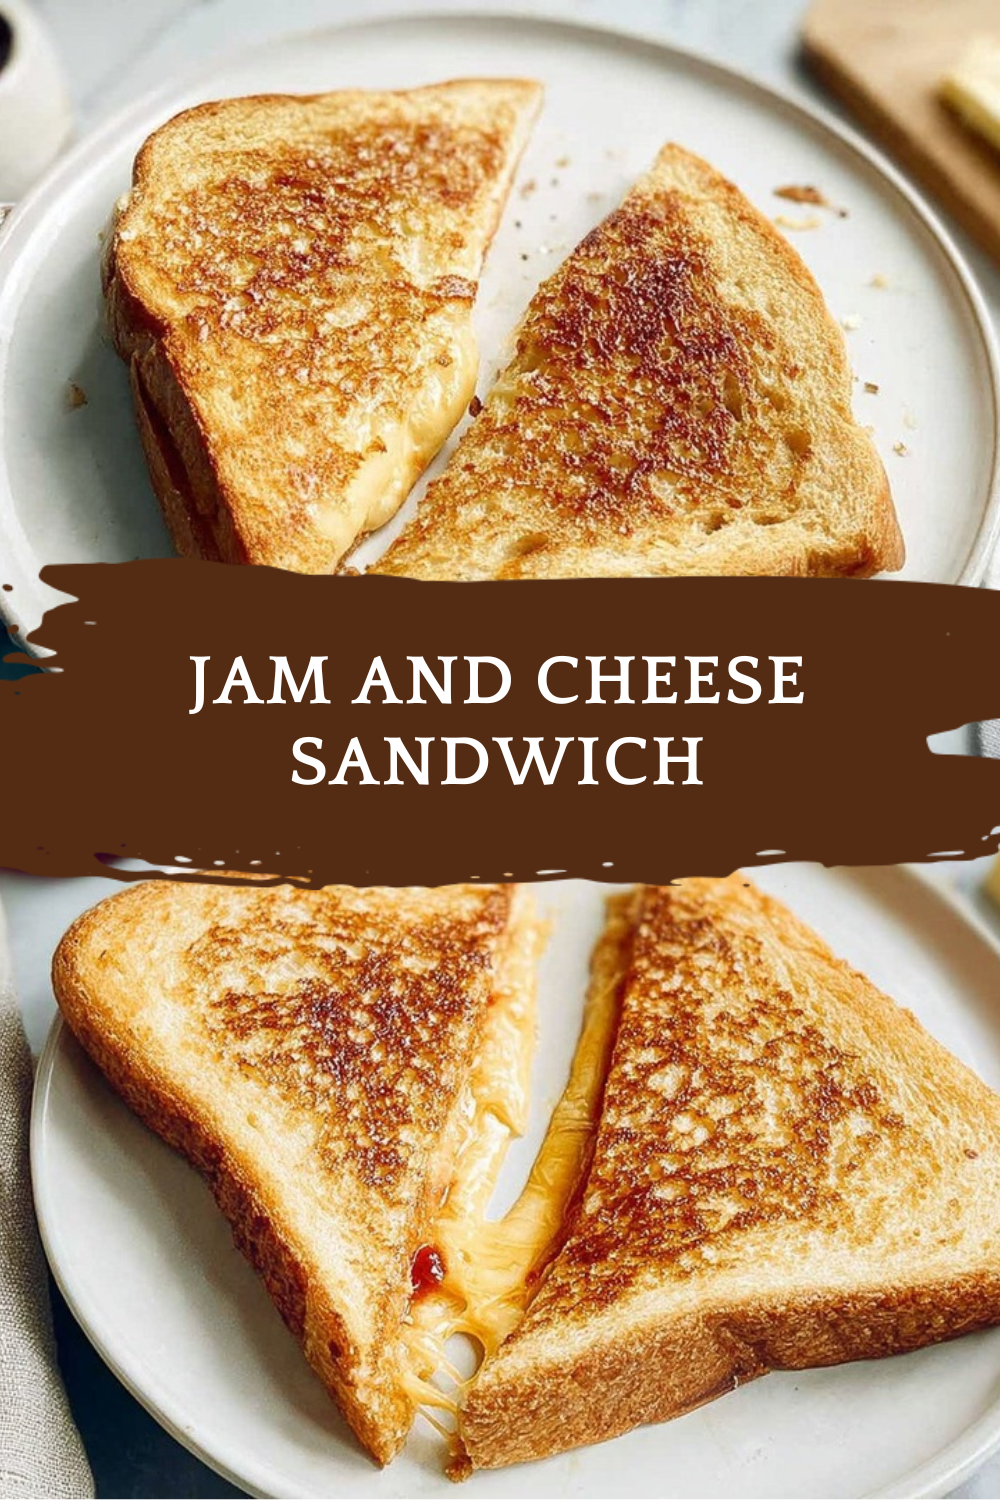
Transfer your finished sandwich to a plate. For the best experience, serve it hot while the bread is still crispy and the cheese is warm and soft. Cut diagonally for the classic triangular presentation this isn’t just aesthetics; it makes the sandwich easier to hold and shows off the colorful jam layer inside.
Total time from start to finish: just 5 minutes. It’s faster than ordering takeout and far more satisfying than cold cereal.
| Step | Action | Time | Key Tip |
|---|---|---|---|
| 1 | Prepare ingredients | 30 seconds | Use room temperature jam |
| 2 | Spread jam | 30 seconds | Cover to edges evenly |
| 3 | Add cheese | 15 seconds | Center on bread |
| 4 | Assemble sandwich | 30 seconds | Press gently |
| 5 | Grill first side | 1-2 minutes | Medium heat |
| 6 | Grill second side | 1-2 minutes | Serve immediately |

Dietary Substitutions to Customize Your Jam And Cheese Sandwich
One of the best things about this jam and cheese sandwich is how easily it adapts to different dietary needs and preferences. Whether you’re cooking for food allergies, personal preferences, or just looking to shake things up, there are plenty of options.
Protein and Main Component Alternatives
The cheese provides most of the protein in this recipe, but you can modify it based on what you have or what fits your diet.
Different cheese varieties: While American cheese melts beautifully and mild cheddar offers more personality, don’t stop there. Cream cheese creates a softer, spreadable texture that pairs wonderfully with berry jams. For bolder flavor, try blue cheese with fig jam the sharp tanginess cuts right through the sweet. Brie works beautifully too, especially when you want a more elegant version.
Adding protein: If you want a heartier sandwich, add a slice of ham for a Monte Cristo-style twist. Turkey works too, though its milder flavor lets the jam shine more. For a breakfast version, a fried egg on the side makes this a complete morning meal.
Vegan options: Plant-based eating doesn’t mean missing out on this treat. Cashew-based cheese alternatives melt surprisingly well. Fruit preserves with vegan cream cheese on sourdough create a completely different but equally delicious experience. Look for vegan cheeses specifically labeled as good melters not all plant-based cheeses behave the same way under heat.
Vegetable, Sauce, and Seasoning Modifications
The jam and cheese combination is a blank canvas for other flavors. Small additions can transform this simple sandwich into something unexpected.
Fresh additions: Thin slices of apple add crunch and a tart brightness that complements both jam and cheese. Arugula brings a peppery bite that cuts through richness. A few fresh basil leaves add an aromatic dimension that makes the sandwich feel almost Italian.
Spice variations: A crack of black pepper over the jam before adding cheese adds subtle warmth. For those who like heat, a pinch of chili flakes creates a sweet-spicy contrast that’s addictive. Everything bagel seasoning sprinkled on the buttered exterior before grilling adds savory depth.
Bread alternatives: While milk bread is traditional, whole wheat adds nutty flavor and fiber. Brioche brings even more buttery richness. For a fun twist, try cinnamon raisin bread the spices echo the jam’s fruitiness. Looking for more creative sandwich ideas? Our salmon and summer veggies in foil recipe offers another quick-cooking option perfect for busy weeknights.
Mastering Jam And Cheese Sandwich: Advanced Tips and Variations
Once you’ve mastered the basic technique, it’s time to get creative. These advanced tips will help you take your jam and cheese sandwich to new heights while avoiding common pitfalls.
Pro Cooking Techniques
Temperature control matters: Medium heat is ideal for achieving a golden crust without burning the sugars in the jam. If your bread browns too quickly but the cheese hasn’t warmed through, lower the heat and cook longer. The sugars in jam caramelize and can burn at high temperatures, leaving a bitter taste.
Press gently for even contact: Using your spatula, apply light pressure while the sandwich grills. This ensures the bread makes full contact with the pan for even browning. Don’t press too hard your goal is contact, not compression.
Room temperature ingredients: Cold cheese takes longer to warm than room temperature cheese. If you remember, pull your cheese out of the refrigerator about 20 minutes before cooking. Room temperature jam also spreads more smoothly.
Flavor Variations Worth Trying
Don’t limit yourself to raspberry jam and American cheese. These combinations have become favorites among those who experiment:
- Fig jam with brie: Elegant enough for entertaining, simple enough for everyday eating
- Apricot preserves with Swiss cheese: A nutty, mildly sweet combination
- Strawberry jam with cream cheese: Like a danish pastry in sandwich form
- Blueberry jam with goat cheese: Tangy and complex
- Orange marmalade with sharp cheddar: Bold flavors that balance beautifully
Presentation Tips
Even a simple sandwich deserves an appealing presentation. Cut diagonally for those classic triangular halves they photograph better and feel more special than rectangles. Serve on a small plate with a napkin for that cafe experience at home.
For brunch entertaining, cut sandwiches into quarters and arrange on a platter. Add some fresh fruit on the side for color. A dusting of powdered sugar is entirely optional but adds a touch of sweetness that works beautifully with the jam.
Make-Ahead Options
This sandwich truly shines when served fresh, but you can prep components ahead of time. Keep your bread, jam, and cheese ready in the kitchen. The actual assembly and grilling take just 5 minutes faster than delivery arrives.
If you’re planning a batch for a crowd, assemble all sandwiches first, then grill them one after another. Keep finished sandwiches warm in a 200°F oven while you cook the rest. For another crowd-pleasing option that’s easy to scale, check out our blackened chicken recipe that pairs wonderfully with simple sides.
How to Store Jam And Cheese Sandwich: Best Practices
Let’s be honest this jam and cheese sandwich tastes best fresh off the pan. The contrast between crispy exterior and soft, warm interior is what makes it special. However, if you find yourself with leftovers or need to prep ahead, here’s what you need to know.
Refrigeration Guidelines
Fully assembled sandwiches can be stored in the refrigerator for up to 24 hours, though the bread will soften and lose its crispy exterior. Wrap tightly in plastic wrap or place in an airtight container to prevent the bread from drying out or absorbing other flavors from your refrigerator.
For best results, store components separately. Keep bread in its original packaging, jam in its jar, and cheese in its wrapper. When you’re ready to eat, simply assemble and grill fresh it only takes 5 minutes.
Freezing Considerations
Freezing is not recommended for assembled jam and cheese sandwiches. The jam’s moisture content causes the bread to become soggy upon thawing, and the cheese texture changes in ways that aren’t appealing. The beauty of this recipe is how quickly it comes together, so there’s really no need to freeze.
If you want to freeze bread for future use, go ahead freeze it in its original packaging. Thaw at room temperature before using for sandwiches.
Reheating Best Practices
If you have a grilled sandwich that’s gone cold, you can restore some of its appeal with proper reheating. Skip the microwave it makes bread soggy and rubbery. Instead, use a nonstick pan over medium-low heat. Grill the sandwich for about 1 minute per side, just until warmed through and slightly re-crisped.
A toaster oven works well too. Set it to 350°F and heat for 3-4 minutes. Watch carefully to avoid burning the exterior.
Meal Prep Strategies
This recipe doesn’t lend itself to traditional meal prep, but it fits beautifully into a “components ready” approach. Keep these elements stocked:
- Soft bread in the freezer thaws quickly at room temperature
- A variety of jams in your refrigerator
- Cheese slices ready to go
- Butter at room temperature for easy spreading
With these items on hand, you can whip up a satisfying snack in the time it takes to scroll through social media.
FAQs: Frequently Asked Questions About Jam And Cheese Sandwich
What is a jam and cheese sandwich?
A jam and cheese sandwich is a simple yet tasty handheld meal made by layering fruit jam and cheese slices between two pieces of bread, then grilling it for a warm, gooey texture. The sweet tang of the jam pairs with the creamy, salty cheese for a balance of flavors that surprises many first-timers. Popular in places like Hong Kong cafes, it’s often served as a snack or light lunch. Use about 2 tablespoons of jam per sandwich to avoid sogginess. This combo works because sweetness from jam offsets cheese’s savoriness, hitting taste buds in a satisfying way. Prep time is under 5 minutes, making it ideal for quick meals. Pair it with a side salad for a fuller plate. (92 words)
What ingredients do I need for a jam and cheese sandwich?
For a classic jam and cheese sandwich, grab soft Chinese-style milk bread or brioche for its pillowy texture, raspberry or strawberry jam for bright sweetness, and processed cheese slices or mild orange cheddar that melts smoothly without overpowering. You’ll also need butter for grilling. Per sandwich: 2 slices bread, 2 tbsp jam, 1-2 cheese slices, 1 tsp butter per side. Opt for full-fat cheese for best melt; low-fat versions can get rubbery. Jam should be thick to prevent leaking. These picks create the perfect sweet-savory bite. Scale up for batches—makes great picnic food. Check your pantry first to avoid last-minute runs. (108 words)
How do you make a jam and cheese sandwich?
Start with two slices of milk bread. Spread 2 tablespoons of raspberry jam evenly on one slice. Top with 1-2 slices of processed cheese or cheddar. Press the second slice on top. Butter both outer sides lightly. Heat a nonstick pan over medium heat. Grill 1-2 minutes per side until golden and crisp, with cheese softened but not fully melted for that signature pull. Total time: 5 minutes. Use medium heat to avoid burning the jam’s sugars. Press gently with a spatula for even contact. Cut in half diagonally and serve hot. Pro tip: Medium cheddar holds shape better than sharp. Perfect for breakfast or snacks. (112 words)
Why does jam and cheese taste good together in a sandwich?
Jam and cheese taste great together because the jam’s natural sugars provide sweetness that cuts through the cheese’s salty, umami richness, creating a craveable contrast. Human taste buds love sweet-savory pairings—think prosciutto with melon. The jam’s fruit acidity brightens creamy cheese fats, preventing greasiness. In a grilled sandwich, heat mellows sharp edges, blending flavors as bread toasts. Studies show such combos boost satisfaction by balancing all five tastes. Raspberry jam with mild cheddar shines here. It’s not gourmet; it’s everyday genius. Try it if you doubt—most converts happen after one bite. Links to sweet-savory recipes on site for more ideas. (104 words)
Are there variations for a jam and cheese sandwich?
Yes, customize your jam and cheese sandwich easily. Swap raspberry jam for apricot or fig for deeper notes. Use blue cheese for bold tang or cream cheese for spreadable softness. Try whole wheat bread for fiber or add ham for a Monte Cristo twist. Vegan option: fruit preserves with cashew cheese on sourdough. Spice it with black pepper or chili flakes on jam. For crunch, add thin apple slices. Grill as usual, 1-2 minutes per side. Each tweak keeps calories around 300-400 per sandwich. Experiment based on fridge finds—nutrition improves with nut butters added. See our grilled cheese variations page for more. (98 words)

Jam And Cheese Sandwich
🥪 Indulge in the perfect sweet-savory harmony of fruity jam and creamy cheese for a satisfying, crave-crushing snack.
🍞 Ready in under 5 minutes, this effortless recipe is ideal for busy days, kids’ lunches, or anytime hunger strikes.
- Total Time: 5 minutes
- Yield: 1 serving
Ingredients
– 2 slices of bread (milk bread recommended)
– 2 tablespoons of jam (raspberry, strawberry, blueberry, or preferred type)
– 1 slice of cheese (American or mild/medium cheddar)
– 1 tablespoon of butter (or oil)
Instructions
1-Step 1: Gather and Prepare Your Ingredients Before you start cooking, pull out all your ingredients and equipment. You’ll need two slices of milk bread, your chosen jam, one slice of cheese, and butter for grilling. Have a nonstick pan ready this is crucial for achieving an even golden crust without sticking. A butter knife and spatula complete your toolkit. Take a moment to check your bread freshness. Slightly soft, fresh bread works best for this recipe. If your bread has been in the fridge, let it come to room temperature for about 10 minutes cold bread can tear when you spread the jam.
2-Step 2: Spread the Jam Evenly Place one slice of bread on your work surface. Using a butter knife, spread exactly 2 tablespoons of jam across the entire surface, extending all the way to the edges. This even distribution ensures every bite has the perfect balance of sweet and savory. Why 2 tablespoons? This amount provides generous jam coverage without creating a soggy mess. Too little jam and you’ll miss that fruity sweetness; too much and it will ooze out during grilling, potentially burning on your pan. For the best results, use jam at room temperature it spreads more smoothly than cold jam straight from the refrigerator.
3-Step 3: Add the Cheese Layer Place one slice of cheese directly on top of your jam-covered bread. Position it carefully so it covers as much surface area as possible. If you’re using cheddar slices that are smaller than your bread, you can tear or overlap slightly to achieve better coverage. The cheese acts as a barrier between the jam and the second slice of bread. This positioning helps prevent the jam from soaking through and making the top bread slice soggy. It also ensures the cheese warms evenly during grilling.
4-Step 4: Complete the Sandwich Gently place the second slice of bread on top of the cheese to form your sandwich. Press down lightly just enough to help the layers adhere without squeezing the jam out the sides. Now comes an important step that many people skip: buttering the exterior. Using about half of your tablespoon of butter, spread a thin, even layer across the top slice of bread. This buttered side will go down in the pan first. The remaining butter will go on the other side after you flip. Some cooks prefer to melt butter directly in the pan, but spreading it on the bread gives you more control over coverage and helps achieve even browning.
5-Step 5: Grill to Golden Perfection Heat your nonstick pan over medium heat. This temperature is crucial too high and the bread will burn before the cheese warms; too low and you won’t get that appealing golden crunch. Once the pan is heated, place your sandwich buttered-side down. Listen for a gentle sizzle that’s the sound of proper heat. Grill for 1-2 minutes until the bottom is golden brown. You can peek by lifting the edge with your spatula. While the first side grills, spread the remaining butter across the top slice of bread. Flip the sandwich carefully and grill the second side for another 1-2 minutes until golden. The goal is to toast the bread and gently warm the cheese not to fully melt it into a gooey puddle. This sandwich works best when the cheese softens but still maintains some structure.
6-Step 6: Serve and Enjoy Transfer your finished sandwich to a plate. For the best experience, serve it hot while the bread is still crispy and the cheese is warm and soft. Cut diagonally for the classic triangular presentation this isn’t just aesthetics; it makes the sandwich easier to hold and shows off the colorful jam layer inside. Total time from start to finish: just 5 minutes. It’s faster than ordering takeout and far more satisfying than cold cereal.
Last Step:
Please leave a rating and comment letting us know how you liked this recipe! This helps our business to thrive and continue providing free, high-quality recipes for you.Notes
🥛 Choose fluffy milk bread for the softest, most delightful texture.
🍓 Experiment with different jam flavors like raspberry or strawberry for variety.
⏲️ Grill just long enough to toast the bread and gently warm the cheese.
- Prep Time: 2 minutes
- Cook Time: 5 minutes
- Category: Sandwiches
- Method: Pan-Frying
- Cuisine: Fusion
Nutrition
- Serving Size: 1 sandwich
- Calories: 479 kcal
- Sugar: 23 g
- Sodium: 551 mg
- Fat: 23 g
- Saturated Fat: 13 g
- Unsaturated Fat: 7 g
- Trans Fat: 0.5 g
- Carbohydrates: 55 g
- Fiber: 3 g
- Protein: 13 g
- Cholesterol: 58 mg





