

Why a Dutch Oven Belongs in Every Home Kitchen
If you are shopping for a Dutch Oven, start with a simple idea: it should help you cook more with less stress. A good Dutch oven gives home cooks steady heat, strong flavor, and one-pot convenience. That makes it a smart pick for busy parents, students, working professionals, newlyweds, seniors, and anyone who wants reliable meals without extra fuss.
For many cooks, the best part is how flexible dutch ovens can be. You can brown, simmer, braise, bake, and serve in the same pot. That saves time on cleanup and helps keep dinner moving on a weeknight.
- Ease of preparation: A cast iron dutch oven holds heat well, so recipes cook evenly with less guessing. That is helpful when you need a meal that fits into a 45-minute window.
- Health benefits: Many dutch oven meals can lean on beans, vegetables, and lean protein. For example, beef and beans give solid protein, while tomatoes and onions add more nutrients. You can read more about beef nutrition at this beef nutrition guide.
- Versatility: From soups to roasts to baked desserts, an enameled dutch oven or a traditional cast iron model can handle many recipes. It works well for fruit desserts like peach cobbler too.
- Distinctive flavor: The heavy lid traps moisture and deepens taste. That is why a dutch oven often makes simple meals taste richer and more satisfying.
Short summary: A Dutch Oven gives you even heat, strong flavor, and one-pot cooking that fits real life.
Jump to:
- Why a Dutch Oven Belongs in Every Home Kitchen
- Essential Ingredients for Dutch Oven Chili
- Main Ingredients
- Special Dietary Options
- How to Prepare the Perfect Dutch Oven Chili
- Step 1: Brown the beef
- Step 2: Add the onion and garlic
- Step 3: Add beans, tomatoes, and spices
- Step 4: Simmer the chili
- Step 5: Taste and serve
- Dietary Substitutions to Customize Your Dutch Oven Chili
- Protein and Main Component Alternatives
- Vegetable, Sauce, and Seasoning Modifications
- Mastering Dutch Oven Cooking with Smart Tips
- Pro cooking techniques
- Flavor variations
- Presentation tips
- Make-ahead options
- How to Store Dutch Oven Chili
- Refrigeration
- Freezing
- Reheating
- Meal prep considerations
- FAQs About Dutch Oven Cooking and Chili
- Dutch Oven
- Ingredients
- Notes
- Nutrition
- Did you make this recipe?
Essential Ingredients for Dutch Oven Chili
This recipe uses simple pantry staples and gives you a warm, filling meal. Here is the full ingredient list, with exact amounts kept clear for easy shopping and prep.
Main Ingredients
- 1 pound ground beef
- 1 chopped onion
- 2 minced garlic cloves
- 1 can kidney beans
- 1 can diced tomatoes
- Chili powder to taste
Each ingredient plays a clear role. Ground beef gives the chili body and protein. Onion and garlic build flavor. Kidney beans add texture and fiber. Diced tomatoes bring moisture and a bright base. Chili powder ties everything together with warmth and depth.
Special Dietary Options
- Vegan: Swap the ground beef for plant-based crumbles, lentils, or extra beans.
- Gluten-free: The listed ingredients are naturally gluten-free, but always check labels on chili powder and canned goods.
- Low-calorie: Use lean ground beef or ground turkey, then add extra beans and tomatoes for volume.
If you are comparing dutch oven brands or figuring out dutch oven sizes, remember that this recipe works well in a medium-size pot that gives enough room for stirring and simmering.
How to Prepare the Perfect Dutch Oven Chili
This is a straightforward dutch oven buying guide for the cook who wants practical results from the pan they already own. A sturdy pot matters, but the method matters even more. Follow the steps below for a balanced, hearty chili that is ready in about 45 minutes.
Step 1: Brown the beef
Set your Dutch Oven over medium heat. Add the 1 pound ground beef and cook until browned, breaking it apart with a spoon as it cooks. This step builds the base flavor, and it also helps render some fat for a richer chili.
If your beef has a lot of fat, spoon off the extra before moving on. A cast-iron dutch oven is ideal here because it spreads heat evenly and keeps the meat from cooking in hot spots.
Step 2: Add the onion and garlic
Stir in 1 chopped onion and 2 minced garlic cloves. Cook them with the beef until they soften. This usually takes a few minutes. The onion should turn translucent, and the garlic should smell fragrant, not burnt.
This is the point where the kitchen starts to smell like real comfort food. If you prefer a milder flavor, cook the onion a little longer. If you like a sharper bite, keep some texture in the onion pieces.
Step 3: Add beans, tomatoes, and spices
Pour in 1 can kidney beans and 1 can diced tomatoes. Stir in chili powder to taste. Mix well so the beef, beans, and tomatoes are fully coated with seasoning. This is where the chili starts to take on its final character.
For home cooks who like control, this is the best stage to adjust heat. Add a little chili powder first, then taste and add more later. That approach works well for families with different spice preferences.
Step 4: Simmer the chili
Reduce the heat to low and let the chili simmer for 30 minutes. Stir now and then so nothing sticks to the bottom. The simmer time lets the flavors blend and gives the tomatoes time to soften into the sauce.
If the chili looks too thick, add a splash of water or broth. If it looks too thin, leave the lid slightly open for part of the simmering time. This flexible method is one reason dutch ovens for home cooks stay so popular.
Step 5: Taste and serve
Before serving, taste the chili and adjust the seasoning. Add more chili powder if you want more heat. Serve it hot in bowls with bread, rice, or simple toppings like shredded cheese or chopped herbs.
For a fun family meal, pair this chili night with a sweet treat like a creamy strawberry milkshake. That kind of pairing makes the table feel special without adding much extra work.
| Recipe Detail | Information |
|---|---|
| Preparation time | 45 minutes |
| Simmer time | 30 minutes |
| Calories per serving | Approximately 300 |
| Protein | 20 grams |
| Fat | 15 grams |
Tip: Use a cast-iron Dutch oven for even heating and adjust the spices to your taste.
Dietary Substitutions to Customize Your Dutch Oven Chili
Protein and Main Component Alternatives
If you want to change the protein, there are easy swaps that still work well in a cast iron dutch oven. Ground turkey is a leaner choice. Plant-based crumbles give a meatless option. Lentils also work if you want a budget-friendly version that still feels filling.
For readers looking for best dutch oven for beginners advice, start with recipes like this one. They are forgiving and easy to adjust. You can change the protein without changing the whole process.
Vegetable, Sauce, and Seasoning Modifications
There are many ways to shift the flavor. Add bell peppers for sweetness, corn for more texture, or extra beans for more fiber. You can also use fire-roasted tomatoes for a smoky note or mild tomatoes if you want a gentler finish.
If you prefer less heat, use less chili powder and add a bit of cumin or smoked paprika instead. If you like stronger spice, add cayenne or a hot chili blend. Readers who want to shop dutch ovens for home cooking should look for a size that leaves enough room for stirring these add-ins safely.
For a crisp snack to serve on the side, you can pair chili night with pink popcorn for a playful treat. It is a fun option for movie night or casual gatherings.
Mastering Dutch Oven Cooking with Smart Tips
Once you know the basics, a few small habits can improve your results. This is where the right technique matters as much as the pot itself. A well-made enameled dutch oven or traditional cast iron model can both perform well when used with care.
Pro cooking techniques
- Preheat the pot before browning for more even searing.
- Stir often during the simmer so the beans and tomatoes do not stick.
- Keep the heat at medium or low to protect the flavor and texture.
- If you cook often, compare dutch oven brands by handle comfort, weight, and lid fit.
Flavor variations
You can shift this chili in many directions. Add cumin for a deeper earthy note. Use smoked paprika for a mild smoky taste. Add cocoa powder for a rich, dark finish. If you want a Tex-Mex style, top it with avocado, salsa, and lime.
These changes work well because the base recipe stays simple. That is the value of a solid dutch oven buying guide: pick a pot that supports the meals you cook most often.
Presentation tips
Serve chili in wide bowls with a garnish that adds color. Chopped cilantro, shredded cheese, or sliced green onions all work well. A warm bread side makes the meal feel complete.
Make-ahead options
This chili is a strong choice for meal prep. Cook it a day ahead, chill it, then reheat it when needed. The flavor often tastes even better the next day because the spices blend more fully.
Good Dutch oven cooking is not about complexity. It is about steady heat, simple ingredients, and careful timing.
How to Store Dutch Oven Chili
Leftovers store well, which makes this recipe useful for busy weeks. After cooking, let the chili cool before packing it away. That helps keep texture and flavor in good shape.
Refrigeration
Store cooled chili in an airtight container in the fridge for up to 4 days. This works well for lunches, quick dinners, and family meal prep.
Freezing
For longer storage, freeze the chili in freezer-safe containers or bags. Leave a little room at the top for expansion. It can last for up to 3 months when frozen properly.
Reheating
Reheat on the stove over low heat or in the microwave in short intervals. Add a splash of water if the chili seems too thick. Stir well so it heats evenly.
Meal prep considerations
If you cook in batches, portion the chili into single servings. That makes weekday meals faster and helps reduce waste. It also fits well for students, working professionals, and seniors who want easy grab-and-go meals.
FAQs About Dutch Oven Cooking and Chili
Print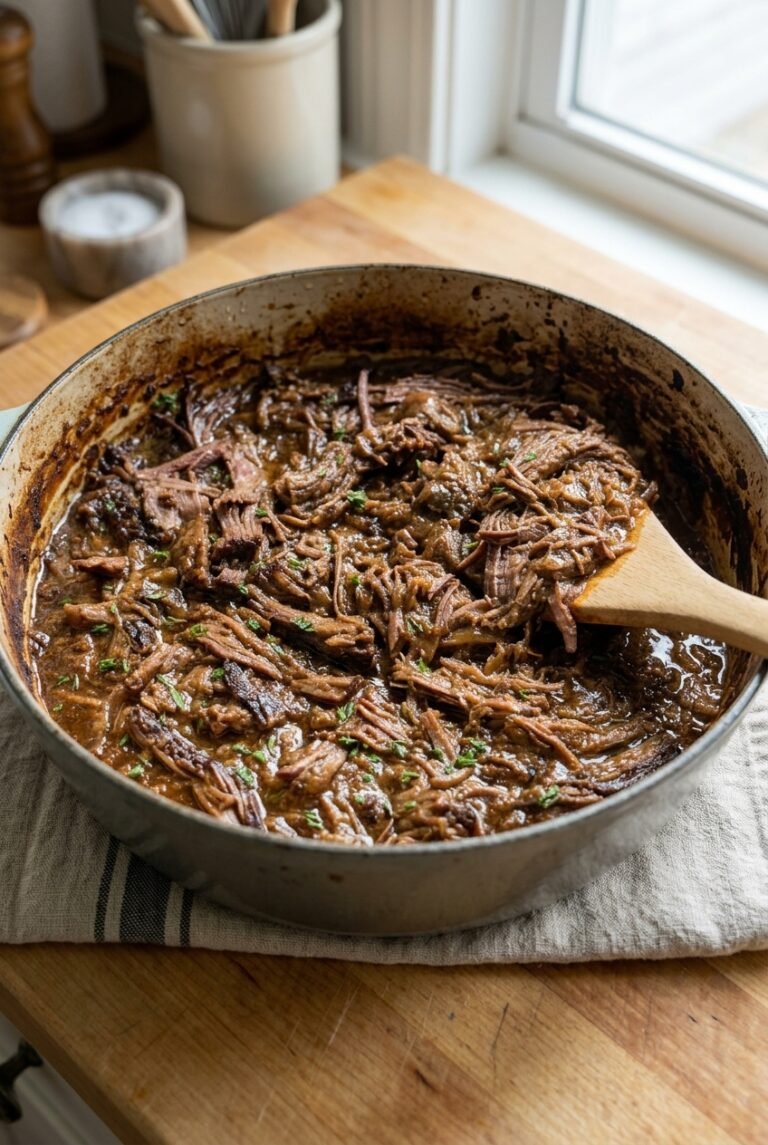
Dutch Oven
🥘 Hearty Dutch oven beef chili – one-pot flavor bomb packed with protein for cozy weeknight dinners!
🔥 Beginner-friendly 45-minute stovetop simmer using cast-iron magic – endlessly customizable heat.
- Total Time: 45 minutes
- Yield: 4 servings
Ingredients
– 1 pound ground beef
– 1 chopped onion
– 2 minced garlic cloves
– 1 can kidney beans
– 1 can diced tomatoes
– Chili powder to taste
Notes
🔥 Use cast-iron Dutch oven for superior even heating and heat retention.
🌶️ Adjust chili powder and cumin to taste; add cayenne for extra heat.
🍲 Make ahead – flavors deepen overnight; freezes well up to 3 months.
- Prep Time: 15 minutes
- Cook Time: 30 minutes
- Category: Main Dish
- Method: Stovetop
- Cuisine: American
Nutrition
- Serving Size: 1 bowl
- Calories: 300 kcal
- Sugar: 5g
- Sodium: 800mg
- Fat: 15g
- Saturated Fat: 6g
- Unsaturated Fat: 9g
- Trans Fat: 0g
- Carbohydrates: 20g
- Fiber: 6g
- Protein: 20g
- Cholesterol: 70mg





