

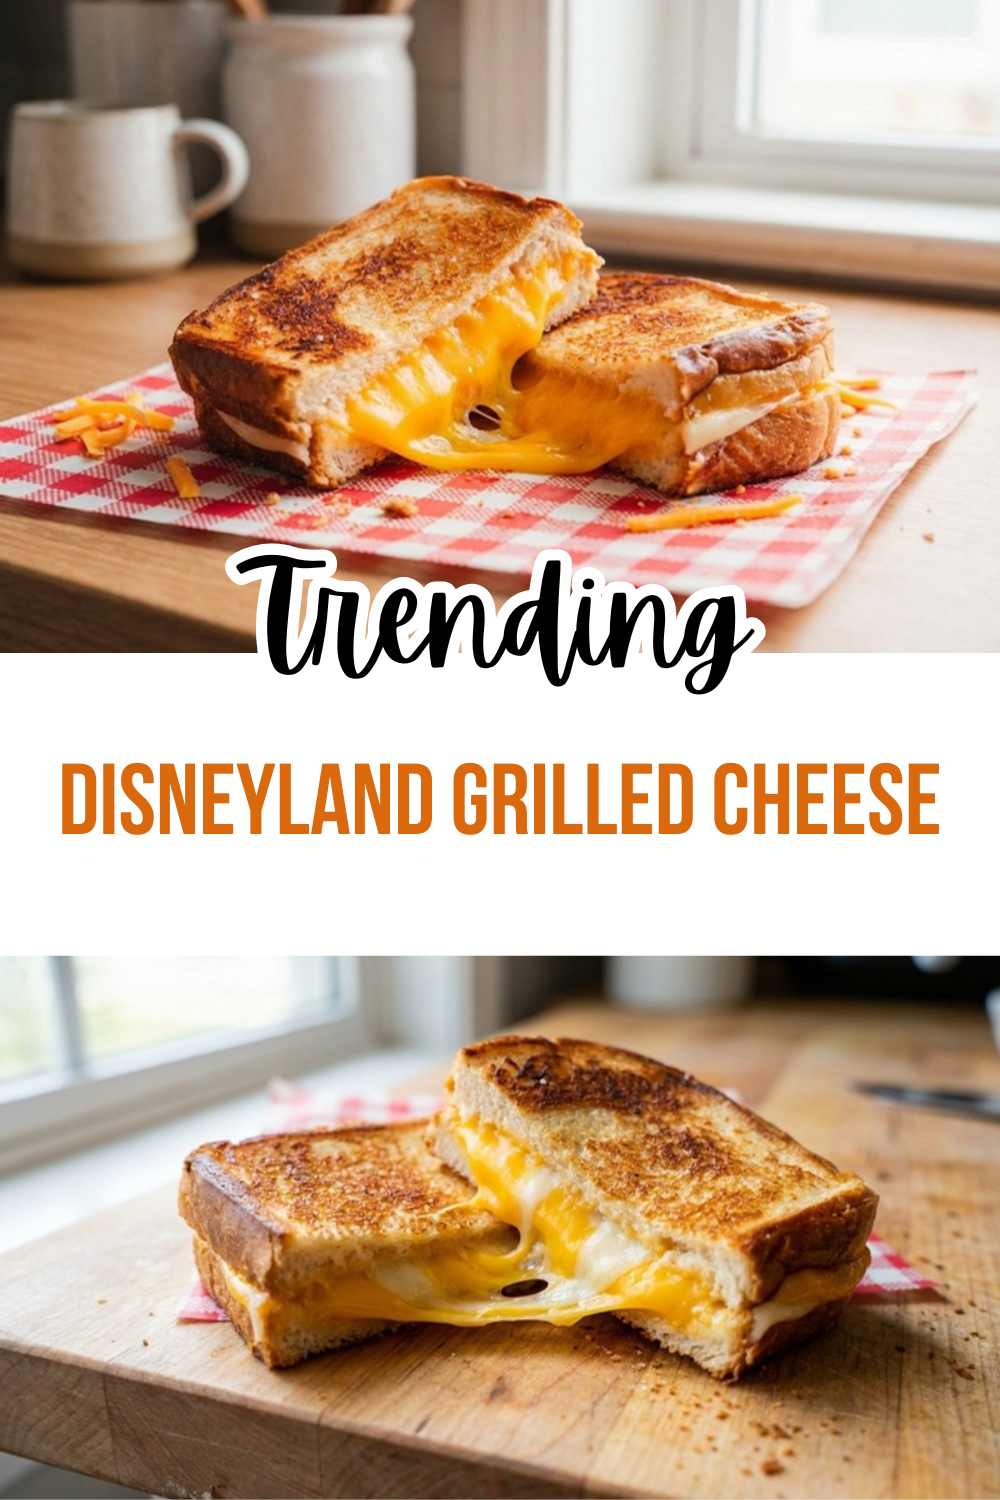
Why You’ll Love This Disneyland Grilled Cheese
If you love a melty sandwich with big comfort food energy, this Disneyland Grilled Cheese recipe is going to hit the spot. It brings that fun park-style feel right into your kitchen, and it is easy enough for a busy weeknight or a weekend family lunch. I also love that it uses simple ingredients you can find at most grocery stores, which makes it a great pick for home cooks, students, and parents who want something special without a lot of fuss.
- Easy to make: This sandwich comes together in about 26 minutes total, with just a few simple steps. The cream cheese spread and garlic spread add big flavor without extra work, so even beginner cooks can handle this Disneyland Grilled Cheese with confidence.
- Rich and satisfying: With cheddar, provolone, cream cheese, and garlic mayo, every bite feels creamy, salty, and extra cheesy. For cheese lovers, this is comfort food at its best, and it pairs nicely with soup or a simple side salad.
- Flexible for different eaters: You can swap in gluten-free bread, use lighter cheese options, or make a vegan-inspired version with plant-based cheese and mayo alternatives. That makes this grilled cheese style recipe easy to adapt for many households.
- Big flavor payoff: The mix of garlicky bread, smooth cream cheese spread, and melty cheese gives this sandwich a standout taste that feels a little special. It is the kind of lunch that makes people ask for seconds.
These sandwiches taste like a fun park treat, but they are simple enough to make any day of the week.
If you enjoy cozy, family-friendly meals like this, you might also like my blackened chicken recipe for an easy dinner idea or my salmon and summer veggies in foil for a quick wholesome meal.
For readers who like to look at the nutrition side of cheese, you can read more about the health benefits of cheese. Garlic also gets a lot of attention for its nutritional value, and this article on garlic nutrition facts and health benefits is a useful resource.
Jump to:
- Why You’ll Love This Disneyland Grilled Cheese
- Essential Ingredients for Disneyland Grilled Cheese
- Ingredients List
- What Each Ingredient Does
- Special Dietary Options
- How to Prepare the Perfect Disneyland Grilled Cheese: Step-by-Step Guide
- First Step: Make the cream cheese spread
- Second Step: Mix the garlic spread
- Third Step: Set up the bread and cheese
- Fourth Step: Add the cream cheese mixture
- Fifth Step: Spread the garlic mixture on the outside
- Sixth Step: Heat the skillet
- Seventh Step: Cook the sandwiches
- Eighth Step: Serve hot and enjoy
- Dietary Substitutions to Customize Your Disneyland Grilled Cheese
- Protein and Main Component Alternatives
- Vegetable, Sauce, and Seasoning Modifications
- Mastering Disneyland Grilled Cheese: Advanced Tips and Variations
- Pro cooking techniques
- Flavor variations
- Presentation tips
- Make-ahead options
- How to Store Disneyland Grilled Cheese: Best Practices
- Refrigeration
- Freezing
- Reheating
- Meal prep considerations
- FAQs: Frequently Asked Questions About Disneyland Grilled Cheese
- Where can I get grilled cheese at Disneyland?
- How much does grilled cheese cost at Disneyland?
- What are the best grilled cheese options at Disneyland?
- Are there gluten-free or vegan grilled cheese options at Disneyland?
- Can I make Disneyland grilled cheese at home?
- Disneyland Grilled Cheese
- Ingredients
- Instructions
- Last Step:
- Notes
- Nutrition
- Did you make this recipe?
Essential Ingredients for Disneyland Grilled Cheese
Before you start cooking, it helps to gather everything first. This recipe is really about two flavorful spreads plus the bread and cheese layers that make the sandwich so rich and gooey. The ingredients below are listed with exact amounts so you can prep with confidence and avoid guessing.
Ingredients List
- 1/2 cup cream cheese
- 1/2 cup shredded Double Gloucester or sharp cheddar cheese
- 2 tablespoons heavy cream
- 1/4 teaspoon coarse salt
- 1 cup mayonnaise
- 1 1/2 teaspoons minced garlic
- 1/2 teaspoon coarse salt
- 8 slices artisan bread
- 8 medium cheddar cheese slices
- 8 provolone cheese slices
What Each Ingredient Does
- Cream cheese: Makes the filling smooth, rich, and a little tangy.
- Shredded Double Gloucester or sharp cheddar: Adds body and sharp cheesy flavor to the spread.
- Heavy cream: Helps the cream cheese mixture blend into a soft, spreadable texture.
- Coarse salt: Brings out the flavor in both spreads.
- Mayonnaise: Creates the garlic spread and helps the outside toast beautifully.
- Minced garlic: Gives the sandwich its bold savory kick.
- Artisan bread: Holds up well in the skillet and gives the sandwich a sturdy, crisp crust.
- Cheddar slices: Melt into a sharp, familiar cheese layer.
- Provolone slices: Add mild creaminess and a great melt.
Special Dietary Options
- Vegan: Use plant-based cream cheese, vegan shredded cheese, vegan mayo, and dairy-free sliced cheese.
- Gluten-free: Choose sturdy gluten-free sandwich bread that toasts well.
- Low-calorie: Use light cream cheese, reduced-fat cheese slices, and a thinner layer of mayonnaise.
| Ingredient Group | Amount | Purpose |
|---|---|---|
| Cream Cheese Spread | 1/2 cup cream cheese, 1/2 cup shredded cheese, 2 tablespoons heavy cream, 1/4 teaspoon coarse salt | Creates a smooth, tangy filling |
| Garlic Spread | 1 cup mayonnaise, 1 1/2 teaspoons minced garlic, 1/2 teaspoon coarse salt | Adds savory flavor and helps browning |
| Sandwich Build | 8 slices artisan bread, 8 medium cheddar cheese slices, 8 provolone cheese slices | Forms the melty grilled cheese sandwiches |
How to Prepare the Perfect Disneyland Grilled Cheese: Step-by-Step Guide
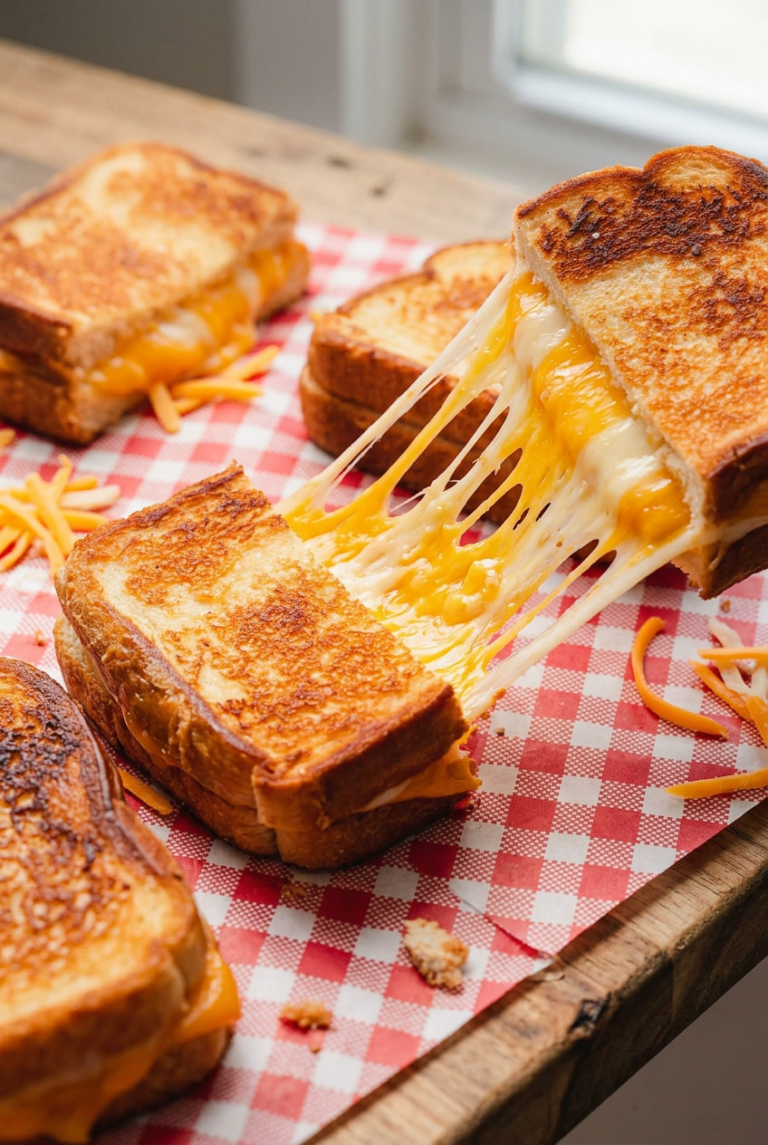
This Disneyland Grilled Cheese recipe is simple, but the small details make a big difference. The creamy filling, the garlic spread, and the skillet method all work together to create a sandwich with crisp edges and a gooey center. If you follow the steps closely, you will get that golden brown finish and melty cheese pull every time.
First Step: Make the cream cheese spread
Place the 1/2 cup cream cheese, 1/2 cup shredded Double Gloucester or sharp cheddar cheese, 2 tablespoons heavy cream, and 1/4 teaspoon coarse salt into a food processor. Blend until the mixture is smooth and creamy. You want it thick enough to spread, but soft enough to sit neatly on the bread without tearing it.
Second Step: Mix the garlic spread
In a separate bowl, stir together 1 cup mayonnaise, 1 1/2 teaspoons minced garlic, and 1/2 teaspoon coarse salt. Mix well so the garlic is evenly distributed. This spread gives the outside of the bread a savory flavor and helps it toast to a pretty golden color in the skillet.
Third Step: Set up the bread and cheese
Lay out the 8 slices artisan bread on your counter. On 4 slices, place 2 medium cheddar cheese slices each. On the other 4 slices, place 2 provolone cheese slices each. This split makes it easy to create one side with cheddar and one side with provolone, which gives the sandwich a layered, creamy flavor.
Fourth Step: Add the cream cheese mixture
Divide the cream cheese spread evenly over the provolone halves. Spread it gently so it reaches close to the edges without spilling over. Then top those halves with the cheddar halves so the two sides meet and create a full sandwich. If your cheese slices are a little too large for the bread, tear them into pieces and tuck them in so they fit better.
Fifth Step: Spread the garlic mixture on the outside
Take the remaining bread slices and spread the garlic mayonnaise mixture on the outside surfaces. This is the part that will touch the skillet, so make sure the spread is even. A thin, consistent layer helps the bread brown nicely without burning too fast.
Sixth Step: Heat the skillet
Set a skillet, cast iron pan, or griddle over medium heat. Let it warm up before adding the sandwiches. The recipe can stick in nonstick pans, so cast iron or a flat griddle is a better choice for a smoother, more reliable result.
Medium heat is the sweet spot here. Too hot, and the bread browns before the cheese melts. Too low, and the sandwich can turn soft instead of crisp.
Seventh Step: Cook the sandwiches
Place the sandwiches in the hot skillet and cook for about 2 minutes per side. Flip carefully once the first side is golden brown. After the second side cooks, the cheese should be melted, the bread should be crisp, and the filling should be warm and stretchy. Depending on your stove, you may need a few extra seconds, but avoid rushing it with high heat.
Eighth Step: Serve hot and enjoy
Move the sandwiches to a cutting board and let them rest for a minute before slicing. This short wait helps the cheese settle a little so the filling does not run out right away. Serve them warm while the crust is crisp and the middle is extra gooey. These are great with tomato soup, a simple salad, or even fruit for a kid-friendly lunch.
Recipe timing: Prep Time 10 minutes, Cook Time 16 minutes, Total Time 26 minutes. Yields 8 sandwich halves.

Dietary Substitutions to Customize Your Disneyland Grilled Cheese
Protein and Main Component Alternatives
While this recipe is all about cheese, there are still lots of ways to adjust the main components. If you want a lighter version, use reduced-fat cheese slices and a lighter mayonnaise. If you need a dairy-free option, plant-based cream cheese and vegan cheese slices can work well, especially if you choose brands that melt nicely.
For a gluten-free version, swap the artisan bread for a sturdy gluten-free loaf. Look for bread that is thick enough to hold the spreads and cheese without getting soggy. If you want more protein, you can serve the sandwich with a bowl of soup, a handful of nuts, or a side of grilled chicken for a fuller meal.
Vegetable, Sauce, and Seasoning Modifications
You can also add a few extras to match your taste. Thin tomato slices, caramelized onions, or roasted red peppers fit nicely inside the sandwich. A little paprika, black pepper, or dried herbs can also give the garlic spread a new twist. If you want less sodium, cut back a little on the coarse salt and use a lower-sodium cheese when possible.
For families with picky eaters, keep the recipe simple and serve veggies on the side. That way, everyone gets the flavors they like without changing the main sandwich too much. The Disneyland Grilled Cheese idea is easy to customize while still keeping its fun, melty personality.
Mastering Disneyland Grilled Cheese: Advanced Tips and Variations
Once you have made this sandwich once, it becomes easy to tweak and repeat. A few small tricks can make the texture better, the flavor deeper, and the presentation more fun. This is the kind of recipe that works well for lunch boxes, casual dinners, or a movie night at home.
Pro cooking techniques
Use room temperature cream cheese so the spread blends smoothly. Keep the skillet at medium heat and give it time to preheat. If you are making several sandwiches, wipe the pan between batches if the garlic spread starts to darken. A cast iron pan gives the best crust, while a griddle is useful when you are feeding a crowd.
Flavor variations
Try swapping sharp cheddar for a stronger aged cheese if you want a bolder bite. You can also add a little Dijon mustard to the garlic spread for tang. If you want a more kid-friendly sandwich, stick with mild cheddar and provolone and skip extra seasonings. For a richer taste, mix in a little mozzarella with the cheddar.
Presentation tips
Cut the sandwiches in half on the diagonal for that classic diner look. Stack them on a plate with a small bowl of tomato soup or a few pickle spears on the side. A sprinkle of chopped parsley can add a nice pop of color, though it is not required. If you are serving guests, arrange the halves on a wooden board for a cozy, welcoming feel.
Make-ahead options
You can mix both spreads ahead of time and keep them in the refrigerator until you are ready to cook. This is helpful for busy parents and working professionals who want dinner to move fast. Assemble the sandwiches right before cooking so the bread stays fresh and the filling stays neat.
How to Store Disneyland Grilled Cheese: Best Practices
If you have leftovers, you can store them and enjoy them later. The key is to cool the sandwiches first so they do not trap steam in the container. That helps the bread stay in better shape and keeps the cheese from turning rubbery.
Refrigeration
Place cooled sandwiches in an airtight container and refrigerate them for up to 3 days. If possible, wrap each sandwich in parchment paper before storing. This helps reduce sogginess and keeps them easier to reheat.
Freezing
You can freeze the cooked sandwiches for longer storage, though the texture will be a bit softer after reheating. Wrap each sandwich tightly and place it in a freezer-safe bag or container. For best results, freeze them for up to 1 month.
Reheating
Warm leftovers in a skillet over medium-low heat so the bread crisps back up. You can also use an oven or air fryer for a similar effect. Avoid the microwave if you want to keep the outside crisp, since it can make the bread soft.
Meal prep considerations
If you plan to make these for the week, prep the spreads ahead of time and keep the bread and cheese ready to go. Assemble only what you need for the day. That way, you can enjoy a fresh grilled cheese quickly without losing the good texture.
FAQs: Frequently Asked Questions About Disneyland Grilled Cheese
Where can I get grilled cheese at Disneyland?
Grilled cheese sandwiches are available at several quick-service spots in Disneyland Resort. In Disneyland Park, head to Red Rockett’s Pizza Port in Tomorrowland for classic versions starting around $10. At Disney California Adventure, check the carts near Pixar Pier or Lamplight Lounge for gourmet options like bacon-topped melts. Pooh’s Corner in Critter Country often has kid-friendly Mickey-shaped grilled cheese during peak hours. Availability varies by season, so use the Disneyland app to check menus and wait times. Pro tip: Arrive early at carts to avoid long lines, and pair it with tomato soup for $3 extra. These spots serve from park open to close, making them ideal for quick bites between rides. (92 words)
How much does grilled cheese cost at Disneyland?
Prices for grilled cheese at Disneyland range from $9.99 for a basic American cheese melt to $14.99 for loaded versions with bacon, avocado, or specialty cheeses. Kids’ portions start at $7.49. Add-ons like fries or soup cost $4-6. Expect a 8.25-10% sales tax in California, bringing a standard sandwich to about $11-12 total. Prices updated as of 2024; check the app for current menus. It’s a budget-friendly option compared to table-service meals (often $20+), perfect for families. Mobile order via the app to skip lines and save time. (98 words)
What are the best grilled cheese options at Disneyland?
Top picks include the Bacon 3-Cheese at Red Rockett’s Pizza Port (cheddar, mozzarella, Monterey Jack with crispy bacon for $13.49) and the gourmet Gouda melt with applewood bacon at California Adventure carts ($14.99). For kids, the Mickey-shaped classic at Pooh’s Corner delights with its fun shape. Vegan options are limited but soy cheese melts appear seasonally. Ratings from Disney foodies average 4.5/5 on apps like TouringPlans. Pair with a frozen lemonade for the full experience. These stand out for melty cheese pull and park-exclusive flavors not found elsewhere. (102 words)
Are there gluten-free or vegan grilled cheese options at Disneyland?
Yes, Disneyland offers accommodations. Gluten-free grilled cheese uses Udi’s bread at select locations like Red Rockett’s (request it; $12.99), prepared in a dedicated area to minimize cross-contamination. Vegan versions feature plant-based cheese on request at carts near Pixar Pier, often with Beyond Meat add-ins ($13.49). Always inform cast members of allergies—they’ll swap to safe options. Nut-free is standard, but check for dairy. Use the Disneyland app’s allergy filter for real-time availability. About 20% of menu items now cater to dietary needs per Disney’s 2024 updates, ensuring everyone enjoys. (96 words)
Can I make Disneyland grilled cheese at home?
Recreate the park’s Bacon 3-Cheese grilled cheese with this simple recipe (serves 2, 20 mins): Ingredients—4 slices sourdough, 4 oz each cheddar/Monterey Jack/mozzarella, 4 bacon strips (cooked), butter. Spread butter on bread outsides, layer cheeses and bacon inside. Grill on medium heat 3-4 mins per side until golden. For authenticity, use Tillamook cheeses like the parks. Kids’ Mickey version: Use cookie cutter on assembled sandwich before grilling. Costs under $10 total vs. $13 in-park. Perfect for game nights—pairs with Disney+ movie marathons. Full video tutorials on YouTube for visual steps. (104 words)
Disneyland Grilled Cheese
🧀 Recreate Toy Story Land magic with Disney’s gooey grilled cheese – layers of cheddar, provolone, cream cheese spread, and garlic mayo for ultimate cheesy bliss!
🎢 Quick 26-minute pan-fried sandwiches deliver park-quality flavor at home; kid-approved, customizable, perfect for lunch or snack.
- Total Time: 26 minutes
- Yield: 8 sandwich halves
Ingredients
– 1/2 cup cream cheese
– 1/2 cup shredded Double Gloucester or sharp cheddar cheese
– 2 tablespoons heavy cream
– 1/4 teaspoon coarse salt
– 1 cup mayonnaise
– 1 1/2 teaspoons minced garlic
– 1/2 teaspoon coarse salt
– 8 slices artisan bread
– 8 medium cheddar cheese slices
– 8 provolone cheese slices
Instructions
1-First Step: Make the cream cheese spread Place the 1/2 cup cream cheese, 1/2 cup shredded Double Gloucester or sharp cheddar cheese, 2 tablespoons heavy cream, and 1/4 teaspoon coarse salt into a food processor. Blend until the mixture is smooth and creamy. You want it thick enough to spread, but soft enough to sit neatly on the bread without tearing it.
2-Second Step: Mix the garlic spread In a separate bowl, stir together 1 cup mayonnaise, 1 1/2 teaspoons minced garlic, and 1/2 teaspoon coarse salt. Mix well so the garlic is evenly distributed. This spread gives the outside of the bread a savory flavor and helps it toast to a pretty golden color in the skillet.
3-Third Step: Set up the bread and cheese Lay out the 8 slices artisan bread on your counter. On 4 slices, place 2 medium cheddar cheese slices each. On the other 4 slices, place 2 provolone cheese slices each. This split makes it easy to create one side with cheddar and one side with provolone, which gives the sandwich a layered, creamy flavor.
4-Fourth Step: Add the cream cheese mixture Divide the cream cheese spread evenly over the provolone halves. Spread it gently so it reaches close to the edges without spilling over. Then top those halves with the cheddar halves so the two sides meet and create a full sandwich. If your cheese slices are a little too large for the bread, tear them into pieces and tuck them in so they fit better.
5-Fifth Step: Spread the garlic mixture on the outside Take the remaining bread slices and spread the garlic mayonnaise mixture on the outside surfaces. This is the part that will touch the skillet, so make sure the spread is even. A thin, consistent layer helps the bread brown nicely without burning too fast.
6-Sixth Step: Heat the skillet Set a skillet, cast iron pan, or griddle over medium heat. Let it warm up before adding the sandwiches. The recipe can stick in nonstick pans, so cast iron or a flat griddle is a better choice for a smoother, more reliable result. Medium heat is the sweet spot here. Too hot, and the bread browns before the cheese melts. Too low, and the sandwich can turn soft instead of crisp.
7-Seventh Step: Cook the sandwiches Place the sandwiches in the hot skillet and cook for about 2 minutes per side. Flip carefully once the first side is golden brown. After the second side cooks, the cheese should be melted, the bread should be crisp, and the filling should be warm and stretchy. Depending on your stove, you may need a few extra seconds, but avoid rushing it with high heat.
8-Eighth Step: Serve hot and enjoy Move the sandwiches to a cutting board and let them rest for a minute before slicing. This short wait helps the cheese settle a little so the filling does not run out right away. Serve them warm while the crust is crisp and the middle is extra gooey. These are great with tomato soup, a simple salad, or even fruit for a kid-friendly lunch.
Last Step:
Please leave a rating and comment letting us know how you liked this recipe! This helps our business to thrive and continue providing free, high-quality recipes for you.Notes
🧀 If cheese slices are larger than bread, use 1 slice each of cheddar and provolone per half, torn to fit.
🔥 Prefer cast iron or griddle over nonstick to avoid sticking during cooking.
❄️ Chill spreads 15 minutes for easier spreading and better sandwich assembly.
- Prep Time: 10 minutes
- Cook Time: 16 minutes
- Category: Sandwiches
- Method: Pan-frying
- Cuisine: American
- Diet: Vegetarian
Nutrition
- Serving Size: 1 sandwich half
- Calories: 663 kcal
- Sugar: 3g
- Sodium: 1185mg
- Fat: 54g
- Saturated Fat: 23g
- Unsaturated Fat: 28g
- Trans Fat: 1g
- Carbohydrates: 19g
- Fiber: 1g
- Protein: 25g
- Cholesterol: 106mg





