

Why You’ll Love This Dim Sum Chicken Feet
If you’ve ever sat in a bustling dim sum restaurant, pushing carts of steaming bamboo baskets past your table, you’ve probably seen these glossy, sauce-coated delights. My dad has been making Dim Sum Chicken Feet for as long as I can remember, and his method brings restaurant quality right into our home kitchen. This recipe is close to my heart, and I’m so excited to share it with you.
Here’s why this recipe will become a favorite in your home too:
- Ease of preparation: Despite looking fancy, this dish comes together with basic ingredients and simple techniques. The hands-on time is minimal, and the slow braising does all the work for you. Total active time is under 30 minutes!
- Health benefits: These little treats pack a serious collagen punch, which supports skin elasticity and joint health. With moderate protein content and minimal fat when braised rather than deep-fried, they make a nourishing addition to your meal rotation.
- Versatility: Whether you prefer a spicy kick with chili bean paste or a classic black bean sauce base, this recipe adapts to your taste. Serve it as a dim sum starter or alongside rice for a satisfying main.
- Distinctive flavor: The combination of fermented black beans, star anise, ginger, and garlic creates that authentic savory depth you crave from your favorite dim sum spot. Each bite delivers umami richness that keeps you coming back.
This traditional Cantonese dish might seem intimidating at first, but trust me, if I can master it in my tiny apartment kitchen, you can too!
Jump to:
- Why You’ll Love This Dim Sum Chicken Feet
- Essential Ingredients for Dim Sum Chicken Feet
- Main Ingredients
- Special Dietary Options
- How to Prepare the Perfect Dim Sum Chicken Feet: Step-by-Step Guide
- Step 1: Clean and Prepare the Chicken Feet
- Step 2: Blanch the Chicken Feet
- Step 3: Deep-Fry or Boil for Texture
- Step 4: Prepare the Braising Sauce
- Step 5: Braise Until Tender
- Step 6: Thicken and Finish
- Step 7: Steam Before Serving
- Dietary Substitutions to Customize Your Dim Sum Chicken Feet
- Protein and Main Component Alternatives
- Vegetable, Sauce, and Seasoning Modifications
- Mastering Dim Sum Chicken Feet: Advanced Tips and Variations
- Pro Cooking Techniques
- Flavor Variations
- Presentation Tips
- Make-Ahead Options
- How to Store Dim Sum Chicken Feet: Best Practices
- Refrigeration
- Freezing
- Reheating
- Meal Prep Considerations
- FAQs: Frequently Asked Questions About Dim Sum Chicken Feet
- What are dim sum chicken feet?
- How do you clean and prepare chicken feet for dim sum?
- What’s a simple recipe for homemade dim sum chicken feet?
- How do you eat dim sum chicken feet?
- Are dim sum chicken feet healthy and good for you?
- Dim Sum Chicken Feet
- Ingredients
- Instructions
- Last Step:
- Notes
- Nutrition
- Did you make this recipe?
Essential Ingredients for Dim Sum Chicken Feet
Every great dish starts with great ingredients. Here’s everything you’ll need to make authentic Dim Sum Chicken Feet at home. My dad always says the secret lies in using fresh aromatics and quality sauces, so don’t skimp on these!
Main Ingredients
- 1 lb chicken feet, fresh or thawed – The star of the show, providing that signature gelatinous texture and collagen-rich goodness
- 3 tablespoons soy sauce – Builds the savory foundation and adds that beautiful dark color
- 2 tablespoons black bean sauce, fermented – The key to authentic dim sum flavor with deep, salty umami
- 1 teaspoon sugar – Balances the saltiness and helps create that glossy finish
- 4 cloves garlic, smashed – Infuses aromatic sweetness throughout the braise
- 1-inch piece ginger, sliced – Adds warm spice and helps neutralize any strong odors
- 2 tablespoons cooking wine (Shaoxing preferred) – Tenderizes and adds complexity
- 2 whole star anise – Provides that distinct licorice-like aroma essential to Chinese braising
- 2 cups water or chicken broth – Creates the braising liquid for slow cooking
- 1 dried chili (optional) – For a gentle heat that won’t overpower the dish
- 1 green onion, cut into 2-inch pieces – Fresh aromatics for the braising stage
Special Dietary Options
| Dietary Need | Substitution | Notes |
|---|---|---|
| Gluten-free | Use tamari instead of soy sauce; gluten-free oyster sauce | Check labels on black bean sauce as some contain wheat |
| Low-sodium | Reduce soy sauce by half; use low-sodium broth | Add extra ginger and garlic for flavor |
| Low-calorie | Skip deep-frying; boil or steam instead | Reduces calories significantly while keeping tenderness |
| Vegetarian/Vegan | Substitute with king oyster mushrooms | Mimics the chewy texture beautifully |
For those new to cooking with chicken feet, you can find them at most Asian grocery stores, often in the frozen section. Fresh is ideal, but frozen works perfectly fine. Just make sure to thaw them completely before starting. If you’re looking for another protein dish to try, check out my blackened chicken recipe for a completely different flavor profile!
How to Prepare the Perfect Dim Sum Chicken Feet: Step-by-Step Guide
Alright, let’s get cooking! I’ll walk you through every step my dad taught me. Don’t worry if this is your first time working with chicken feet. Take it step by step, and you’ll have restaurant-quality results.
Step 1: Clean and Prepare the Chicken Feet
Start by rinsing your chicken feet under cold running water. If they were frozen, make sure they’re completely thawed. Using clean kitchen shears or a sharp knife, trim off the nails from each toe. This might feel strange at first, but it makes the dish much nicer to eat! If you spot any rough yellow skin patches, give them a little scrape with your knife.
My dad’s tip: Don’t skip this cleaning stage. Those extra few minutes of prep make all the difference in the final taste and texture.
Step 2: Blanch the Chicken Feet
Bring a large pot of water to a rolling boil. Add a slice of ginger and one cut green onion to the water. Carefully drop in the prepared chicken feet and let them boil for 5 minutes. This blanching step removes impurities and any strong odors, giving you a clean base to work with.
After 5 minutes, drain the chicken feet and rinse them under cold water. Pat them dry with paper towels. At this point, they should look cleaner and slightly tightened.
Step 3: Deep-Fry or Boil for Texture
Here’s where you have a choice to make:
- Restaurant-style method: Heat about 2 inches of oil in a wok or deep pot to 350°F. Carefully add the dried chicken feet and fry for 3-4 minutes until golden and puffy. Drain on paper towels. This creates that characteristic puffy, wrinkled skin that soaks up sauce beautifully.
- Healthier home method: Skip the frying and proceed directly to braising. Boil the blanched feet for 30 minutes in fresh water with aromatics until they start to soften. This cuts calories while still achieving tender results.
My family typically uses the boiling method at home since it’s easier and lighter. But for special occasions, we go all out with the fried version!
Step 4: Prepare the Braising Sauce
In a clean pot or wok, combine all your sauce ingredients: soy sauce, black bean sauce, sugar, smashed garlic, sliced ginger, cooking wine, and star anise. Add the dried chili if you want a hint of heat. Pour in the water or chicken broth.
Stir everything together and bring the mixture to a gentle simmer. Give it a taste. It should be savory with a subtle sweetness. The black beans might look chunky at first, but they’ll break down during cooking.
Step 5: Braise Until Tender
Add your prepared chicken feet to the simmering sauce. Make sure they’re mostly submerged. Cover the pot with a tight-fitting lid and turn the heat down to low. Let everything bubble away gently for 1 to 1.5 hours.
Check on them every 30 minutes or so. Give them a stir and add a splash more water if the sauce is reducing too quickly. The chicken feet are done when you can easily pierce the thickest part with a chopstick. The skin should feel tender and gelatinous, not rubbery.
Pro tip from my dad: The secret to tender Dim Sum Chicken Feet is patience. Don’t rush the braising time. The collagen needs time to break down into that melt-in-your-mouth gelatin we love.
Step 6: Thicken and Finish
Once the chicken feet are tender, remove the lid and turn up the heat slightly. Let the sauce reduce and thicken for about 10-15 minutes. The sauce should coat the back of a spoon and have a glossy appearance.
If you want an even thicker sauce, mix 1 teaspoon of cornstarch with 1 tablespoon of cold water and stir it into the bubbling sauce. Cook for another minute until thickened.
Step 7: Steam Before Serving
For that authentic dim sum restaurant texture, steam the braised chicken feet for 10 minutes before serving. Place them in a heat-proof dish inside a steamer basket over boiling water. This final step softens the skin further and brings all the flavors together.
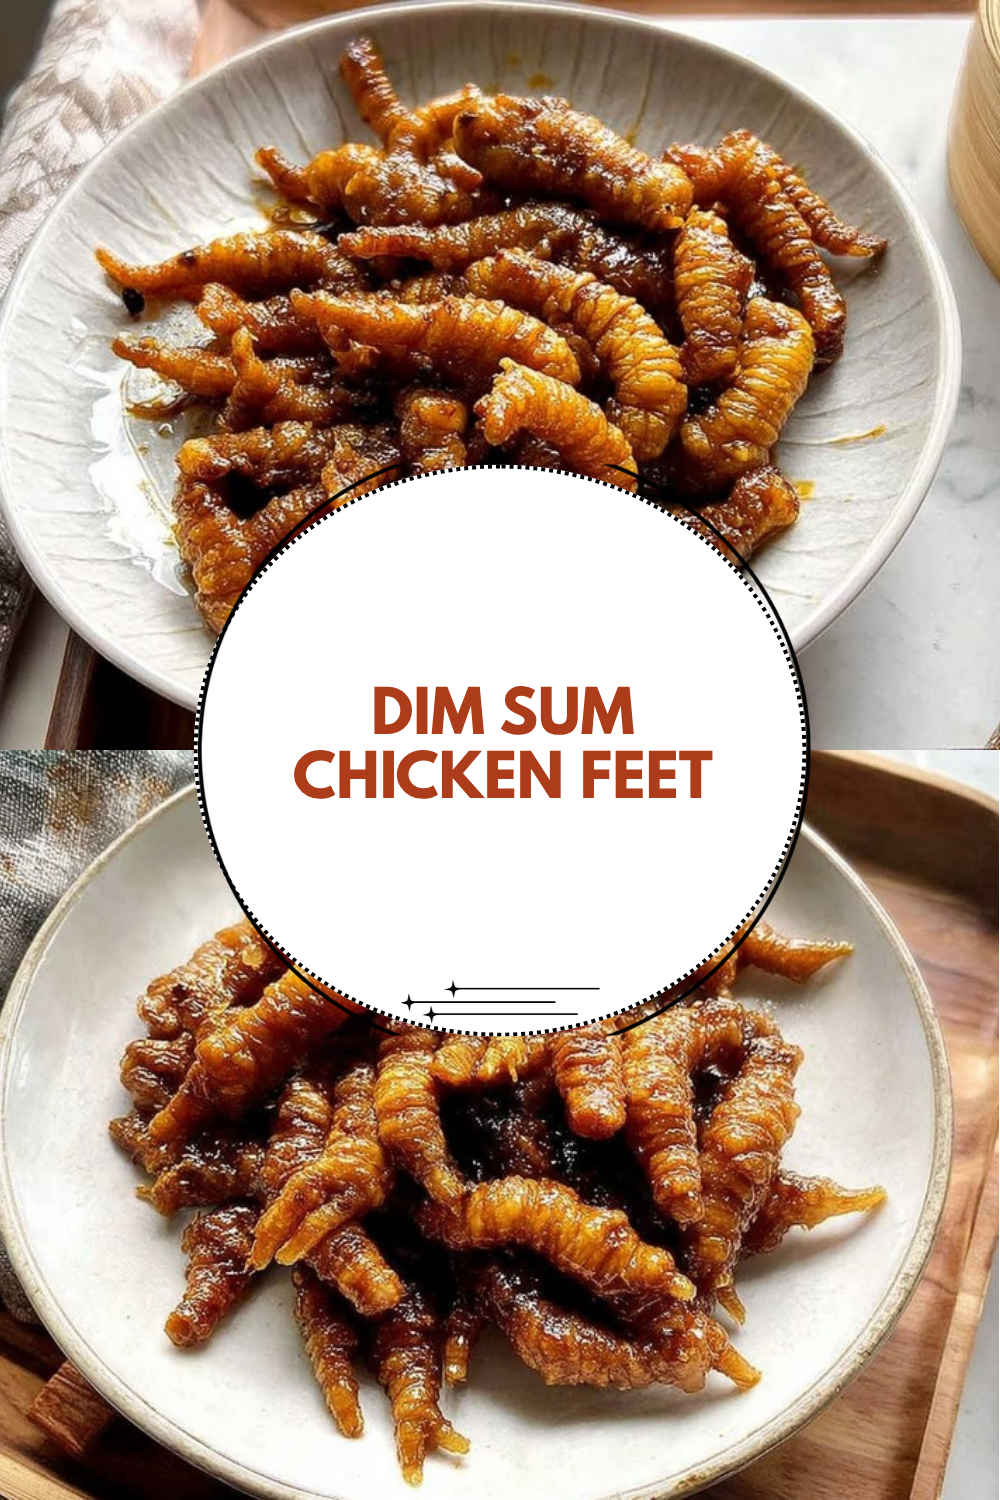
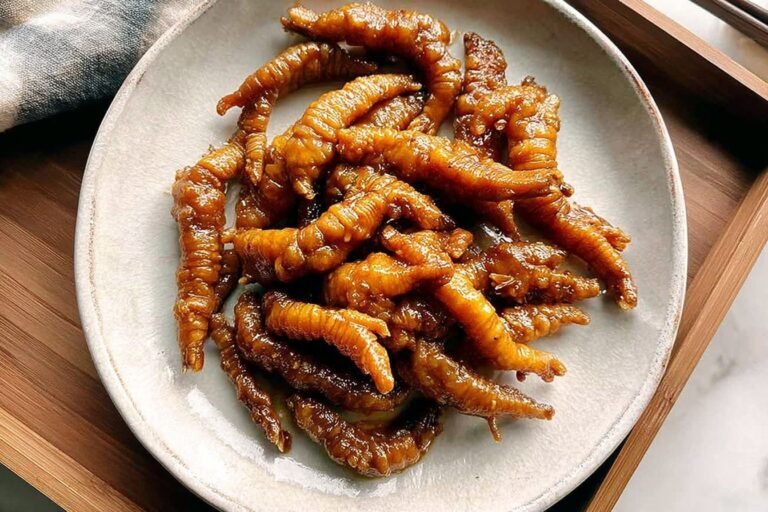
Serve hot in a small bowl, garnished with sliced green onions. The sauce should glisten, coating each piece of chicken feet. They’re best enjoyed immediately while hot and tender!
Total prep and cook time ranges from 1.5 to 2 hours, including cleaning, cooking, and marinating. Most of this is hands-off braising time, so you can prep other dishes while these simmer away.

Dietary Substitutions to Customize Your Dim Sum Chicken Feet
One of the things I love most about cooking at home is the ability to adapt recipes to fit different needs. Whether you’re cooking for someone with dietary restrictions or just want to switch things up, here are some options.
Protein and Main Component Alternatives
For those who don’t eat chicken or want a plant-based version, you have options! King oyster mushrooms make an excellent substitute. Their firm, meaty texture mimics the chewiness of chicken feet surprisingly well. Slice them into thick rounds and prepare them using the same braising method.
Pork ribs or pork belly chunks can also work with this sauce blend. Adjust the cooking time, as pork needs about 45-60 minutes of braising. The sauce is versatile enough to flavor many proteins beautifully.
Vegetable, Sauce, and Seasoning Modifications
The braising sauce can be tweaked to your preferences. Here are some ideas:
- Vegetables: Add cubed daikon radish or carrots during the last 30 minutes of braising. They soak up flavor and add nice variety.
- Sauce variations: Replace black bean sauce with hoisin sauce for a sweeter profile, or add chili bean paste for a spicy Sichuan twist.
- Seasoning swaps: No star anise? Use a pinch of five-spice powder. Out of Shaoxing wine? Dry sherry works in a pinch.
For those watching their sodium intake, reduce both soy sauces by half and skip adding extra salt. The fermented black beans are naturally salty, so the dish will still have plenty of flavor.
Mastering Dim Sum Chicken Feet: Advanced Tips and Variations
Once you’ve mastered the basic recipe, you might want to try some advanced techniques. My dad has picked up plenty of tricks over the years, and I’m sharing them with you!
Pro Cooking Techniques
For ultra-tender results without hours of simmering, use a pressure cooker. After the initial cleaning and blanching, pressure cook the chicken feet in the sauce for 40 minutes on high. Quick-release the pressure and you’ll have incredibly tender results. This cuts total cooking time nearly in half!
If you have the time, marinate the blanched chicken feet in the soy-black bean mixture overnight before braising. This gives the flavors a chance to really penetrate deep into the meat.
Flavor Variations
Chinese cuisine varies by region, and you can reflect that in your sauce:
- Cantonese style: Stick with the classic black bean sauce base, plenty of ginger, and a touch of sugar for balance.
- Sichuan style: Add doubanjiang (chili bean paste), Sichuan peppercorns, and more dried chilies for a numbing, spicy kick.
- Braised abalone sauce style: Add a splash of abalone sauce for an extra rich, luxurious taste.
Presentation Tips
Dim Sum Chicken Feet should look as good as they taste! Here are presentation ideas:
- Serve in small individual bowls, which keeps the sauce contained and looks restaurant-fancy.
- Garnish with a sprinkle of sesame seeds and thinly sliced green onions for color contrast.
- For a party, serve in a large steaming dish and let guests help themselves.
Make-Ahead Options
This dish actually tastes better the next day! The flavors continue to develop overnight. Cook it a day ahead, store in the refrigerator, and reheat gently before serving. This makes it perfect for dinner parties or weekend dim sum brunches.
You can also freeze the braised chicken feet for up to a month. Thaw in the refrigerator overnight and steam to reheat. The texture holds up surprisingly well!
How to Store Dim Sum Chicken Feet: Best Practices
Properly storing leftovers keeps your hard work tasting delicious for days. Here’s everything you need to know about storing Dim Sum Chicken Feet.
Refrigeration
Let the cooked chicken feet cool to room temperature before storing. Place them in an airtight container with all the sauce. They’ll keep in the refrigerator for up to 3 days. The gelatinous skin firms up when cold, but will soften again when reheated.
Freezing
For longer storage, freeze the chicken feet in portion-sized containers. Leave about an inch of headspace as the sauce expands when frozen. Label with the date and use within 1 month for best quality. The texture might change slightly, but the flavor remains wonderful.
Reheating
The best way to reheat Dim Sum Chicken Feet is by steaming. Place them in a heat-proof dish and steam for 8-10 minutes until heated through. This gentle method preserves the tender texture.
You can also reheat in the microwave. Cover the dish loosely and heat in 1-minute intervals, checking after each one. Add a splash of water if the sauce has thickened too much.
Meal Prep Considerations
This dish works well for meal prep! Cook a double batch on the weekend and portion into containers. Pair with steamed rice and vegetables for a complete meal. If you enjoy cooking proteins in advance like this, you might also like my salmon and summer veggies in foil for another great make-ahead option.
FAQs: Frequently Asked Questions About Dim Sum Chicken Feet
What are dim sum chicken feet?
Dim sum chicken feet, also known as “phoenix claws,” are a classic Cantonese dish featuring chicken feet braised in a savory sauce until tender and flavorful. The skin and tendons become gelatinous and chewy, while the sauce—made with soy, oyster sauce, star anise, and ginger—infuses deep umami. At dim sum restaurants, they’re steamed or braised and served hot. Nutritionally, they’re rich in collagen for skin and joint health, low in fat, and high in protein. To try at home, clean fresh chicken feet by trimming nails and blanching in boiling water for 5 minutes to remove impurities. This dish shines in family recipes passed down through generations, like those from experienced Chinese chefs who’ve perfected it over decades.
How do you clean and prepare chicken feet for dim sum?
Start with fresh or thawed chicken feet. Use kitchen shears to clip off the nails and any yellow skin. Rinse under cold water, then blanch in boiling water with a slice of ginger and green onion for 3-5 minutes to remove scum and impurities—this step is key for a clean taste. Drain and rinse again. Pat dry before braising. For dim sum style, marinate in a mix of light soy sauce (2 tbsp), dark soy (1 tbsp), oyster sauce (2 tbsp), sugar (1 tsp), and water to cover. Add aromatics like garlic, star anise, and dried chilies. Simmer on low for 1.5-2 hours until tender. Test by poking with a chopstick; it should slide in easily. Cool in sauce overnight for better flavor absorption.
What’s a simple recipe for homemade dim sum chicken feet?
For 1 lb chicken feet: Clean and blanch as above. In a pot, combine 2 cups water, 3 tbsp soy sauce, 2 tbsp oyster sauce, 1 tbsp dark soy, 1 tsp sugar, 2 star anise, 3 garlic cloves (smashed), 1-inch ginger (sliced), and 1 dried chili. Add chicken feet, bring to boil, then simmer covered for 90 minutes. Uncover and cook 30 more minutes to thicken sauce. Thicken further with cornstarch slurry if needed. Steam for 10 minutes before serving to mimic restaurant texture. Pro tip from veteran chefs: pressure cook for 40 minutes for ultra-tender results without hours of simmering. Serve with pickled radish. Total time: 2.5 hours. Yields 4 servings—perfect for dim sum brunch.
How do you eat dim sum chicken feet?
Grip a chicken foot with chopsticks or fingers by the ankle bone. Pop it in your mouth and nibble the tender skin and meat off the tiny bones—suck the flavorful sauce from the crevices. Use teeth to strip gelatinous skin from each toe, spitting out small bones discreetly into a napkin or bowl. The texture is chewy yet melts like jelly; avoid crunching bones. Dip in extra black vinegar or chili oil for zing. First-timers: start with one toe to get the feel. It’s messy but fun—embrace the hands-on experience! In dim sum houses, they’re shared family-style. Practice makes perfect; soon you’ll handle them like a pro.
Are dim sum chicken feet healthy and good for you?
Yes, dim sum chicken feet offer health perks. One serving (about 100g) provides 15g protein, minimal fat (5g), and zero carbs, aiding weight management. They’re packed with collagen—up to 70% of their protein—for better skin elasticity, joint health, and hair strength, backed by studies on gelatin benefits. Also rich in folate, vitamin B12, and minerals like selenium for immunity. Drawbacks: high sodium from sauces (watch intake if hypertensive), and small bones pose choking risk if not eaten carefully. Opt for homemade to control salt. A chef with 50+ years experience recommends pairing with veggies for balance. Enjoy 2-3 times weekly as part of a varied diet.
Dim Sum Chicken Feet
🐔 Savor melt-in-your-mouth tender chicken feet bursting with savory Cantonese flavors, rich in collagen for glowing skin and joint health!
👨🍳 Master authentic Chinese Dad Chef secrets for dim sum perfection – crispy outside, gelatinous inside, better than any restaurant.
- Total Time: 2 hours 30 minutes
- Yield: 4 servings
Ingredients
– 1 lb chicken feet, fresh or thawed
– 3 tablespoons soy sauce
– 2 tablespoons black bean sauce, fermented
– 1 teaspoon sugar
– 4 cloves garlic, smashed
– 1-inch piece ginger, sliced
– 2 tablespoons cooking wine (Shaoxing preferred)
– 2 whole star anise
– 2 cups water or chicken broth
– 1 dried chili (optional)
– 1 green onion, cut into 2-inch pieces
Instructions
1-Step 1: Clean and Prepare the Chicken Feet Start by rinsing your chicken feet under cold running water. If they were frozen, make sure they’re completely thawed. Using clean kitchen shears or a sharp knife, trim off the nails from each toe. This might feel strange at first, but it makes the dish much nicer to eat! If you spot any rough yellow skin patches, give them a little scrape with your knife.
2-Step 2: Blanch the Chicken Feet Bring a large pot of water to a rolling boil. Add a slice of ginger and one cut green onion to the water. Carefully drop in the prepared chicken feet and let them boil for 5 minutes. This blanching step removes impurities and any strong odors, giving you a clean base to work with. After 5 minutes, drain the chicken feet and rinse them under cold water. Pat them dry with paper towels. At this point, they should look cleaner and slightly tightened.
3-Step 3: Deep-Fry or Boil for Texture Here’s where you have a choice to make: *Restaurant-style method: Heat about 2 inches of oil in a wok or deep pot to 350°F. Carefully add the dried chicken feet and fry for 3-4 minutes until golden and puffy. Drain on paper towels. This creates that characteristic puffy, wrinkled skin that soaks up sauce beautifully. *Healthier home method: Skip the frying and proceed directly to braising. Boil the blanched feet for 30 minutes in fresh water with aromatics until they start to soften. This cuts calories while still achieving tender results.
4-Step 4: Prepare the Braising Sauce In a clean pot or wok, combine all your sauce ingredients: soy sauce, black bean sauce, sugar, smashed garlic, sliced ginger, cooking wine, and star anise. Add the dried chili if you want a hint of heat. Pour in the water or chicken broth. Stir everything together and bring the mixture to a gentle simmer. Give it a taste. It should be savory with a subtle sweetness. The black beans might look chunky at first, but they’ll break down during cooking.
5-Step 5: Braise Until Tender Add your prepared chicken feet to the simmering sauce. Make sure they’re mostly submerged. Cover the pot with a tight-fitting lid and turn the heat down to low. Let everything bubble away gently for 1 to 1.5 hours. Check on them every 30 minutes or so. Give them a stir and add a splash more water if the sauce is reducing too quickly. The chicken feet are done when you can easily pierce the thickest part with a chopstick. The skin should feel tender and gelatinous, not rubbery.
6-Step 6: Thicken and Finish Once the chicken feet are tender, remove the lid and turn up the heat slightly. Let the sauce reduce and thicken for about 10-15 minutes. The sauce should coat the back of a spoon and have a glossy appearance. If you want an even thicker sauce, mix 1 teaspoon of cornstarch with 1 tablespoon of cold water and stir it into the bubbling sauce. Cook for another minute until thickened.
7-Step 7: Steam Before Serving For that authentic dim sum restaurant texture, steam the braised chicken feet for 10 minutes before serving. Place them in a heat-proof dish inside a steamer basket over boiling water. This final step softens the skin further and brings all the flavors together. Serve hot in a small bowl, garnished with sliced green onions. The sauce should glisten, coating each piece of chicken feet. They’re best enjoyed immediately while hot and tender!
Last Step:
Please leave a rating and comment letting us know how you liked this recipe! This helps our business to thrive and continue providing free, high-quality recipes for you.Notes
🧼 Thoroughly clean and blanch chicken feet to remove impurities for a cleaner taste and texture.
🔥 Deep fry first for that signature crispy skin before braising to lock in flavors.
⏳ Braise low and slow for 40-60 minutes – patience yields the perfect gelatinous tenderness.
- Prep Time: 30 minutes
- Braising: 60 minutes
- Cook Time: 1 hour 30 minutes
- Category: Appetizers
- Method: Deep-Fry and Braise
- Cuisine: Chinese
- Diet: Gluten-Free Option, High-Protein
Nutrition
- Serving Size: 8-10 chicken feet
- Calories: 280 kcal
- Sugar: 3g
- Sodium: 1200mg
- Fat: 20g
- Saturated Fat: 5g
- Unsaturated Fat: 13g
- Trans Fat: 0g
- Carbohydrates: 8g
- Fiber: 1g
- Protein: 18g
- Cholesterol: 80mg





