

Why You’ll Love This Cheese Kimbap
Cheese Kimbap brings together the best of Korean flavors in a convenient, portable package that’s perfect for any time of day. This fusion dish combines tangy kimchi fried rice with gooey melted mozzarella, all wrapped in crispy seaweed for a satisfying bite every time.
- Ease of preparation: This Cheese Kimbap recipe comes together in just 30 minutes, making it an ideal choice for busy weeknights or quick meal prep. With simple techniques and everyday ingredients, even beginner cooks can achieve professional-looking results without any special equipment.
- Health benefits: Kimchi, the star ingredient in this Cheese Kimbap, is a fermented food rich in probiotics that support gut health. Each serving provides 18g of protein from the cheese and 308mg of calcium, while the fermented cabbage delivers essential vitamins and antioxidants.
- Versatility: This recipe works beautifully as a main meal, afternoon snack, or even breakfast. You can easily customize the filling based on what you have available, and leftovers reheat wonderfully for next-day lunches.
- Distinctive flavor: The combination of savory, slightly spicy kimchi fried rice with creamy melted mozzarella creates an irresistible contrast that makes this Cheese Kimbap truly memorable. Each bite delivers layers of texture and taste that keep you coming back for more.
Jump to:
- Why You’ll Love This Cheese Kimbap
- Essential Ingredients for Cheese Kimbap
- Main Ingredients
- For the Kimchi Fried Rice Filling
- Special Dietary Options
- How to Prepare the Perfect Cheese Kimbap: Step-by-Step Guide
- Step 1: Prepare the Kimchi Fried Rice Filling
- Step 2: Set Up Your Rolling Station
- Step 3: Spread the Rice
- Step 4: Add the Cheese
- Step 5: Roll the Kimbap
- Step 6: Slice and Serve
- Dietary Substitutions to Customize Your Cheese Kimbap
- Protein and Main Component Alternatives
- Vegetable, Sauce, and Seasoning Modifications
- Mastering Cheese Kimbap: Advanced Tips and Variations
- Pro Cooking Techniques
- Creative Flavor Variations
- Presentation Tips
- Make-Ahead Options
- How to Store Cheese Kimbap: Best Practices
- Refrigeration Guidelines
- Freezing Considerations
- Reheating Methods
- Meal Prep Strategies
- FAQs: Frequently Asked Questions About Cheese Kimbap
- What is cheese kimbap?
- What ingredients do I need for cheese kimbap?
- Do I need a bamboo rolling mat to make cheese kimbap?
- Can I make cheese kimbap in advance?
- How do I store leftover cheese kimbap?
- Cheese Kimbap
- Ingredients
- Instructions
- Last Step:
- Notes
- Nutrition
- Did you make this recipe?
Essential Ingredients for Cheese Kimbap
Gathering the right ingredients is key to making delicious Cheese Kimbap at home. Here’s everything you’ll need to create four satisfying rolls.
Main Ingredients
- 4 sheets of gim or nori (dry roasted seaweed) – These provide the outer wrapper that holds everything together and adds a satisfying crispy texture and oceanic flavor.
- Mozzarella cheese block with 45% moisture rate, cut into four 7-inch by 3/4-inch thick strips – The moisture content matters greatly here; a 45% moisture rate ensures the cheese melts beautifully without becoming too runny or staying too firm.
- 2 teaspoons sesame oil for garnishing – Adds a nutty, aromatic finish that enhances the overall flavor profile.
- 1 teaspoon sesame seeds for garnishing – Provides a subtle crunch and visual appeal to the finished rolls.
For the Kimchi Fried Rice Filling
- 1 tablespoon neutral oil – Used for stir-frying the garlic and kimchi; any mild vegetable oil works well.
- 4 cups cooked short grain rice – Short grain rice is essential because its natural stickiness helps the rolls hold their shape.
- 1 cup finely chopped napa cabbage kimchi, well-fermented – Look for kimchi with a deep red color and soft texture, indicating proper fermentation and maximum flavor development.
- 2 tablespoons kimchi juice – The liquid from your kimchi jar adds concentrated flavor and helps season the rice evenly.
- 2 cloves minced garlic – Fresh garlic provides aromatic depth to the fried rice base.
- 1 tablespoon soy sauce – Adds umami richness and helps season the rice throughout.
- 2 teaspoons chicken bouillon powder or chicken stock powder – Boosts the savory character of the rice filling.
- 1/2 teaspoon sesame oil – Added to the rice mixture for a finishing touch of nutty flavor.
Special Dietary Options
- Vegan: Replace mozzarella with a plant-based cheese alternative and use vegetable bouillon powder instead of chicken. Make sure your kimchi is fish sauce-free.
- Gluten-free: Use tamari instead of soy sauce and verify your gochugaru and bouillon are certified gluten-free.
- Low-calorie: Reduce the cheese quantity slightly and add more vegetables like spinach or carrots to bulk up the filling.
How to Prepare the Perfect Cheese Kimbap: Step-by-Step Guide
Making Cheese Kimbap at home is easier than you might think. Follow these detailed steps to create restaurant-quality rolls in your own kitchen.
Step 1: Prepare the Kimchi Fried Rice Filling
Start by heating 1 tablespoon of neutral oil in a large pan over medium heat. Add 2 cloves of minced garlic and stir-fry for about 10 seconds until fragrant, being careful not to let it burn. Garlic cooks quickly, so stay attentive during this step.
Add 1 cup of finely chopped well-fermented napa cabbage kimchi to the pan. Stir-fry the kimchi for approximately 1 minute, allowing it to release its flavorful juices. You’ll notice the kimchi becoming slightly softer and more aromatic as it cooks.
Once the kimchi has released its juices, add 4 cups of cooked short grain rice to the pan. Pour in 2 tablespoons of kimchi juice, 1 tablespoon of soy sauce, and 2 teaspoons of chicken bouillon powder. Mix everything thoroughly, breaking up any rice clumps with your spatula to ensure even distribution of seasonings.
Important Tip: Avoid overcooking the kimchi fried rice. You want the rice to remain sticky enough to hold together when rolling. Overcooked rice becomes dry and crumbly, making it difficult to form tight rolls.
Remove the pan from heat and stir in 1/2 teaspoon of sesame oil. Toss the rice gently to incorporate the oil, then transfer the rice to a bowl. Let it cool slightly while keeping it warm, as warm rice is much easier to spread and roll.
Step 2: Set Up Your Rolling Station
Clear a clean, flat surface for rolling. A large cutting board or clean countertop works perfectly. Place your nori sheets nearby and have your mozzarella cheese strips (7 inches long by 3/4-inch thick) ready to go. According to experienced Korean home cooks, having everything prepared before you start rolling makes the process much smoother.
Lay one sheet of nori rough side up on your work surface. The rough side helps the rice adhere better to the seaweed. Identify which end is closest to you, as this will be your starting point for rolling.
Step 3: Spread the Rice
Scoop approximately 1 cup of warm kimchi fried rice onto the nori sheet. Using your hands or the back of a spoon, spread the rice evenly across the seaweed, leaving a 1.5-inch border at the top edge. This border is essential for sealing the roll properly.
Work quickly but carefully, pressing the rice gently into an even layer about 1/4-inch thick. The warmth of the rice helps it spread smoothly and adhere to the nori. If the rice has cooled too much, briefly microwave it for 15-20 seconds to restore workability.
Step 4: Add the Cheese
Place one strip of mozzarella cheese horizontally across the middle of the rice layer. Position the cheese about one-third of the way up from the bottom edge, giving yourself enough rice below to tuck around the cheese when you start rolling.
The cheese strip should span nearly the full width of your nori sheet. If your cheese strips are shorter than 7 inches, you can place two shorter pieces end-to-end to cover the width.
Step 5: Roll the Kimbap
This step requires a confident but gentle touch. Lift the bottom edge of the nori (the end closest to you) with both hands. Bring it up and over the cheese, tucking the rice and nori firmly around the cheese strip. Use your fingers to press and shape the roll as you go.
Continue rolling away from you, keeping steady, even pressure throughout. When you reach the top edge (the 1.5-inch border you left bare), press gently to seal the roll. The moisture from the rice will help the nori stick to itself.
Let the completed roll rest seam side down for about 30 seconds. This resting period allows the residual heat to set the seal and helps the roll hold its shape.
Repeat this process with the remaining nori sheets, rice, and cheese strips to create four rolls total.
Step 6: Slice and Serve
Lightly brush the outside of each roll with sesame oil using a pastry brush. This adds flavor and gives the rolls an attractive sheen. Sprinkle sesame seeds over the oiled surface for extra flavor and visual appeal.
Now for the slicing. Dip your sharpest knife in a small bowl of warm water mixed with a drop of sesame oil. This prevents the rice from sticking to the blade. Place the roll on your cutting board and slice it into pieces approximately 3/4-inch wide.
Rinse or wipe your knife between each cut to maintain clean edges. Dull or sticky knives will tear the nori and create ragged slices. With a properly prepared knife, you’ll achieve neat, professional-looking pieces.
For the ultimate melted cheese experience, microwave each sliced roll for 15-20 seconds before serving. This extra step transforms the mozzarella into gooey, pull-apart perfection that takes your Cheese Kimbap to the next level.

Dietary Substitutions to Customize Your Cheese Kimbap
One of the best things about Cheese Kimbap is how easily it adapts to different dietary needs and preferences. Here are some practical substitutions to consider.
Protein and Main Component Alternatives
While mozzarella cheese is traditional in this recipe, you can experiment with other melting cheeses depending on your taste preferences. Cheddar brings a sharper flavor profile, while provolone offers a subtle smokiness. For those avoiding dairy entirely, several plant-based mozzarella alternatives now melt comparably well.
If you want to boost the protein content beyond what the cheese provides, consider adding thin strips of cooked seasoned chicken alongside the cheese. Just make sure any added proteins are fully cooked and cut thinly enough to roll easily. Canned tuna, drained and lightly seasoned, also works well as a protein addition.
For a lower-fat version, reduce the cheese quantity by half and add extra vegetables to maintain satisfying bulk. The kimchi already provides significant flavor, so you won’t miss the extra cheese as much as you might expect.
Vegetable, Sauce, and Seasoning Modifications
The vegetable components in Cheese Kimbap are highly customizable based on seasonal availability and personal preference. Spinach adds valuable iron and a lovely green color. Briefly blanch fresh spinach, squeeze out excess moisture, and layer it alongside the cheese before rolling.
Carrots, either julienned raw or lightly sautéed, contribute sweetness and crunch. Pickled radish, a common addition to traditional kimbap, brings tangy contrast to the rich cheese and spicy kimchi. You can find pickled radish at Korean grocery stores, or make your own by soaking daikon radish in rice vinegar and sugar.
For those who enjoy incorporating seafood, small pieces of cooked imitation crab or real crab meat make excellent additions. Cucumber strips add refreshing crunch, especially welcome during summer months.
Sauce modifications can significantly change the character of your Cheese Kimbap. If you prefer more heat, add a thin layer of gochujang (Korean chili paste) to the rice before adding cheese. For a milder version suitable for children or those sensitive to spice, reduce the amount of kimchi and skip any additional chili products.
Mastering Cheese Kimbap: Advanced Tips and Variations
Once you’ve mastered the basic Cheese Kimbap technique, you can start experimenting with variations and advanced methods to take your rolls to new heights.
Pro Cooking Techniques
The quality of your rice directly impacts your Cheese Kimbap success. Short grain rice works best because of its natural starch content and sticky texture. For optimal results, measure your rice accurately and add 3 extra tablespoons of water when cooking fresh rice specifically for kimbap. This additional moisture creates the perfect stickiness for rolling.
If working with leftover rice from the refrigerator, reheat it covered in the microwave. The cover traps steam and rehydrates the rice, restoring its workable texture. Never use rice straight from the fridge without reheating, as cold rice won’t spread smoothly or hold together well.
Temperature matters throughout the entire process. Warm rice spreads easily, and the residual heat helps seal the nori edges. Let your completed rolls rest briefly before slicing, as this cooling period allows the structure to set firm.
Creative Flavor Variations
Try a “loaded” Cheese Kimbap by adding multiple fillings beyond just cheese. A thin layer of cooked egg, prepared like a Korean rolled omelet, adds protein and a beautiful yellow streak to each slice. Simply beat an egg with a pinch of salt, cook it in a thin layer in a small pan, and slice it into strips for rolling.
Bulgogi-style beef transforms Cheese Kimbap into a heartier meal. Marinate thinly sliced beef in soy sauce, sugar, garlic, and sesame oil, then stir-fry until fully cooked. Layer the beef next to the cheese for a satisfying beef-and-cheese combination.
For a vegetarian protein boost, marinate firm tofu in similar seasonings to bulgogi, then pan-fry until golden. The savory, chewy texture pairs beautifully with the soft cheese and tangy kimchi.
Presentation Tips
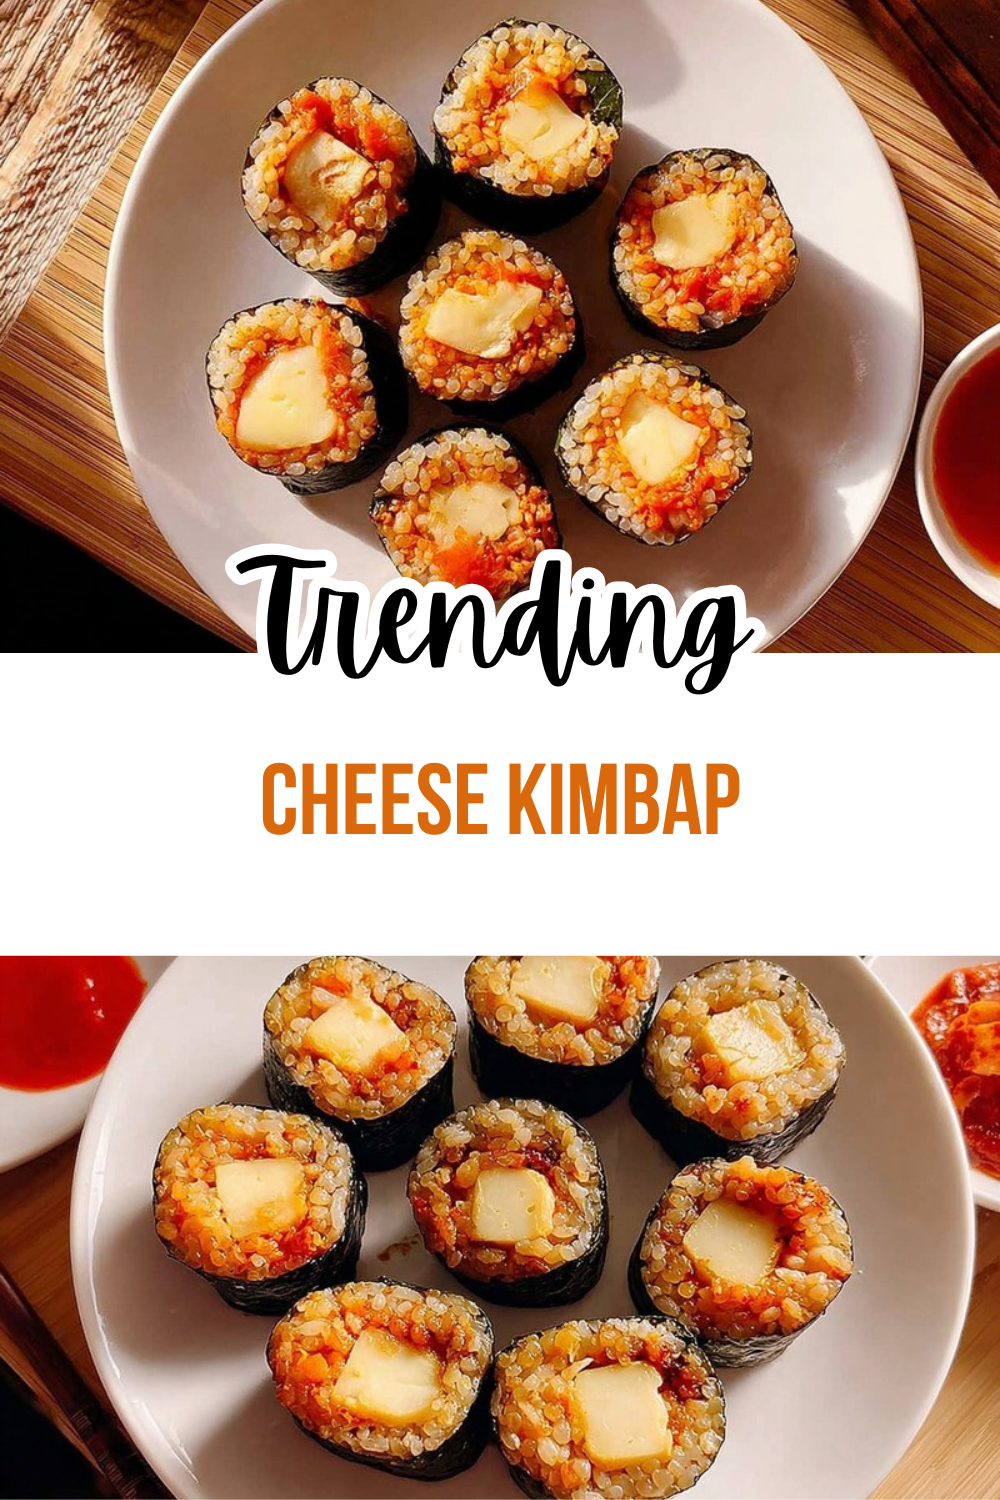
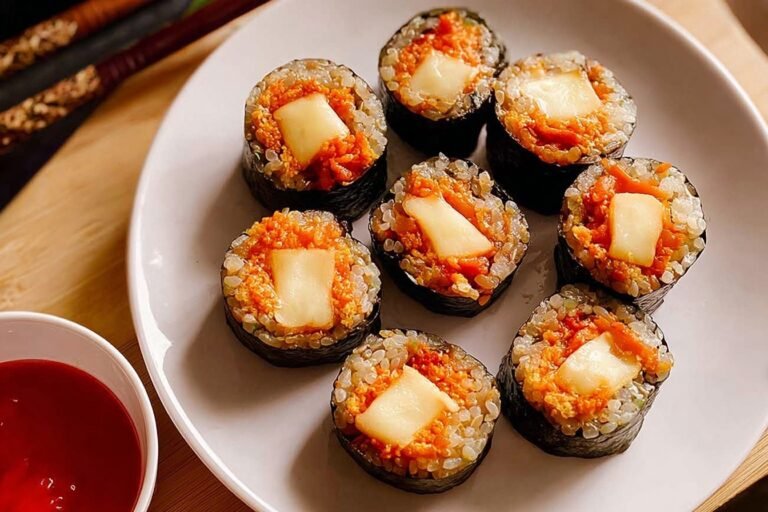
The visual appeal of Cheese Kimbap comes from its colorful cross-section. When you slice through the roll, you should see distinct layers: dark nori on the outside, orange-tinted kimchi rice, and white mozzarella running through the center.
Arrange your sliced pieces on a serving plate in a circular pattern, cut sides facing up. The sesame oil brushing gives them an attractive shine, while sesame seeds add visual interest. For special occasions, serve with small dishes of soy sauce or spicy gochujang for dipping.
Make-Ahead Options
For busy schedules, prepare the kimchi fried rice filling up to 2 days in advance. Store it in an airtight container in the refrigerator, then reheat it before assembling your rolls. The rice can be made ahead, but the actual rolling should happen the day you plan to serve for best texture.
You can also pre-slice your cheese strips and store them wrapped in plastic in the refrigerator. This prep work saves valuable time when you’re ready to assemble, making weeknight Cheese Kimbap preparation much more manageable.
How to Store Cheese Kimbap: Best Practices
Proper storage keeps your Cheese Kimbap tasting fresh and maintains its appealing texture. Here’s what you need to know about storing leftovers and prepping ahead.
Refrigeration Guidelines
Cheese Kimbap tastes best the day it’s made, when the nori remains slightly crisp and the rice is perfectly textured. However, leftovers can be refrigerated successfully for up to 2 days when stored properly.
Wrap individual rolls or sliced pieces tightly in plastic wrap before placing them in an airtight container. This double protection prevents the nori from absorbing refrigerator odors and keeps the rice from drying out.
Freezing Considerations
Freezing assembled Cheese Kimbap is not recommended. The rice undergoes textural changes during freezing and thawing, becoming grainy and losing its desirable stickiness. The nori also becomes unpleasantly chewy after thawing.
However, you can freeze the kimchi fried rice filling separately for up to 1 month. Store it flat in freezer bags for quick thawing, then use it to make fresh Cheese Kimbap when ready to serve.
Reheating Methods
To reheat refrigerated Cheese Kimbap, place the rolls or slices in a microwave-safe container and cover loosely. Heat for 45-60 seconds, checking halfway through. The cheese should melt and become gooey again, but don’t overcook or the rice will toughen.
For a crispier exterior, try pan-frying leftover slices. Dip each piece in beaten egg and fry in a lightly oiled pan until golden on both sides. This technique, similar to the Korean dish “gimbap-gu-i,” creates an entirely new eating experience from your leftovers.
Meal Prep Strategies
If you’re planning to pack Cheese Kimbap for lunches, assemble the rolls in the morning rather than the night before. Freshly made rolls hold their texture much better than overnight-stored versions.
Use an insulated lunch container with an ice pack if you won’t be refrigerating the rolls before eating. Try to consume packed Cheese Kimbap within 4-6 hours of assembly for best quality.
FAQs: Frequently Asked Questions About Cheese Kimbap
What is cheese kimbap?
Cheese kimbap is a fun Korean rice roll variation that combines the classic kimbap structure—nori seaweed sheets filled with seasoned rice and ingredients—with gooey mozzarella cheese and often kimchi fried rice for a cheesy, spicy twist. Unlike traditional kimbap with bulgogi or veggies, this version melts cheese inside for a pull-apart texture when bitten. It’s popular as a quick snack or lunch, easy to customize with spinach, carrots, or crab sticks. To make it, spread sushi rice on nori, add fillings like kimchi rice and cheese slices, then roll tightly. Slice into bite-sized pieces and serve at room temperature. Prep time is about 30 minutes for 3 rolls, perfect for beginners craving fusion flavors. Pair with soy sauce or gochujang for dipping.
What ingredients do I need for cheese kimbap?
For 3 rolls of cheese kimbap, gather these staples: 2 cups cooked short-grain rice (seasoned with sesame oil and salt), 3 nori sheets, 1 cup kimchi fried rice (made from chopped kimchi, leftover rice, garlic, and gochujang), 6-9 slices mozzarella cheese, optional veggies like spinach or pickled radish, and sesame seeds for garnish. Cook kimchi fried rice by stir-frying kimchi with rice over medium heat for 5 minutes until crispy. Slice cheese thinly for even melting. No fancy tools needed—just a cutting board and knife. This yields about 24 pieces, with around 200 calories per roll. Adjust spice by using less kimchi. Shop at Asian markets or use substitutes like cheddar for variety.
Do I need a bamboo rolling mat to make cheese kimbap?
No, you don’t need a bamboo rolling mat for cheese kimbap. Use clean, damp hands or lay plastic wrap flat on a counter as a simple alternative. Spread rice evenly on nori (about 1/4 inch thick), leaving a 1-inch border at the top. Layer kimchi fried rice down the center, top with mozzarella slices, and add veggies if desired. Lift the bottom edge with your thumbs, using fingers to tuck and roll tightly away from you. Press firmly to seal. If using plastic wrap, roll inside it for a smooth finish, then remove before slicing. This method works great for beginners and prevents sticking. Practice once for perfect tight rolls every time—results rival sushi shop quality.
Can I make cheese kimbap in advance?
Cheese kimbap tastes best fresh, but you can prep components ahead for quick assembly. Make kimchi fried rice up to 2 days early: stir-fry, cool, and store in an airtight fridge container. Slice mozzarella cheese similarly, wrapping in plastic to avoid drying. Assemble rolls same-day to keep nori crisp and cheese from sogginess—roll, slice, and wrap tightly in plastic. Store assembled rolls in the fridge up to 4 hours; reheat rice filling briefly if cold. Avoid overnight full rolls as rice dries out nori. For parties, prep fillings morning-of. This saves 20 minutes on busy days while maintaining texture. Pro tip: Cover cut ends with extra nori if storing briefly.
How do I store leftover cheese kimbap?
Store leftover cheese kimbap in an airtight container lined with plastic wrap to prevent sticking—keep rolls whole or sliced, stacked gently. Refrigerate up to 24 hours; the cheese stays melty when microwaved 10-15 seconds per roll. Don’t freeze assembled rolls as nori gets soggy upon thawing; instead, freeze kimchi rice filling flat in bags for 1 month, then thaw and remake. For best flavor, eat within hours of slicing to retain crispness. If transporting, use a lunchbox with ice pack. Leftovers make great next-day snacks—re-crisp nori by quick pan-fry cut-side down. One roll provides 8 pieces, about 150-200 calories each, balancing carbs, protein, and veggies for a satisfying bite.
Cheese Kimbap
🥢 Indulge in gooey melted mozzarella paired with spicy, tangy kimchi fried rice wrapped in seaweed – a probiotic-packed, portable Korean fusion delight!
🍙 Ready in 30 minutes, this easy recipe delivers high-protein satisfaction for meals, snacks, or breakfast on the go.
- Total Time: 30 minutes
- Yield: 4 servings (4 rolls)
Ingredients
– 4 sheets of gim or nori (dry roasted seaweed)
– Mozzarella cheese block with 45% moisture rate, cut into four 7-inch by 3/4-inch thick strips
– 2 teaspoons sesame oil for garnishing
– 1 teaspoon sesame seeds for garnishing
– 1 tablespoon neutral oil
– 4 cups cooked short grain rice
– 1 cup finely chopped napa cabbage kimchi, well-fermented
– 2 tablespoons kimchi juice
– 2 cloves minced garlic
– 1 tablespoon soy sauce
– 2 teaspoons chicken bouillon powder or chicken stock powder
– 1/2 teaspoon sesame oil
Instructions
1-Step 1: Prepare the Kimchi Fried Rice Filling Start by heating 1 tablespoon of neutral oil in a large pan over medium heat. Add 2 cloves of minced garlic and stir-fry for about 10 seconds until fragrant, being careful not to let it burn. Garlic cooks quickly, so stay attentive during this step. Add 1 cup of finely chopped well-fermented napa cabbage kimchi to the pan. Stir-fry the kimchi for approximately 1 minute, allowing it to release its flavorful juices. You’ll notice the kimchi becoming slightly softer and more aromatic as it cooks. Once the kimchi has released its juices, add 4 cups of cooked short grain rice to the pan. Pour in 2 tablespoons of kimchi juice, 1 tablespoon of soy sauce, and 2 teaspoons of chicken bouillon powder. Mix everything thoroughly, breaking up any rice clumps with your spatula to ensure even distribution of seasonings. Remove the pan from heat and stir in 1/2 teaspoon of sesame oil. Toss the rice gently to incorporate the oil, then transfer the rice to a bowl. Let it cool slightly while keeping it warm, as warm rice is much easier to spread and roll.
2-Step 2: Set Up Your Rolling Station Clear a clean, flat surface for rolling. A large cutting board or clean countertop works perfectly. Place your nori sheets nearby and have your mozzarella cheese strips (7 inches long by 3/4-inch thick) ready to go. According to experienced Korean home cooks, having everything prepared before you start rolling makes the process much smoother. Lay one sheet of nori rough side up on your work surface. The rough side helps the rice adhere better to the seaweed. Identify which end is closest to you, as this will be your starting point for rolling.
3-Step 3: Spread the Rice Scoop approximately 1 cup of warm kimchi fried rice onto the nori sheet. Using your hands or the back of a spoon, spread the rice evenly across the seaweed, leaving a 1.5-inch border at the top edge. This border is essential for sealing the roll properly. Work quickly but carefully, pressing the rice gently into an even layer about 1/4-inch thick. The warmth of the rice helps it spread smoothly and adhere to the nori. If the rice has cooled too much, briefly microwave it for 15-20 seconds to restore workability.
4-Step 4: Add the Cheese Place one strip of mozzarella cheese horizontally across the middle of the rice layer. Position the cheese about one-third of the way up from the bottom edge, giving yourself enough rice below to tuck around the cheese when you start rolling. The cheese strip should span nearly the full width of your nori sheet. If your cheese strips are shorter than 7 inches, you can place two shorter pieces end-to-end to cover the width.
5-Step 5: Roll the Kimbap This step requires a confident but gentle touch. Lift the bottom edge of the nori (the end closest to you) with both hands. Bring it up and over the cheese, tucking the rice and nori firmly around the cheese strip. Use your fingers to press and shape the roll as you go. Continue rolling away from you, keeping steady, even pressure throughout. When you reach the top edge (the 1.5-inch border you left bare), press gently to seal the roll. The moisture from the rice will help the nori stick to itself. Let the completed roll rest seam side down for about 30 seconds. This resting period allows the residual heat to set the seal and helps the roll hold its shape. Repeat this process with the remaining nori sheets, rice, and cheese strips to create four rolls total.
6-Step 6: Slice and Serve Lightly brush the outside of each roll with sesame oil using a pastry brush. This adds flavor and gives the rolls an attractive sheen. Sprinkle sesame seeds over the oiled surface for extra flavor and visual appeal. Now for the slicing. Dip your sharpest knife in a small bowl of warm water mixed with a drop of sesame oil. This prevents the rice from sticking to the blade. Place the roll on your cutting board and slice it into pieces approximately 3/4-inch wide. Rinse or wipe your knife between each cut to maintain clean edges. Dull or sticky knives will tear the nori and create ragged slices. With a properly prepared knife, you’ll achieve neat, professional-looking pieces. For the ultimate melted cheese experience, microwave each sliced roll for 15-20 seconds before serving. This extra step transforms the mozzarella into gooey, pull-apart perfection that takes your Cheese Kimbap to the next level.
Last Step:
Please leave a rating and comment letting us know how you liked this recipe! This helps our business to thrive and continue providing free, high-quality recipes for you.Notes
💧 For stickier rice ideal for rolling, add 3 extra tablespoons water when cooking fresh rice.
🌾 Use warm, freshly cooked rice or reheat cold rice in microwave to restore moisture and stickiness.
🧀 Select mozzarella blocks with 45% moisture for the best gooey melting texture without sogginess.
- Prep Time: 20 minutes
- Cook Time: 10 minutes
- Category: Main Dishes
- Method: Stir-Fry and Rolling
- Cuisine: Korean
- Diet: Vegetarian
Nutrition
- Serving Size: 1 roll (8-10 pieces)
- Calories: 477 kcal
- Sugar: 1g
- Sodium: 730mg
- Fat: 19g
- Saturated Fat: 8g
- Unsaturated Fat: 9g
- Trans Fat: 0g
- Carbohydrates: 57g
- Fiber: 1g
- Protein: 18g
- Cholesterol: 45mg





