

Why You’ll Love This Baked Chicken
Hey there, fellow food lovers! If you’re looking for a simple way to make baked chicken that’s juicy and full of flavor, this recipe is just what you need. It’s one of those dishes that comes together quickly and always impresses, whether you’re cooking for your family or trying something new on a weeknight. Let me share a few reasons why this baked chicken will become a go-to in your kitchen.
Ease of Preparation
One big plus of this baked chicken is how straightforward it is to whip up. You can get everything ready in about 20 minutes, including brining, and the oven does most of the work after that. This makes it perfect for busy parents or anyone juggling a full schedule, as it doesn’t require fancy tools or hours in the kitchen. Plus, with just a few basic steps, even beginners can nail it, helping baked chicken feel like an easy win every time.
Health Benefits
Chicken breasts are a fantastic lean protein that fits right into a healthy eating plan, especially for those watching their calories or aiming for a balanced diet. Prepared with just a tablespoon of oil or butter, this recipe keeps things light while still packing in nutrients like protein for muscle repair and essential vitamins. It’s a great choice for diet-conscious folks, seniors, or anyone seeking meals that support wellness without sacrificing taste, making baked chicken a smart addition to your routine.
Versatility
This baked chicken adapts to all sorts of meals, from quick lunches to dinner spreads, which is ideal for students, working pros, or food enthusiasts experimenting with flavors. You can pair it with veggies, slide it into salads, or mix it into tacos, so it works for various dietary needs like gluten-free options. Whether you’re a newlywed building a home menu or a traveler adapting recipes on the go, this dish’s flexibility means it never gets boring and enhances whatever you serve alongside it.
Distinctive Flavor
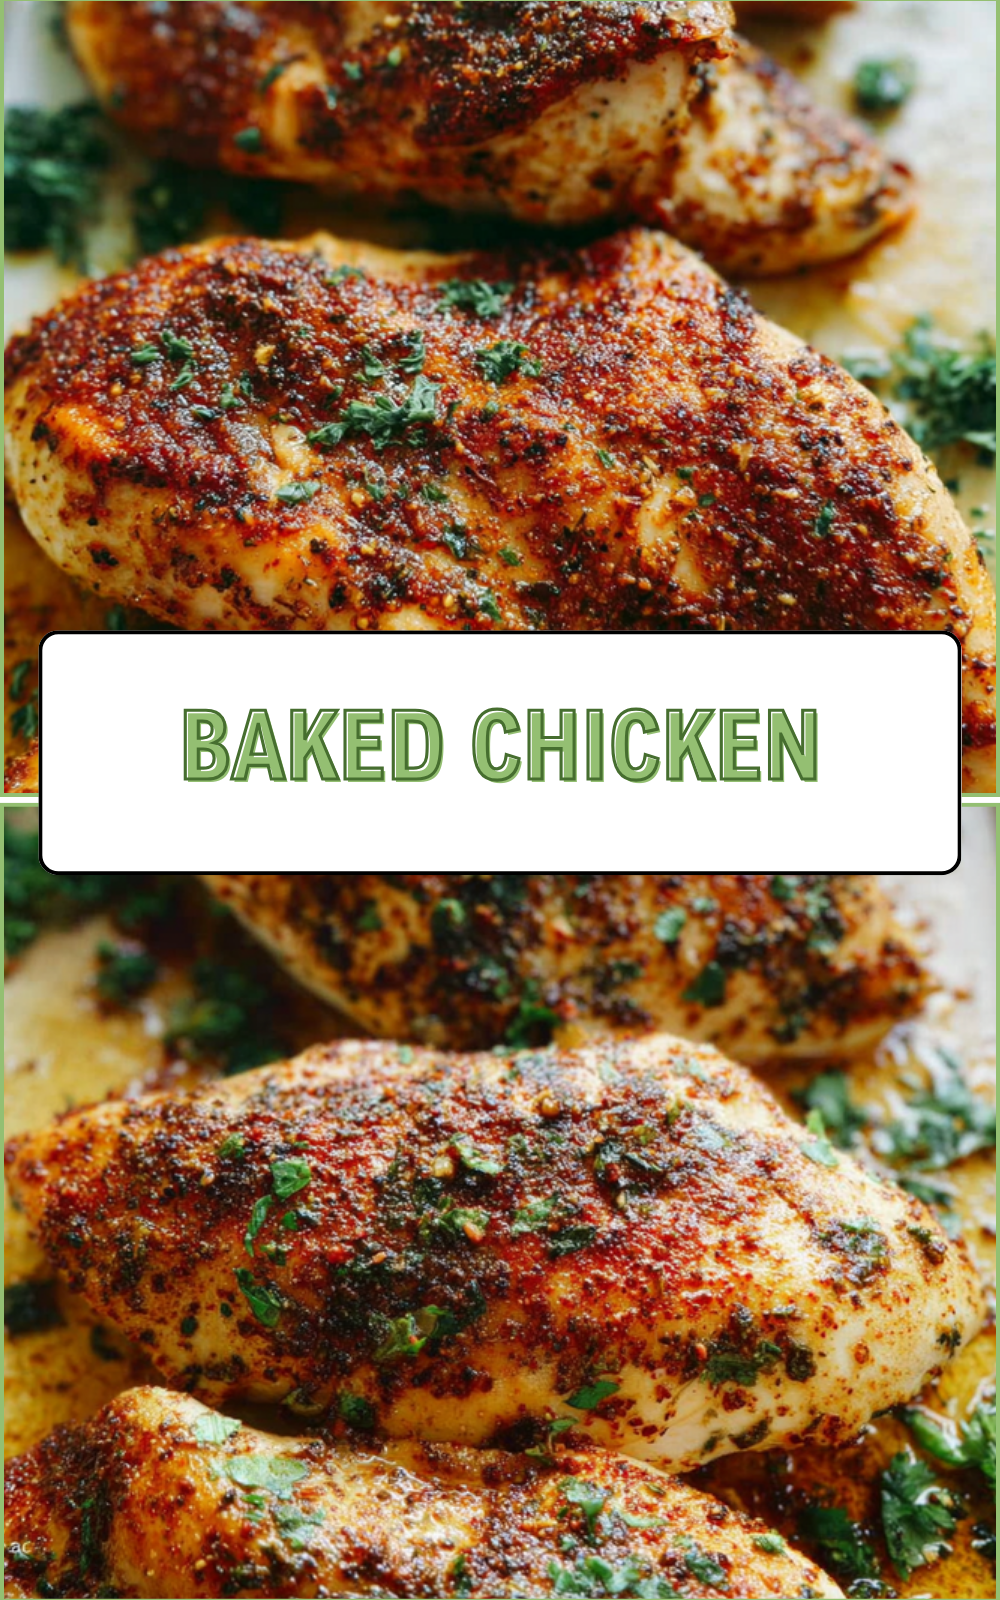
What sets this baked chicken apart is the brining step that locks in moisture and adds a subtle depth, combined with seasonings like garlic powder and smoked paprika for a smoky kick. It’s not overly spicy, so it appeals to a wide crowd, including picky eaters or baking fans who love a reliable base. The high-heat roasting at 450°F creates crispy edges while keeping the inside tender, giving baked chicken that homey taste you’ll crave again and again. Overall, it’s a recipe that delivers big on flavor with minimal effort, just like the simple joys we share around the table.
Jump to:
- Why You’ll Love This Baked Chicken
- Ease of Preparation
- Health Benefits
- Versatility
- Distinctive Flavor
- Essential Ingredients for Baked Chicken
- How to Prepare the Perfect Baked Chicken: Step-by-Step Guide
- First Step: Prepare the Chicken for Brining
- Second Step: Preheat the Oven and Season the Chicken
- Third Step: Arrange and Bake the Chicken
- Fourth Step: Rest and Serve the Chicken
- Final Step: Enjoy and Store Leftovers
- Dietary Substitutions to Customize Your Baked Chicken
- Protein and Main Component Alternatives
- Vegetable, Sauce, and Seasoning Modifications
- Mastering Baked Chicken: Advanced Tips and Variations
- Pro Cooking Techniques
- Flavor Variations
- Presentation Tips
- Make-Ahead Options
- How to Store Baked Chicken: Best Practices
- FAQs: Frequently Asked Questions About Baked Chicken
- How do I bake chicken so it stays juicy and tender?
- What is the best way to bake chicken breasts evenly?
- Can I bake chicken with vegetables at the same time?
- How long should I bake a whole chicken, and at what temperature?
- Is it safe to bake chicken from frozen, and how should I do it?
- Baked Chicken
- Ingredients
- Instructions
- Last Step:
- Notes
- Nutrition
- Did you make this recipe?
Essential Ingredients for Baked Chicken
Gathering the right ingredients is the first step to making this baked chicken shine. Each one plays a key role in creating that juicy, flavorful result. Below, you’ll find a complete list with exact measurements, plus a quick note on why they’re important for the recipe.
- 4 boneless skinless chicken breasts, pounded to even thickness – This ensures the chicken cooks evenly and stays tender, making it the star of the dish.
- 1 tablespoon melted butter or olive oil – Helps lock in moisture and adds a rich flavor, with olive oil as a lighter alternative for health-focused meals.
- 1 teaspoon kosher salt (note: an unspecified amount of kosher salt is also used for brining) – The specified amount seasons the chicken perfectly, while the brining salt draws out moisture to keep it juicy; adjust based on your taste.
- 1/2 teaspoon freshly-ground black pepper – Adds a subtle heat and balances the flavors, enhancing the overall taste without overwhelming it.
- 1/2 teaspoon garlic powder – Infuses a savory note that complements the other spices, making the chicken more aromatic and delicious.
- 1/2 teaspoon smoked paprika – Brings a smoky, slightly sweet flavor that gives the chicken its distinctive edge and beautiful color.
For special dietary options, here are some easy swaps:
- Vegan: Swap chicken breasts for plant-based alternatives like tofu or seitan, ensuring they’re pounded to even thickness for consistent cooking.
- Gluten-free: This recipe is naturally gluten-free, but double-check any added seasonings; use certified gluten-free options if needed.
- Low-calorie: Stick with olive oil instead of butter and reduce salt slightly to cut calories while keeping the dish light and nutritious.
How to Prepare the Perfect Baked Chicken: Step-by-Step Guide
Let’s dive into making this baked chicken that’s juicy and full of flavor it’s easier than you might think! I’ll walk you through each part step by step, so you can follow along and get great results every time. Start by getting your ingredients ready, as that sets the stage for success.
First Step: Prepare the Chicken for Brining
Begin by dissolving an unspecified amount of kosher salt in lukewarm water to create the brine, then add cold water to cool it down. Submerge the 4 boneless skinless chicken breasts in this mixture and let them sit in the refrigerator for at least 15 minutes or up to 6 hours this step is crucial for keeping the meat tender. Once done, rinse the chicken under cool water and pat it dry with paper towels to remove any excess salt, adapting this for dietary needs by using less salt if you’re watching your intake.
Second Step: Preheat the Oven and Season the Chicken
Now, preheat your oven to 450°F to get that high heat ready for roasting. Brush the chicken on both sides with the 1 tablespoon of melted butter or olive oil, which helps create a golden crust and seals in juices. In a small bowl, mix together the 1 teaspoon kosher salt, 1/2 teaspoon freshly-ground black pepper, 1/2 teaspoon garlic powder, and 1/2 teaspoon smoked paprika, then rub this seasoning evenly over the chicken for a flavorful coat that can be adjusted for preferences, like using less spice for milder tastes.
Third Step: Arrange and Bake the Chicken
Place the seasoned chicken on a metal baking sheet in a single layer to allow for even cooking and crispy edges. Pop it into the preheated oven and bake for 15-18 minutes, checking the internal temperature with a meat thermometer to ensure it reaches 165°F this prevents it from drying out and works for various portion sizes. If you want a browned crust, switch to broil for 3-5 minutes at the end, but keep an eye on it to avoid burning, and remember you can add veggies alongside for a complete meal.
Fourth Step: Rest and Serve the Chicken
Once baked, take the chicken out of the oven and let it rest loosely covered with foil for 5-10 minutes; this allows the juices to redistribute, making every bite tender. Slice or serve whole, pairing it with sides like roasted vegetables or even something sweet like a peach cobbler for a fun twist. The total preparation time is about 20 minutes plus 15 minutes of cooking, so it’s quick for busy days, and you can customize by adding herbs for extra flavor. For more on chicken nutrition, check out this resource on chicken health benefits.
Final Step: Enjoy and Store Leftovers
After resting, dig in and savor your baked chicken it’s versatile for meals like salads or tacos. This step wraps up the process, but if you have extras, follow the storage tips below to keep it fresh. Remember, always use a meat thermometer for safety, and feel free to experiment with the seasoning to match your dietary goals, like making it low-sodium for heart-healthy eating. With practice, you’ll master baked chicken that’s perfect for any occasion, taking just around 35 minutes total.

Dietary Substitutions to Customize Your Baked Chicken
Protein and Main Component Alternatives
Swapping the main protein in this recipe lets you tailor it to what you have on hand or your dietary needs. For instance, if you’re out of chicken, try turkey breasts as a lean alternative that brines and bakes similarly, keeping the dish juicy. Another option is using firm tofu for a plant-based version, ensuring you press it first to mimic the texture and absorb the seasonings well. These changes make baked chicken accessible for everyone, from vegans to those seeking lighter options.
Vegetable, Sauce, and Seasoning Modifications
Adding or changing veggies can bring new flavors to your baked chicken, like including carrots or broccoli around the pan for a one-dish meal. For sauces, swap the butter or oil with a yogurt-based mix to cut calories while keeping things moist. Seasonings are easy to tweak too; replace smoked paprika with cumin for a different vibe, or go lighter on the salt for low-sodium diets. This flexibility means you can adapt baked chicken to seasons or tastes, making it a hit for families or food explorers alike. For more ideas, visit this brine recipe guide.
Mastering Baked Chicken: Advanced Tips and Variations
Pro Cooking Techniques
To take your baked chicken to the next level, focus on even heat distribution by using a metal pan, as it handles high temperatures better than glass. Experiment with marinating longer than the brine for deeper flavors, and always let the chicken rest to lock in juices. These tricks help avoid common pitfalls like dry meat, making your meals more reliable for weekly cooking. Pairing it with grains adds bulk, and for a fun side, try a strawberry milkshake as a refreshing treat.
Flavor Variations
Mix up the seasonings with herbs like rosemary for a fresh twist or add chili flakes for some heat, turning basic baked chicken into something exciting. You can also incorporate different oils, like avocado oil, for a nutty taste that complements the spices. These variations keep things interesting, whether you’re cooking for a crowd or just yourself, and they adapt easily to seasonal ingredients.
Presentation Tips
Slice the chicken neatly and arrange it on a platter with colorful sides to make your dish look as good as it tastes. Add garnishes like fresh herbs for a pop of green, elevating the meal without extra effort. This approach works wonders for dinner parties or family nights, turning simple food into something special.
Make-Ahead Options
Prep the chicken in advance by brining it the night before and storing it in the fridge, so you can bake it fresh when needed. This strategy is perfect for busy schedules, allowing you to have a healthy meal ready in minutes. With these tips, you’ll enjoy baked chicken that’s not only tasty but also fits into your lifestyle seamlessly.
How to Store Baked Chicken: Best Practices
Proper storage keeps your baked chicken safe and tasty for later, so let’s cover the basics. First, cool the chicken completely before putting it away to prevent bacterial growth. Here’s a quick table to guide you on storage times and methods:
| Storage Method | Duration | Tips |
|---|---|---|
| Refrigeration | Up to 3 days | Place in a sealed container to maintain freshness and reheat gently. |
| Freezing | Up to 3 months | Slice or shred first, then store in airtight bags for easy thawing. |
For reheating, warm it in the oven at 350°F until it reaches 165°F to keep the texture intact. If you’re into meal prep, portion out the chicken for grab-and-go lunches, making it simple for your daily routine. Always check for signs of spoilage before eating to ensure everything stays safe and delicious.
FAQs: Frequently Asked Questions About Baked Chicken
How do I bake chicken so it stays juicy and tender?
To keep baked chicken juicy, start by seasoning the chicken with salt and pepper and adding a light coating of olive oil or butter to lock in moisture. Bake at 375°F (190°C) and avoid overcooking by using a meat thermometer to check for an internal temperature of 165°F (74°C). Let the chicken rest for 5-10 minutes after baking to allow juices to redistribute, resulting in tender, flavorful meat.
What is the best way to bake chicken breasts evenly?
For even baking of chicken breasts, pound them to an equal thickness, about 1 inch, before seasoning. Place them in a single layer in a greased baking dish and bake at 375°F (190°C) for 20-25 minutes or until the internal temperature reaches 165°F (74°C). Avoid opening the oven frequently, which causes temperature fluctuations that can lead to uneven cooking.
Can I bake chicken with vegetables at the same time?
Yes, you can bake chicken with vegetables together by cutting vegetables into similar-sized pieces to ensure they cook evenly. Place firmer vegetables like carrots or potatoes around the chicken and toss them with olive oil, salt, and pepper. Bake at 400°F (204°C) for 25-30 minutes, checking that the chicken reaches 165°F (74°C) and vegetables are tender.
How long should I bake a whole chicken, and at what temperature?
Bake a whole chicken at 375°F (190°C) for about 20 minutes per pound. For example, a 4-pound chicken will take approximately 1 hour and 20 minutes. Use a meat thermometer to check the thickest part of the thigh; it should read 165°F (74°C). Let the chicken rest before carving to keep the juices locked in.
Is it safe to bake chicken from frozen, and how should I do it?
Baking chicken from frozen is safe but requires a longer cooking time. Preheat your oven to 350°F (175°C), place frozen chicken pieces in a baking dish, and bake for 50% longer than the recommended time for thawed chicken. Use a meat thermometer to ensure the internal temperature reaches 165°F (74°C) before serving to avoid any food safety risks.
Baked Chicken
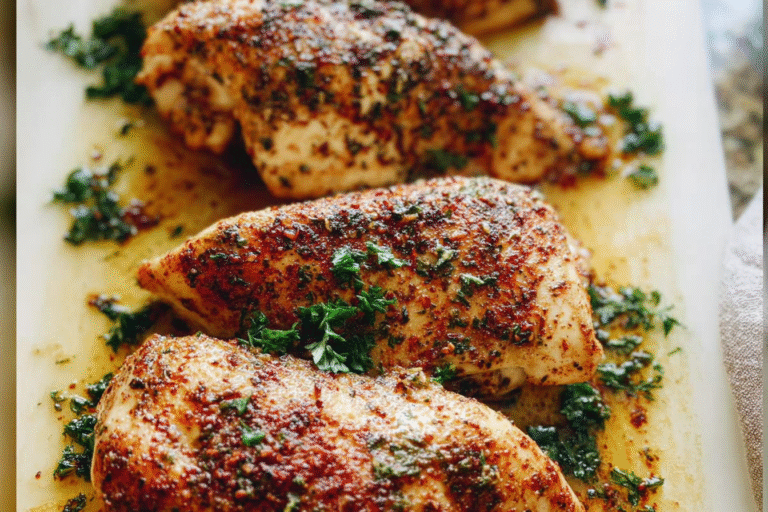
🍗 This Baked Chicken Breasts recipe guarantees juicy, tender chicken every time, thanks to a simple brining process and high-heat cooking.
🔥 Perfect for quick dinners or meal prep, it delivers flavorful results with minimal effort and versatile seasoning.
- Total Time: 0 hours 35 minutes
- Yield: 4 servings 1x
Ingredients
4 boneless skinless chicken breasts pounded to even thickness
1 tablespoon melted butter or olive oil helps lock in moisture and adds a rich flavor
1 teaspoon kosher salt seasons the chicken perfectly
1/2 teaspoon freshly-ground black pepper adds a subtle heat
1/2 teaspoon garlic powder infuses a savory note
1/2 teaspoon smoked paprika brings a smoky, slightly sweet flavor
Instructions
1-First Step: Prepare the Chicken for Brining: Begin by dissolving an unspecified amount of kosher salt in lukewarm water to create the brine, then add cold water to cool it down. Submerge the 4 boneless skinless chicken breasts in this mixture and let them sit in the refrigerator for at least 15 minutes or up to 6 hours this step is crucial for keeping the meat tender. Once done, rinse the chicken under cool water and pat it dry with paper towels to remove any excess salt, adapting this for dietary needs by using less salt if you’re watching your intake.
2-Second Step: Preheat the Oven and Season the Chicken: Now, preheat your oven to 450°F to get that high heat ready for roasting. Brush the chicken on both sides with the 1 tablespoon of melted butter or olive oil, which helps create a golden crust and seals in juices. In a small bowl, mix together the 1 teaspoon kosher salt, 1/2 teaspoon freshly-ground black pepper, 1/2 teaspoon garlic powder, and 1/2 teaspoon smoked paprika, then rub this seasoning evenly over the chicken for a flavorful coat that can be adjusted for preferences, like using less spice for milder tastes.
3-Third Step: Arrange and Bake the Chicken: Place the seasoned chicken on a metal baking sheet in a single layer to allow for even cooking and crispy edges. Pop it into the preheated oven and bake for 15-18 minutes, checking the internal temperature with a meat thermometer to ensure it reaches 165°F this prevents it from drying out and works for various portion sizes. If you want a browned crust, switch to broil for 3-5 minutes at the end, but keep an eye on it to avoid burning, and remember you can add veggies alongside for a complete meal.
4-Fourth Step: Rest and Serve the Chicken: Once baked, take the chicken out of the oven and let it rest loosely covered with foil for 5-10 minutes; this allows the juices to redistribute, making every bite tender. Slice or serve whole, pairing it with sides like roasted vegetables or even something sweet like a peach cobbler for a fun twist. The total preparation time is about 20 minutes plus 15 minutes of cooking, so it’s quick for busy days, and you can customize by adding herbs for extra flavor. For more on chicken nutrition, check out this resource on chicken health benefits.
5-Final Step: Enjoy and Store Leftovers: After resting, dig in and savor your baked chicken it’s versatile for meals like salads or tacos. This step wraps up the process, but if you have extras, follow the storage tips below to keep it fresh. Remember, always use a meat thermometer for safety, and feel free to experiment with the seasoning to match your dietary goals, like making it low-sodium for heart-healthy eating. With practice, you’ll master baked chicken that’s perfect for any occasion, taking just around 35 minutes total.
Last Step:
Please leave a rating and comment letting us know how you liked this recipe! This helps our business to thrive and continue providing free, high-quality recipes for you.Notes
💧 Brining is essential for keeping chicken juicy—don’t skip this step unless using pre-brined chicken.
🧈 Using melted butter adds flavor and helps create a golden crust; olive oil is a fine substitute.
🌡️ Always use a meat thermometer to ensure chicken reaches 165°F to avoid dryness or overcooking.
- Prep Time: 0 hours 20 minutes
- Cook time: 0 hours 15 minutes
- Cook Time: 0 hours 15 minutes
- Category: Main Course, Dinner
- Method: Baking, Broiling
- Cuisine: American
- Diet: Gluten-Free
Nutrition
- Serving Size: 1 chicken breast
- Calories: 220 (approximate)
- Sugar: 0g
- Sodium: 350mg (including brining salt, approximate)
- Fat: 8g
- Saturated Fat: 2g
- Unsaturated Fat: 6g (estimated)
- Trans Fat: 0g
- Carbohydrates: 0g
- Fiber: 0g
- Protein: 40g
- Cholesterol: 100mg





