

Why You’ll Love This Watermelon Rind Kimchi
If you’ve ever tossed watermelon rinds into the trash after enjoying the sweet fruit, you’re missing out on something truly special. Watermelon Rind Kimchi transforms what we typically consider kitchen scraps into a crunchy, tangy, and spicy Korean side dish that will surprise your taste buds in the best way possible.
This recipe has quickly become a favorite among home cooks for good reason. Here’s why you’ll want to add this to your cooking rotation:
- Ease of preparation: This watermelon rind kimchi requires just 1 hour and 10 minutes total, with most of that being hands-off pickling time. The active cooking takes only about 10 minutes, making it perfect for busy weeknights or weekend meal prep sessions. Even kitchen beginners can master this recipe on their first try.
- Health benefits: This kimchi is a nutritional powerhouse in disguise. Low in calories and incredibly hydrating, it supports immune health, may help lower blood pressure thanks to citrulline in the rinds, and aids in weight management. The fermentation process also introduces beneficial probiotics for gut health.
- Versatility: Serve it alongside grilled meats, toss it into rice bowls, add crunch to tacos, or enjoy it straight from the jar. The recipe easily adapts to vegan diets and can be adjusted for spice tolerance, making it suitable for various dietary needs and preferences.
- Distinctive flavor: The mild, slightly sweet flavor of watermelon rinds provides a unique canvas for the spicy, savory kimchi seasoning. Unlike traditional cabbage kimchi, this version offers a refreshing crunch and lighter taste that’s perfect for summer days.
Jump to:
- Why You’ll Love This Watermelon Rind Kimchi
- Essential Ingredients for Watermelon Rind Kimchi
- Main Ingredients
- Kimchi Seasoning
- Garnish
- Optional
- Special Dietary Options
- How to Prepare the Perfect Watermelon Rind Kimchi: Step-by-Step Guide
- Step 1: Prepare the Watermelon Rinds
- Step 2: Salt and Pickle the Rinds
- Step 3: Make the Kimchi Seasoning
- Step 4: Rinse and Drain the Rinds
- Step 5: Combine Rinds and Seasoning
- Step 6: Garnish and Serve
- Preparation Time Summary
- Dietary Substitutions to Customize Your Watermelon Rind Kimchi
- Protein and Main Component Alternatives
- Vegetable, Sauce, and Seasoning Modifications
- Mastering Watermelon Rind Kimchi: Advanced Tips and Variations
- Pro Cooking Techniques
- Flavor Variations
- Presentation Tips
- Make-Ahead Options
- How to Store Watermelon Rind Kimchi: Best Practices
- Refrigeration Guidelines
- Freezing Considerations
- Signs Your Kimchi Has Gone Bad
- Meal Prep Storage Tips
- FAQs: Frequently Asked Questions About Watermelon Rind Kimchi
- Can you make kimchi with watermelon rinds?
- What are the health benefits of watermelon rind kimchi?
- What type of watermelon rinds work best for kimchi?
- How do I make watermelon rind kimchi less spicy?
- How long does watermelon rind kimchi last?
- Watermelon Rind Kimchi
- Ingredients
- Instructions
- Last Step:
- Notes
- Nutrition
- Did you make this recipe?
Essential Ingredients for Watermelon Rind Kimchi
Gathering the right ingredients is key to making this watermelon rind kimchi recipe a success. Most items can be found at your local grocery store, though you may need to visit an Asian market for gochugaru and mesil.
Main Ingredients
- 2 lbs watermelon rind slices (white part only, green skin discarded) – The star of the show! Use only the firm white flesh of the watermelon rinds. This is the part that transforms into crunchy, pickle-like pieces that hold the kimchi seasoning beautifully.
- 3 tablespoons coarse sea salt – Essential for drawing out excess moisture from the rinds and beginning the pickling process. Coarse salt dissolves more gradually, allowing for even brining.
Kimchi Seasoning
- 6 cloves garlic, minced – Fresh garlic provides the pungent, aromatic base that gives kimchi its distinctive savory character. Mince it finely to distribute the flavor evenly.
- 5 tablespoons gochugaru (coarse red chili flakes) – This Korean chili powder brings heat, vibrant color, and a subtle fruity note. Adjust the amount based on your spice tolerance.
- 2 tablespoons mesil (plum syrup) – A sweet and tangy Korean condiment made from green plums. It adds complexity and balances the heat from the chilies. You can substitute with rice syrup or a mixture of sugar and rice vinegar.
Garnish
- Chopped scallions – Add a fresh, mild onion flavor and a pop of green color when sprinkled on top just before serving.
- Sesame seeds – Provide a nutty aroma and subtle crunch that complements the kimchi’s texture.
Optional
- 1/3 cup freshly blended watermelon juice – Adds natural sweetness and enhances the watermelon flavor. Keep in mind this will shorten the shelf life to about 2 days, so add it only if you plan to consume the kimchi quickly.
Special Dietary Options
| Dietary Need | Modification |
|---|---|
| Vegan | This recipe is naturally vegan! No fish sauce is used, making it suitable for plant-based diets. |
| Gluten-free | All ingredients listed are gluten-free. Double-check your gochugaru label to confirm. |
| Low-calorie | Skip the optional watermelon juice to keep calories minimal. Each serving remains under 25 calories. |
How to Prepare the Perfect Watermelon Rind Kimchi: Step-by-Step Guide
Ready to turn those watermelon rinds into something delicious? This detailed guide walks you through each step, ensuring your watermelon rind kimchi turns out perfectly crunchy and flavorful every time.
Step 1: Prepare the Watermelon Rinds
Start with fresh watermelon rinds from a melon you’ve just enjoyed. Remove all the green outer skin using a sharp knife or vegetable peeler, leaving only the firm white flesh. Discard any pieces with bite marks, blemishes, or soft spots, as these can affect freshness and flavor.
Slice the white rind into thin, even pieces, about 1/4 inch thick. You can cut them into matchsticks, small rectangles, or bite-sized squares depending on your preference. Thinner slices will absorb seasoning more quickly, while thicker cuts maintain a stronger crunch.
Place all the sliced rinds in a wide bowl or shallow container that allows them to spread out evenly during the salting process.
Step 2: Salt and Pickle the Rinds
Sprinkle the 3 tablespoons of coarse sea salt over the watermelon rinds. Using your hands (gloves recommended), toss everything together until the salt is evenly distributed and you see it beginning to dissolve on the surface of the rinds.
Cover the bowl with plastic wrap and let it sit at room temperature for 30 minutes. After the first 30 minutes, toss and flip the rinds to ensure even brining, then cover again and let sit for another 30 minutes.
During this hour, the salt draws moisture from the rinds through osmosis, which begins the pickling process and softens the texture slightly while maintaining the signature crunch.
Step 3: Make the Kimchi Seasoning
While the rinds are busy pickling, prepare your seasoning paste. In a medium bowl, combine the 6 cloves of minced garlic, 5 tablespoons of gochugaru, and 2 tablespoons of mesil (plum syrup).
Mix everything together until you have a thick, fragrant paste. The garlic should be evenly distributed throughout the red chili mixture. If you prefer less spice, reduce the gochugaru to 3 tablespoons; for more heat, feel free to add up to 7 tablespoons.
If you’re using the optional 1/3 cup of freshly blended watermelon juice, add it to the seasoning mixture now. For tips on making refreshing beverages with leftover watermelon, check out our strawberry milkshake recipe which pairs wonderfully with summer meals.
Step 4: Rinse and Drain the Rinds
After the full hour of pickling, your rinds should have released a significant amount of liquid. Drain this salty brine and rinse the rinds twice in cold water to remove excess salt.
Gently squeeze out remaining water from the rinds, but don’t press too hard. You want them to retain some moisture so they stay crisp rather than becoming dry. Proper drainage is key to achieving the right texture in your finished kimchi.
Step 5: Combine Rinds and Seasoning
Place the drained rinds in a large mixing bowl. Add the kimchi seasoning paste on top and mix thoroughly. Use your hands (wearing food-safe gloves is highly recommended to avoid chili burns) to massage the seasoning into every piece of rind.
Work quickly but thoroughly, ensuring each piece is coated with the vibrant red seasoning. The mixing process helps the flavors penetrate the rinds and creates that beautiful color watermelon rind kimchi is known for.
Step 6: Garnish and Serve
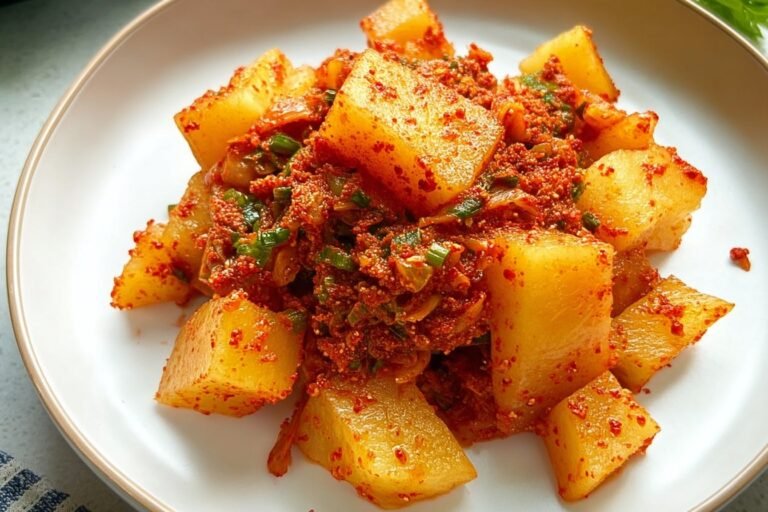
Transfer your finished watermelon rind kimchi to a serving dish. Sprinkle generously with chopped scallions and sesame seeds for both flavor and visual appeal. The green onions add a fresh bite, while the sesame seeds contribute a subtle nuttiness.
Your kimchi is ready to eat immediately! It tastes best when served chilled, so consider refrigerating it for 30 minutes before serving if you have time. For a fun summer dessert pairing, our peach cobbler recipe makes a sweet finish after a spicy Korean-inspired meal.
Preparation Time Summary
| Step | Time Required |
|---|---|
| Preparing rinds | 10 minutes |
| Salting and pickling | 1 hour (hands-off) |
| Making seasoning | 5 minutes |
| Rinsing and draining | 5 minutes |
| Mixing and serving | 5 minutes |
| Total | 1 hour 10 minutes |

Dietary Substitutions to Customize Your Watermelon Rind Kimchi
One of the best things about this watermelon rind kimchi recipe is how easily it adapts to different dietary needs and ingredient availability. Here are some smart substitutions to make it your own.
Protein and Main Component Alternatives
While watermelon rinds are the star of this recipe, you can mix things up by combining them with other vegetables. Consider adding daikon radish, which is traditional in many kimchi recipes and provides a similar crunch with a peppery bite.
For a more filling version, small cubes of firm tofu can be folded in after the seasoning step. This adds protein and makes the kimchi more substantial as a standalone dish. Just remember that tofu will release some liquid, so drain it well before adding.
If mesil (plum syrup) is unavailable, substitute with equal parts rice syrup, honey for non-vegans, or a mixture of sugar and a splash of rice vinegar. Each alternative brings slight flavor variations but maintains the sweet-tangy balance.
Vegetable, Sauce, and Seasoning Modifications
The kimchi seasoning can be customized in numerous ways. For a deeper umami flavor, add 1-2 tablespoons of fish sauce (making it non-vegan) or soy sauce for a vegetarian option that still brings savory complexity.
Some cooks like adding grated Asian pear or apple to the seasoning paste. These fruits provide natural sweetness and enzymes that help tenderize the rinds. Use about 1/2 cup of grated fruit and reduce the mesil accordingly.
For those avoiding nightshades or spicy foods, create a white kimchi version by replacing gochugaru with a paste made from blended onions, garlic, ginger, and a touch of sugar. This variation skips the red color but still delivers plenty of flavor.
Fresh ginger is another welcome addition. Grate about 1 tablespoon into the seasoning for warmth and a slight kick. The ginger pairs beautifully with the mild sweetness of the watermelon rinds.
Mastering Watermelon Rind Kimchi: Advanced Tips and Variations
Ready to take your watermelon rind kimchi skills to the next level? These expert tips and creative variations will help you achieve restaurant-quality results at home.
Pro Cooking Techniques
The secret to perfectly crunchy watermelon rind kimchi lies in the brining process. Always use coarse sea salt rather than fine table salt. Coarse salt dissolves gradually, allowing for more even moisture extraction without over-salting the surface.
Pay attention to the watermelon variety you’re using. Summer watermelons have tender, sweeter rinds that brine quickly. Winter watermelons are denser and less sweet, requiring extended brining time of up to 4-6 hours and possibly extra sweetener in the seasoning.
Flavor Variations
Create different flavor profiles by adjusting the seasoning. For a citrusy twist, add 1 tablespoon of lemon or lime zest to the paste. For smoky depth, mix in 1 teaspoon of smoked paprika alongside the gochugaru.
Love garlic? Double the amount for a more pungent, aromatic kimchi. Prefer a milder version? Reduce the garlic to 3 cloves and the gochugaru to 2 tablespoons. According to this watermelon rind kimchi recipe, the key is tasting your seasoning paste before mixing it with the rinds.
Presentation Tips
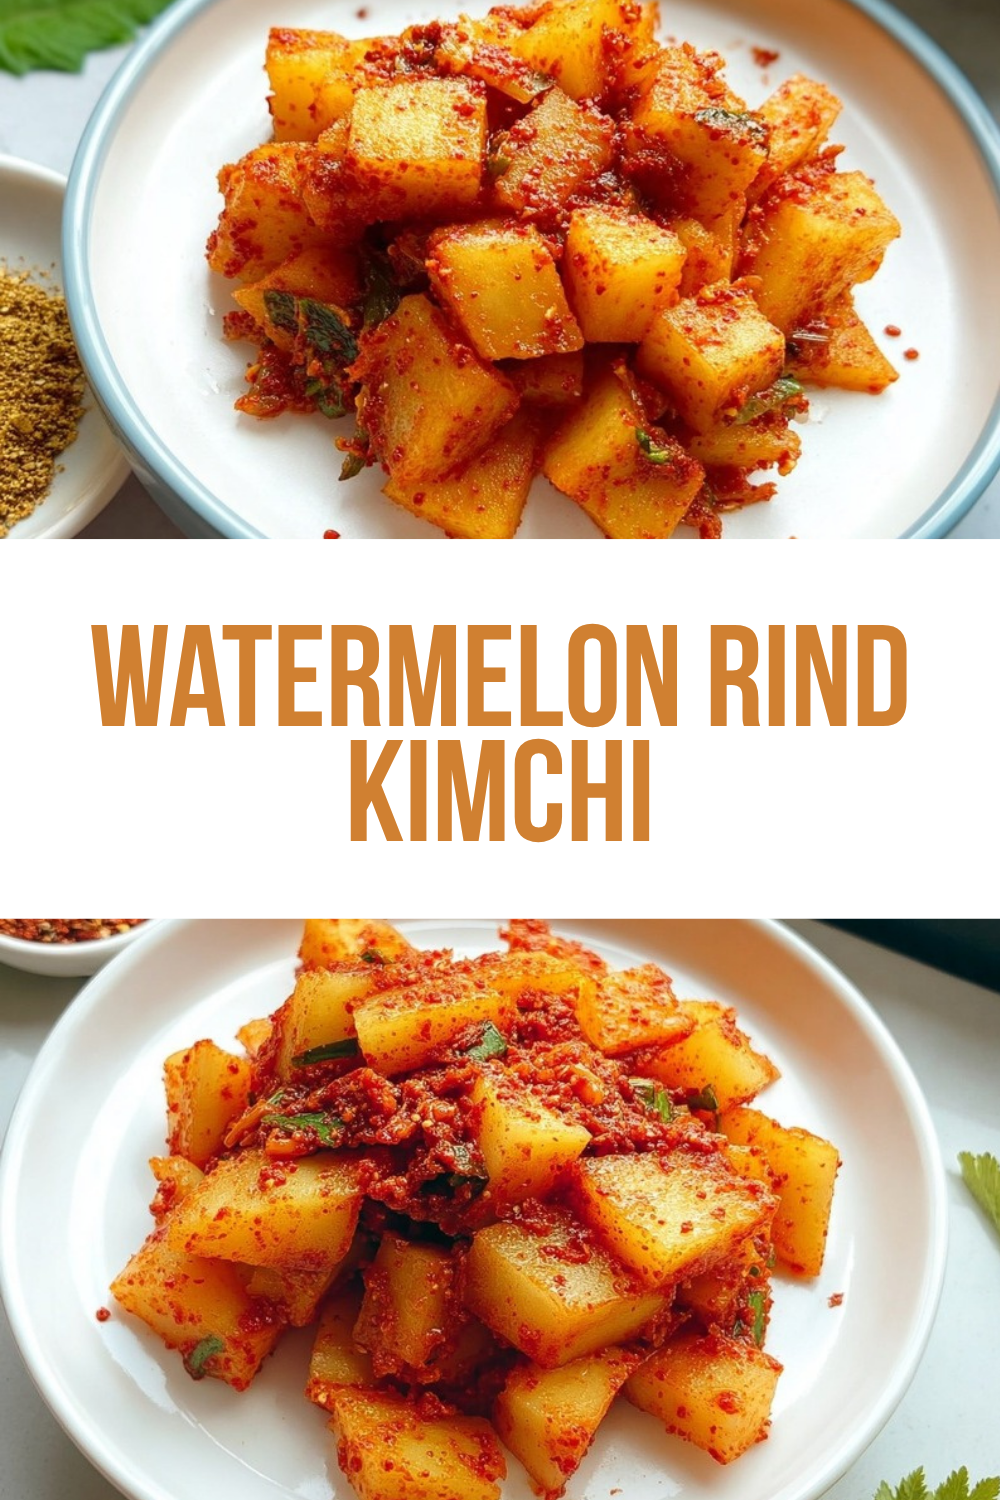
Serve your watermelon rind kimchi in a shallow dish or bowl to showcase the vibrant red pieces against a white background. The contrast makes the dish visually appealing and restaurant-worthy.
For a beautiful finishing touch, add the sesame seeds and chopped scallions in a neat line across the center or in a pattern. A sprinkle of red chili threads on top adds an extra pop of color.
Make-Ahead Options
You can prepare the watermelon rinds up to a day in advance. After brining and rinsing, store them in an airtight container in the refrigerator until you’re ready to add the seasoning. This is perfect for entertaining when you want to spread out the prep work.
The seasoning paste can also be made ahead and refrigerated for up to 3 days. Just bring it to room temperature before mixing with the rinds for easier blending.
How to Store Watermelon Rind Kimchi: Best Practices
Proper storage is essential to maintain the crunch and flavor of your watermelon rind kimchi. Follow these guidelines to keep it fresh and delicious.
Refrigeration Guidelines
Store your watermelon rind kimchi in a clean glass container with an airtight lid. Glass is preferred over plastic because it doesn’t absorb odors and is easier to sanitize. Press the kimchi down gently to remove air pockets before sealing.
For the best texture and flavor, consume within 2 days if you’ve added the optional watermelon juice. Without the juice, the kimchi stays crunchy for up to 5 days when properly refrigerated at 35-40°F.
Freezing Considerations
Freezing is not recommended for this watermelon rind kimchi. The high water content of the rinds causes them to become mushy when thawed, losing that signature crunch that makes the dish special.
If you must freeze leftovers, understand that the texture will change significantly. Thawed kimchi works better as a cooking ingredient in stir-fries or fried rice rather than a fresh side dish.
Signs Your Kimchi Has Gone Bad
Watch for these indicators that your watermelon rind kimchi should be discarded: a slimy texture, off-putting smell (different from the normal fermented aroma), visible mold, or a mushy consistency. When in doubt, throw it out.
Meal Prep Storage Tips
For batch cooking, divide the kimchi into smaller portions in separate containers. This way, you only open what you plan to eat, keeping the rest fresher for longer. Always use clean utensils when serving to avoid introducing bacteria into the container.
FAQs: Frequently Asked Questions About Watermelon Rind Kimchi
Can you make kimchi with watermelon rinds?
Yes, watermelon rinds make a refreshing twist on traditional kimchi. They come from the white part inside the green skin after eating the fruit, turning crunchy and tangy when brined. This approach cuts food waste—use rinds from a fresh watermelon carved with a knife, avoiding any with bite marks for best flavor. Start by thinly slicing or julienning the rinds, salting them for 1-2 hours to draw out moisture, then rinsing and mixing with a sauce of gochugaru, garlic, ginger, fish sauce, and sugar. Ferment at room temperature for a few hours or overnight. It’s a quick, summer-friendly recipe that highlights the rind’s mild sweetness and high water content for hydration. Perfect for beginners trying unique ferments. (98 words)
What are the health benefits of watermelon rind kimchi?
Watermelon rind kimchi offers several perks from the rinds’ nutrients. High in citrulline, an amino acid that may help lower blood pressure by relaxing blood vessels—studies show up to 30% improvement in some cases. The fiber aids digestion and gut health, promoting regularity. Probiotics from fermentation boost immunity, while low calories (about 20 per cup) support weight loss. It’s hydrating due to 92% water content, plus vitamins C and B6 for skin and energy. Compared to cabbage kimchi, rinds add antioxidants like lycopene. Eat it as a side for balanced meals—pair with rice or grilled meats for full benefits. Always consult a doctor for specific health advice. (112 words)
What type of watermelon rinds work best for kimchi?
Summer watermelon rinds are ideal—tender, sweeter, and juicier from green-skinned varieties like Crimson Sweet. They brine quickly (1-2 hours salting) and stay crisp. Winter types, like smaller orange-fleshed ones, are denser and less sweet, so extend brining to 4-6 hours and add extra sugar or apple for balance. Peel off the tough outer green skin, use only the white flesh up to 1/4-inch thick slices. Fresh rinds only—no blemishes or pre-cut store packs. Test tenderness by bending; it should snap easily. This ensures vibrant flavor and texture in your kimchi. Experiment with both for variety. (104 words)
How do I make watermelon rind kimchi less spicy?
Reduce gochugaru (Korean red chili flakes) from 2-3 tablespoons to 1/2-1 tablespoon per pound of rinds for mild heat. This keeps some color but tones down fire—taste the paste first and adjust. Replace half with sweet paprika for redness without spice. Add more pear, apple, or sugar to mellow flavors. For no-heat version, skip chilies and use ginger-garlic-soy base. Ferment shorter (2-4 hours) to limit intensity buildup. Serve chilled to calm any lingering warmth. Kids and spice-averse eaters love this tweak—great in salads or tacos. Always wear gloves handling chilies. (96 words)
How long does watermelon rind kimchi last?
Fresh watermelon rind kimchi peaks same-day—crisp and juicy. In the fridge (sealed glass jar), it stays good 2 days before softening from natural juices. For 5-day crunch, skip watermelon flesh juice; drain rinds well post-brine and use minimal liquid sauce. Store at 35-40°F, away from strong odors. Signs it’s done: mushy texture or off smell—discard then. Without juice, it ferments slower like cabbage kimchi. Revive wilting batches by rinsing in cold water. Link to our full storage guide for tips. Enjoy in bowls, wraps, or fried rice while fresh. (102 words)
Watermelon Rind Kimchi
🍉 Transform watermelon rinds into crunchy, probiotic-packed kimchi – low-calorie, hydrating side dish loaded with gut-friendly benefits and vitamins!
🌶️ Zero-waste Korean banchan ready in just over an hour, spicy-sweet flavor elevates meals without the guilt.
- Total Time: 1 hour 10 minutes
- Yield: 6-8 servings
Ingredients
– 2 lbs watermelon rind slices (white part only, green skin discarded)
– 3 tablespoons coarse sea salt
– 6 cloves garlic, minced
– 5 tablespoons gochugaru (coarse red chili flakes)
– 2 tablespoons mesil (plum syrup)
– Chopped scallions
– Sesame seeds
– 1/3 cup freshly blended watermelon juice
Instructions
1-Step 1: Prepare the Watermelon Rinds Start with fresh watermelon rinds from a melon you’ve just enjoyed. Remove all the green outer skin using a sharp knife or vegetable peeler, leaving only the firm white flesh. Discard any pieces with bite marks, blemishes, or soft spots, as these can affect freshness and flavor. Slice the white rind into thin, even pieces, about 1/4 inch thick. You can cut them into matchsticks, small rectangles, or bite-sized squares depending on your preference. Thinner slices will absorb seasoning more quickly, while thicker cuts maintain a stronger crunch. Place all the sliced rinds in a wide bowl or shallow container that allows them to spread out evenly during the salting process.
2-Step 2: Salt and Pickle the Rinds Sprinkle the 3 tablespoons of coarse sea salt over the watermelon rinds. Using your hands (gloves recommended), toss everything together until the salt is evenly distributed and you see it beginning to dissolve on the surface of the rinds. Cover the bowl with plastic wrap and let it sit at room temperature for 30 minutes. After the first 30 minutes, toss and flip the rinds to ensure even brining, then cover again and let sit for another 30 minutes.
3-Step 3: Make the Kimchi Seasoning While the rinds are busy pickling, prepare your seasoning paste. In a medium bowl, combine the 6 cloves of minced garlic, 5 tablespoons of gochugaru, and 2 tablespoons of mesil (plum syrup). Mix everything together until you have a thick, fragrant paste. The garlic should be evenly distributed throughout the red chili mixture. If you prefer less spice, reduce the gochugaru to 3 tablespoons; for more heat, feel free to add up to 7 tablespoons. If you’re using the optional 1/3 cup of freshly blended watermelon juice, add it to the seasoning mixture now.
4-Step 4: Rinse and Drain the Rinds After the full hour of pickling, your rinds should have released a significant amount of liquid. Drain this salty brine and rinse the rinds twice in cold water to remove excess salt. Gently squeeze out remaining water from the rinds, but don’t press too hard. You want them to retain some moisture so they stay crisp rather than becoming dry. Proper drainage is key to achieving the right texture in your finished kimchi.
5-Step 5: Combine Rinds and Seasoning Place the drained rinds in a large mixing bowl. Add the kimchi seasoning paste on top and mix thoroughly. Use your hands (wearing food-safe gloves is highly recommended to avoid chili burns) to massage the seasoning into every piece of rind. Work quickly but thoroughly, ensuring each piece is coated with the vibrant red seasoning. The mixing process helps the flavors penetrate the rinds and creates that beautiful color watermelon rind kimchi is known for.
6-Step 6: Garnish and Serve Transfer your finished watermelon rind kimchi to a serving dish. Sprinkle generously with chopped scallions and sesame seeds for both flavor and visual appeal. The green onions add a fresh bite, while the sesame seeds contribute a subtle nuttiness. Your kimchi is ready to eat immediately! It tastes best when served chilled, so consider refrigerating it for 30 minutes before serving if you have time.
Last Step:
Please leave a rating and comment letting us know how you liked this recipe! This helps our business to thrive and continue providing free, high-quality recipes for you.Notes
🍉 Select fresh watermelon rinds without bites or damage for optimal flavor and crunch.
🌶️ Adjust gochugaru amount to control spiciness and the vibrant red color intensity.
❄️ Refrigerate in a sealed glass container; add juice shortens shelf life to 2 days for peak crispness.
- Prep Time: 10 minutes
- Salting: 1 hour
- Category: Side Dishes
- Method: Pickling
- Cuisine: Korean
- Diet: Vegan, Vegetarian, Gluten-Free, Low-Calorie
Nutrition
- Serving Size: 1/2 cup
- Calories: 25 kcal
- Sugar: 2g
- Sodium: 500mg
- Fat: 0.5g
- Saturated Fat: 0g
- Unsaturated Fat: 0.5g
- Trans Fat: 0g
- Carbohydrates: 5g
- Fiber: 1g
- Protein: 1g
- Cholesterol: 0mg





