

Why You’ll Love This Taro Cookies
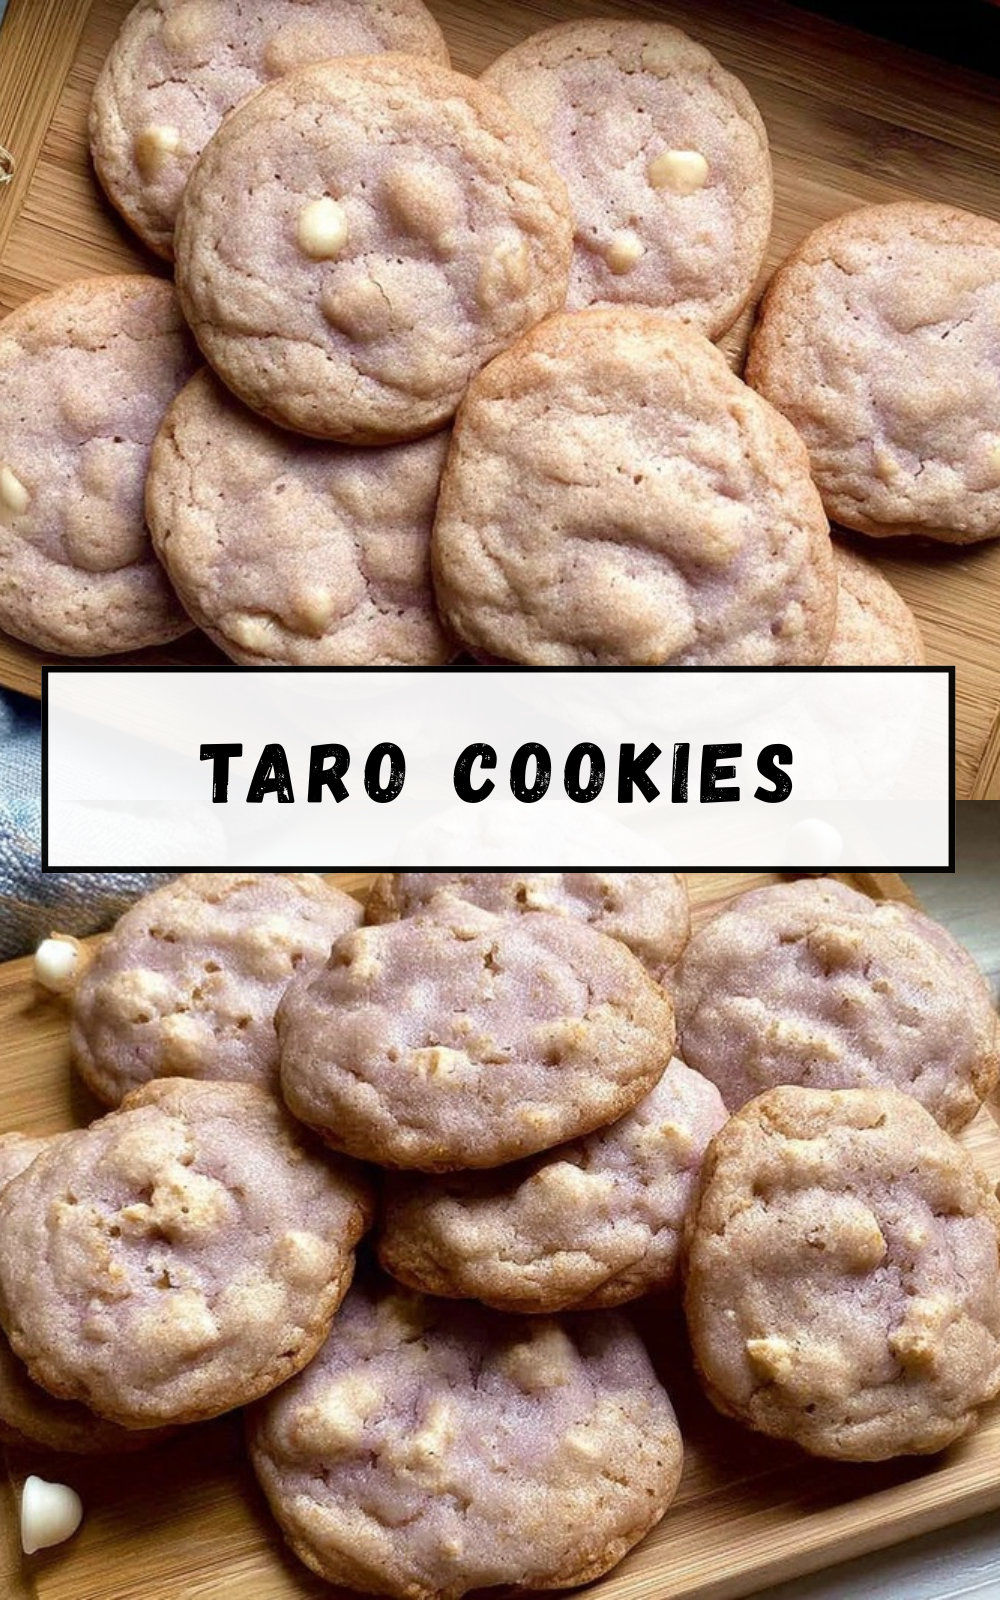
There’s something truly magical about pulling a tray of taro cookies from the oven the soft purple hue, the sweet aroma filling your kitchen, and the anticipation of that first bite. If you’ve ever wondered what all the fuss is about with taro-flavored treats, this recipe is your perfect introduction to the trend.
These white chocolate chip taro cookies have become one of my absolute favorites to bake, and I’m thrilled to share them with you. Here’s why they deserve a spot in your baking rotation:
- Ease of preparation: With just 15 minutes of prep time and 12 minutes in the oven, this easy taro cookies recipe comes together in under 30 minutes total. No complicated techniques or hard-to-find ingredients required just simple mixing and baking that even beginner bakers can master on their first try.
- Health benefits: Taro root, the star ingredient, offers impressive nutritional benefits. According to WebMD, taro is rich in fiber, vitamins, and minerals while providing a lower glycemic index than many other starches. The purple-fleshed variety contains antioxidants called anthocyanins, which give these cookies their stunning color naturally.
- Versatility: These cookies adapt beautifully to different occasions. Serve them plain for an afternoon snack, dress them up with the white chocolate drizzle for special gatherings, or package them as thoughtful homemade gifts. They’re also easily customizable swap the white chocolate chips for dark chocolate or add chopped macadamia nuts for a tropical twist.
- Distinctive flavor: The combination of earthy, slightly nutty taro with creamy white chocolate creates a flavor profile unlike any other cookie. It’s subtly sweet without being overwhelming, making these treats perfect for those who prefer desserts that aren’t cloyingly sugary.
Jump to:
- Why You’ll Love This Taro Cookies
- How to Prepare the Perfect Taro Cookies: Step-by-Step Guide
- Ingredients You’ll Need
- Cookie Ingredients:
- White Chocolate Drizzle:
- Step One: Prepare Your Equipment and Oven
- Step Two: Cream the Butter and Taro Powder
- Step Three: Add Egg and Vanilla
- Step Four: Combine Dry Ingredients
- Step Five: Mix Dough and Fold in Chocolate
- Step Six: Scoop and Shape the Cookies
- Step Seven: Bake to Perfection
- Step Eight: Cool and Optional Toppings
- Step Nine: Add the White Chocolate Drizzle (Optional)
- Dietary Substitutions to Customize Your Taro Cookies
- Flour and Base Alternatives
- Dairy-Free Modifications
- Sweetness Adjustments
- Mastering Taro Cookies: Advanced Tips and Variations
- Professional Baking Techniques
- Creative Flavor Variations
- Presentation Tips
- Make-Ahead Options
- How to Store Taro Cookies: Best Practices
- Room Temperature Storage
- Refrigeration Guidelines
- Freezing Options
- Reheating Tips
- FAQs: Frequently Asked Questions About Taro Cookies
- What are taro cookies?
- What do taro cookies taste like?
- How do you make taro cookies at home?
- Can you use fresh taro for cookies instead of powder?
- How should you store taro cookies?
- Taro Cookies
- Ingredients
- Instructions
- Last Step:
- Notes
- Nutrition
- Did you make this recipe?
How to Prepare the Perfect Taro Cookies: Step-by-Step Guide
Making these chewy white chocolate chip taro cookies is simpler than you might think. I’ll walk you through each step so you can achieve bakery-quality results right in your own kitchen. The key is using sweetened taro milk tea powder, which infuses the dough with that distinctive purple ube-like color and flavor without requiring you to cook and mash fresh taro root.
Ingredients You’ll Need
Before you begin, gather all your ingredients and measure them out. This mise en place approach makes the baking process smooth and enjoyable.
Cookie Ingredients:
- 1 1/2 cups all-purpose flour
- 1/2 cup sweetened taro milk tea powder
- 1/2 cup unsalted butter, softened
- 1 egg
- 1/2 teaspoon baking soda
- 1/2 teaspoon salt
- 1 teaspoon vanilla extract
- 3/4 cup white chocolate chips
White Chocolate Drizzle:
- 1/4 cup white chocolate chips
- 1 teaspoon coconut oil (not melted)
Step One: Prepare Your Equipment and Oven
Start by preheating your oven to 350°F. This temperature is ideal for creating cookies with slightly crisp edges and soft, chewy centers. While the oven heats up, line two cookie sheets with parchment paper. I always recommend parchment over greasing the pans because it prevents sticking beautifully and makes cleanup a breeze. The parchment also helps the cookies bake evenly on the bottom without over-browning.
Step Two: Cream the Butter and Taro Powder
In a stand mixer fitted with the paddle attachment, combine your softened unsalted butter and the sweetened taro milk tea powder. Mix on high speed for a full 3 minutes. This extended mixing time is crucial it allows the taro powder to fully incorporate into the butter and creates a light, fluffy base for your cookie dough. You’ll notice the mixture turning a lovely pale purple color as it beats.
Pro tip: Make sure your butter is properly softened but not melted. Leave it on the counter for about an hour before baking, or cut it into tablespoons and let it sit for 20 minutes. Cold butter won’t cream properly, and melted butter will make your cookies spread too thin.
Step Three: Add Egg and Vanilla
With the mixer still running, add your egg and vanilla extract. Continue mixing until everything is well combined and the mixture looks smooth and creamy. The egg provides structure and richness to the cookies, while the vanilla enhances the overall flavor profile. Don’t skip this step thinking you can rush it proper incorporation at this stage ensures even texture throughout your finished cookies.
Step Four: Combine Dry Ingredients
In a separate medium bowl, whisk together the all-purpose flour, baking soda, and salt. This step ensures your leavening agent (baking soda) and salt are evenly distributed throughout the flour, preventing any bitter spots in your finished cookies. The baking soda helps the cookies rise slightly and creates that perfect tender crumb we’re after.
Step Five: Mix Dough and Fold in Chocolate
With the mixer on low speed, gradually add the dry ingredients to your butter-taro mixture. Mix just until the flour is incorporated overmixing at this stage can lead to tough cookies. Once the dough comes together, stop the mixer and fold in the 3/4 cup of white chocolate chips by hand using a spatula. This gentle folding method preserves those pockets of chocolate that will melt and create delicious gooey spots throughout each cookie.
Step Six: Scoop and Shape the Cookies
Using a cookie scoop or tablespoon, portion out six dough balls per cookie sheet, spacing them about 2 inches apart to allow for spreading. Gently flatten each ball slightly with your palm or the back of a spoon this helps them bake evenly and creates that perfect cookie shape. Don’t flatten them completely; just press down enough to create a disc shape about 3/4-inch thick.
Step Seven: Bake to Perfection
Slide your cookie sheets into the preheated 350°F oven and bake for exactly 12 minutes. You’re looking for cookies that are set around the edges but still look slightly underdone in the center they’ll continue cooking on the hot baking sheet after you remove them from the oven. This technique is the secret to achieving that perfect chewy texture.
Step Eight: Cool and Optional Toppings
Let the cookies cool on the baking sheet for 5 minutes before transferring them to a wire rack to cool completely. If you want to add extra chocolate chips on top, press them gently into the warm cookies right after removing them from the oven. The residual heat will slightly melt the chocolate, creating a beautiful presentation and an extra hit of sweetness.
Step Nine: Add the White Chocolate Drizzle (Optional)
For an elegant finishing touch, prepare the white chocolate drizzle. In a microwave-safe bowl, combine 1/4 cup white chocolate chips with 1 teaspoon coconut oil (keep it solid, don’t melt it beforehand). Microwave in 20-second increments, stirring thoroughly between each burst, until the mixture is completely melted and smooth.
Here’s my favorite trick for neat drizzling: place a quart-size ziplock bag inside a tall glass, folding the top edges over the rim. Pour the melted chocolate into the bag, then seal it while pushing out excess air. Snip a tiny corner off the bag with scissors, and you’ve got a perfect piping tool for drizzling. Zigzag the chocolate over your cooled cookies in any pattern you like.
| Preparation Stage | Time Required |
|---|---|
| Prep Time | 15 minutes |
| Cook Time | 12 minutes |
| Total Time | ~27 minutes |
| Yields | 12-15 cookies |

Dietary Substitutions to Customize Your Taro Cookies
One of the things I love most about this taro cookie recipe is how adaptable it is. Whether you’re dealing with dietary restrictions or simply want to switch things up, there are plenty of ways to make these cookies work for you.
Flour and Base Alternatives
For those avoiding gluten, you can substitute the all-purpose flour with a 1:1 gluten-free flour blend. Look for one that contains xanthan gum, which helps replicate the structure that gluten provides. The texture might be slightly different perhaps a bit more cake-like but the flavor will remain delicious.
If you’re watching your refined carbohydrate intake, try using almond flour. Substitute at a 1:1 ratio, but add an extra egg to help bind everything together. These cookies will be more tender and have a lovely nutty undertone that complements the taro beautifully.
Dairy-Free Modifications
Making these cookies dairy-free is straightforward. Replace the unsalted butter with your favorite plant-based butter alternative look for one designed for baking, as it will have the right fat content and melting properties. For the white chocolate chips, seek out vegan white chocolate, which is becoming increasingly available at health food stores and online. The coconut oil in the drizzle is already dairy-free, so no changes needed there.
Sweetness Adjustments
The recipe calls for sweetened taro milk tea powder, which means no additional sugar is needed in the dough. However, if you prefer a less sweet cookie or your taro powder is particularly sugary, you can reduce the white chocolate chips to 1/2 cup. Conversely, if you have a serious sweet tooth, feel free to add an extra tablespoon or two of white chocolate chips.
For those avoiding refined sugar, you can use unsweetened taro powder and add your sweetener of choice coconut sugar or maple syrup work well. Start with 1/3 cup and adjust to taste.
Mastering Taro Cookies: Advanced Tips and Variations
Once you’ve mastered the basic white chocolate taro cookies, you might want to take your baking game to the next level. Here are some advanced techniques and creative variations to keep things interesting.
Professional Baking Techniques
Chill your dough: For thicker, chewier cookies with more concentrated flavor, refrigerate the dough for at least 30 minutes before baking. Cold dough spreads less in the oven, resulting in a thicker cookie. If you have time, try making the dough the night before and letting it rest overnight the flavors will develop beautifully.
Use room temperature ingredients: Beyond the softened butter, make sure your egg is at room temperature before mixing. Cold eggs can cause the butter to seize, creating an uneven texture. Simply place your egg in a bowl of warm water for 5 minutes if you forgot to take it out ahead of time.
Rotate your pans: Halfway through baking, rotate your cookie sheets 180 degrees. This ensures even browning, especially if your oven has hot spots like mine does.
Creative Flavor Variations
The beautiful thing about taro is how well it pairs with other flavors. Here are some delicious variations to try:
- Coconut Taro: Replace half the white chocolate chips with shredded coconut, or use coconut butter instead of regular butter for a tropical twist.
- Matcha Swirl: For stunning visual appeal, check out these gorgeous zebra-striped matcha taro shortbread cookies for inspiration. The earthy matcha complements the sweet taro perfectly.
- Nutty Taro: Add 1/2 cup of chopped macadamia nuts, pecans, or walnuts for extra crunch and richness.
- Spiced Version: Add 1/2 teaspoon of cinnamon or cardamom to the dry ingredients for a warming spice note.
Presentation Tips
These cookies are already beautiful with their natural purple color, but a few presentation touches can make them truly stunning. Try drizzling the white chocolate in a decorative pattern, or sprinkle a tiny pinch of sea salt on top of the drizzle for a sophisticated salted chocolate effect. For special occasions, add edible flowers or purple sprinkles while the drizzle is still wet.
Make-Ahead Options
You can prepare the dough up to 3 days in advance and store it covered in the refrigerator. Alternatively, scoop the dough into balls, freeze them on a baking sheet until solid, then transfer to a freezer bag. Bake frozen dough balls straight from the freezer just add 1-2 extra minutes to the baking time.
How to Store Taro Cookies: Best Practices
Proper storage keeps your taro cookies fresh and delicious for days. Here’s everything you need to know about storing these purple treats.
Room Temperature Storage
Store completely cooled cookies in an airtight container at room temperature for up to 5 days. Place a piece of bread in the container to help maintain moisture the cookies will absorb moisture from the bread and stay soft. Just replace the bread every couple of days as it dries out.
Refrigeration Guidelines
If your kitchen runs warm or you want to extend the shelf life, refrigerate the cookies in an airtight container for up to 2 weeks. Bring them to room temperature before serving for the best texture, or warm them briefly in the microwave for 10-15 seconds for that fresh-baked taste.
Freezing Options
For longer storage, freeze the baked cookies in a freezer-safe container with parchment paper between layers for up to 3 months. Thaw overnight in the refrigerator, then bring to room temperature before enjoying. You can also freeze the undrizzled cookies and add the white chocolate decoration after thawing for the freshest presentation.
Reheating Tips
To revive day-old cookies, place them on a baking sheet in a 300°F oven for 5 minutes. This restores the slightly crisp edges and softens the centers. For a quick fix, microwave individual cookies for 8-10 seconds, but eat them immediately as microwaved cookies firm up quickly.
FAQs: Frequently Asked Questions About Taro Cookies
What are taro cookies?
Taro cookies are soft or chewy baked treats made from taro root, a starchy vegetable with a nutty, slightly sweet flavor and vibrant purple hue. Popular in Asian desserts, they often feature taro paste or powder mixed into the dough, sometimes with a creamy filling. Key ingredients include taro powder, butter, sugar, eggs, and flour for structure. They’re denser than typical cookies, with a moist texture that melts in your mouth. In places like Hawaii and Taiwan, they’re a bakery staple, available plain, filled, or coated in sugar. Homemade versions let you control sweetness and add mix-ins like coconut or chocolate chips. Each cookie packs about 150-200 calories, making them a indulgent snack. (92 words)
What do taro cookies taste like?
Taro cookies have a mild, earthy sweetness reminiscent of vanilla custard with a subtle chestnut-like nuttiness. The taro imparts a creamy, starchy depth without overpowering fruitiness, often balanced by buttery richness and a hint of salt. Fresh taro versions taste more natural and less powdery than those using commercial powder. Expect a smooth melt-away texture in chewy styles or crisp edges in baked ones. Pair them with tea for contrast—their subtle flavor shines without clashing. If you like mochi or purple yam treats, you’ll enjoy taro cookies. Add cinnamon for warmth or matcha for an umami twist to customize the taste. (98 words)
How do you make taro cookies at home?
To make taro cookies, preheat oven to 350°F (175°C). Cream ½ cup softened butter with ½ cup sugar until fluffy. Beat in 1 egg and 1 tsp vanilla. Mix in 1 cup taro powder, 1½ cups flour, ½ tsp baking powder, and a pinch of salt to form dough. Chill 30 minutes. Scoop tablespoon-sized balls, roll in powdered sugar, and bake 12-15 minutes until edges firm. Cool on racks—they firm up as they rest. Yields 24 cookies. Use room-temp ingredients for even texture. For filled versions, sandwich taro paste between two cookies post-bake. Store airtight for 5 days. (102 words)
Can you use fresh taro for cookies instead of powder?
Yes, fresh taro works great for authentic flavor but requires prep. Peel and boil 1 cup diced taro until soft (20 minutes), then mash with 2 tbsp milk and 2 tbsp sugar into smooth paste. Use ½ cup paste in place of taro powder in your dough recipe, adding 1-2 tbsp extra flour if sticky. Fresh taro gives a vibrant purple color and natural creaminess but can make dough wetter—adjust as needed. Steam instead of boil to retain nutrients. Powder is quicker and shelf-stable for beginners. Either way, taste-test batter for sweetness. Fresh versions stay moist longer, up to a week refrigerated. (96 words)
How should you store taro cookies?
Store taro cookies in an airtight container at room temperature for up to 5 days—they soften over time due to taro starch. For longer freshness, refrigerate in a sealed bag for 1-2 weeks; bring to room temp before eating to restore chewiness. Freeze baked cookies or dough balls in freezer bags for 3 months—thaw overnight and bake as needed. Avoid stacking without parchment to prevent sticking. High humidity softens them faster, so add silica packets if needed. Filled varieties last shorter (3 days room temp) due to cream. Revive stale ones by warming in a 300°F oven for 5 minutes. Proper storage keeps that signature texture intact. (104 words)

Taro Cookies
🍪 Dive into chewy, vibrant purple White Chocolate Chip Taro Cookies that blend earthy taro flavor with melty sweetness – a fun, unique upgrade to classic cookies!
🥛 No added sugar needed thanks to sweetened taro powder, making these an easy, guilt-free bake perfect for milk tea enthusiasts and cookie lovers alike.
- Total Time: 27 minutes
- Yield: 12 cookies
Ingredients
Instructions
1-Step One: Prepare Your Equipment and OvenStart by preheating your oven to 350°F. This temperature is ideal for creating cookies with slightly crisp edges and soft, chewy centers. While the oven heats up, line two cookie sheets with parchment paper. I always recommend parchment over greasing the pans because it prevents sticking beautifully and makes cleanup a breeze. The parchment also helps the cookies bake evenly on the bottom without over-browning.
2-Step Two: Cream the Butter and Taro PowderIn a stand mixer fitted with the paddle attachment, combine your softened unsalted butter and the sweetened taro milk tea powder. Mix on high speed for a full 3 minutes. This extended mixing time is crucial it allows the taro powder to fully incorporate into the butter and creates a light, fluffy base for your cookie dough. You’ll notice the mixture turning a lovely pale purple color as it beats.
3-Step Three: Add Egg and VanillaWith the mixer still running, add your egg and vanilla extract. Continue mixing until everything is well combined and the mixture looks smooth and creamy. The egg provides structure and richness to the cookies, while the vanilla enhances the overall flavor profile. Don’t skip this step thinking you can rush it proper incorporation at this stage ensures even texture throughout your finished cookies.
4-Step Four: Combine Dry IngredientsIn a separate medium bowl, whisk together the all-purpose flour, baking soda, and salt. This step ensures your leavening agent (baking soda) and salt are evenly distributed throughout the flour, preventing any bitter spots in your finished cookies. The baking soda helps the cookies rise slightly and creates that perfect tender crumb we’re after.
5-Step Five: Mix Dough and Fold in ChocolateWith the mixer on low speed, gradually add the dry ingredients to your butter-taro mixture. Mix just until the flour is incorporated overmixing at this stage can lead to tough cookies. Once the dough comes together, stop the mixer and fold in the 3/4 cup of white chocolate chips by hand using a spatula. This gentle folding method preserves those pockets of chocolate that will melt and create delicious gooey spots throughout each cookie.
6-Step Six: Scoop and Shape the CookiesUsing a cookie scoop or tablespoon, portion out six dough balls per cookie sheet, spacing them about 2 inches apart to allow for spreading. Gently flatten each ball slightly with your palm or the back of a spoon this helps them bake evenly and creates that perfect cookie shape. Don’t flatten them completely; just press down enough to create a disc shape about 3/4-inch thick.
7-Step Seven: Bake to PerfectionSlide your cookie sheets into the preheated 350°F oven and bake for exactly 12 minutes. You’re looking for cookies that are set around the edges but still look slightly underdone in the center they’ll continue cooking on the hot baking sheet after you remove them from the oven. This technique is the secret to achieving that perfect chewy texture.
8-Step Eight: Cool and Optional ToppingsLet the cookies cool on the baking sheet for 5 minutes before transferring them to a wire rack to cool completely. If you want to add extra chocolate chips on top, press them gently into the warm cookies right after removing them from the oven. The residual heat will slightly melt the chocolate, creating a beautiful presentation and an extra hit of sweetness.
9-Step Nine: Add the White Chocolate Drizzle (Optional)For an elegant finishing touch, prepare the white chocolate drizzle. In a microwave-safe bowl, combine 1/4 cup white chocolate chips with 1 teaspoon coconut oil (keep it solid, don’t melt it beforehand). Microwave in 20-second increments, stirring thoroughly between each burst, until the mixture is completely melted and smooth.Here’s my favorite trick for neat drizzling: place a quart-size ziplock bag inside a tall glass, folding the top edges over the rim. Pour the melted chocolate into the bag, then seal it while pushing out excess air. Snip a tiny corner off the bag with scissors, and you’ve got a perfect piping tool for drizzling. Zigzag the chocolate over your cooled cookies in any pattern you like.
Last Step:
Please leave a rating and comment letting us know how you liked this recipe! This helps our business to thrive and continue providing free, high-quality recipes for you.Notes
🍵 The sweetened taro milk tea powder provides all the sweetness needed, no extra sugar required!
📜 Line your sheets with parchment paper to prevent sticking and ensure even baking.
❄️ Allow cookies to cool slightly before drizzling for the best adhesion and shine.
- Prep Time: 15 minutes
- Cook Time: 12 minutes
- Category: Dessert
- Method: Baking
- Cuisine: Asian Fusion
- Diet: Vegetarian
Nutrition
- Serving Size: 1 cookie
- Calories: 220 kcal
- Sugar: 12 g
- Sodium: 180 mg
- Fat: 12 g
- Saturated Fat: 7 g
- Unsaturated Fat: 4 g
- Trans Fat: 0 g
- Carbohydrates: 25 g
- Fiber: 1 g
- Protein: 3 g
- Cholesterol: 30 mg





