

Why You Will Love This Sweet Spicy Sticky Chicken
This Sweet Spicy Sticky Chicken is the kind of dinner that makes busy nights feel a whole lot easier. It is baked, not fried, so you get big flavor with less mess. The sauce turns glossy, sticky, and just the right mix of sweet and spicy. If you love a sweet spicy chicken dinner that tastes like takeout but comes from your own kitchen, this one is a keeper.
- Easy to make: This easy sweet spicy sticky chicken comes together in about 55 minutes, and most of that time is hands-off baking. The chicken bakes in one pan, which means less cleanup and less stress after a long day.
- Family-friendly flavor: The sauce has ketchup, sugar, brown sugar, soy sauce, vinegar, and chili garlic sauce for a bold, balanced taste. You can keep the heat mild or turn it up a little for spice lovers.
- Good protein choice: Chicken tenders give you a solid protein boost, and this dish fits nicely into a balanced meal when served with rice and a veggie on the side. For more general chicken nutrition details, you can also read this chicken nutrition resource.
- Works for many schedules: It is a great pick for home cooks, students, working professionals, and parents who need something reliable. You can also double it for a bigger family, or make 1.5 times the recipe for extra servings.
This is the kind of sticky chicken recipe that disappears fast at the table, so you may want to make a little extra!
The flavor is what really makes this dish stand out. The sauce is sweet, tangy, salty, and just a little fiery. It coats the chicken in a shiny glaze that clings to every bite. That is why people keep coming back to this sticky chicken recipe again and again.
If you enjoy simple comfort food like this, you might also like a sweet treat after dinner, such as this easy peach cobbler recipe.
Jump to:
- Why You Will Love This Sweet Spicy Sticky Chicken
- Essential Ingredients for Sweet Spicy Sticky Chicken
- Main Ingredients
- Special Dietary Options
- How to Prepare the Perfect Sweet Spicy Sticky Chicken: Step-by-Step Guide
- First Step: Preheat and melt the butter
- Second Step: Prep the chicken
- Third Step: Arrange and bake the chicken
- Fourth Step: Make the sticky sauce
- Fifth Step: Pour, bake again, and finish
- Quick timing guide
- Protein and Main Component Alternatives
- Chicken substitutes
- Plant-based and seafood options
- Vegetable, Sauce, and Seasoning Modifications
- Vegetable add-ins
- Sauce and seasoning changes
- Mastering Sweet Spicy Sticky Chicken: Advanced Tips and Variations
- Pro cooking techniques
- Flavor variations
- Make-ahead options
- How to Store Sweet Spicy Sticky Chicken: Best Practices
- Refrigeration
- Freezing
- Reheating
- Meal prep considerations
- FAQs: Frequently Asked Questions About Sweet Spicy Sticky Chicken
- Sweet Spicy Sticky Chicken
- Ingredients
- Instructions
- Last Step:
- Notes
- Nutrition
- Did you make this recipe?
Essential Ingredients for Sweet Spicy Sticky Chicken
Here is everything you need for this sweet spicy sticky chicken recipe. Each ingredient plays a role in building flavor, texture, or that sticky finish everyone loves.
Main Ingredients
- 3 tablespoons butter, cut into pieces – Melts in the pan and helps keep the chicken from sticking while adding rich flavor.
- 1 1/2 pounds chicken tenders – The main protein. Chicken tenders cook quickly and stay tender in the oven.
- Salt and pepper, to taste – Simple seasoning that brings out the flavor of the chicken and balances the sauce.
- 1/3 cup all-purpose flour – Creates a light coating that helps the sauce cling to the chicken.
- 1/4 cup chicken broth – Adds savory depth to the sauce and helps it simmer smoothly.
- 1/4 cup white or apple cider vinegar – Brings tang and brightens the sweet sauce.
- 1/4 cup ketchup – Gives the sauce body, color, and a gentle tomato-rich sweetness.
- 1/4 cup granulated sugar – Adds the classic sweet balance that makes the glaze sticky.
- 1/4 cup packed light or dark brown sugar – Adds deeper caramel-like flavor and more stickiness.
- 1 tablespoon soy sauce – Brings salty umami flavor and helps round out the sauce.
- 1 tablespoon chili garlic sauce – Adds heat, garlic flavor, and a little punch.
- Hot cooked rice, for serving – The best base for catching all that extra sauce.
Special Dietary Options
- Vegan: Swap the chicken tenders for extra-firm tofu, seitan, or cauliflower florets. Use plant-based butter and vegetable broth.
- Gluten-free: Use a gluten-free flour blend instead of all-purpose flour and check that your soy sauce is gluten-free.
- Low-calorie: Try less sugar, a light ketchup, and serve the chicken with cauliflower rice or steamed vegetables instead of regular rice.
Tip: The sauce thickens more as it cools, so do not worry if it looks a little loose when it comes out of the oven.
How to Prepare the Perfect Sweet Spicy Sticky Chicken: Step-by-Step Guide
First Step: Preheat and melt the butter
Start by heating your oven to 425°F. Place the 3 tablespoons of butter in a glass 9×13-inch pan and set it in the oven until the butter melts. This takes just a few minutes, and it gives the chicken a flavorful base right away. Once melted, carefully remove the pan from the oven and tilt it if needed so the butter spreads across the bottom.
This step is small, but it matters. The butter helps the flour-coated chicken brown a little and keeps the bottom from drying out. It also adds a rich taste that works so well with the sweet and spicy sauce.
Second Step: Prep the chicken
Pat the chicken tenders dry with paper towels. This helps the flour stick better and keeps the coating from turning gummy. After that, season both sides lightly with salt and pepper. You do not need much here because the sauce adds plenty of flavor later.
Next, place the 1/3 cup of all-purpose flour in a shallow dish or plate. Dredge each chicken tender in the flour, then shake off the extra. You want a light coating, not a thick crust. That thin layer helps create the sticky finish once the sauce goes on.
Third Step: Arrange and bake the chicken
Lay the coated chicken tenders in a single layer in the buttered pan. Try not to crowd them too much, since even spacing helps them cook evenly. Put the pan in the oven and bake for 10 minutes.
While the chicken bakes, this is a great time to make the sauce. Because the chicken only gets a short first bake, it stays juicy and does not dry out. That is one reason this baked sweet spicy sticky chicken works so well for busy nights.
Fourth Step: Make the sticky sauce
In a saucepan, whisk together the chicken broth, vinegar, ketchup, granulated sugar, brown sugar, soy sauce, and chili garlic sauce. Set it over medium heat and simmer for 2 to 3 minutes. Stir often so the sugars dissolve and the sauce becomes smooth.
This is also the moment to adjust the heat level. If you like a milder sauce, use less chili garlic sauce. If you want more kick, add a little more. If you want to read more about hot sauce and spice, this hot sauce nutrition guide is a helpful read.
One of the best tricks is to simmer the sauce before it goes on the chicken. That gives you faster thickening and helps keep the chicken from overcooking.
Fifth Step: Pour, bake again, and finish
Take the chicken out of the oven after the first 10 minutes and pour the hot sauce evenly over the top. Return the pan to the oven and bake for another 15 minutes. The chicken should be cooked through, and the sauce should look bubbly and thickened.
When the chicken is done, spoon the sauce from the pan over the top so every piece gets coated. Serve it right away over hot cooked rice. The rice soaks up the sauce and makes every bite extra good. If you want a fun side or dessert for a full meal night, you could also pair it with a creamy strawberry milkshake for a sweet finish.
Quick timing guide
| Step | Time | Details |
|---|---|---|
| Prep | 25 minutes | Dry, season, dredge, and mix the sauce |
| First bake | 10 minutes | Chicken bakes before the sauce goes on |
| Second bake | 15 minutes | Chicken finishes cooking in the sticky sauce |
| Total time | 55 minutes | Perfect for a weeknight dinner |
Protein and Main Component Alternatives
Chicken substitutes
If you do not have chicken tenders, you can still make this recipe work. Boneless skinless chicken breasts cut into strips are the closest swap. They cook in a similar amount of time, though you may want to check them a minute or two early if the strips are thin. Boneless skinless chicken thighs are another good choice if you prefer darker meat with a richer taste.
For a lighter option, turkey cutlets sliced into strips can work too. Just keep an eye on the cooking time so they do not dry out. If you are feeding picky eaters, chicken tenders are still the easiest choice because they are already the right size and stay nice and tender.
Plant-based and seafood options
To make a meatless version, try extra-firm tofu, pressed well and cut into strips. Cauliflower florets also work well if you want a crispy, saucy bite. For seafood fans, shrimp can be used, but it will cook much faster, so the sauce timing should be shortened.
These swaps make the recipe flexible for different diets and food preferences. They also help when you need to cook with what you already have in the kitchen. That kind of flexibility is one reason this spicy chicken recipe style works so well for real life.
Vegetable, Sauce, and Seasoning Modifications
Vegetable add-ins
You can serve this dish with plenty of vegetables on the side or add some right into the meal. Steamed broccoli, snap peas, green beans, or roasted carrots all work well with the sweet and sticky sauce. Bell peppers and onions can also be baked alongside the chicken if you want more color on the plate.
If you want a one-pan dinner feel, place quick-cooking vegetables around the chicken during the second bake. Just make sure they are cut into small, even pieces so they cook at the same pace. Rice stays the classic choice, but vegetables make the meal feel even more balanced.
Sauce and seasoning changes
The sauce is easy to tweak. Use white vinegar for a sharper tang or apple cider vinegar for a softer, fruitier note. If you want less sweetness, reduce either the granulated sugar or brown sugar a little. If you want a deeper savory taste, add a small splash more soy sauce.
For spice lovers, add extra chili garlic sauce. For kids or anyone sensitive to heat, keep it gentle. You can also stir in a little fresh garlic, ginger, or red pepper flakes if you want more layers of flavor. The base recipe is sturdy, so small changes usually work well.
Simple swaps can change the mood of the dish without changing the easy baked method that makes it so dependable.
Mastering Sweet Spicy Sticky Chicken: Advanced Tips and Variations
Pro cooking techniques
One of the smartest tricks is to pat the chicken very dry before flouring it. That helps the coating stick better and keeps the final texture cleaner. Another helpful move is to simmer the sauce before pouring it over the chicken, since that starts the thickening process early. This keeps the chicken from sitting too long in the oven and helps it stay juicy.
Do not skip the single-layer arrangement in the pan. Crowding traps steam, and steamed chicken does not brown or glaze as well. If you are making a larger batch, use two pans instead of piling everything into one.
Flavor variations
For a deeper flavor, use dark brown sugar instead of light brown sugar. For a sharper finish, use apple cider vinegar. If you like a sweeter glaze, add just a little more ketchup or sugar. If you want a little smoke, serve with smoked paprika on the side or add a pinch to the flour mix.
You can also finish with sesame seeds or sliced green onions for a simple pop of color. These small touches make the dish look special without adding much work.
Make-ahead options
If your evenings are packed, make the sauce ahead and keep it in the fridge for up to a couple of days. You can also dredge the chicken earlier in the day and keep it chilled until baking time. For the best texture, wait to combine the sauce and chicken until you are ready to bake the final 15 minutes.
For a family of seven, doubling the recipe is smart. If you want a little less food, making 1.5 times the recipe is a good middle ground. That way, you can have leftovers without going overboard.
How to Store Sweet Spicy Sticky Chicken: Best Practices
Refrigeration
Store leftover chicken in an airtight container once it has cooled a bit. Keep it in the fridge for up to 3 to 4 days. If possible, store extra rice separately so it does not soak up too much sauce.
Freezing
You can freeze the cooked chicken and sauce for longer storage. Place portions in freezer-safe containers or bags and freeze for up to 2 months. For best results, thaw in the fridge overnight before reheating. The sauce may thicken more after freezing, but a splash of water or broth can help bring it back.
Reheating
Warm leftovers in the oven at 325°F until heated through, or microwave in short bursts. Add a spoonful of water if the sauce looks too thick. Stir gently so the coating stays on the chicken as much as possible.
Meal prep considerations
This dish is a nice meal prep option because the sauce holds up well and the chicken reheats nicely. Pack it with rice and a vegetable for easy lunches. The flavors often taste even better the next day after the sauce has soaked in a little more.

FAQs: Frequently Asked Questions About Sweet Spicy Sticky Chicken
Print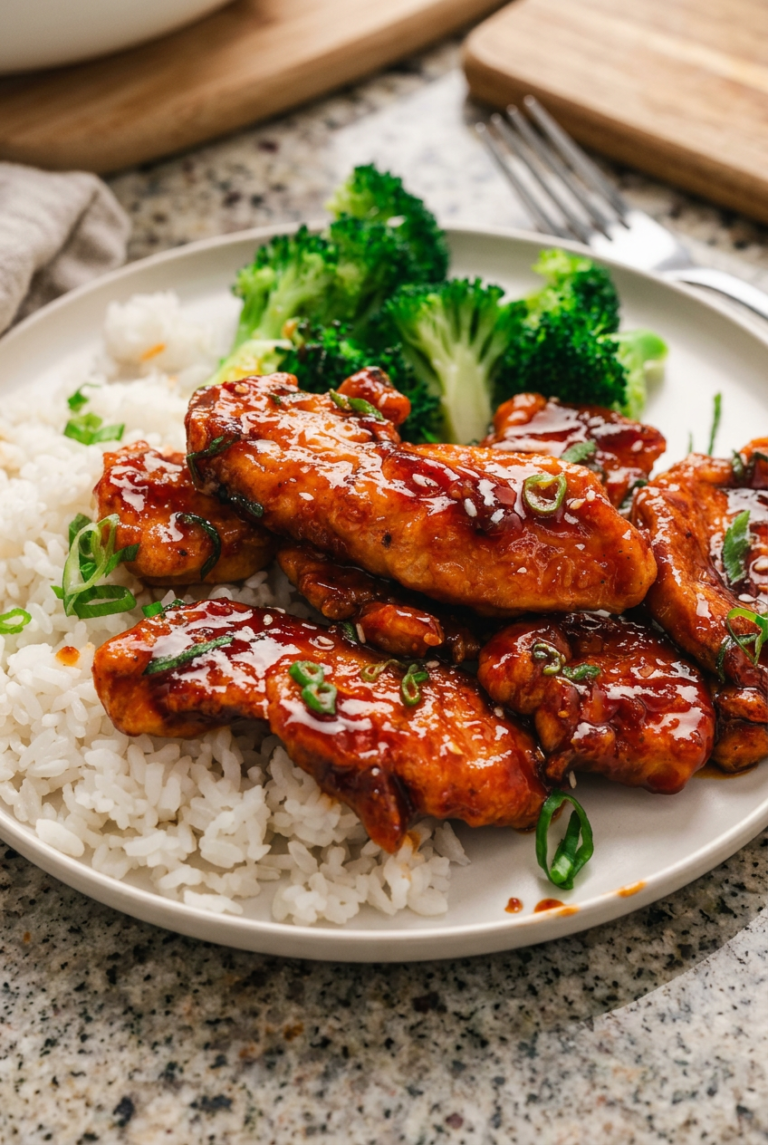
Sweet Spicy Sticky Chicken
🍗 Indulge in crispy oven-baked chicken tenders glazed with a perfect sweet and spicy sticky sauce that’s finger-licking good and family-friendly!
🌶️ Quick to prepare with bold flavors – ideal for busy weeknights, delivering juicy chicken with caramelized sticky goodness everyone craves!
- Total Time: 55 minutes
- Yield: 4 servings
Ingredients
– 3 tablespoons butter, cut into pieces for rich flavor and preventing sticking
– 1 1/2 pounds chicken tenders for main protein
– Salt and pepper, to taste for seasoning
– 1/3 cup all-purpose flour for coating
– 1/4 cup chicken broth for savory depth
– 1/4 cup white or apple cider vinegar for tang
– 1/4 cup ketchup for sauce body and sweetness
– 1/4 cup granulated sugar for sweetness
– 1/4 cup packed light or dark brown sugar for caramel flavor and stickiness
– 1 tablespoon soy sauce for umami
– 1 tablespoon chili garlic sauce for heat and garlic flavor
– Hot cooked rice, for serving
Instructions
1-First Step: Preheat and melt the butter Start by heating your oven to 425°F. Place the 3 tablespoons of butter in a glass 9×13-inch pan and set it in the oven until the butter melts. This takes just a few minutes, and it gives the chicken a flavorful base right away. Once melted, carefully remove the pan from the oven and tilt it if needed so the butter spreads across the bottom. This step is small, but it matters. The butter helps the flour-coated chicken brown a little and keeps the bottom from drying out. It also adds a rich taste that works so well with the sweet and spicy sauce.
2-Second Step: Prep the chicken Pat the chicken tenders dry with paper towels. This helps the flour stick better and keeps the coating from turning gummy. After that, season both sides lightly with salt and pepper. You do not need much here because the sauce adds plenty of flavor later. Next, place the 1/3 cup of all-purpose flour in a shallow dish or plate. Dredge each chicken tender in the flour, then shake off the extra. You want a light coating, not a thick crust. That thin layer helps create the sticky finish once the sauce goes on.
3-Third Step: Arrange and bake the chicken Lay the coated chicken tenders in a single layer in the buttered pan. Try not to crowd them too much, since even spacing helps them cook evenly. Put the pan in the oven and bake for 10 minutes. While the chicken bakes, this is a great time to make the sauce. Because the chicken only gets a short first bake, it stays juicy and does not dry out. That is one reason this baked sweet spicy sticky chicken works so well for busy nights.
4-Fourth Step: Make the sticky sauce In a saucepan, whisk together the chicken broth, vinegar, ketchup, granulated sugar, brown sugar, soy sauce, and chili garlic sauce. Set it over medium heat and simmer for 2 to 3 minutes. Stir often so the sugars dissolve and the sauce becomes smooth. This is also the moment to adjust the heat level. If you like a milder sauce, use less chili garlic sauce. If you want more kick, add a little more. If you want to read more about hot sauce and spice, this hot sauce nutrition guide is a helpful read. One of the best tricks is to simmer the sauce before it goes on the chicken. That gives you faster thickening and helps keep the chicken from overcooking.
5-Fifth Step: Pour, bake again, and finish Take the chicken out of the oven after the first 10 minutes and pour the hot sauce evenly over the top. Return the pan to the oven and bake for another 15 minutes. The chicken should be cooked through, and the sauce should look bubbly and thickened. When the chicken is done, spoon the sauce from the pan over the top so every piece gets coated. Serve it right away over hot cooked rice. The rice soaks up the sauce and makes every bite extra good. If you want a fun side or dessert for a full meal night, you could also pair it with a creamy strawberry milkshake for a sweet finish.
Last Step:
Please leave a rating and comment letting us know how you liked this recipe! This helps our business to thrive and continue providing free, high-quality recipes for you.Notes
🔥 Simmer the sauce first to thicken it quickly without overcooking the chicken.
🌶️ Adjust the amount of chili garlic sauce to control the spice level to your taste.
💧 Always pat the chicken dry before dredging for the best flour coating adhesion.
- Prep Time: 25 minutes
- Cook Time: 30 minutes
- Category: Main Dish
- Method: Oven-Baked
- Cuisine: American
Nutrition
- Serving Size: 1 chicken tender with sauce
- Calories: 289 kcal
- Sugar: 20g
- Sodium: 616mg
- Fat: 9g
- Saturated Fat: 4g
- Unsaturated Fat: 5g
- Trans Fat: 0g
- Carbohydrates: 26g
- Fiber: 0.4g
- Protein: 25g
- Cholesterol: 88mg





