

Why You’ll Love This Peppermint Oreo Bark
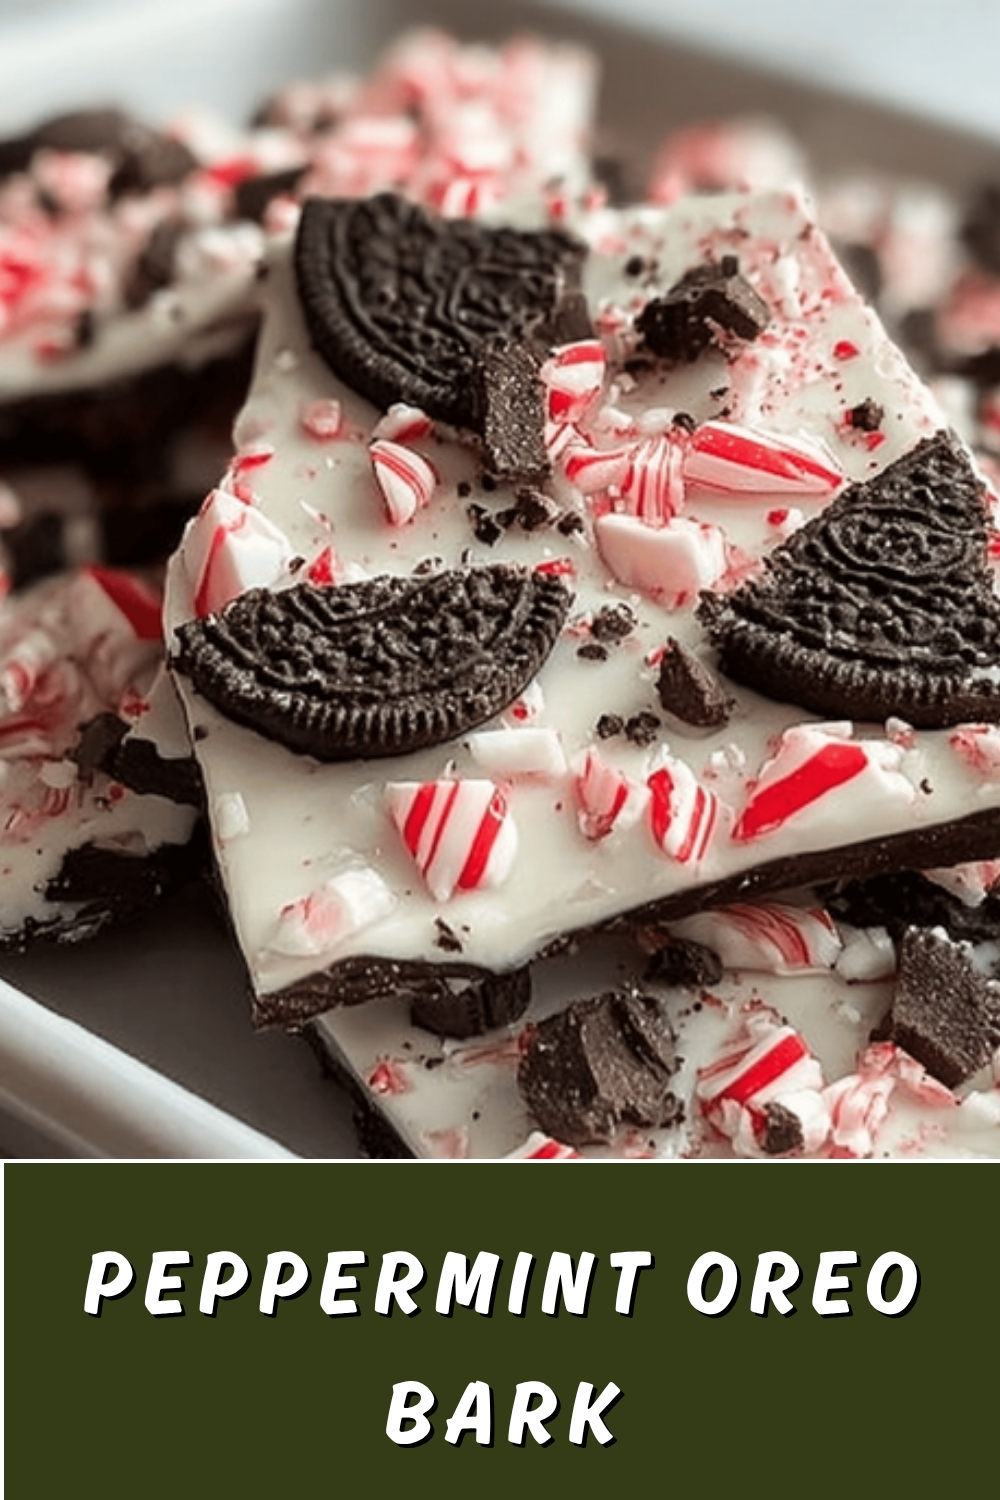
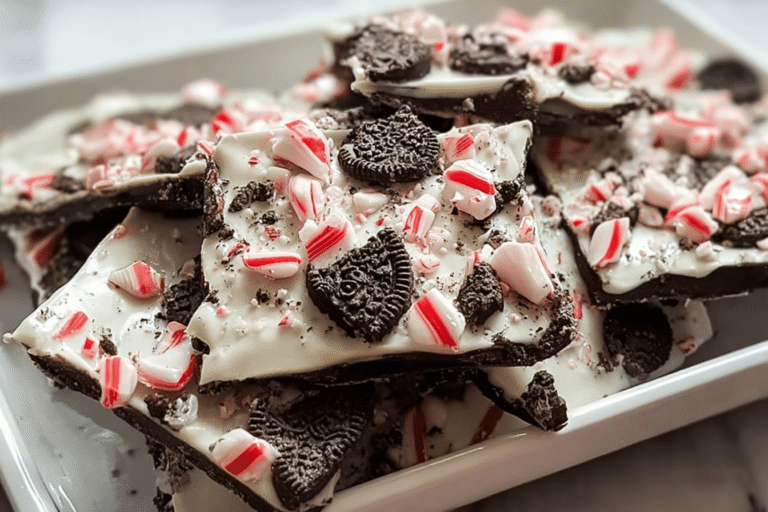
If you’re looking for a fun and simple treat during the holidays, our peppermint Oreo bark recipe hits the spot with its mix of creamy chocolate and crunchy cookies. It’s super easy to whip up, taking just 15 minutes from start to finish, making it perfect for busy days when you want something festive without much fuss. The blend of thin chocolate cookies, white and dark chocolate melts, and peppermint bits creates a delicious snack that’s both refreshing and rich.
This recipe stands out because it’s versatile for different diets and offers a quick mood boost, especially with the antioxidant benefits from good quality chocolate. Whether you’re a home cook or a baking enthusiast, you’ll appreciate how it adapts to your needs. Plus, it makes about 30 servings, so it’s ideal for sharing at gatherings or gifting to friends.
One of the best parts is how the crunchy cookies add texture to the smooth chocolate layers, turning a basic ingredient list into a holiday favorite. For those watching their calories, you can tweak it a bit, but overall, it’s a treat that feels indulgent yet not overwhelming. Imagine pulling it out of the fridge and enjoying a piece that tastes like pure joy during chilly evenings.
Key Benefits and Adaptations
This peppermint Oreo bark is perfect for last-minute holiday needs since it requires no baking and minimal prep. It’s also easy to make healthier by swapping in reduced-sugar options for a quick energy lift. The adaptability means you can go vegan or gluten-Free without losing that signature taste, keeping everyone happy at your table.
Don’t forget the fun of experimenting with flavors, like adding dark chocolate for extra depth. If you’re new to desserts like this, it’s a great starting point that builds confidence in the kitchen.
Jump to:
- Why You’ll Love This Peppermint Oreo Bark
- Key Benefits and Adaptations
- Essential Ingredients for Peppermint Oreo Bark
- How to Prepare the Perfect Peppermint Oreo Bark: Step-by-Step Guide
- Dietary Substitutions to Customize Your Peppermint Oreo Bark
- Mastering Peppermint Oreo Bark: Advanced Tips and Variations
- Storage and Make-Ahead Options
- How to Store Peppermint Oreo Bark: Best Practices
- FAQs: Frequently Asked Questions About Peppermint Oreo Bark
- What type of chocolate is best for making Peppermint Oreo Bark?
- How do I keep the Oreo cookies from shifting when spreading the melted chocolate?
- What’s the easiest way to achieve a swirled look with white and dark chocolate on Peppermint Oreo Bark?
- How should I cut and store Peppermint Oreo Bark to keep it fresh?
- Can I substitute white chocolate chips for melting wafers in this recipe?
- Peppermint Oreo Bark
- Ingredients
- Instructions
- Last Step:
- Notes
- Nutrition
- Did you make this recipe?
Essential Ingredients for Peppermint Oreo Bark
Gathering the right ingredients is key to making this peppermint Oreo bark recipe turn out just right. This quick holiday treat uses simple items that come together in about 15 minutes for a festive dessert. Let’s break down the list so you can see exactly what’s needed.
- 1 package (10 ounces) of thin chocolate cookies (35-40 cookies) – These add the crunchy base that makes the bark irresistible.
- 2 bags (10 ounces each) of white chocolate melts – They provide the creamy foundation that’s essential for binding everything together.
- 1 bag (10 ounces) of chocolate melts – This brings in the rich, dark notes for that marbled effect.
- 1/4 cup peppermint bits – For a refreshing burst that ties the whole treat together with holiday vibes.
These ingredients make the recipe straightforward and accessible, perfect for home cooks and baking enthusiasts alike. Remember, choosing high-quality chocolate ensures a smooth texture that elevates the final product. For special diets, you can swap in vegan or gluten-Free alternatives to keep things inclusive.
How to Prepare the Perfect Peppermint Oreo Bark: Step-by-Step Guide
Getting started with this peppermint Oreo bark recipe is as easy as it gets, and it’s ready in just 15 minutes. First, line an 11×15 inch sheet pan with foil or parchment paper to make removal simple later. This step sets the stage for a mess-free process that even busy parents can handle quickly.
Next, melt 2 1/2 cups of white chocolate melts and 1 cup of chocolate melts separately following the package instructions, which usually involves gentle heating to avoid burning. Once melted, dip the bottoms of the chocolate cookies in the white chocolate and place them flat on the pan side by side this little trick keeps them from shifting.
- Prepare your pan by lining it with foil or parchment paper for easy lifting.
- Melt the white and chocolate melts as directed, taking care to stir frequently.
- Dip each cookie bottom in melted white chocolate and arrange them on the pan.
- Spread the remaining white chocolate over the cookies using a flat spatula for an even layer.
- Drop spoonfuls of melted chocolate on top and swirl gently to create that eye-catching marbled look.
- Sprinkle the peppermint bits immediately before the chocolate sets.
- Let it set completely, then cut into pieces with a large knife for neat portions.
- Store in a sealed container, and remember, it’s best shared to avoid eating it all at once!
For dietary tweaks, substitute ingredients like vegan chocolate during the melting and dipping steps. This guide to easy holiday recipes on our site can offer more ideas if you’re new to adapting recipes.
Once you’re done, the bark is ready to enjoy, with each bite offering a perfect balance of creamy chocolate peppermint Oreo bark flavors. It’s a hit for students and working professionals who need something fast and delicious.

Dietary Substitutions to Customize Your Peppermint Oreo Bark
Making this peppermint Oreo bark adaptable is simple, especially if you have dietary needs in mind. For instance, swap regular chocolate cookies with gluten-Free ones to keep the crunch without the worry. This way, diet-conscious individuals and newlyweds can enjoy it just as much.
When it comes to the chocolate, use vegan white chocolate melts instead of traditional ones for a dairy-Free version. You can also adjust seasonings like peppermint bits for a milder taste, perhaps by reducing the amount slightly.
| Original Ingredient | Substitution | Reason |
|---|---|---|
| Thin chocolate cookies | Gluten-Free sandwich cookies | Maintains texture for gluten-Free diets |
| White chocolate melts | Vegan white chocolate | Accommodates vegan preferences |
| Peppermint bits | Reduced-sugar peppermint | Lowers calories for diet-conscious eaters |
These changes help create a customized crunchy cookies peppermint Oreo bark that’s versatile for everyone, from seniors to food enthusiasts.
Mastering Peppermint Oreo Bark: Advanced Tips and Variations
To take your peppermint Oreo bark to the next level, focus on proper techniques like tempering the chocolate for a shiny finish. This ensures the bark snaps perfectly and looks as good as it tastes. For flavor variations, try adding crushed nuts or dried fruit to mix things up, which can make it even more exciting for chocolate lovers.
Presentation is key, so consider using molds or drizzling extra chocolate on top for a professional touch. If you’re planning ahead, this treat freezes well for several months. For more inspiration on chocolate treats, check out this resource on chocolate treat ideas from our blog.
Another pro tip is to press the cookies into the first layer of chocolate to keep them secure when cutting. This peppermint Oreo bark recipe is all about experimenting while keeping it simple.
Storage and Make-Ahead Options
Prepare large batches in advance and store them for busy times, ensuring they’re sealed tight. Adding twists like cinnamon can give a seasonal flair without overpowering the main flavors.
How to Store Peppermint Oreo Bark: Best Practices
Once your peppermint Oreo bark is set and cut, proper storage keeps it fresh and tasty. Keep it in an airtight container in the fridge for up to two weeks to preserve that creamy texture. Freezing is another great option, wrapping it tightly for up to three months so you can pull it out when needed.
For reheating, let it sit at room temperature instead of warming it, as it tastes best when cool. This approach works well for meal prep, letting you portion it out for quick snacks. The nutritional info per serving includes about 206 calories, with 11g of fat, so it’s a treat you can enjoy in moderation.
FAQs: Frequently Asked Questions About Peppermint Oreo Bark
What type of chocolate is best for making Peppermint Oreo Bark?
For smooth melting and rich flavor, use good quality white chocolate or white chocolate melting wafers. They melt creamy and provide the right sweetness that complements the peppermint and Oreo cookies well. Dark or semi-sweet chocolate can be added for swirls if you want a two-toned look, but white chocolate is usually the base. Avoid using low-quality chocolate as it may become grainy when melted.
How do I keep the Oreo cookies from shifting when spreading the melted chocolate?
To prevent the Oreos from moving, dip the bottom of each cookie in a small amount of melted white chocolate and place them on the lined pan. This acts as a “glue” holding them in place. Once set, you can spread the remaining melted white chocolate carefully over and around the cookies without disturbing their arrangement.
What’s the easiest way to achieve a swirled look with white and dark chocolate on Peppermint Oreo Bark?
After spreading the white chocolate base, drop small spoonfuls of melted dark chocolate onto the surface. Use a toothpick or skewer to gently swirl the two chocolates together. This creates an attractive marbled effect without mixing the colors completely, giving you a layered and decorative finish once the bark sets.
How should I cut and store Peppermint Oreo Bark to keep it fresh?
Use a sharp knife to cut the bark into pieces, preferably triangles or squares, before the chocolate fully hardens to avoid cracking. Once cut, store the pieces in an airtight container at room temperature to maintain crunch and flavor. If your environment is warm, keep them in the refrigerator but bring to room temperature before serving for the best taste.
Can I substitute white chocolate chips for melting wafers in this recipe?
Yes, white chocolate chips can replace melting wafers, but they melt less smoothly and can seize if overheated. To melt chips evenly, heat them gently at 50% power in short increments, stirring frequently. You can add a small amount of butter or vegetable shortening to improve meltability and texture, helping the chocolate spread more easily for your bark.
Peppermint Oreo Bark
🍫 Enjoy a festive holiday treat that combines creamy chocolate and crunchy Oreo cookies for a delightful snack.
🎄 This Peppermint Oreo Bark is quick to make and perfect for sharing or gifting during the holiday season.
- Total Time: 15 minutes
- Yield: About 30 servings
Ingredients
– 1 package (10 ounces) thin chocolate cookies (35-40 cookies) for crunchy base
– 2 bags (10 ounces each) white chocolate melts for creamy foundation
– 1 bag (10 ounces) chocolate melts for rich, dark notes
– 1/4 cup peppermint bits for refreshing burst
Instructions
1-Prepare your pan: Prepare your pan by lining it with foil or parchment paper for easy lifting.
2-Melt the white and chocolate melts: Melt the white and chocolate melts as directed, taking care to stir frequently.
3-Dip each cookie bottom: Dip each cookie bottom in melted white chocolate and arrange them on the pan.
4-Spread the remaining white chocolate: Spread the remaining white chocolate over the cookies using a flat spatula for an even layer.
5-Drop spoonfuls of melted chocolate: Drop spoonfuls of melted chocolate on top and swirl gently to create that eye-catching marbled look.
6-Sprinkle the peppermint bits: Sprinkle the peppermint bits immediately before the chocolate sets.
7-Let it set completely: Let it set completely, then cut into pieces with a large knife for neat portions.
8-Store in a sealed container: Store in a sealed container, and remember, it’s best shared to avoid eating it all at once!
Last Step:
Please leave a rating and comment letting us know how you liked this recipe! This helps our business to thrive and continue providing free, high-quality recipes for you.Notes
🍫 Select high-quality chocolate for a smooth and creamy texture.
🍬 Use foil or parchment paper for easy removal from the pan.
🔪 Cut with a knife for neat pieces rather than breaking by hand.
- Prep Time: 15 minutes
- Category: Dessert
- Method: Melting and assembling
- Cuisine: American
- Diet: Vegetarian
Nutrition
- Serving Size: 1 piece
- Calories: 206
- Sugar: 21 g
- Sodium: 69 mg
- Fat: 11 g
- Saturated Fat: 6 g
- Unsaturated Fat: 4 g
- Trans Fat: 0 g
- Carbohydrates: 25 g
- Fiber: 1 g
- Protein: 2 g
- Cholesterol: 6 mg





