

Why You’ll Love These Peanut Butter Rice Krispie Treats
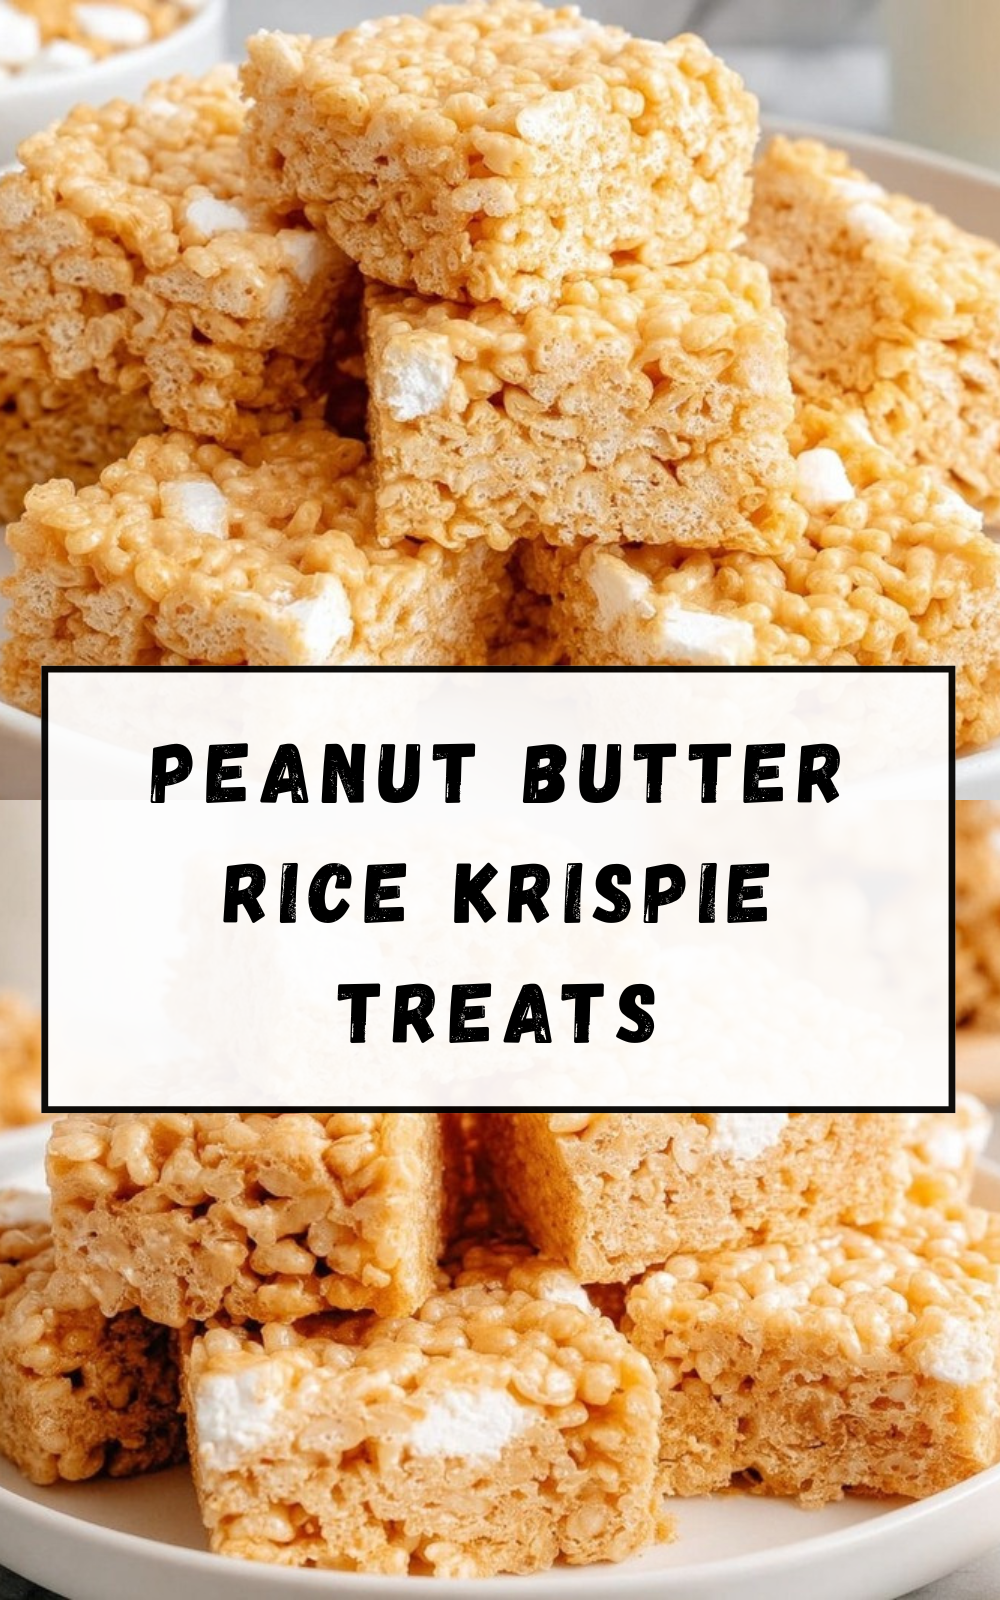
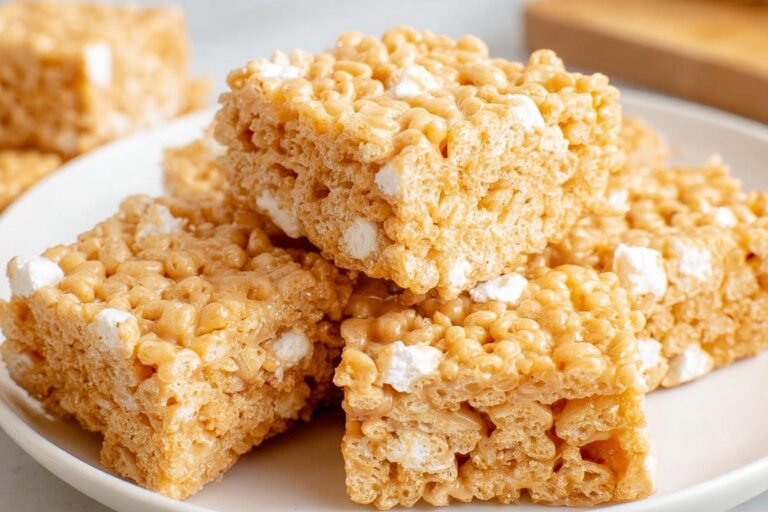
These Peanut Butter Rice Krispie Treats are the kind of dessert that feels like a small win on a busy day. They come together in about 15 minutes, need just one pot, and do not ask much from you besides a little stirring and a gentle hand when pressing them into the pan. If you like no-fuss sweets that still taste like something special, this is a solid one to keep close.
- Easy to make: With only 10 minutes of prep and 5 minutes of cook time, these peanut butter Rice Krispie treats are quick enough for after-school snacks, last-minute desserts, or weekend cravings.
- Nice balance of comfort and fuel: Each serving has protein from peanut butter, a bit of fiber, and enough carbs to make these treats satisfying without feeling overly heavy.
- Flexible for different tastes: You can use creamy peanut butter or crunchy, swap in store-brand cereal, or add mix-ins like chocolate chips and sprinkles to fit your mood.
- Big peanut butter flavor: The mix of melted marshmallows, salted butter, and peanut butter gives these Peanut Butter Rice Krispie Treats a rich, sweet-salty taste that stands out from the usual version.
These bars are also great for home cooks who want a dessert that is simple but still fun to share. If you enjoy easy no bake desserts, you may also like more quick recipes on Savoring Flavors. For readers curious about food safety and ingredient handling, the latest food education update from THOCC is worth a look.
One of the best things about Peanut Butter Rice Krispie Treats is how they turn pantry basics into something people actually get excited about.
Jump to:
- Why You’ll Love These Peanut Butter Rice Krispie Treats
- Essential Ingredients for Peanut Butter Rice Krispie Treats
- Main ingredients
- Pan and finishing basics
- Special dietary options
- How to Prepare the Perfect Peanut Butter Rice Krispie Treats: Step-by-Step Guide
- First step: Get the pan ready
- Second step: Melt the butter slowly
- Third step: Add the marshmallows
- Fourth step: Stir in the peanut butter
- Fifth step: Add the vanilla
- Sixth step: Fold in the cereal
- Seventh step: Press into the pan
- Eighth step: Let them set
- Ninth step: Serve and enjoy
- Dietary Substitutions to Customize Your Peanut Butter Rice Krispie Treats
- Protein and main ingredient alternatives
- Vegetable, sauce, and seasoning modifications
- Mastering Peanut Butter Rice Krispie Treats: Advanced Tips and Variations
- Pro cooking techniques
- Flavor variations
- Presentation tips
- Make-ahead options
- How to Store Peanut Butter Rice Krispie Treats
- FAQs: Frequently Asked Questions About Peanut Butter Rice Krispie Treats
- Are peanut butter Rice Krispie treats no bake?
- Why did my peanut butter Rice Krispie treats turn out hard?
- Can I use other cereals for peanut butter Rice Krispie treats?
- What can I add to peanut butter Rice Krispie treats?
- How do you store peanut butter Rice Krispie treats?
- Peanut Butter Rice Krispie Treats
- Ingredients
- Instructions
- Last Step:
- Notes
- Nutrition
- Did you make this recipe?
Essential Ingredients for Peanut Butter Rice Krispie Treats
Main ingredients
- 4 tablespoons salted butter – This gives the treats rich flavor and helps melt the marshmallows into a smooth base.
- 10-ounce bag mini marshmallows, about 5 cups – These create the classic gooey texture that holds the bars together.
- 1/2 cup creamy peanut butter – This adds that nutty, salty-sweet flavor. Crunchy peanut butter can also be used if you want a little texture.
- 1/2 teaspoon vanilla extract, optional – A small splash of vanilla rounds out the flavor and makes the bars taste a little warmer and more homemade.
- 6 cups puffed rice cereal – This gives the treats their light crunch and helps them hold their shape.
Pan and finishing basics
- Nonstick cooking spray or parchment paper – Either one helps the bars release easily from the pan.
Special dietary options
- Vegan: Use plant-based butter, vegan marshmallows, and a peanut butter that fits your needs.
- Gluten-free: Pick a certified gluten-free puffed rice cereal and check the marshmallows and vanilla for label details.
- Lower sugar: Try a smaller portion size, or add a few mix-ins instead of extra sweet toppings.
If you want a similar easy treat idea for another day, check out simple snack recipes at Savoring Flavors. For people who like to read up on how sweet foods fit into the bigger picture, this article on sugar and health from Medical News Today gives helpful background.
| Ingredient | Amount | Role in the recipe |
|---|---|---|
| Salted butter | 4 tablespoons | Creates a rich base and keeps the bars from tasting flat. |
| Mini marshmallows | 10-ounce bag, about 5 cups | Melts into the sticky binder. |
| Peanut butter | 1/2 cup | Adds flavor and creaminess. |
| Vanilla extract | 1/2 teaspoon, optional | Adds a gentle sweet aroma. |
| Puffed rice cereal | 6 cups | Gives the treats their classic crisp bite. |
How to Prepare the Perfect Peanut Butter Rice Krispie Treats: Step-by-Step Guide
First step: Get the pan ready
Start by spraying a 9×9-inch casserole dish with nonstick cooking spray or lining it with parchment paper for easier removal. If you want thinner bars, use a 9×13-inch dish instead. This small choice makes a big difference in how thick the final treats look and how easy they are to cut later. If you plan to add toppings like melted chocolate, a lined pan also helps keep things neat.
Second step: Melt the butter slowly
Set a large saucepan or pot over low heat and melt the 4 tablespoons salted butter slowly. Low heat matters here because high heat can scorch the butter and make the final bars hard. Stir once or twice as it melts so it moves evenly across the bottom of the pan. This is one of those recipes where patience pays off in chewy treats.
Third step: Add the marshmallows
Once the butter has melted, add the 10-ounce bag of mini marshmallows. Keep the heat low and stir until the marshmallows soften and melt into a smooth, glossy mixture. This usually takes only a few minutes, but it is worth staying nearby. If you rush this part, the texture can turn stiff instead of soft and gooey.
Fourth step: Stir in the peanut butter
Add the 1/2 cup creamy peanut butter and stir constantly for a couple of minutes. This helps the peanut butter melt evenly and keeps it from sticking to the bottom of the pan. If you are using crunchy peanut butter, the texture will be a little more rustic, which can be fun. Natural peanut butter with no added sugar or salt can work too, but add it gradually because it may make the treats less firm.
Low heat is the secret here. If the marshmallow mixture gets too hot, the bars can turn hard instead of soft and chewy.
Fifth step: Add the vanilla
Remove the pan from the heat and stir in 1/2 teaspoon vanilla extract if you are using it. This step is optional, but it adds a warm, sweet note that works really well with peanut butter. It is a small touch, but small touches often make a home recipe feel extra cozy.
Sixth step: Fold in the cereal
Add the 6 cups puffed rice cereal to the saucepan. Stir gently but thoroughly until every piece is coated. The mixture will be sticky, so a sturdy spoon or spatula helps here. If you want to add mix-ins like mini chocolate chips, peanut butter chips, or sprinkles, this is the moment to do it. Keep the total amount of extras modest so the bars still hold together well.
Seventh step: Press into the pan
Pour the mixture into the prepared dish. Spray your hands with nonstick spray and gently press the mixture into an even layer. Do not pack it down too hard, because that can make the treats dense. A light touch gives you bars that stay soft and chewy after they set.
Eighth step: Let them set
Allow the treats to set for 30 to 45 minutes before slicing. If you are in a hurry, you can place the pan in a cool spot on the counter, but avoid the refrigerator unless you want firmer bars. Once set, cut into squares or rectangles, depending on your mood and the size of your pan. A 9×9-inch pan gives thicker squares, while a 9×13-inch pan makes thinner bars.
Ninth step: Serve and enjoy
Once the bars are firm, lift them from the pan if you lined it, cut them into pieces, and serve. These peanut butter Rice Krispie treats are best fresh, when the texture is soft and the peanut butter flavor is at its peak. They are also easy to pack for school lunches, road trips, or a quick desk snack.

Dietary Substitutions to Customize Your Peanut Butter Rice Krispie Treats
Protein and main ingredient alternatives
If you want to shift the flavor or work around what is already in your pantry, there are a few easy swaps for Peanut Butter Rice Krispie Treats. Almond butter or sunflower seed butter can stand in for peanut butter, though the texture may change a little. If you prefer a stronger crunch, try crunchy peanut butter instead of creamy. For a sweeter twist, chocolate puffed rice cereal gives you a chocolate and peanut butter combo that tastes like a treat shop snack.
Vegetable, sauce, and seasoning modifications
This recipe is simple, so the main changes usually come from mix-ins and toppings rather than big ingredient swaps. You can stir in white chocolate chips, dark chocolate chips, crushed candies, or mini chocolate chips. A drizzle of melted chocolate on top adds a pretty finish, and a small pinch of flaky salt can make the peanut butter flavor pop even more. For a more holiday-style version, add sprinkles or candy pieces before the bars set.
Mastering Peanut Butter Rice Krispie Treats: Advanced Tips and Variations
Pro cooking techniques
For the best texture, keep everything on low heat and move quickly once the cereal goes in. The mixture firms up fast, so it helps to have the pan ready before you start melting anything. If your kitchen runs warm, lightly spray the spatula and your hands so the sticky mixture stays manageable. You can also make the recipe in a crockpot on low, which takes about 45 minutes but gives you more hands-off time and helps avoid burning.
Flavor variations
There are a lot of fun ways to play with Peanut Butter Rice Krispie Treats. Add peanut butter chips for a richer nutty bite, or mix in crushed pretzels if you like salty crunch. Holiday versions can include M&Ms or candy cane bits, while a chocolate drizzle adds a bakery-style finish. If you want a more dessert-like bar, try a layer of melted chocolate on top before slicing.
Presentation tips
For neat squares, let the bars sit fully before cutting with a sharp knife. Wiping the knife between cuts helps keep the edges clean. If you want to serve them at a party, place each square in a paper liner or stack them on a simple tray. They look especially nice with a few mini chocolate chips scattered on top before the bars set.
Make-ahead options
This recipe can be made up to one day in advance, which is handy for busy weeks and party planning. The treats are best eaten the day they are made, but they still keep well in an airtight container if you need to save some for later. If they start to feel a little stale, a quick 5 to 10 seconds in the microwave brings back some softness. That tiny refresh can make them taste close to fresh again.
How to Store Peanut Butter Rice Krispie Treats
Store Peanut Butter Rice Krispie Treats in an airtight container at room temperature for up to 2 days. For the best texture, keep them in a single layer or place parchment paper between layers so they do not stick together. Refrigeration is not the best choice because it can make the bars firm and a little hard.
If you want to freeze them, wrap each square individually in plastic wrap and place them in a zip-top freezer bag. They can stay frozen for up to 1 month. Thaw them at room temperature or microwave them for 10 to 15 seconds to bring back some softness. If you are making a batch for later in the week, this is a handy option for meal prep and lunch boxes.
For the chewiest result, store them at room temperature and eat them sooner rather than later.
FAQs: Frequently Asked Questions About Peanut Butter Rice Krispie Treats
Are peanut butter Rice Krispie treats no bake?
Yes, peanut butter Rice Krispie treats are completely no-bake, making them a quick dessert ready in under 20 minutes. Start by melting ½ cup butter and 10 oz marshmallows over low heat in a large pot, stirring until smooth. Stir in ½ cup peanut butter until fully combined. Remove from heat and mix in 6 cups Rice Krispies cereal until coated. Press the mixture evenly into a greased 9×9-inch pan using a spatula or waxed paper. Let cool for 30 minutes before cutting into squares. This method avoids the oven entirely, perfect for hot days or easy kitchen tasks. Store leftovers in an airtight container at room temperature for up to 2 days. Yields 16 treats. (92 words)
Why did my peanut butter Rice Krispie treats turn out hard?
Hard peanut butter Rice Krispie treats usually result from high heat while melting the marshmallows and butter, which makes them tough. Always use low heat and stir constantly until smooth—about 5-7 minutes. Avoid boiling the mixture. Another cause is overpacking the cereal into the pan; press gently with a spatula or lightly oiled hands to keep them soft and chewy. For extra softness, add 1-2 tablespoons extra butter or a splash of corn syrup. After mixing in peanut butter and cereal, work quickly to prevent sticking and hardening. Cool at room temperature, not in the fridge. These tips ensure gooey, perfect treats every time. (104 words)
Can I use other cereals for peanut butter Rice Krispie treats?
Absolutely, you can swap Rice Krispies for other cereals in peanut butter Rice Krispie treats while keeping the same 6-cup amount. Store-brand crisps work fine for savings without sacrificing taste. Cocoa Krispies add a chocolate-peanut butter twist kids love. Try Cheerios for a healthier oat base, or Fruity Pebbles for colorful fun. Corn flakes offer a crispier texture. Adjust peanut butter to ⅓-½ cup based on flavor preference. Melt marshmallows and butter as usual, stir in peanut butter, then fold in cereal. Press into pan and cool. Experiment, but puffed cereals hold up best to avoid sogginess. Always test a small batch first. (98 words)
What can I add to peanut butter Rice Krispie treats?
Customize peanut butter Rice Krispie treats with mix-ins for variety. Stir in ½ cup mini chocolate chips, peanut butter chips, or white chocolate chips right after adding cereal for melty pockets. Add sprinkles, crushed pretzels, or Reese’s Pieces for crunch and color. For topping, drizzle melted chocolate or peanut butter over the set bars before cutting. Mix in ¼ cup chopped peanuts or pecans for nutty texture. Holiday versions shine with M&Ms or candy cane bits. Keep add-ins under 1 cup total to maintain binding. Press firmly into the pan. These ideas turn basic treats into party favorites without changing the core no-bake recipe. (102 words)
How do you store peanut butter Rice Krispie treats?
Store peanut butter Rice Krispie treats in an airtight container at room temperature for up to 2 days—they’re best fresh on day one for maximum chewiness. Layer with parchment paper to prevent sticking. For longer storage, wrap individually in plastic wrap and freeze in a zip-top bag for up to 1 month. Thaw at room temp or microwave 10-15 seconds to refresh softness. Avoid refrigeration, as it hardens them. If making ahead, prepare the day of serving or up to 24 hours early. In humid areas, add a silica packet to the container. Proper storage keeps them tasting just-made. (96 words)
Peanut Butter Rice Krispie Treats
🥜🍬 Gooey peanut butter rice krispies treats: crunchy PB-packed nostalgia – ultimate quick sweet fix!
🔥 15-min no-bake magic: customizable add-ins, perfect for snacks or parties.
- Total Time: 45 minutes
- Yield: 16 bars
Ingredients
– 4 tablespoons salted butter for creating a rich base and keeping the bars from tasting flat.
– 10-ounce bag, about 5 cups mini marshmallows for melting into the sticky binder.
– 1/2 cup peanut butter for adding flavor and creaminess.
– 1/2 teaspoon, optional vanilla extract for adding a gentle sweet aroma.
– 6 cups puffed rice cereal for giving the treats their classic crisp bite.
Instructions
1-First step: Get the pan ready Start by spraying a 9×9-inch casserole dish with nonstick cooking spray or lining it with parchment paper for easier removal. If you want thinner bars, use a 9×13-inch dish instead. This small choice makes a big difference in how thick the final treats look and how easy they are to cut later. If you plan to add toppings like melted chocolate, a lined pan also helps keep things neat.
2-Second step: Melt the butter slowly Set a large saucepan or pot over low heat and melt the 4 tablespoons salted butter slowly. Low heat matters here because high heat can scorch the butter and make the final bars hard. Stir once or twice as it melts so it moves evenly across the bottom of the pan. This is one of those recipes where patience pays off in chewy treats.
3-Third step: Add the marshmallows Once the butter has melted, add the 10-ounce bag of mini marshmallows. Keep the heat low and stir until the marshmallows soften and melt into a smooth, glossy mixture. This usually takes only a few minutes, but it is worth staying nearby. If you rush this part, the texture can turn stiff instead of soft and gooey.
4-Fourth step: Stir in the peanut butter Add the 1/2 cup creamy peanut butter and stir constantly for a couple of minutes. This helps the peanut butter melt evenly and keeps it from sticking to the bottom of the pan. If you are using crunchy peanut butter, the texture will be a little more rustic, which can be fun. Natural peanut butter with no added sugar or salt can work too, but add it gradually because it may make the treats less firm.
5-Fifth step: Add the vanilla Remove the pan from the heat and stir in 1/2 teaspoon vanilla extract if you are using it. This step is optional, but it adds a warm, sweet note that works really well with peanut butter. It is a small touch, but small touches often make a home recipe feel extra cozy.
6-Sixth step: Fold in the cereal Add the 6 cups puffed rice cereal to the saucepan. Stir gently but thoroughly until every piece is coated. The mixture will be sticky, so a sturdy spoon or spatula helps here. If you want to add mix-ins like mini chocolate chips, peanut butter chips, or sprinkles, this is the moment to do it. Keep the total amount of extras modest so the bars still hold together well.
7-Seventh step: Press into the pan Pour the mixture into the prepared dish. Spray your hands with nonstick spray and gently press the mixture into an even layer. Do not pack it down too hard, because that can make the treats dense. A light touch gives you bars that stay soft and chewy after they set.
8-Eighth step: Let them set Allow the treats to set for 30 to 45 minutes before slicing. If you are in a hurry, you can place the pan in a cool spot on the counter, but avoid the refrigerator unless you want firmer bars. Once set, cut into squares or rectangles, depending on your mood and the size of your pan. A 9×9-inch pan gives thicker squares, while a 9×13-inch pan makes thinner bars.
9-Ninth step: Serve and enjoy Once the bars are firm, lift them from the pan if you lined it, cut them into pieces, and serve. These peanut butter Rice Krispie treats are best fresh, when the texture is soft and the peanut butter flavor is at its peak. They are also easy to pack for school lunches, road trips, or a quick desk snack.
Last Step:
Please leave a rating and comment letting us know how you liked this recipe! This helps our business to thrive and continue providing free, high-quality recipes for you.Notes
🔥 Low heat only – prevents burning, keeps chewy.
📏 9×13 pan = thinner, crispier bars.
🍫 Mix in chips or drizzle chocolate for upgrades.
- Prep Time: 10 minutes
- Setting: 30 minutes
- Cook Time: 5 minutes
- Category: Desserts
- Method: No-Bake
- Cuisine: American
- Diet: Vegetarian
Nutrition
- Serving Size: 1 bar
- Calories: 321 kcal
- Sugar: 21 g
- Sodium: 255 mg
- Fat: 14 g
- Saturated Fat: 6 g
- Unsaturated Fat: 8 g
- Trans Fat: 0 g
- Carbohydrates: 45 g
- Fiber: 1 g
- Protein: 6 g
- Cholesterol: 20 mg





