

Why You’ll Love Oreo Penguins
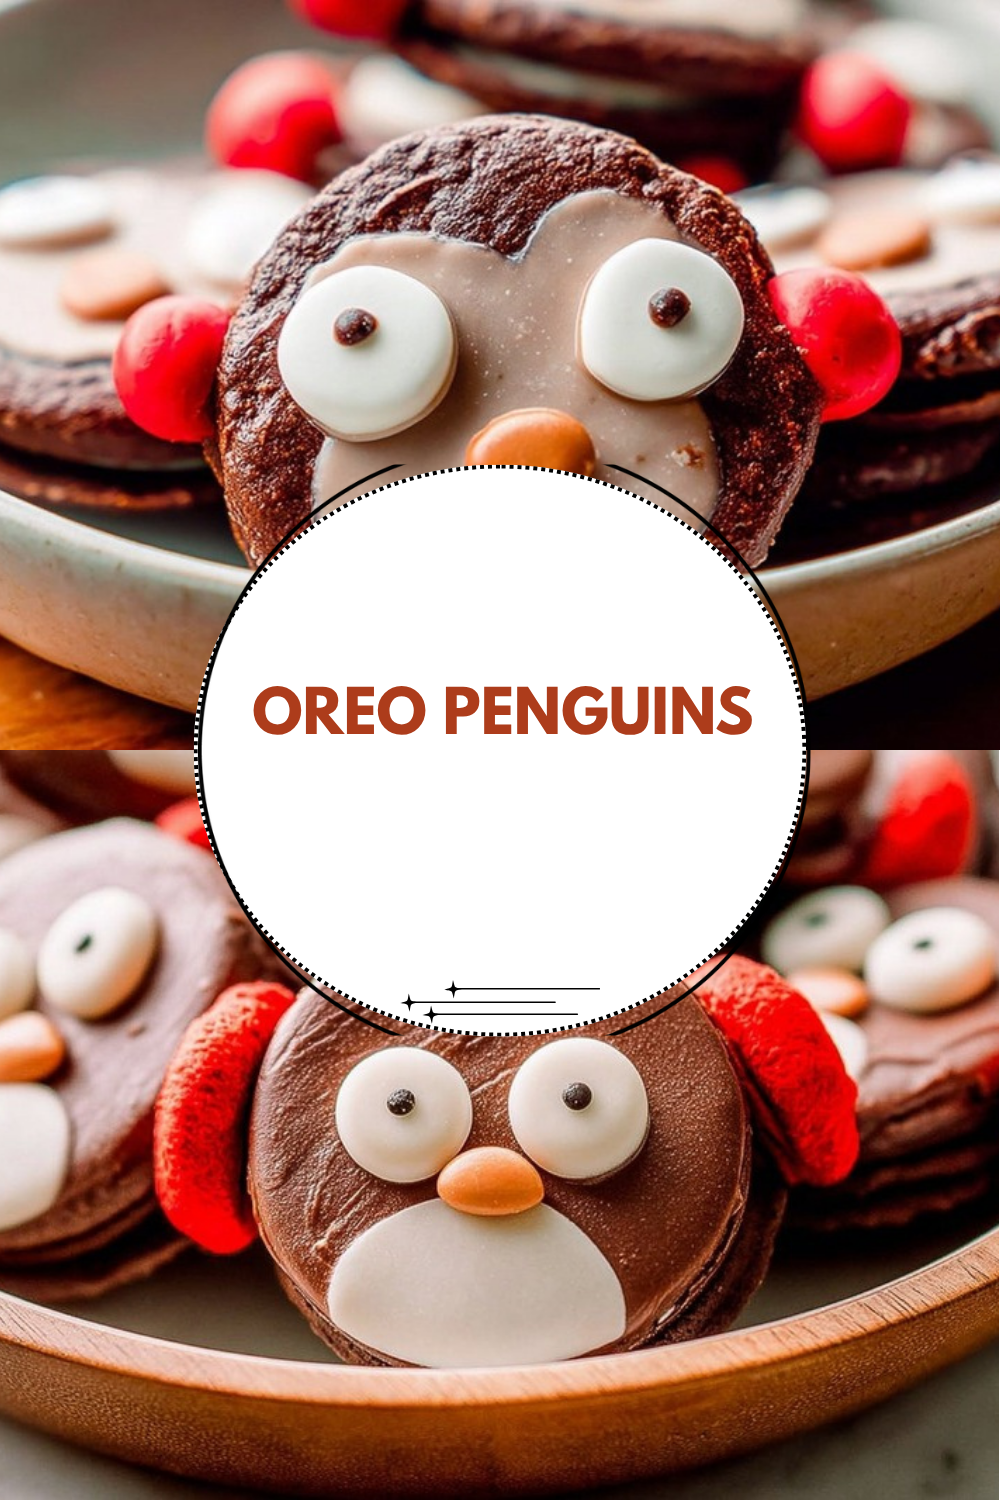
Oreo Penguins are one of those fun no-bake treats that bring a big smile with very little effort. They are cute, quick, and perfect for busy days when you want a holiday dessert that still feels special. If you are looking for a simple project that kids can help with, this Oreo Penguins recipe is a great pick.
- Easy to make: This Oreo Penguins recipe uses simple steps and no oven at all. You only need a few ingredients, a microwave, and about 30 minutes from start to finish. That makes it a smart choice for busy parents, students, and anyone who wants a fast treat.
- Fun for family time: Kids love helping with the wing pieces, eyes, and heart sprinkles. Broken cookie bits even become a tasty snack during prep, which helps keep little helpers happy while you work.
- Great for many occasions: The heart sprinkles make these Oreo Penguins perfect for Valentine’s Day, but you can swap in other candies to fit birthdays, winter parties, classroom events, or holiday trays.
- Sweet, playful flavor: Since the recipe starts with chocolate sandwich cookies and creamy candy melts, the result tastes familiar and crowd pleasing. It is a cute dessert that feels festive without being complicated.
These little penguins are the kind of treat that looks fancy on a plate, but comes together with everyday ingredients and a few easy decorating steps.
If you enjoy simple holiday sweets like this, you may also like easy no-bake desserts for more quick ideas from the kitchen. For cookie lovers, the official Oreo recipe ideas page is also a fun place to browse for inspiration.
Jump to:
- Why You’ll Love Oreo Penguins
- Essential Ingredients for Oreo Penguins
- Main Ingredients List
- Special Dietary Options
- How to Prepare the Perfect Oreo Penguins: Step-by-Step Guide
- First Step: Separate and prep the cookies
- Second Step: Shape the wings
- Third Step: Melt the white candy
- Fourth Step: Create a piping tip
- Fifth Step: Add the penguin belly
- Sixth Step: Build the face
- Seventh Step: Add the feet and wings
- Eighth Step: Let them set
- Dietary Substitutions to Customize Your Oreo Penguins
- Protein and Main Component Alternatives
- Vegetable, Sauce, and Seasoning Modifications
- Mastering Oreo Penguins: Advanced Tips and Variations
- Pro cooking techniques
- Flavor variations
- Presentation tips
- Make-ahead options
- How to Store Oreo Penguins: Best Practices
- Refrigeration
- Freezing
- Reheating
- Meal prep considerations
- FAQs: Frequently Asked Questions About Oreo Penguins
- What ingredients do I need to make Oreo penguins?
- How do you melt candy melts for Oreo penguins?
- How do you make wings for Oreo penguin cookies?
- How do you assemble Oreo penguins step by step?
- Can I customize Oreo penguins for different holidays?
- Oreo Penguins
- Ingredients
- Instructions
- Last Step:
- Notes
- Nutrition
- Did you make this recipe?
Essential Ingredients for Oreo Penguins
This Penguin Cookies Recipe keeps the ingredient list short, which is part of the charm. Each item has a clear purpose, and the decorations are easy to adjust based on the holiday or theme you want.
| Ingredient | Amount | Why It Matters |
|---|---|---|
| Chocolate sandwich cookies | Quantities as needed per batch | The base of the penguin and the main cookie flavor |
| White melting candies | Small handful per assembly batch | Used to create the belly and attach the decorations |
| Small candy eyeballs | 2 per cookie | Gives each penguin its face |
| Small heart sprinkles | 1 per beak and 2 per feet, upside-down | Used for the beak and feet, with a cute Valentine’s look |
Main Ingredients List
- Chocolate sandwich cookies, quantities as needed per batch
- White melting candies, small handful per assembly batch
- Small candy eyeballs, 2 per cookie
- Small heart sprinkles, 1 per beak and 2 per feet, upside-down
Special Dietary Options
- Vegan: Use vegan chocolate sandwich cookies and dairy-free white candy melts. Check that the sprinkles and candy eyes are also plant-based.
- Gluten-free: Swap in gluten-free chocolate sandwich cookies so the treat works for more guests.
- Low-calorie: Make smaller cookies or use fewer decorations per piece for a lighter sweet bite.
How to Prepare the Perfect Oreo Penguins: Step-by-Step Guide
Making Oreo Penguins is simple, but a little care at each step helps the cookies look neat and cute. Set out all of your ingredients first so the decorating goes smoothly. If you are making them with children, this is a good time to split the jobs so everyone has a safe and fun part to do.
First Step: Separate and prep the cookies
Start by separating some chocolate sandwich cookies and scraping out the filling. This gives you clean cookie halves to work with. Place one cookie half on a cutting board and use a careful sawing motion to cut three slices from the edge of each cookie half. Go slow here, since a quick back-and-forth motion works better than pressing down hard. If some pieces break, save them for a snack.
Second Step: Shape the wings
Cut each slice in half to create wings. You will usually get a few wing pieces from each cookie half, which is why this recipe is so handy for batch making. Broken pieces are fine and can be eaten during prep, especially if kids are helping. Try to keep the wing pieces roughly even so the penguins look balanced when attached.
Third Step: Melt the white candy
Place a small handful of white melting candies into a plastic sandwich bag. Microwave them in 30-second intervals, kneading between each round until the candy is fully melted and smooth. If the candy gets thick, knead it again before reheating for a few seconds. A very small amount of candy works best because it melts faster and is easier to manage.
Fourth Step: Create a piping tip
Snip a tiny corner off the bag to pipe the melted candy. Keep the opening very small so you have better control when piping the glue-like candy. This helps you place the eyes, beak, feet, and wings without making a mess. If the hole is too big, the candy can spread too quickly and cover the details.
Fifth Step: Add the penguin belly
Pipe melted candy onto the back of a white melting candy piece and place it near the bottom of a cookie half to form the penguin’s belly. Press lightly so it sticks well. This white center is what gives Oreo Penguins their classic look, and it makes the design easy to recognize right away.
Sixth Step: Build the face
Attach two candy eyeballs above the belly with melted candy. Then attach one heart sprinkle below the eyes for the beak. For a sweet holiday look, place the heart with the point facing downward. This tiny detail gives the penguin a playful personality and makes the treat extra cute on a dessert tray.
Seventh Step: Add the feet and wings
Attach two upside-down heart sprinkles at the bottom for feet using melted candy. If you want wings, attach them on each side with a small dab of melted candy. The wings are optional, but they really help the penguins look more finished and fun. This step is also where the broken pieces from earlier can come in handy if you need a few extra wing shapes.
Eighth Step: Let them set
Let the assembled cookies set undisturbed for 5 to 10 minutes until the candy is fully set. Place them on parchment paper or a clean tray so they do not stick. Once the candy hardens, the penguins are ready to serve. The total preparation time is about 30 minutes, which makes this a great last-minute holiday treat.
A small piping tip and a steady hand make a big difference when decorating Oreo Penguins.
For more decorating help, you can also check the candy melt tips from Wilton’s candy melt guide, which is helpful for beginners.

Dietary Substitutions to Customize Your Oreo Penguins
Protein and Main Component Alternatives
Even though Oreo Penguins are a sweet treat, there are still easy ways to adjust the main ingredients for different eating needs. The cookie base and candy decorations can be swapped to match what you have on hand or what your guests prefer.
- Vegan option: Use vegan chocolate sandwich cookies and dairy-free white candy melts. Many plant-based candy eyes and sprinkles are also available online.
- Gluten-free option: Choose gluten-free sandwich cookies in place of regular Oreos. The rest of the recipe can stay the same if the candies are gluten-free too.
- Lower sugar option: Use smaller cookies or serve half-sized penguins to keep portions lighter.
Vegetable, Sauce, and Seasoning Modifications
This recipe does not use vegetables or seasoning, but you can still change the look with a few simple swaps. Mini chocolate candies, orange sprinkles, or different colored heart sprinkles can stand in for the beak and feet. That means you can keep the same easy decorating method while changing the theme for different seasons or parties.
For example, use orange pieces for a classic penguin feel, red hearts for Valentine’s Day, or silver sprinkles for winter celebrations. The recipe stays simple, but the look changes fast, which is great for busy schedules and family events.
Mastering Oreo Penguins: Advanced Tips and Variations
Once you have made a batch or two, a few small tricks can make your Oreo Penguins look even better. These ideas are helpful for holiday trays, school parties, and family baking afternoons. They also make the process smoother if you are working with a bigger batch.
Pro cooking techniques
Cut the wings with a quick sawing motion rather than a hard press. This helps reduce breakage and gives you more usable pieces. Also, keep the candy melts warm but not too hot, since overheated candy can get thick or grainy. If that happens, knead the bag gently and let it cool for a moment before piping again.
Flavor variations
Heart sprinkles are perfect for a Valentine’s theme, but you can switch them out for mini chocolate candies or other sprinkles to match any occasion. Try orange accents for a classic look, pastel pieces for spring, or colorful sprinkles for birthdays. The simple cookie base works well with many styles, so you can change the design without changing the recipe.
Presentation tips
Arrange the finished cookies on a white platter or a tray lined with parchment paper. A few extra sprinkles around the plate can make the display feel festive. If you are serving them for a party, group them in small rows so the penguins are easy to grab and admire.
Make-ahead options
You can separate the cookies and cut the wing pieces ahead of time, then store them in an airtight container until you are ready to decorate. This is helpful for busy parents or anyone planning a holiday dessert table. Since the cookies set in just a few minutes, you can also finish assembly close to serving time.
How to Store Oreo Penguins: Best Practices
Oreo Penguins are best enjoyed soon after making them, but you can still store leftovers with a little care. The cookies stay neat when kept dry and protected from air and moisture.
Refrigeration
Store the finished cookies in an airtight container in the refrigerator if your kitchen is warm. Keep them in a single layer if possible, or place parchment paper between layers. They should hold up well for a few days.
Freezing
Freezing is not the best choice for decorated Oreo Penguins, since condensation can soften the candy details. If you need to prep ahead, freeze only the plain cookie halves or the wing pieces, then decorate later.
Reheating
There is no reheating needed for this no-bake treat. If the cookies come from the fridge, let them sit at room temperature for a few minutes before serving so the texture is a little softer.
Meal prep considerations
If you are making a large batch for a class party or holiday dessert table, prep the cookies and decorations in stages. That way, you can decorate quickly right before serving and keep the finished Oreo Penguins looking fresh.
FAQs: Frequently Asked Questions About Oreo Penguins
What ingredients do I need to make Oreo penguins?
To make cute Oreo penguins, gather these simple ingredients: one package of regular Oreo cookies (double-stuffed works best for easier separation), white candy melts (about 12 ounces), small black candy eyes (one bag of 100-200 pieces), and small heart-shaped red sprinkles (for beaks and feet; one small container). Optional: orange sprinkles or mini chocolate chips for variety. This recipe yields about 20-24 penguins, perfect for parties or snacks. All items are available at most grocery stores or online. Double-check for allergies, as Oreos contain wheat, soy, and dairy. Prep time is under 30 minutes, plus setting time. Keep it budget-friendly—total cost around $10-15. (78 words)
How do you melt candy melts for Oreo penguins?
Melting candy melts is quick and mess-free for Oreo penguins. Place a small handful (about 1/4 cup) into a quart-sized plastic sandwich bag. Microwave on high in 30-second bursts, kneading the bag after each interval until fully smooth (usually 1-2 minutes total—avoid overheating to prevent seizing). Snip a tiny corner off one end of the bag to create a piping tip for precise attachment. If it thickens, reheat briefly. Pro tip: Work in small batches to keep it fluid. This method prevents lumps and works without a double boiler. Always use clean, dry tools. Leftover melts store in the fridge for up to a week. (102 words)
How do you make wings for Oreo penguin cookies?
Creating wings adds charm to Oreo penguins. Start by separating 10-12 Oreo cookies and scraping off the cream filling with a knife. For each cookie half, use a serrated knife to carefully saw three thin slices from the rounded outer edge, about 1/4-inch wide each. Cut each slice in half crosswise to form a pair of wings (one set per penguin). Trim edges smooth if needed. Attach with melted white candy melts. This step takes 10 minutes for 20 penguins. Kids can help with supervision. Store extra wings in an airtight container for quick future use. Wings make the penguins look more realistic and fun for holiday displays. (108 words)
How do you assemble Oreo penguins step by step?
Assembling Oreo penguins is straightforward: 1) Pipe melted white candy melts onto the center-front of a whole Oreo for the belly—let it set 1 minute. 2) Add two candy eyes above the belly with a dot of melts. 3) Attach an upright heart sprinkle below the eyes as the beak using more melts. 4) Pipe two upside-down hearts at the bottom front for feet. 5) Optional: Add wings on the sides. Place on parchment paper and let set 5-10 minutes at room temp (or fridge for 2-3 minutes). Makes 20-24 treats. Handle gently to avoid smudges. Perfect no-bake project for kids. (96 words)
Can I customize Oreo penguins for different holidays?
Yes, Oreo penguins are highly customizable beyond Valentine’s. Swap red heart sprinkles for orange mini M&Ms or carrot candies for Halloween “pumpkin penguins,” green for St. Patrick’s Day, or blue/silver for Hanukkah. Use black/white sprinkles for New Year’s or chocolate chips for Christmas trees. For Easter, add pastel candy eggs as “feet.” Keep the white belly, eyes, and wings the same for consistency. Test attachments with melted candy first. This flexibility makes them ideal for parties—adapt to themes without new recipes. Share your versions on social media for inspiration. Shelf life: 1 week in airtight container at room temp. (92 words)

Oreo Penguins
🐧 Whip up these cute Penguin Oreo Treats for a fun, creative activity that delights kids and adults alike!
🎉 Perfect no-bake holiday dessert that’s quick to make and brings smiles to any party.
- Total Time: 40 minutes
- Yield: 12 penguins
Ingredients
– Quantities as needed per batch Chocolate sandwich cookies for the base of the penguin and the main cookie flavor
– Small handful per assembly batch White melting candies for creating the belly and attaching the decorations
– 2 per cookie Small candy eyeballs for giving each penguin its face
– 1 per beak and 2 per feet, upside-down Small heart sprinkles for the beak and feet, with a cute Valentine’s look
Instructions
1-First Step: Separate and prep the cookies Start by separating some chocolate sandwich cookies and scraping out the filling. This gives you clean cookie halves to work with. Place one cookie half on a cutting board and use a careful sawing motion to cut three slices from the edge of each cookie half. Go slow here, since a quick back-and-forth motion works better than pressing down hard. If some pieces break, save them for a snack.
2-Second Step: Shape the wings Cut each slice in half to create wings. You will usually get a few wing pieces from each cookie half, which is why this recipe is so handy for batch making. Broken pieces are fine and can be eaten during prep, especially if kids are helping. Try to keep the wing pieces roughly even so the penguins look balanced when attached.
3-Third Step: Melt the white candy Place a small handful of white melting candies into a plastic sandwich bag. Microwave them in 30-second intervals, kneading between each round until the candy is fully melted and smooth. If the candy gets thick, knead it again before reheating for a few seconds. A very small amount of candy works best because it melts faster and is easier to manage.
4-Fourth Step: Create a piping tip Snip a tiny corner off the bag to pipe the melted candy. Keep the opening very small so you have better control when piping the glue-like candy. This helps you place the eyes, beak, feet, and wings without making a mess. If the hole is too big, the candy can spread too quickly and cover the details.
5-Fifth Step: Add the penguin belly Pipe melted candy onto the back of a white melting candy piece and place it near the bottom of a cookie half to form the penguin’s belly. Press lightly so it sticks well. This white center is what gives Oreo Penguins their classic look, and it makes the design easy to recognize right away.
6-Sixth Step: Build the face Attach two candy eyeballs above the belly with melted candy. Then attach one heart sprinkle below the eyes for the beak. For a sweet holiday look, place the heart with the point facing downward. This tiny detail gives the penguin a playful personality and makes the treat extra cute on a dessert tray.
7-Seventh Step: Add the feet and wings Attach two upside-down heart sprinkles at the bottom for feet using melted candy. If you want wings, attach them on each side with a small dab of melted candy. The wings are optional, but they really help the penguins look more finished and fun. This step is also where the broken pieces from earlier can come in handy if you need a few extra wing shapes.
8-Eighth Step: Let them set Let the assembled cookies set undisturbed for 5 to 10 minutes until the candy is fully set. Place them on parchment paper or a clean tray so they do not stick. Once the candy hardens, the penguins are ready to serve. The total preparation time is about 30 minutes, which makes this a great last-minute holiday treat.
Last Step:
Please leave a rating and comment letting us know how you liked this recipe! This helps our business to thrive and continue providing free, high-quality recipes for you.Notes
💕 Customize with different sprinkles for any holiday or theme!
✂️ Use a gentle sawing motion when cutting wings to avoid breakage.
👶 Broken cookie pieces are a tasty treat for kids during prep!
- Prep Time: 30 minutes
- Setting: 10 minutes
- Cook Time: 0 minutes
- Category: Desserts
- Method: No-Bake
- Cuisine: American
- Diet: Vegetarian
Nutrition
- Serving Size: 1 penguin
- Calories: 110 kcal
- Sugar: 10 g
- Sodium: 40 mg
- Fat: 7 g
- Saturated Fat: 3 g
- Unsaturated Fat: 3 g
- Trans Fat: 0 g
- Carbohydrates: 15 g
- Fiber: 1 g
- Protein: 1 g
- Cholesterol: 0 mg





