

Why You’ll Love These Oreo Cupcakes
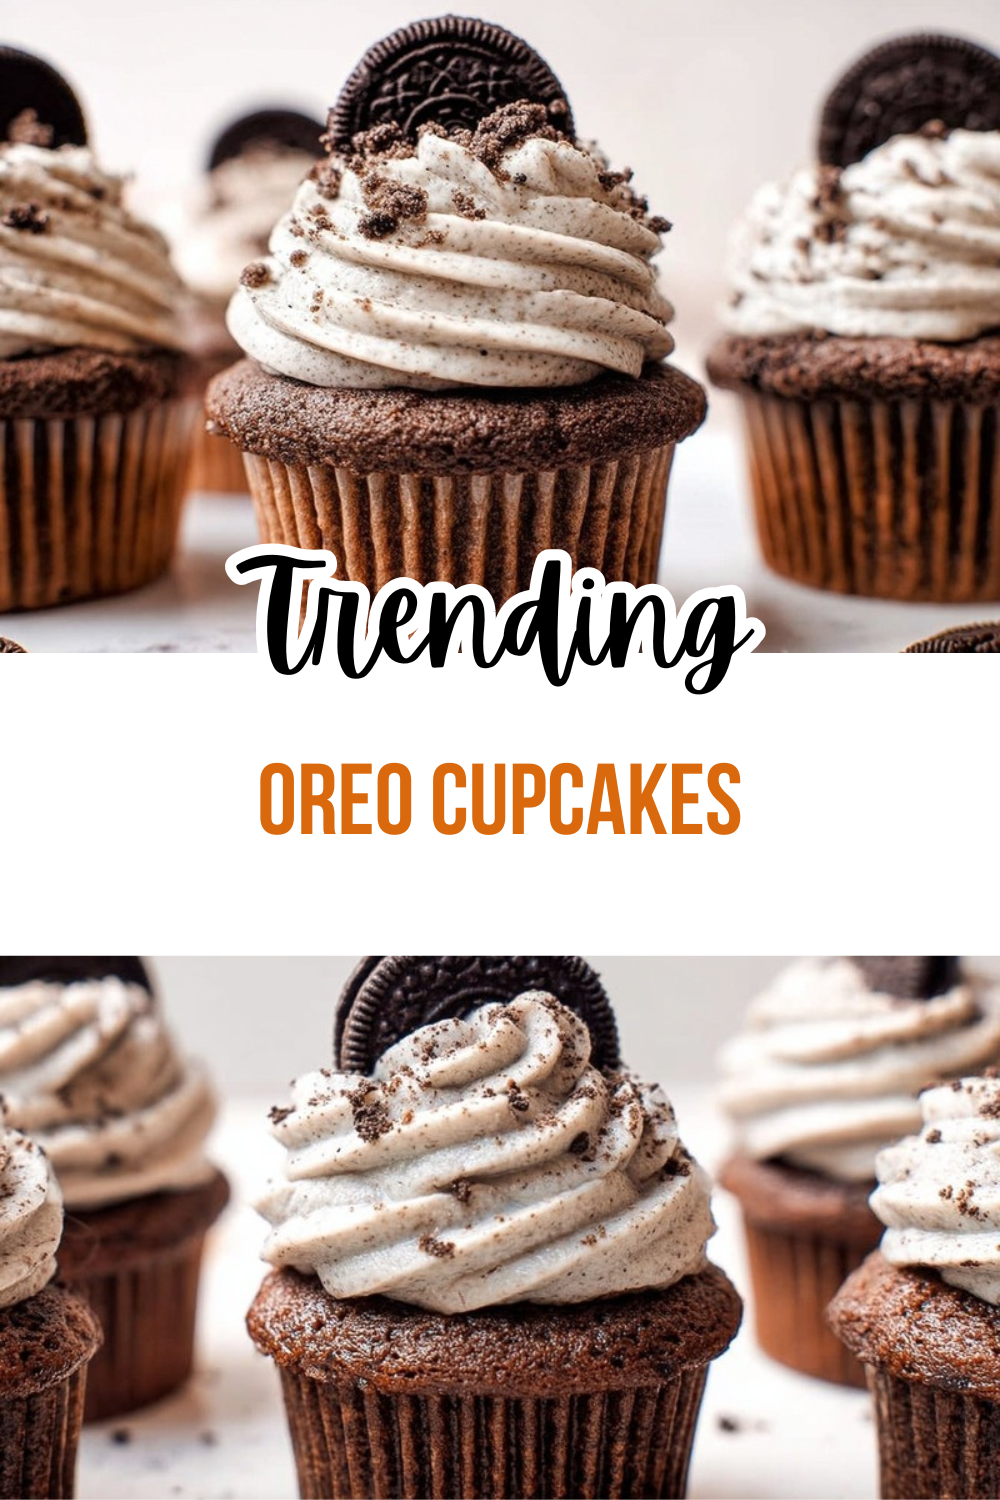
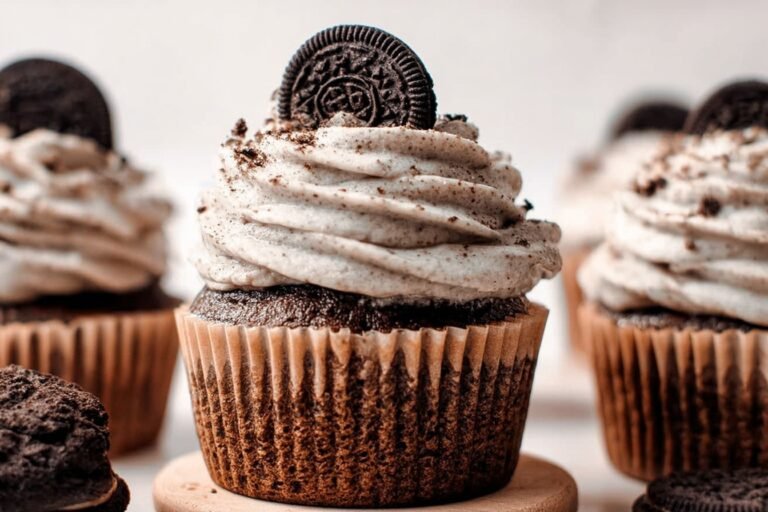
These Oreo Cupcakes bring together a soft vanilla cupcake base, chopped chocolate sandwich cookies, and a swirl of vanilla and chocolate buttercream. If you love cookies and cream desserts, this recipe gives you all the flavor you want in a bake that feels fun, familiar, and special at the same time.
- Easy to make: The batter comes together with simple pantry ingredients and straightforward steps, so home bakers of all skill levels can make it with confidence. Prep time is about 30 minutes, and the cupcakes bake in just 19 to 22 minutes.
- Soft, light texture: Cake flour, egg whites, sour cream, and whole milk work together to create cupcakes that are tender and fluffy instead of dense.
- Great for busy schedules: You can bake the cupcakes a day ahead, make the frostings up to 2 days ahead, or freeze uniced cupcakes for later.
- Cookies and cream flavor in every bite: Chopped chocolate sandwich cookies inside the batter and crushed cookies on top make these Oreo Cupcakes stand out from a basic vanilla cupcake.
These cupcakes are a great pick when you want a dessert that feels bakery-style but still fits into a home kitchen routine.
If you enjoy simple desserts that still feel a little special, you may also like easy vanilla cupcakes and chocolate buttercream frosting for more everyday baking ideas.
For readers who like to keep an eye on balance while still enjoying dessert, the health benefits of chocolate are worth a quick look. You can read more in this Mayo Clinic article on what science says about the health benefits of chocolate. And if you want to compare cookie choices with your goals in mind, this guide from Verywell Fit on the best cookies for weight loss is helpful too.
Jump to:
- Why You’ll Love These Oreo Cupcakes
- Essential Ingredients for Oreo Cupcakes
- Cupcake Batter
- Vanilla Buttercream
- Chocolate Buttercream
- Helpful Ingredient Notes
- Special Dietary Options
- How to Prepare the Perfect Oreo Cupcakes: Step-by-Step Guide
- First Step: Get your pans and oven ready
- Second Step: Mix the dry ingredients
- Third Step: Cream the butter and sugar
- Fourth Step: Add the wet ingredients
- Fifth Step: Add the dry ingredients
- Sixth Step: Fill the liners and bake
- Seventh Step: Make the vanilla buttercream
- Eighth Step: Make the chocolate buttercream
- Ninth Step: Pipe the swirled frosting
- Tenth Step: Serve and enjoy
- Dietary Substitutions to Customize Your Oreo Cupcakes
- Protein and Main Component Alternatives
- Vegetable, Sauce, and Seasoning Modifications
- Mastering Oreo Cupcakes: Advanced Tips and Variations
- Flavor variations
- Presentation tips
- Make-ahead options
- How to Store Oreo Cupcakes: Best Practices
- FAQs: Frequently Asked Questions About Oreo Cupcakes
- Why does the Oreo cupcakes recipe call for egg whites only?
- What type of flour works best for Oreo cupcakes?
- How long does it take to make Oreo cupcakes from scratch?
- Can I make Oreo cupcakes gluten-free?
- How do you turn Oreo cupcake batter into a layer cake?
- Oreo Cupcakes
- Ingredients
- Instructions
- Last Step:
- Notes
- Nutrition
- Did you make this recipe?
Essential Ingredients for Oreo Cupcakes
Here is the full ingredient list for the cupcakes and both frostings. I have kept the measurements exact so you can prep everything before you begin.
Cupcake Batter
- 1 and 3/4 cups cake flour
- 3/4 teaspoon baking powder
- 1/4 teaspoon baking soda
- 1/4 teaspoon salt
- 1/2 cup unsalted butter, softened
- 1 cup granulated sugar
- 3 large egg whites, at room temperature
- 2 teaspoons pure vanilla extract
- 1/2 cup full-fat sour cream, at room temperature
- 1/2 cup whole milk, at room temperature
- 1 and 1/2 cups chopped chocolate sandwich cookies, about 12 cookies
Vanilla Buttercream
- 1/2 cup unsalted butter, softened
- 1 and 3/4 cups confectioners’ sugar
- 2 tablespoons heavy cream, whole milk, or half-and-half
- 1 teaspoon pure vanilla extract
- Salt, to taste
Chocolate Buttercream
- 1/2 cup unsalted butter, softened
- 1 and 3/4 cups confectioners’ sugar
- 1/4 cup Dutch-process or natural cocoa powder, Dutch-process recommended
- 2 tablespoons heavy cream, whole milk, or half-and-half
- 1 teaspoon pure vanilla extract
- Salt, to taste
- Optional: crushed chocolate sandwich cookies for garnish
Helpful Ingredient Notes
| Ingredient | Why it matters |
|---|---|
| Cake flour | Gives the cupcakes a soft, fine crumb. |
| Egg whites | Keep the texture light and fluffy. |
| Sour cream | Adds moisture and a tender bite. |
| Whole milk | Helps the batter stay rich and smooth. |
| Dutch-process cocoa | Makes the chocolate frosting darker and deeper in flavor. |
Special Dietary Options
- Vegan: Use plant-based butter, dairy-free milk, and a vegan sour cream substitute. Replace egg whites with aquafaba, then whip until foamy before adding. Use vegan chocolate sandwich cookies.
- Gluten-free: Swap in a 1:1 gluten-free flour blend. If the blend does not include xanthan gum, add 1/4 teaspoon to help with structure.
- Lower-calorie: Use a lighter frosting portion, skip the extra cookie garnish, and top with a smaller swirl of buttercream.
How to Prepare the Perfect Oreo Cupcakes: Step-by-Step Guide
First Step: Get your pans and oven ready
Start by preheating your oven to 350°F, which is 177°C. Line cupcake pans with paper liners and prepare two pans or bake in batches, since this recipe makes about 16 to 17 cupcakes. Having everything ready before mixing helps the batter stay airy and keeps the process smooth from start to finish.
Take your butter, sour cream, milk, and egg whites out ahead of time so they can come to room temperature. This small step helps the batter blend better and gives the cupcakes a softer crumb. If you are baking for a party or school event, this recipe is easy to spread over a short prep window without feeling rushed.
Second Step: Mix the dry ingredients
In a medium bowl, whisk together the cake flour, baking powder, baking soda, and salt. Whisking helps distribute the leavening evenly, which matters for an even rise. If your flour looks clumpy, give it a quick sift first.
This is also the time to chop the chocolate sandwich cookies. You want small chunks, not fine crumbs, so you still get those nice cookies and cream bites inside each cupcake. Set the cookies aside so they are ready when the batter is mixed.
Third Step: Cream the butter and sugar
In a large bowl, beat the softened butter and granulated sugar on medium-high speed for about 3 minutes. The mixture should look pale and fluffy. This step helps trap air, which gives the cupcakes their light texture.
Next, add the egg whites and beat on high speed for about 2 minutes until the batter looks smooth. Using egg whites only may seem unusual if you are used to whole eggs, but it helps the cupcakes stay tender and not heavy. The sour cream and milk bring back the richness that egg yolks would normally add.
Fourth Step: Add the wet ingredients
Beat in the vanilla extract and sour cream on medium-high speed until combined. The batter may look a little curdled at this point, but that is normal. Keep mixing until it comes together.
Then pour in the whole milk slowly while mixing on low speed. A slow addition helps the batter stay smooth. If you see a few small lumps, use a whisk to gently break them up, but avoid over-mixing.
Fifth Step: Add the dry ingredients
With the mixer on low, slowly add the dry ingredients. Stop as soon as the flour disappears. Over-mixing can make cupcakes tough, so this part should be gentle and brief. If needed, finish with a few turns of a whisk by hand.
After that, fold in the chopped chocolate sandwich cookies with a spatula. Use a light hand so the cookies do not break down too much. You want bits of cookie throughout the batter for texture and flavor.
Sixth Step: Fill the liners and bake
Spoon the batter into the cupcake liners, filling each one about two-thirds full. This is important because it keeps the batter from spilling over the sides as the cupcakes rise. Since this recipe makes a fairly full batch, two pans or a second baking round may be needed.
Bake for 19 to 22 minutes. The cupcakes are done when a toothpick inserted into the center comes out clean or with just a few moist crumbs. Let them cool in the pans for 20 minutes, then move them to a wire rack to cool completely before frosting.
Cooling fully before frosting is one of the easiest ways to keep your buttercream smooth and pretty.
Seventh Step: Make the vanilla buttercream
For the vanilla buttercream, beat the softened butter until creamy. Add the confectioners’ sugar, cream, vanilla extract, and salt. Start on low speed so the sugar does not puff everywhere, then move to medium-high until the frosting turns light and fluffy.
If the frosting feels too thick, add a small splash more cream. If it feels too soft, add a little more confectioners’ sugar. You want a texture that pipes well but still holds its shape on the cupcake tops.
Eighth Step: Make the chocolate buttercream
For the chocolate buttercream, beat the softened butter until creamy, then add the confectioners’ sugar, cocoa powder, cream, vanilla extract, and salt. Mix on low first, then increase to high speed once the cocoa is incorporated. This helps keep the kitchen from getting coated in sugar and cocoa dust.
Adjust the texture the same way you would with the vanilla version. Dutch-process cocoa is the best choice if you want a deeper chocolate color and a richer flavor that pairs well with the cookie pieces.
Ninth Step: Pipe the swirled frosting
To make the swirled look, place your piping tip inside a piping bag, then fold the bag over a tall glass. Fill one side with vanilla buttercream and the other side with chocolate buttercream. Remove the bag from the glass, press out air bubbles, twist the top, and pipe directly onto the cooled cupcakes.
This method gives you the classic cookies and cream look without needing two separate piping bags. Finish with crushed chocolate sandwich cookies sprinkled over the frosting. If you want a thicker vanilla-only top, make a larger batch of vanilla buttercream, since the swirl amount is enough for the mixed topping but not as generous for one flavor alone.
Tenth Step: Serve and enjoy
Serve the cupcakes once the frosting is set. The recipe makes about 16 to 17 cupcakes, which is great for a birthday, bake sale, classroom treat, or weekend dessert. The blend of soft cake, cookie chunks, and creamy frosting gives each bite a nice mix of textures.
If you have leftovers, cover them and keep them in the refrigerator for up to 3 days. Let them sit at room temperature for a short time before serving so the frosting softens a bit.

Dietary Substitutions to Customize Your Oreo Cupcakes
Protein and Main Component Alternatives
If you need to swap a few ingredients, there are several easy ways to make these Oreo Cupcakes work for different needs. For the butter, use a plant-based stick butter if you want a dairy-free version. For the sour cream, plain full-fat yogurt can work well, and for the milk, oat milk or almond milk can be used when needed.
If you want to replace the egg whites, aquafaba is the most common plant-based choice. Whip it lightly first so it has some body before adding it to the batter. The texture may be slightly different, but the cupcakes can still bake up soft and pleasant.
Vegetable, Sauce, and Seasoning Modifications
Although this is a dessert recipe rather than a savory dish, the same idea of small swaps still applies. You can change the frosting style, skip the chocolate drizzle, or use more vanilla frosting for a sweeter finish. If you want a darker cookie flavor, use Dutch-process cocoa in the frosting and extra cookie crumbs on top.
For gluten-free baking, use a 1:1 gluten-free blend and test one cupcake first if you are unsure how the batter behaves. For a lighter dessert, use less frosting and keep the cookie garnish simple. If you are serving a crowd with mixed preferences, you can even top half the batch with vanilla buttercream and half with chocolate buttercream.
Mastering Oreo Cupcakes: Advanced Tips and Variations
Once you have made the recipe once, a few small changes can help you get even better results. The biggest tip is not to rush the mixing. The butter and sugar need enough time to cream properly, and the dry ingredients should be mixed only until combined. That balance gives you cupcakes that are soft, not dense.
If you want to bake ahead, make the cupcakes one day in advance and frost them the day you plan to serve them. You can also freeze the unfrosted cupcakes for up to 3 months. Frostings can be made up to 2 days ahead and stored in the refrigerator, then brought back to a spreadable texture with a splash of cream.
Flavor variations
- Add extra crushed cookies to the frosting for a more intense cookies and cream taste.
- Use only vanilla buttercream if you want a milder, sweeter cupcake.
- Swap part of the cookie garnish for mini chocolate chips if you want more texture.
- Try a layer cake version by baking the batter in three 6-inch pans.
Presentation tips
For a neat finish, use a large round or star piping tip and pipe in steady circles. The swirled frosting looks especially nice when topped with a few cookie crumbs right in the center. If you want the cupcakes to look bakery-style, chill them briefly after frosting so the swirl firms up before serving.
Make-ahead options
This recipe is flexible for busy weeks. You can bake the cupcakes a day ahead, chill the frostings, and assemble later. For mini cupcakes, bake at the same temperature for about 11 to 13 minutes, which should give you roughly 36 to 40 mini cupcakes. If you need a larger amount, it is better to make separate batches instead of doubling the recipe, since the texture stays more reliable that way.
How to Store Oreo Cupcakes: Best Practices
Store leftover cupcakes covered in the refrigerator for up to 3 days. Because the frosting contains butter and dairy, refrigeration is the safest short-term choice. Before serving, let them sit at room temperature for 15 to 20 minutes so the buttercream softens.
For longer storage, freeze the uniced cupcakes in an airtight container for up to 3 months. Wrap each one well so they do not pick up freezer smells. Thaw them in the refrigerator overnight or at room temperature for a few hours, then frost after they have fully thawed.
If you are meal prepping desserts for a gathering, it helps to bake the cupcakes early and make the frostings separately. That way, you can decorate them close to serving time and keep the swirl looking fresh.
FAQs: Frequently Asked Questions About Oreo Cupcakes
Why does the Oreo cupcakes recipe call for egg whites only?
Egg yolks add fat and moisture that can make cupcakes dense and heavy. Using just egg whites gives the batter lift and structure for a light, fluffy texture. To balance the missing fat, the recipe includes sour cream and whole milk, which keep the Oreo cupcakes moist without compromising rise. This technique is common in cake baking for tender results. Whip the whites to soft peaks before folding in for best volume. If you prefer whole eggs, reduce milk by 2 tablespoons and expect slightly denser cupcakes. This method yields about 12-15 perfect Oreo cupcakes. (78 words)
What type of flour works best for Oreo cupcakes?
Cake flour is ideal for Oreo cupcakes because its lower protein content creates the softest, most tender crumb. All-purpose flour works but results in a slightly chewier texture. For dairy, use whole milk and full-fat sour cream for rich flavor and moisture; substitute plain full-fat yogurt if needed. Nondairy milk like almond or oat can replace dairy in a pinch, but test for taste as it may alter sweetness with the Oreo chunks. Always sift flour with leaveners for even distribution. Fresh baking powder and soda are key—replace after 3 months for proper rise. (92 words)
How long does it take to make Oreo cupcakes from scratch?
Total time is about 3 hours, including 30 minutes prep, 19 minutes baking at 350°F, and 2 hours cooling. Cupcakes bake in standard liners until a toothpick comes out clean. Cooling prevents soggy frosting and crumbly tops. Speed up by prepping dry ingredients ahead or using a stand mixer. The recipe makes 12-15 cupcakes. For mini Oreo cupcakes, bake 11-13 minutes to yield 36-40. Full cooling ensures the cookies-and-cream frosting sets perfectly without melting. Store cooled cupcakes airtight at room temp for 2 days or refrigerate up to 5. (98 words)
Can I make Oreo cupcakes gluten-free?
Yes, substitute a 1:1 gluten-free flour blend like King Arthur Measure for Measure. Results may not rise as high or have the exact texture due to missing gluten structure—expect a softer, more delicate cupcake. Use fresh baking soda and powder, as they expire after 3 months and affect lift. Add 1/4 teaspoon xanthan gum if your blend lacks it. Crush Oreos finely for the batter to mimic traditional chew. Test bake one batch first. This yields 12-15 gluten-free Oreo cupcakes perfect for celiacs. Pair with dairy-free buttercream for full allergy-friendly options. (94 words)
How do you turn Oreo cupcake batter into a layer cake?
The batter for 12-15 Oreo cupcakes fits a 3-layer 6-inch cake or 13×9-inch pan. Divide evenly into greased pans. Bake layers 25-30 minutes at 350°F (longer than cupcakes due to thickness)—check with a toothpick. For 13×9, bake 28-32 minutes. Cool fully before frosting. Use the vanilla and chocolate buttercream for swirled tops; double vanilla if skipping chocolate, as listed amount is thin. For 6-inch layers, trim domes for even stacking. This makes a stunning cookies-and-cream cake serving 12. Freeze unfrosted layers up to 1 month. (92 words)
Oreo Cupcakes
🧁 Irresistible cookies and cream cupcakes: soft vanilla cake chunks of cookie bliss topped with swirled chocolate-vanilla buttercream!
🍪 Ultimate crowd-pleaser dessert – bakery-quality homemade treats that wow at parties with crunchy, creamy perfection.
- Total Time: 1 hour 50 minutes
- Yield: 16 cupcakes
Ingredients
– 1 and 3/4 cups cake flour
– 3/4 teaspoon baking powder
– 1/4 teaspoon baking soda
– 1/4 teaspoon salt
– 1/2 cup unsalted butter, softened
– 1 cup granulated sugar
– 3 large egg whites, at room temperature
– 2 teaspoons pure vanilla extract
– 1/2 cup full-fat sour cream, at room temperature
– 1/2 cup whole milk, at room temperature
– 1 and 1/2 cups chopped chocolate sandwich cookies, about 12 cookies
– 1/2 cup unsalted butter, softened
– 1 and 3/4 cups confectioners’ sugar
– 2 tablespoons heavy cream, whole milk, or half-and-half
– 1 teaspoon pure vanilla extract
– Salt, to taste
– 1/2 cup unsalted butter, softened
– 1 and 3/4 cups confectioners’ sugar
– 1/4 cup Dutch-process or natural cocoa powder, Dutch-process recommended
– 2 tablespoons heavy cream, whole milk, or half-and-half
– 1 teaspoon pure vanilla extract
– Salt, to taste
– crushed chocolate sandwich cookies for garnish
Instructions
1-First Step: Get your pans and oven readyStart by preheating your oven to 350°F, which is 177°C. Line cupcake pans with paper liners and prepare two pans or bake in batches, since this recipe makes about 16 to 17 cupcakes. Having everything ready before mixing helps the batter stay airy and keeps the process smooth from start to finish.Take your butter, sour cream, milk, and egg whites out ahead of time so they can come to room temperature. This small step helps the batter blend better and gives the cupcakes a softer crumb. If you are baking for a party or school event, this recipe is easy to spread over a short prep window without feeling rushed.
2-Second Step: Mix the dry ingredientsIn a medium bowl, whisk together the cake flour, baking powder, baking soda, and salt. Whisking helps distribute the leavening evenly, which matters for an even rise. If your flour looks clumpy, give it a quick sift first.This is also the time to chop the chocolate sandwich cookies. You want small chunks, not fine crumbs, so you still get those nice cookies and cream bites inside each cupcake. Set the cookies aside so they are ready when the batter is mixed.
3-Third Step: Cream the butter and sugarIn a large bowl, beat the softened butter and granulated sugar on medium-high speed for about 3 minutes. The mixture should look pale and fluffy. This step helps trap air, which gives the cupcakes their light texture.Next, add the egg whites and beat on high speed for about 2 minutes until the batter looks smooth. Using egg whites only may seem unusual if you are used to whole eggs, but it helps the cupcakes stay tender and not heavy. The sour cream and milk bring back the richness that egg yolks would normally add.
4-Fourth Step: Add the wet ingredientsBeat in the vanilla extract and sour cream on medium-high speed until combined. The batter may look a little curdled at this point, but that is normal. Keep mixing until it comes together.Then pour in the whole milk slowly while mixing on low speed. A slow addition helps the batter stay smooth. If you see a few small lumps, use a whisk to gently break them up, but avoid over-mixing.
5-Fifth Step: Add the dry ingredientsWith the mixer on low, slowly add the dry ingredients. Stop as soon as the flour disappears. Over-mixing can make cupcakes tough, so this part should be gentle and brief. If needed, finish with a few turns of a whisk by hand.After that, fold in the chopped chocolate sandwich cookies with a spatula. Use a light hand so the cookies do not break down too much. You want bits of cookie throughout the batter for texture and flavor.
6-Sixth Step: Fill the liners and bakeSpoon the batter into the cupcake liners, filling each one about two-thirds full. This is important because it keeps the batter from spilling over the sides as the cupcakes rise. Since this recipe makes a fairly full batch, two pans or a second baking round may be needed.Bake for 19 to 22 minutes. The cupcakes are done when a toothpick inserted into the center comes out clean or with just a few moist crumbs. Let them cool in the pans for 20 minutes, then move them to a wire rack to cool completely before frosting.
7-Seventh Step: Make the vanilla buttercreamFor the vanilla buttercream, beat the softened butter until creamy. Add the confectioners’ sugar, cream, vanilla extract, and salt. Start on low speed so the sugar does not puff everywhere, then move to medium-high until the frosting turns light and fluffy.If the frosting feels too thick, add a small splash more cream. If it feels too soft, add a little more confectioners’ sugar. You want a texture that pipes well but still holds its shape on the cupcake tops.
8-Eighth Step: Make the chocolate buttercreamFor the chocolate buttercream, beat the softened butter until creamy, then add the confectioners’ sugar, cocoa powder, cream, vanilla extract, and salt. Mix on low first, then increase to high speed once the cocoa is incorporated. This helps keep the kitchen from getting coated in sugar and cocoa dust.Adjust the texture the same way you would with the vanilla version. Dutch-process cocoa is the best choice if you want a deeper chocolate color and a richer flavor that pairs well with the cookie pieces.
9-Ninth Step: Pipe the swirled frostingTo make the swirled look, place your piping tip inside a piping bag, then fold the bag over a tall glass. Fill one side with vanilla buttercream and the other side with chocolate buttercream. Remove the bag from the glass, press out air bubbles, twist the top, and pipe directly onto the cooled cupcakes.This method gives you the classic cookies and cream look without needing two separate piping bags. Finish with crushed chocolate sandwich cookies sprinkled over the frosting. If you want a thicker vanilla-only top, make a larger batch of vanilla buttercream, since the swirl amount is enough for the mixed topping but not as generous for one flavor alone.
10-Tenth Step: Serve and enjoyServe the cupcakes once the frosting is set. The recipe makes about 16 to 17 cupcakes, which is great for a birthday, bake sale, classroom treat, or weekend dessert. The blend of soft cake, cookie chunks, and creamy frosting gives each bite a nice mix of textures.If you have leftovers, cover them and keep them in the refrigerator for up to 3 days. Let them sit at room temperature for a short time before serving so the frosting softens a bit.
Last Step:
Please leave a rating and comment letting us know how you liked this recipe! This helps our business to thrive and continue providing free, high-quality recipes for you.Notes
🌾 Cake flour yields super soft, light cupcakes – don’t skip it!
🥚 Egg whites only create tender structure; sour cream adds richness.
📏 Fill liners exactly 2/3 full to avoid muffin tops and spills.
- Prep Time: 30 minutes
- Cooling: 1 hour
- Cook Time: 20 minutes
- Category: Desserts
- Method: Baked
- Cuisine: American
- Diet: Vegetarian
Nutrition
- Serving Size: 1 cupcake
- Calories: 450 kcal
- Sugar: 40 g
- Sodium: 200 mg
- Fat: 24 g
- Saturated Fat: 14 g
- Unsaturated Fat: 10 g
- Trans Fat: 0 g
- Carbohydrates: 55 g
- Fiber: 1 g
- Protein: 4 g
- Cholesterol: 80 mg





