

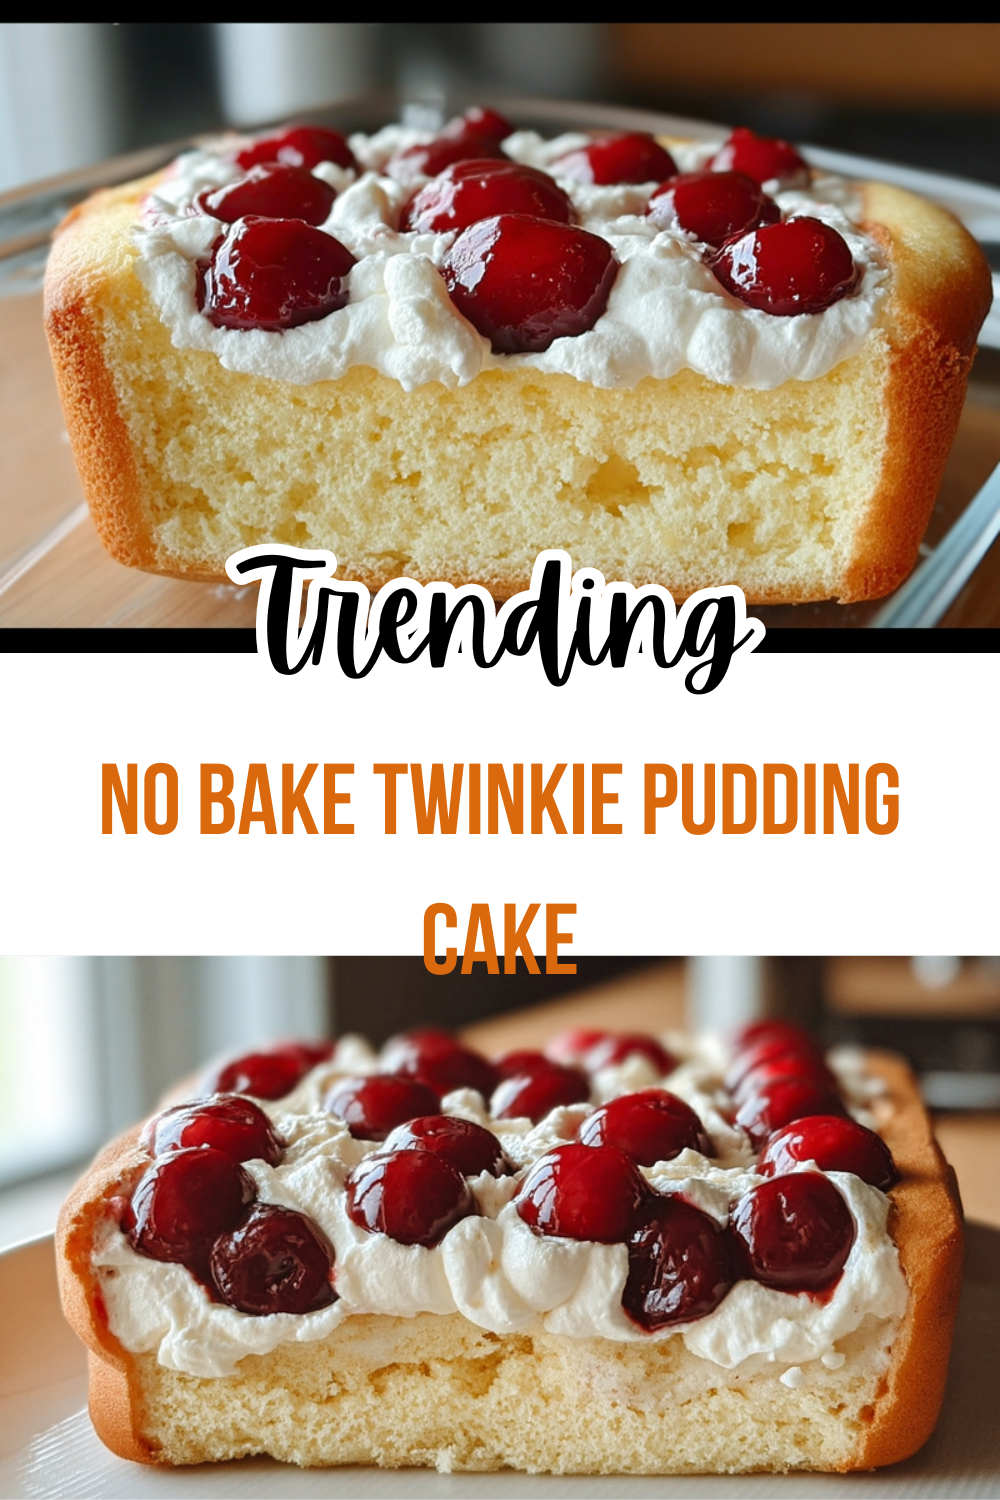
Why You’ll Love This No Bake Twinkie Pudding Cake
This no bake Twinkie pudding cake stands out as a simple no bake cake that delivers big on taste without the hassle of an oven. Busy parents and working professionals appreciate its quick assembly, while baking enthusiasts enjoy the creative layers. Home cooks find it perfect for potlucks or weeknight treats. You get a twinkie dessert that combines nostalgic flavors with creamy pudding in every bite.
Ease of Preparation
Prepare this twinkie cake in under 20 minutes of active time. Slice Twinkies, mix the pudding filling, and layer everything in a dish. Chill for a few hours, and it sets perfectly. No baking means less cleanup and no hot kitchen, ideal for students or seniors on hot days. This easy cake recipe suits anyone short on time.
Health Benefits
Compared to traditional baked cakes, this pudding cake offers lighter options. Use low-fat cream cheese and skim milk to cut calories while keeping creaminess. Instant pudding provides calcium from milk, and portioning into 12 servings controls indulgence. Opt for fresh fruit toppings to add vitamins without extra sugar. Diet-conscious individuals love how it fits into balanced meals.
Versatility
Adapt this homemade twinkie pudding cake for various needs. Make it vegan with plant-based swaps or gluten-free with alternative cakes. Serve as a twinkie dessert for kids or a sophisticated treat for newlyweds. Travelers can pack slices for picnics, and food enthusiasts experiment with flavors. Its flexible layers welcome seasonal tweaks.
Distinctive Flavor
The magic comes from Twinkies’ soft sponge and vanilla cream paired with smooth pudding. Cool Whip adds airy lightness, creating a texture like a cloud. Optional fruits bring freshness that balances sweetness. This no bake twinkie pudding cake recipe creates a unique profile that beats store-bought options every time.
This simple no bake twinkie dessert captures joy in every layer, perfect for creating memories around the table.
Jump to:
- Why You’ll Love This No Bake Twinkie Pudding Cake
- Ease of Preparation
- Health Benefits
- Versatility
- Distinctive Flavor
- Essential Ingredients for No Bake Twinkie Pudding Cake
- How to Prepare the Perfect No Bake Twinkie Pudding Cake: Step-by-Step Guide
- First Step: Prepare the Twinkie Base
- Second Step: Mix the Creamy Pudding Filling
- Third Step: Fold in Cool Whip for Lightness
- Fourth Step: Layer the Middle and Top Twinkies
- Fifth Step: Finish with Remaining Filling
- Final Step: Garnish and Serve
- Dietary Substitutions to Customize Your No Bake Twinkie Pudding Cake
- Protein and Main Component Alternatives
- Vegetable, Sauce, and Seasoning Modifications
- Mastering No Bake Twinkie Pudding Cake: Advanced Tips and Variations
- How to Store No Bake Twinkie Pudding Cake: Best Practices
- FAQs: Frequently Asked Questions About No Bake Twinkie Pudding Cake
- What ingredients do I need for no bake Twinkie pudding cake?
- How do you make no bake Twinkie pudding cake step by step?
- How long does no bake Twinkie pudding cake last?
- Can I make no bake Twinkie pudding cake ahead of time?
- What are some variations for no bake Twinkie pudding cake?
- No Bake Twinkie Pudding Cake
- Ingredients
- Instructions
- Last Step:
- Notes
- Nutrition
- Did you make this recipe?
Essential Ingredients for No Bake Twinkie Pudding Cake
Gather these items for your twinkie pudding cake recipe. They create a creamy, dreamy homemade cake without baking. Each plays a key role in texture and taste.
Main Ingredients:
- One 15-ounce box of Twinkies (about 10-12 pieces) – Forms the soft, golden sponge base with built-in creamy filling for structure and flavor.
- 8 ounces softened cream cheese – Delivers rich, tangy smoothness to the pudding layer.
- One 3.4-ounce box instant vanilla pudding mix – Thickens quickly into a velvety filling with classic vanilla notes.
- 2 cups cold milk – Activates the pudding for perfect consistency; use whole or skim based on preference.
- One 8-ounce tub Cool Whip (thawed) – Adds light, fluffy volume to make the topping irresistible.
- Sliced bananas (optional, about 2-3 bananas) – Brings fresh sweetness and moisture to middle layers.
- Crushed pineapple (drained, optional, one 8-ounce can) – Offers tropical tang and juiciness.
- Chocolate syrup (optional, to taste) – Drizzles for decadent contrast.
Special Dietary Options:
- Vegan: Swap for vegan Twinkie-style sponge rolls or homemade, dairy-free cream cheese, plant-based instant pudding mix, almond milk, and coconut whipped topping.
- Gluten-free: Use gluten-free yellow cake rolls instead of Twinkies, certified GF pudding mix, and check labels for other items.
- Low-calorie: Choose light cream cheese, sugar-free pudding mix, skim milk, and lite Cool Whip; skip heavy toppings.
These choices keep your easy homemade twinkie cake accessible for all.
How to Prepare the Perfect No Bake Twinkie Pudding Cake: Step-by-Step Guide
Follow these clear steps for a foolproof no bake twinkie pudding cake recipe. This simple no bake twinkie dessert comes together fast. Grease a 9×13-inch dish first for easy release. Total active time sits at 20 minutes, plus chilling.
First Step: Prepare the Twinkie Base
Take 10-12 Twinkies from the 15-ounce box. Slice each lengthwise to expose the creamy centers. Arrange half cut-side up in the greased 9×13-inch dish, pressing gently to fit snugly. This forms a sturdy, flavorful bottom layer. For dietary tweaks, use vegan or gluten-free alternatives here. Avoid overcrowding to ensure even pudding absorption.
Second Step: Mix the Creamy Pudding Filling
In a large bowl, beat 8 ounces softened cream cheese with an electric mixer until smooth, about 1 minute. This prevents lumps. Add one 3.4-ounce box instant vanilla pudding mix and 2 cups cold milk. Whisk vigorously for 2 minutes until it thickens to a mousse-like consistency. Low-calorie version? Use sugar-free mix and skim milk. Taste and adjust if needed, but keep it simple.
Third Step: Fold in Cool Whip for Lightness
Gently fold one 8-ounce tub thawed Cool Whip into the pudding mixture using a spatula. Move in slow circles to keep air bubbles intact. This creates a fluffy spread that holds the twinkie cake layers together. For vegan diets, fold in dairy-free whipped topping. The result stays light and stable even after chilling.
Fourth Step: Layer the Middle and Top Twinkies
Spread half the pudding mixture evenly over the bottom Twinkie layer. Add optional sliced bananas (2-3) or drained crushed pineapple for fruitiness. Layer remaining Twinkies cut-side down on top. Press lightly. This sandwich effect locks in moisture. Fruit adds natural sweetness; drain pineapple well to avoid sogginess. Gluten-free cakes work here too.
Fifth Step: Finish with Remaining Filling
Spread the rest of the pudding-Cool Whip mix over the top Twinkies. Smooth with an offset spatula for a polished look. Cover with plastic wrap and refrigerate for at least 4 hours, or overnight for best results. The chilling sets everything firmly. During this time, flavors meld beautifully.
Final Step: Garnish and Serve
Before serving, drizzle chocolate syrup or add extra Cool Whip dollops. Slice into 12 squares. Serve chilled for peak creaminess. This homemade twinkie pudding cake shines at gatherings. Store leftovers as noted later. Each bite delivers that perfect no bake cake bliss.
Pro tips throughout make this twinkie dessert beginner-friendly. Watch for overmixing the filling, which deflates it. Chill times vary by fridge temp, so plan ahead for parties. Adapt steps for busy schedules by prepping filling a day early.
| Step | Time | Yield Note |
|---|---|---|
| Twinkie Layering | 5 min | Half box bottom |
| Mixing Filling | 5 min | Serves 12 |
| Assembling | 5 min | Fruit optional |
| Chilling | 4+ hours | Overnight best |

Dietary Substitutions to Customize Your No Bake Twinkie Pudding Cake
Protein and Main Component Alternatives
Twinkies serve as the main structure in this pudding cake. For vegan diets, replace with store-bought vegan cream-filled cakes or bake simple sponge rolls using egg replacer and plant milk. Gluten-free needs call for GF yellow cake snacks, ensuring no wheat cross-contamination. Low-calorie eaters pick angel food cake pieces to slash carbs while mimicking texture. These swaps keep the no bake twinkie pudding cake intact. Always test a small batch first.
Vegetable, Sauce, and Seasoning Modifications
Fresh fruits act as veggie-like add-ins for nutrition. Swap bananas for strawberries or blueberries in season, slicing thin to layer easily. For sauce, use sugar-free chocolate instead of syrup or caramel drizzle. Seasonings? Infuse pudding with banana extract or coconut for twists. Low-cal versions skip sauces altogether. These changes suit travelers or seniors preferring lighter profiles. Experiment to match preferences without altering core steps.
Discover more no-bake desserts for summer to inspire your customizations.
Mastering No Bake Twinkie Pudding Cake: Advanced Tips and Variations
Take your easy cake recipe further with these pro moves. They elevate the homemade cake experience.
Pro Cooking Techniques: Chill mixing bowl before folding Cool Whip for extra volume. Use room-temp cream cheese to avoid gritty bits. Press Twinkies firmly but gently to prevent crumbling.
Flavor Variations:
- Banana split: Banana pudding mix plus slices.
- Chocolate delight: Chocolate pudding and fudge drizzle.
- Strawberry shortcake: Strawberry mix with fresh berries.
- Pineapple coconut: Crushed pineapple and toasted coconut.
Presentation Tips: Dust with crushed graham crackers or nuts. Serve in clear cups for layers view. Slice clean with hot knife.
Make-Ahead Options: Assemble 24 hours early. Store filling separate up to 48 hours. Ideal for working professionals.
| Variation | Key Swap | Extra Time |
|---|---|---|
| Banana Split | Banana pudding | 2 min |
| Chocolate | Chocolate pudding | 1 min |
| Strawberry | Strawberries | 3 min |
Check out this homemade Twinkies recipe for authentic subs. These keep calories around 300 per slice.
How to Store No Bake Twinkie Pudding Cake: Best Practices
Proper storage keeps your twinkie cake fresh and tasty. Follow these for best results.
Refrigeration: Cover tightly with plastic wrap or foil. Store in fridge up to 4-5 days. Twinkies soften nicely, but eat within 48 hours for prime texture. Dairy elements stay creamy if sealed well.
Freezing: Not ideal due to Cool Whip separation, but wrap individual slices in foil for 1 month. Thaw overnight in fridge. Avoid whole cake freezing.
Reheating: Serve cold; no need to reheat. If fruit layers weep, pat dry before eating.
Meal Prep Considerations: Portion into containers for grab-and-go. Label dates. Perfect for busy parents or students. Check for spoilage before enjoying.
This approach extends your no bake cake enjoyment safely.
FAQs: Frequently Asked Questions About No Bake Twinkie Pudding Cake
What ingredients do I need for no bake Twinkie pudding cake?
For a standard 9×13-inch no bake Twinkie pudding cake serving 12, gather these simple ingredients: one 15-ounce box of Twinkies (about 10-12 pieces), 8 ounces softened cream cheese, one 3.4-ounce box instant vanilla pudding mix, 2 cups cold milk, one 8-ounce tub Cool Whip (thawed), and optional toppings like sliced bananas, crushed pineapple (drained), or chocolate syrup. No eggs, flour, or oven required. This dessert relies on the soft sponge cakes of Twinkies for structure, layered with a creamy pudding filling. Prep everything in advance—soften cream cheese at room temperature for easy mixing. Total cost is under $10, making it budget-friendly for potlucks or family gatherings. Double-check pudding mix for instant variety to set quickly without cooking.
How do you make no bake Twinkie pudding cake step by step?
Start by slicing 10-12 Twinkies lengthwise and layering them cut-side up in a greased 9×13-inch dish to form the base. In a bowl, beat 8 ounces softened cream cheese until smooth, then add one 3.4-ounce box instant vanilla pudding mix and 2 cups cold milk—whisk for 2 minutes until thickened. Fold in 8 ounces thawed Cool Whip for lightness. Spread half the mixture over Twinkies. Add a middle layer of sliced bananas or drained pineapple if desired, then top with remaining Twinkies cut-side down. Spread the rest of the pudding mix on top. Chill for at least 4 hours or overnight. Garnish with extra Cool Whip or syrup before serving. Total time: 20 minutes active, plus chilling. Perfect for beginners—mess-free and foolproof.
How long does no bake Twinkie pudding cake last?
No bake Twinkie pudding cake stays fresh in the fridge for up to 4-5 days when covered tightly with plastic wrap or stored in an airtight container. The dairy-based filling (cream cheese, pudding, Cool Whip) keeps it creamy, but Twinkies may soften further after day 3. For best texture, enjoy within 48 hours. It doesn’t freeze well due to the whipped topping separating upon thawing, but individual slices can be frozen for 1 month wrapped in foil—let thaw overnight in fridge. Avoid leaving at room temperature over 2 hours to prevent spoilage. This makes it ideal for meal prepping desserts for the week or parties. Always check for off smells or mold before eating. Yields 12 servings, so portion control helps extend freshness.
Can I make no bake Twinkie pudding cake ahead of time?
Yes, no bake Twinkie pudding cake is perfect for making ahead—it tastes even better after flavors meld. Assemble up to 24 hours in advance, chilling overnight for the easiest slicing. The pudding sets firmly, holding layers together without sogginess. For events 2-3 days ahead, prepare components separately: mix filling and store covered in fridge, layer Twinkies fresh before serving. Avoid assembling more than 48 hours early to maintain Twinkie texture. Pro tip: Use a springform pan for neat removal if presenting whole. This no-fuss dessert frees up party time—no last-minute baking. Customize with seasonal fruits like strawberries in summer for variety. Always label with date made for safety.
What are some variations for no bake Twinkie pudding cake?
Switch up the classic no bake Twinkie pudding cake with these easy tweaks: Use banana pudding mix and add fresh banana slices for a banana split vibe. Chocolate fans, swap vanilla pudding for chocolate and drizzle hot fudge on top. For strawberry shortcake style, layer sliced strawberries and use strawberry pudding. Go pineapple-coconut by mixing drained crushed pineapple into the filling and sprinkling toasted coconut. Vegan option: sub dairy-free cream cheese, pudding mix, and whipped topping with plant-based alternatives. Keep Twinkies as the star—they provide structure. Each variation takes under 5 extra minutes. These keep calories around 300 per slice while adding fun twists for holidays or diets. Experiment safely, tasting filling before layering.
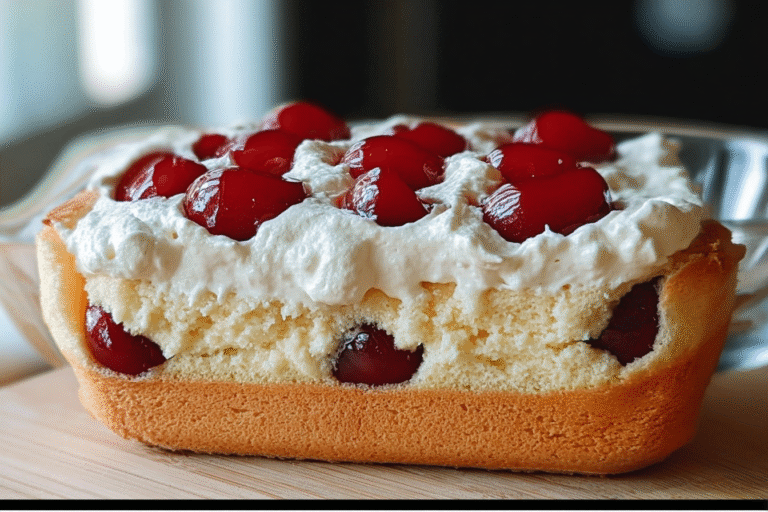
No Bake Twinkie Pudding Cake
🍰 Dive into nostalgic bliss with this soft, golden cake layered with ultra-creamy marshmallow filling just like your favorite snack.
🎂 Effortlessly homemade, it’s a crowd-pleasing delight that’s quick to prepare and impossible to resist.
- Total Time: 2 hours
- Yield: 12 servings
Ingredients
– One 15-ounce box of Twinkies (about 10-12 pieces) for structure and flavor
– 8 ounces softened cream cheese for pudding layer
– One 3.4-ounce box instant vanilla pudding mix for filling
– 2 cups cold milk for consistency
– One 8-ounce tub Cool Whip (thawed) for topping
– Sliced bananas (optional, about 2-3 bananas) for middle layers
– Crushed pineapple (drained, optional, one 8-ounce can) for tropical tang
– Chocolate syrup (optional, to taste) for drizzling
Instructions
1-First Step: Prepare the Twinkie Base Take 10-12 Twinkies from the 15-ounce box. Slice each lengthwise to expose the creamy centers. Arrange half cut-side up in the greased 9×13-inch dish, pressing gently to fit snugly. This forms a sturdy, flavorful bottom layer. For dietary tweaks, use vegan or gluten-free alternatives here. Avoid overcrowding to ensure even pudding absorption.
2-Second Step: Mix the Creamy Pudding Filling In a large bowl, beat 8 ounces softened cream cheese with an electric mixer until smooth, about 1 minute. This prevents lumps. Add one 3.4-ounce box instant vanilla pudding mix and 2 cups cold milk. Whisk vigorously for 2 minutes until it thickens to a mousse-like consistency. Low-calorie version? Use sugar-free mix and skim milk. Taste and adjust if needed, but keep it simple.
3-Third Step: Fold in Cool Whip for Lightness Gently fold one 8-ounce tub thawed Cool Whip into the pudding mixture using a spatula. Move in slow circles to keep air bubbles intact. This creates a fluffy spread that holds the twinkie cake layers together. For vegan diets, fold in dairy-free whipped topping. The result stays light and stable even after chilling.
4-Fourth Step: Layer the Middle and Top Twinkies Spread half the pudding mixture evenly over the bottom Twinkie layer. Add optional sliced bananas (2-3) or drained crushed pineapple for fruitiness. Layer remaining Twinkies cut-side down on top. Press lightly. This sandwich effect locks in moisture. Fruit adds natural sweetness; drain pineapple well to avoid sogginess. Gluten-free cakes work here too.
5-Fifth Step: Finish with Remaining Filling Spread the rest of the pudding-Cool Whip mix over the top Twinkies. Smooth with an offset spatula for a polished look. Cover with plastic wrap and refrigerate for at least 4 hours, or overnight for best results. The chilling sets everything firmly. During this time, flavors meld beautifully.
6-Final Step: Garnish and Serve Before serving, drizzle chocolate syrup or add extra Cool Whip dollops. Slice into 12 squares. Serve chilled for peak creaminess. This homemade twinkie pudding cake shines at gatherings. Store leftovers as noted later. Each bite delivers that perfect no bake cake bliss.
Last Step:
Please leave a rating and comment letting us know how you liked this recipe! This helps our business to thrive and continue providing free, high-quality recipes for you.Notes
🍰 Use room temperature eggs and milk for a lighter, more tender cake crumb.
🧈 Beat the filling ingredients thoroughly to achieve that signature smooth, fluffy Twinkie texture.
❄️ Refrigerate leftovers covered; the flavors meld beautifully overnight.
- Prep Time: 25 minutes
- Cooling Time: 1 hour
- Cook Time: 35 minutes
- Category: Dessert
- Method: Baked
- Cuisine: American
- Diet: Vegetarian
Nutrition
- Serving Size: 1 slice
- Calories: 450 kcal
- Sugar: 38g
- Sodium: 300mg
- Fat: 24g
- Saturated Fat: 9g
- Unsaturated Fat: 13g
- Trans Fat: 0g
- Carbohydrates: 52g
- Fiber: 0g
- Protein: 5g
- Cholesterol: 85mg





