

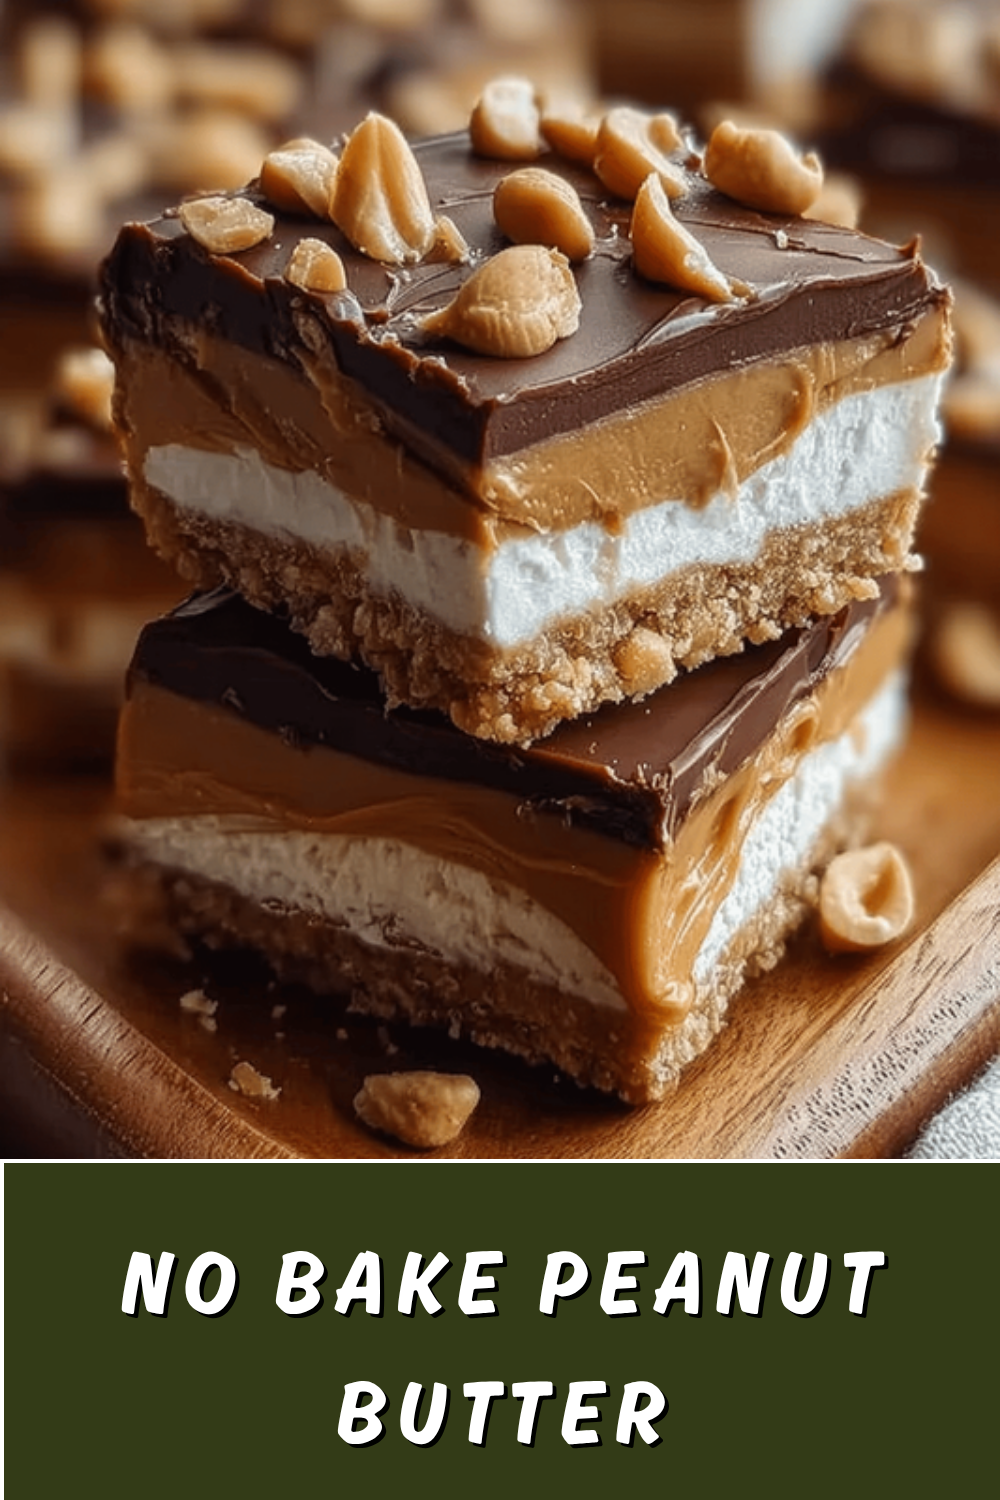
Why You’ll Love This No Bake Peanut Butter Cheesecake Bars
As a home cook who’s always on the lookout for quick and tasty treats, I have to say that these No Bake Peanut Butter Cheesecake Bars have become my go-to dessert for busy days. Picture this: no oven required, minimal prep, and a creamy, dreamy result that hits the spot every time. What makes them so special is how they combine the rich, nutty flavor of peanut butter with a smooth cheesecake base, making them a hit with everyone from busy parents to baking enthusiasts.
One of the best parts about this No Bake Peanut Butter Cheesecake Bars recipe is its ease of preparation. It’s incredibly simple and quick to make, saving you time and avoiding any complicated baking steps, which is perfect for any skill level. The quick setting time means you can enjoy these delicious creamy bars with minimal waiting, letting you get back to enjoying family time or a quiet evening.
Beyond the simplicity, these bars offer some great health benefits. Packed with peanut butter and cream cheese, they provide a good source of protein and healthy fats that keep you satisfied longer. Opting for natural peanut butter boosts the nutritional value even more, giving you a balanced energy boost compared to overly sweet traditional desserts.
They are also super versatile, which is why they’re ideal for a wide audience like students or diet-conscious folks. This No Bake Peanut Butter Cheesecake Bars recipe can be tweaked for vegan, gluten-free, or low-calorie needs with easy swaps, all while keeping that irresistible flavor and texture intact. And let’s not forget the distinctive taste a perfect blend of rich, creamy cheesecake and the nutty sweetness of peanut butter that sets these bars apart from the usual sweets.
Personal Touches and Recipe Variations
When I first tried whipping up these bars for a family gathering, everyone raved about how the peanut butter added a fun twist. I love experimenting with flavors, and you’ll find that adding a hint of your favorite extras can make them even more exciting. For instance, I’ve shared my experiences with friends who are always asking for more ideas on how to customize recipes like this one.
To keep things engaging, remember that exploring options like different nut butters can add a personal flair. If you’re a food enthusiast like me, you’ll appreciate how this recipe lets you play around while sticking to the basics. For more inspiration on no-bake treats, check out my Easy No-Bake Desserts Guide on the blog.
Jump to:
- Why You’ll Love This No Bake Peanut Butter Cheesecake Bars
- Personal Touches and Recipe Variations
- Essential Ingredients for No Bake Peanut Butter Cheesecake Bars
- The Full Ingredients List
- Special Dietary Options
- How to Prepare the Perfect No Bake Peanut Butter Cheesecake Bars: Step-by-Step Guide
- Dietary Substitutions to Customize Your No Bake Peanut Butter Cheesecake Bars
- Mastering No Bake Peanut Butter Cheesecake Bars: Advanced Tips and Variations
- Pro Techniques and Flavor Ideas
- How to Store No Bake Peanut Butter Cheesecake Bars: Best Practices
- FAQs: Frequently Asked Questions About No Bake Peanut Butter Cheesecake Bars
- How do I make no bake peanut butter cheesecake bars?
- What ingredients do I need for no bake peanut butter cheesecake bars?
- Can I make no bake peanut butter cheesecake bars ahead of time?
- How can I store leftover peanut butter cheesecake bars?
- Are no bake peanut butter cheesecake bars gluten-free?
- No Bake Peanut Butter Cheesecake Bars
- Ingredients
- Instructions
- Last Step:
- Notes
- Nutrition
- Did you make this recipe?
Essential Ingredients for No Bake Peanut Butter Cheesecake Bars
Getting the ingredients right is key to nailing these No Bake Peanut Butter Cheesecake Bars, and I’ve made sure to list everything out clearly so you can shop with ease. As someone who loves keeping things simple in the kitchen, I always recommend using fresh, quality items to bring out the best flavors. This section breaks down the essentials, including options for special diets, to make your cooking experience straightforward and fun.
The Full Ingredients List
- 1 1/2 cups (180 grams) graham cracker crumbs (about 11-12 full sheets) – Forms the sturdy base of the bars
- 1/4 cup (50 grams) granulated sugar – Adds a touch of sweetness to the crust
- 5 tablespoons (71 grams) unsalted butter, melted – Helps bind the crust together
- 1 pack (8 oz) cream cheese, room temperature – Creates the creamy cheesecake filling
- 1/2 cup (130 grams) creamy peanut butter – Provides that signature nutty flavor and smooth texture
- 1/2 cup (60 grams) powdered sugar – Sweetens the filling without making it gritty
- 1/2 cup (120 mL) heavy whipping cream – Whips up to add lightness and fluffiness
- 1 teaspoon vanilla extract – Enhances the overall taste with a subtle aroma
- Extra peanut butter (amount as desired) – For optional drizzling on top
- Mini chocolate chips (amount as desired) – Adds a chocolatey crunch for toppings
- Mini peanut butter cups (amount as desired) – Provides extra peanut butter burst in the toppings
This structured list covers everything you need, ensuring you don’t miss a beat. I always double-check my measurements to get that perfect balance, and you should too it makes all the difference in the final product.
Special Dietary Options
If you’re adapting for dietary needs, like going vegan or gluten-free, it’s as easy as swapping a few items. For example, use vegan cream cheese and coconut oil instead of butter to keep things plant-based. These adjustments help make the recipe accessible for busy professionals or seniors looking for lighter options.
| Dietary Need | Substitution |
|---|---|
| Vegan | Use vegan cream cheese and coconut oil for butter |
| Gluten-Free | Swap graham cracker crumbs with gluten-free alternatives like almond flour |
| Low-Calorie | Choose powdered sugar substitutes like erythritol and reduced-fat cream cheese |
This table makes it simple to see your options at a glance, just like I do when planning meals for different crowds.
How to Prepare the Perfect No Bake Peanut Butter Cheesecake Bars: Step-by-Step Guide
Let’s dive into the fun part making these No Bake Peanut Butter Cheesecake Bars! As a baking enthusiast, I find that following steps carefully turns a simple recipe into something magical. You’ll love how straightforward this is, especially if you’re a student or working professional with limited time.
- Line a 9×5 inch pan with parchment paper, leaving overhang for easy removal. This step ensures your bars come out neatly without sticking.
- Process graham crackers into fine crumbs and mix with 1/4 cup (50 grams) granulated sugar, then blend in 5 tablespoons (71 grams) melted unsalted butter until the mixture is sandy. If you don’t have a processor, crushing them by hand in a bag works just fine and adds a hands-on touch.
- Press the mixture firmly into the bottom of the pan and refrigerate while you prepare the filling. This helps the base set up perfectly.
- Beat 1 pack (8 oz) room temperature cream cheese until it’s creamy and fluffy, which is crucial for that smooth texture.
- Add 1/2 cup (130 grams) creamy peanut butter and 1/2 cup (60 grams) powdered sugar, then mix on low and medium speed until fully combined.
- In a separate bowl, beat 1/2 cup (120 mL) heavy whipping cream with 1 teaspoon vanilla extract until stiff peaks form, giving the filling that airy lift.
- Fold half the whipped cream into the peanut butter mixture, then fold in the remaining whipped cream to keep it light and even.
- Pour the filling over the chilled base and smooth it evenly with a spatula for a professional finish.
- Optional: Drizzle extra peanut butter over the top and swirl with a knife, then sprinkle with mini chocolate chips and mini peanut butter cups for extra flair.
- Chill in the refrigerator for at least 3 hours or overnight until fully set. This is where the magic happens, letting the flavors meld together.
- Slice and serve, storing leftovers in an airtight container in the fridge. It’s always a joy to share these with friends and see their reactions.
For vegan or gluten-free versions, just use the substitutions from earlier in your steps. Remember, the prep time is only about 20 minutes, with a total of 3 hours and 20 minutes including chilling, making it ideal for last-minute desserts.

Dietary Substitutions to Customize Your No Bake Peanut Butter Cheesecake Bars
One of the things I love most about this No Bake Peanut Butter Cheesecake Bars recipe is how flexible it is for different tastes and needs. Whether you’re a traveler packing light snacks or a newlywed hosting dinners, tweaking ingredients can make it fit your lifestyle perfectly.
- Replace peanut butter with almond or cashew butter to change up the nutty flavors or accommodate allergies.
- Use tofu blended with vegan cream cheese as a plant-based protein substitute for a fully vegan option.
- Add a pinch of cinnamon or nutmeg for a seasonal twist that brings warmth to the bars.
- Incorporate a swirl of fruit preserves or chocolate sauce to mix up the flavor profile and add visual appeal.
- For low-sugar versions, reduce powdered sugar and use natural sweeteners like honey or agave nectar, adjusting as needed for the right consistency.
These changes keep the recipe accessible and delicious, no matter your dietary goals.
Mastering No Bake Peanut Butter Cheesecake Bars: Advanced Tips and Variations
Once you’re comfortable with the basics, it’s time to level up your No Bake Peanut Butter Cheesecake Bars game. From my own kitchen experiments, I’ve learned that little tricks can make a big difference in the outcome.
Pro Techniques and Flavor Ideas
To get that velvety texture, always ensure cream cheese is fully softened before mixing it’s a game-changer for avoiding lumps. Use a hand mixer at medium speed for even blending, and don’t overmix to keep the filling light. For flavor variations, try adding crushed pretzels for a salty contrast or mini chocolate chips into the layer for extra crunch, which always surprises my guests.
Presentation is key too; serve on decorative plates with fresh berries or a dusting of cocoa powder. And if you’re prepping ahead, these bars can be made up to 3 days in advance and stored in the fridge, perfect for busy parents or working professionals.
How to Store No Bake Peanut Butter Cheesecake Bars: Best Practices
Storing these No Bake Peanut Butter Cheesecake Bars properly keeps them tasting fresh and creamy, which is essential for enjoying them later. I’ve found that good storage habits make meal prep a breeze, especially for families or food enthusiasts on the go.
- Refrigerate in an airtight container for up to 5 days to maintain the perfect texture.
- Freeze by wrapping tightly in plastic wrap and foil, lasting up to 2 months thaw overnight in the fridge for the best results.
- Avoid reheating to keep the creamy consistency intact; they’re best served chilled.
- Consider them for meal prep, as they’re great for portion-controlled snacks or desserts.
FAQs: Frequently Asked Questions About No Bake Peanut Butter Cheesecake Bars
How do I make no bake peanut butter cheesecake bars?
To make no bake peanut butter cheesecake bars, start by mixing crushed graham crackers with melted butter to form the crust. Press this mixture into the bottom of a lined pan. For the filling, beat cream cheese until smooth, then mix in peanut butter, powdered sugar, and whipped topping until creamy. Spread the filling evenly over the crust and chill in the refrigerator for at least 4 hours or until firm. Once set, cut into bars and optionally top with chocolate drizzle or chopped peanuts before serving.
What ingredients do I need for no bake peanut butter cheesecake bars?
The key ingredients include graham cracker crumbs and melted butter for the crust, cream cheese, creamy peanut butter, powdered sugar, and whipped topping (such as Cool Whip) for the filling. Optional toppings can include melted chocolate or chopped peanuts. These ingredients are simple and easy to find at most grocery stores, making this dessert quick and convenient to prepare.
Can I make no bake peanut butter cheesecake bars ahead of time?
Yes, no bake peanut butter cheesecake bars can be made up to 2 days in advance. After assembling the bars, cover the pan tightly with plastic wrap and refrigerate. This not only saves time but also allows the flavors to meld and the bars to firm up nicely. For best texture, remove from the refrigerator about 10 minutes before serving.
How can I store leftover peanut butter cheesecake bars?
Store leftover bars in an airtight container in the refrigerator for up to 3-4 days. Keeping them chilled preserves their creamy texture and prevents spoilage. For longer storage, you can freeze the bars by wrapping them tightly in plastic wrap and then placing them in a freezer-safe container; thaw overnight in the refrigerator before serving.
Are no bake peanut butter cheesecake bars gluten-free?
Traditional no bake peanut butter cheesecake bars are not gluten-free due to the graham cracker crust, which typically contains wheat. To make a gluten-free version, substitute the graham crackers with gluten-free crumbs or crushed gluten-free cookies. Always check labels on all ingredients to confirm they are gluten-free if you have dietary restrictions.
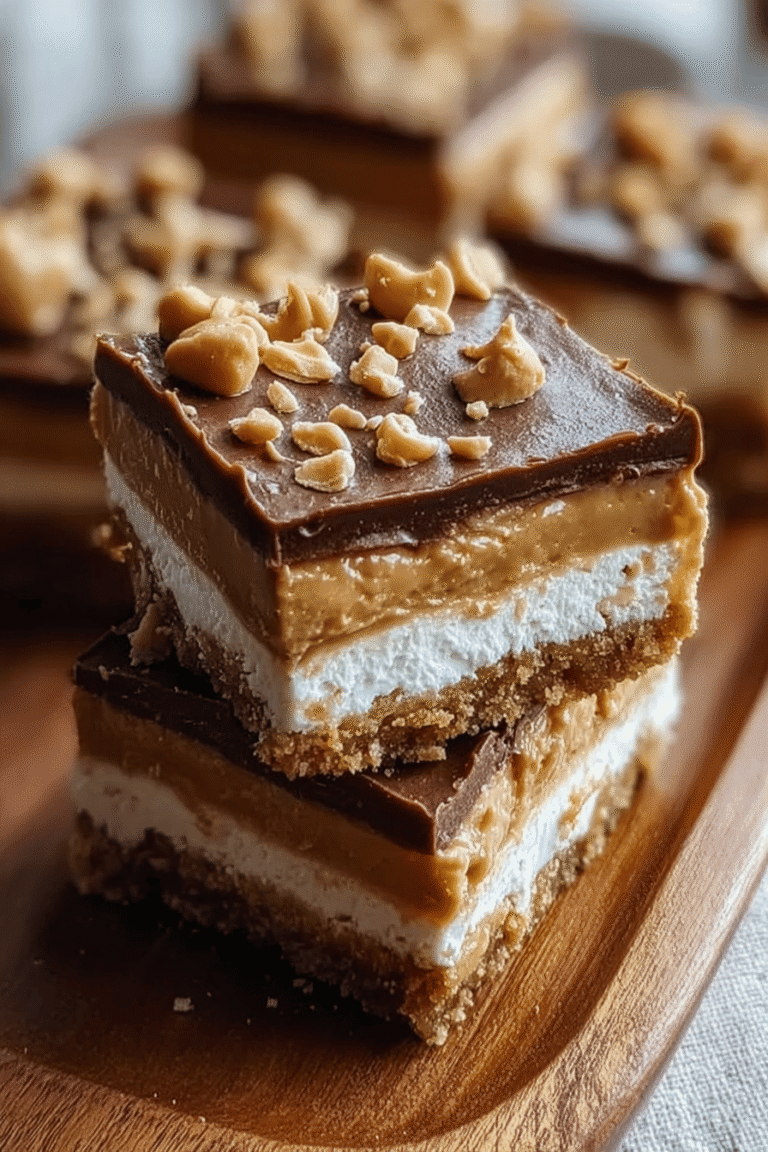
No Bake Peanut Butter Cheesecake Bars
🥜 Satisfy your dessert cravings with these rich and creamy Peanut Butter Cheesecake Bars made without any baking.
🍰 Perfect for a quick, easy dessert that combines a crunchy graham cracker base with a smooth peanut butter filling.
- Total Time: 3 hours 20 minutes
- Yield: 12 bars
Ingredients
– 1 1/2 cups (180 grams) graham cracker crumbs Forms the sturdy base of the bars
– 1/4 cup (50 grams) granulated sugar Adds a touch of sweetness to the crust
– 5 tablespoons (71 grams) unsalted butter, melted Helps bind the crust together
– 1 pack (8 oz) cream cheese, room temperature Creates the creamy cheesecake filling
– 1/2 cup (130 grams) creamy peanut butter Provides that signature nutty flavor and smooth texture
– 1/2 cup (60 grams) powdered sugar Sweetens the filling without making it gritty
– 1/2 cup (120 mL) heavy whipping cream Whips up to add lightness and fluffiness
– 1 teaspoon vanilla extract Enhances the overall taste with a subtle aroma
– Extra peanut butter For optional drizzling on top
– Mini chocolate chips Adds a chocolatey crunch for toppings
– Mini peanut butter cups Provides extra peanut butter burst in the toppings
Instructions
1-Line a 9×5 inch pan with parchment paper, leaving overhang for easy removal. This step ensures your bars come out neatly without sticking.
2-Process graham crackers into fine crumbs and mix with 1/4 cup (50 grams) granulated sugar, then blend in 5 tablespoons (71 grams) melted unsalted butter until the mixture is sandy. If you don’t have a processor, crushing them by hand in a bag works just fine and adds a hands-on touch.
3-Press the mixture firmly into the bottom of the pan and refrigerate while you prepare the filling. This helps the base set up perfectly.
4-Beat 1 pack (8 oz) room temperature cream cheese until it’s creamy and fluffy, which is crucial for that smooth texture.
5-Add 1/2 cup (130 grams) creamy peanut butter and 1/2 cup (60 grams) powdered sugar, then mix on low and medium speed until fully combined.
6-In a separate bowl, beat 1/2 cup (120 mL) heavy whipping cream with 1 teaspoon vanilla extract until stiff peaks form, giving the filling that airy lift.
7-Fold half the whipped cream into the peanut butter mixture, then fold in the remaining whipped cream to keep it light and even.
8-Pour the filling over the chilled base and smooth it evenly with a spatula for a professional finish.
9-Optional: Drizzle extra peanut butter over the top and swirl with a knife, then sprinkle with mini chocolate chips and mini peanut butter cups for extra flair.
10-Chill in the refrigerator for at least 3 hours or overnight until fully set. This is where the magic happens, letting the flavors meld together.
11-Slice and serve, storing leftovers in an airtight container in the fridge. It’s always a joy to share these with friends and see their reactions.
Last Step:
Please leave a rating and comment letting us know how you liked this recipe! This helps our business to thrive and continue providing free, high-quality recipes for you.Notes
🔪 Use a sharp knife dipped in hot water and wiped dry for clean cuts, wiping the knife between slices.
🧀 Ensure cream cheese is fully softened before mixing to prevent lumps.
⚙️ A food processor helps make the crumb base quicker, but crushing by hand is also effective.
- Prep Time: 20 minutes
- Chill time: 3 hours
- Category: Dessert
- Method: No Bake
- Cuisine: American
Nutrition
- Serving Size: 1 bar
- Calories: 340
- Sugar: 8g
- Sodium: 150mg
- Fat: 26g
- Saturated Fat: 10g
- Trans Fat: 0g
- Carbohydrates: 18g
- Fiber: 2g
- Protein: 7g
- Cholesterol: 55mg





