

Why You’ll Love This Lemon Bars
If you’re looking for a simple dessert that brings a burst of citrus goodness, lemon bars stand out as a crowd-pleaser many home bakers turn to again and again. This recipe stands apart with its buttery crust and tangy filling, making it a go-to treat for busy days when you want something homemade without spending hours in the kitchen. Not only is it quick to prepare, but it also offers a fresh way to enjoy the health benefits of lemons, like a natural dose of vitamin C that supports your immune system and adds a refreshing twist to your daily routine.
One of the best parts about this lemon bars recipe is its versatility, allowing you to tweak it for different needs whether you’re vegan, following a gluten-free diet, or watching your calories. For instance, swapping in plant-based ingredients keeps the flavor vibrant while fitting various lifestyles. Overall, these bars deliver a perfect balance of sweet and tart that makes every bite feel special and satisfying.
Beyond the taste, this dessert is great for creating memorable moments, such as sharing with family during gatherings or as a quick snack. It’s adaptable for occasions like holidays or casual weeknights, proving that great food can be both easy and exciting. With just a few basic steps, you’ll have a treat that impresses without overwhelming your schedule.
- Ease of preparation: This lemon bars recipe is simple to make with quick cooking time, perfect for busy schedules or last-minute desserts.
- Health benefits: Made with fresh lemons, these bars provide a good source of vitamin C and antioxidants, supporting wellness and a boost to your immune system.
- Versatility: Easily adaptable to various dietary preferences including vegan, gluten-free, and low-calorie options without sacrificing flavor.
- Distinctive flavor: The perfect balance of tangy citrus and sweet crust makes these lemon bars stand out as a refreshing and delightful treat.
Jump to:
- Why You’ll Love This Lemon Bars
- Essential Ingredients for Lemon Bars
- Shortbread Crust Ingredients
- Lemon Filling Ingredients
- Optional Additions
- How to Prepare the Perfect Lemon Bars: Step-by-Step Guide
- Dietary Substitutions to Customize Your Lemon Bars
- Mastering Lemon Bars: Advanced Tips and Variations
- How to Store Lemon Bars: Best Practices
- FAQs: Frequently Asked Questions About Lemon Bars
- What pan should I use for baking lemon bars?
- Can I use bottled lemon juice instead of fresh lemon juice in lemon bars?
- How can I store leftover lemon bars properly?
- Why do lemon bars sometimes have small white bubbles on top after baking?
- Can other citrus juices be used instead of lemon juice in lemon bars?
- Lemon Bars
- Ingredients
- Instructions
- Last Step:
- Notes
- Nutrition
- Did you make this recipe?
Essential Ingredients for Lemon Bars
Great lemon bars start with the right ingredients, carefully chosen to create a buttery crust and a zesty filling that shines. To make this recipe, gather everything listed below to ensure your bars turn out perfectly every time. Fresh lemons are key for that authentic citrus flavor, so I’ll walk you through the exact quantities needed for both the crust and the filling.
This list pulls together all the essentials based on proven combinations that balance sweetness and tartness just right. Remember, using these measurements helps avoid common pitfalls like a soggy base or overly sweet results.
Shortbread Crust Ingredients
- 1 cup unsalted butter, melted
- 1/2 cup granulated sugar
- 2 teaspoons vanilla extract
- 1/2 teaspoon salt
- 2 cups plus 2 tablespoons all-purpose flour
Lemon Filling Ingredients
- 2 cups granulated sugar
- 6 tablespoons all-purpose flour
- 6 large eggs
- 1 cup lemon juice (about 4 lemons)
Optional Additions
- Confectioners’ sugar for dusting
For special dietary options, consider these tweaks to make the recipe fit your needs. You can use gluten-free flour in place of regular flour or swap butter for coconut oil in the crust. These small changes keep the lemon bars delicious while opening them up to everyone at the table. easy baking recipes on our site can help if you need more ideas.
How to Prepare the Perfect Lemon Bars: Step-by-Step Guide
Creating lemon bars is a straightforward process that anyone can master, even if you’re new to baking. Start by gathering your tools and ingredients to keep things organized and fun from the first step. This guide breaks it down into easy stages, ensuring your bars come out with that ideal buttery crust and tangy top.
First, preheat your oven to 350°F (175°C) and line a baking pan with parchment paper for simple removal later. This little prep goes a long way in making cleanup easier and your bars look neat. Next, mix the crust ingredients until they form a crumbly dough that holds together well.
Press the mixture into your pan and bake it briefly to set the base. While it bakes, whip up the filling by combining the eggs, sugar, flour, and lemon juice until smooth. Pour this over the hot crust right away to lock in that fresh citrus vibe, then bake again until just set.
- First Step: Preheat your oven to 350°F (175°C). Grease and line a baking pan with parchment paper to ensure easy removal of lemon bars.
- Second Step: Combine the flour and softened butter in a mixing bowl and blend until crumbly to form the crust base.
- Third Step: Press the crust mixture evenly into the prepared pan. Bake for 15-18 minutes or until lightly golden.
- Fourth Step: While the crust bakes, whisk together eggs, sugar, lemon juice, lemon zest, and baking powder until smooth and frothy for the filling.
- Fifth Step: Pour the lemon filling over the hot crust as soon as it comes out of the oven.
- Sixth Step: Return the pan to the oven and bake an additional 20-25 minutes, or until the filling is set but still slightly jiggly.
- Seventh Step: Let the bars cool completely on a wire rack, then refrigerate for at least 2 hours to fully set.
- Eighth Step: Cut into squares and dust with powdered sugar before serving.
- Adaptations: For vegan options, use plant-based butter and egg alternatives in the filling. For gluten-free, ensure the flour is gluten-free. Adjust baking times slightly if needed.
To add more depth, try chocolate desserts as a pairing for your lemon bars. For more inspiration, check out this external resource on similar lemon bar recipes.

Dietary Substitutions to Customize Your Lemon Bars
Everyone’s dietary needs vary, so tailoring this lemon bars recipe can make it accessible for all. Whether you’re avoiding certain ingredients or experimenting with flavors, simple swaps keep the bars tasty and true to form. Let’s look at how to adjust the main parts without losing that signature zing.
For the eggs and butter, plant-based options work wonders to keep things creamy. You can also play with add-ins like herbs or spices to match the season or your mood. These changes help the recipe stay flexible for any occasion.
- Protein and Main Component Alternatives: Replace eggs with flaxseed or chia seed substitutes for a vegan-friendly option; use plant-based butter instead of dairy butter for a non-dairy version.
- Vegetable, Sauce, and Seasoning Modifications: Add a touch of fresh ginger or turmeric for a subtle spice twist; substitute regular sugar with maple syrup or agave nectar to alter sweetness naturally; incorporate fresh herbs like mint or basil for unique flavor profiles.
These substitutions allow tailoring the lemon bars recipe to dietary restrictions and seasonal ingredient availability without compromising flavor or texture. By trying these, you can turn a basic batch into something personalized and exciting.
Mastering Lemon Bars: Advanced Tips and Variations
Once you’re comfortable with the basics, take your lemon bars to the next level with some pro techniques and creative twists. Using the right tools, like a food processor for the crust, ensures a smooth texture that impresses your guests. Flavors can be amped up with easy add-ins that keep things fresh and fun.
Presentation matters too, so think about how you serve these treats to make them pop. Whether it’s for a party or a quiet night in, these tips add that extra touch of polish.
| Tips | Benefits |
|---|---|
| Use a food processor for crust | Achieves a finer, even texture |
| Add raspberry puree to filling | Introduces a fruity layer of flavor |
| Dust with powdered sugar | Enhances visual appeal |
Pro cooking techniques: Use a food processor to blend crust ingredients thoroughly for a finer texture; blind bake the crust to prevent sogginess. Flavor variations: Add raspberry puree to the filling for a fruity twist or incorporate lavender into the crust for a floral note. Presentation tips: Serve lemon bars dusted with powdered sugar and topped with a lemon slice or fresh berry garnish for an elegant look. Make-ahead options: Prepare the crust and filling separately in advance; assemble and bake when needed to save time. These expert techniques and creative variations elevate the lemon bars, enhancing flavor, texture, and presentation. For more ideas, explore this guide on creative lemon baking ideas.
How to Store Lemon Bars: Best Practices
Proper storage keeps your lemon bars tasting fresh and delicious for days, so follow these straightforward steps to preserve their quality. Whether you’re saving them for later or prepping ahead, the right method makes a big difference. Refrigeration is key for maintaining that perfect tangy-sweet balance.
Freezing allows you to enjoy these treats over a longer period, which is ideal for meal planning. Always use quality containers to avoid any off flavors creeping in.
- Refrigeration: Store lemon bars in an airtight container in the refrigerator for up to 5 days to maintain freshness.
- Freezing: Wrap bars tightly in plastic wrap and place in a freezer-safe container; freeze for up to 3 months.
- Reheating: Thaw frozen lemon bars in the refrigerator overnight. Warm briefly in a low oven (about 300°F) if desired, but avoid microwave reheating to preserve texture.
- Meal prep considerations: Portion bars before storing for convenient grab-and-go snacks or desserts. Use parchment paper between layers to prevent sticking during storage.

FAQs: Frequently Asked Questions About Lemon Bars
What pan should I use for baking lemon bars?
A glass baking pan is ideal for lemon bars because it distributes heat evenly and prevents any metallic taste. Ceramic pans can also work well. It’s best to avoid metal pans, as they sometimes react with acidic lemon juice and impact the flavor of the bars.
Can I use bottled lemon juice instead of fresh lemon juice in lemon bars?
While bottled lemon juice can be used in a pinch, fresh lemon juice produces a brighter, more natural flavor that is preferred for lemon bars. Fresh juice enhances the tartness and overall taste, making the dessert more vibrant.
How can I store leftover lemon bars properly?
Lemon bars should be stored in an airtight container in the refrigerator. They will stay fresh for up to one week. If you want to keep them longer, wrap individual bars tightly and freeze for up to 3-4 months; thaw them in the fridge before serving.
Why do lemon bars sometimes have small white bubbles on top after baking?
The white bubbles are caused by air trapped in the eggs rising to the surface during baking. This is normal and does not affect taste or quality. You can lightly dust the bars with powdered sugar to cover the bubbles if desired.
Can other citrus juices be used instead of lemon juice in lemon bars?
Yes, you can substitute fresh juices like blood orange, lime, or grapefruit. Since different citrus juices vary in sweetness and acidity, you might need to adjust the sugar in the recipe slightly to balance the flavor.
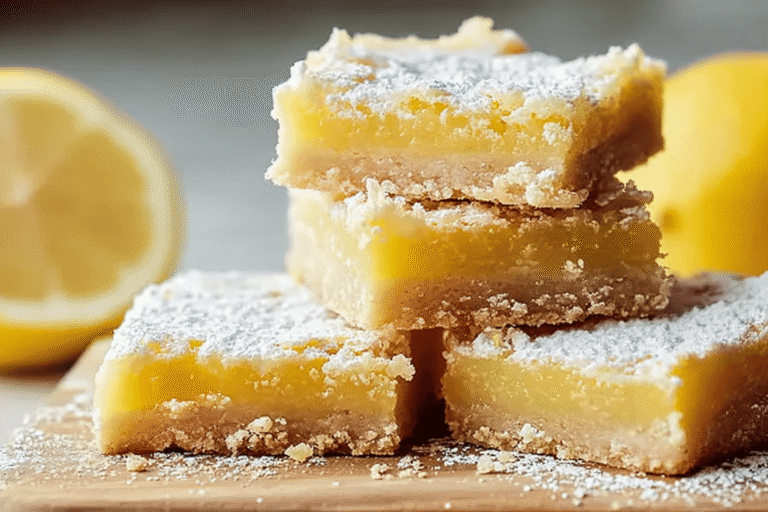
Lemon Bars
🍋 Enjoy the perfect balance of tangy citrus flavor and a buttery crust with these classic lemon bars.
🍰 This easy-to-make dessert is refreshing and indulgent, ideal for any occasion or a delightful treat.
- Total Time: 65 minutes
- Yield: 12–16 bars 1x
Ingredients
1 cup unsalted butter, melted
1/2 cup granulated sugar
2 teaspoons vanilla extract
1/2 teaspoon salt
2 cups plus 2 tablespoons all-purpose flour
2 cups granulated sugar
6 tablespoons all-purpose flour
6 large eggs
1 cup lemon juice (about 4 lemons)
Confectioners’ sugar for dusting
Instructions
1-First Step: Preheat your oven to 350°F (175°C). Grease and line a baking pan with parchment paper to ensure easy removal of lemon bars.
2-Second Step: Combine the flour and softened butter in a mixing bowl and blend until crumbly to form the crust base.
3-Third Step: Press the crust mixture evenly into the prepared pan. Bake for 15-18 minutes or until lightly golden.
4-Fourth Step: While the crust bakes, whisk together eggs, sugar, lemon juice, lemon zest, and baking powder until smooth and frothy for the filling.
5-Fifth Step: Pour the lemon filling over the hot crust as soon as it comes out of the oven.
6-Sixth Step: Return the pan to the oven and bake an additional 20-25 minutes, or until the filling is set but still slightly jiggly.
7-Seventh Step: Let the bars cool completely on a wire rack, then refrigerate for at least 2 hours to fully set.
8-Eighth Step: Cut into squares and dust with powdered sugar before serving.
9-Adaptations: For vegan options, use plant-based butter and egg alternatives in the filling. For gluten-free, ensure the flour is gluten-free. Adjust baking times slightly if needed.
Last Step:
Please leave a rating and comment letting us know how you liked this recipe! This helps our business to thrive and continue providing free, high-quality recipes for you.Notes
🍋 Use fresh lemon juice for the best bright and tangy flavor.
🧈 Make sure to press the crust firmly and evenly for a sturdy base.
❄️ Allow the bars to cool completely before cutting to prevent cracking or crumbling.
- Prep Time: 15 minutes
- Bake Time: 50 minutes
- Cook Time: 50 minutes
- Category: Dessert
- Method: Baking
- Cuisine: American
Nutrition
- Serving Size: 1 bar





