

Why You’ll Love These Hot Chocolate Cupcakes
If you love cozy winter baking, these Hot Chocolate Cupcakes are the kind of treat that makes people smile before the first bite. They look like tiny mugs of cocoa, taste rich and chocolatey, and come with marshmallow buttercream, mini candy cane handles, and all the festive toppings your heart can handle. They are also a great fit for home cooks, busy parents, students, and anyone who wants a pretty dessert without a fussy process.
- Easy enough for a weeknight bake: The batter comes together in one bowl, and the cupcake bake time is just 16 to 18 minutes. That means you can go from pantry ingredients to a tray of Hot Chocolate Cupcakes in under 40 minutes.
- Rich, comforting flavor: Cocoa powder, buttermilk, and a little hot water give these cupcakes that deep hot cocoa taste with a soft, moist crumb. The marshmallow buttercream adds a sweet, fluffy finish that feels festive and nostalgic.
- Fun for all kinds of occasions: These cupcakes work for holiday parties, classroom treats, winter birthdays, and cozy movie nights. The mini candy cane handles make them look like little hot chocolate mugs, which is a fun surprise for kids and grown-ups alike.
- Simple to adapt: You can make mini cupcakes for parties, prepare the frosting ahead, or freeze the cupcakes for later. They are a practical dessert for busy schedules and a sweet choice for bakers who like to plan ahead.
These cupcakes are the kind of recipe that feels special without asking too much from you, which is exactly why they are so lovable.
For more cozy dessert ideas, you may also enjoy my favorite easy baking recipes on Savoring Flavors.
Jump to:
- Why You’ll Love These Hot Chocolate Cupcakes
- Essential Ingredients for Hot Chocolate Cupcakes
- Cupcake ingredients
- Marshmallow buttercream ingredients
- Toppings and decor
- Ingredient notes and helpful swaps
- Special dietary options
- How to Prepare the Perfect Hot Chocolate Cupcakes: Step-by-Step Guide
- First step: Prep the pans and oven
- Second step: Mix the dry ingredients
- Third step: Add the wet ingredients
- Fourth step: Stir in the hot water
- Fifth step: Fill and bake
- Sixth step: Cool completely
- Seventh step: Make the marshmallow buttercream
- Eighth step: Frost and decorate
- Ninth step: Serve and enjoy
- Dietary Substitutions to Customize Your Hot Chocolate Cupcakes
- Protein and main ingredient alternatives
- Vegetable, sauce, and seasoning modifications
- Mastering Hot Chocolate Cupcakes: Advanced Tips and Variations
- Pro cooking techniques
- Flavor variations
- Presentation tips
- Make-ahead options
- How to Store Hot Chocolate Cupcakes: Best Practices
- Refrigeration
- Freezing
- Reheating and serving
- Meal prep considerations
- FAQs: Frequently Asked Questions About Hot Chocolate Cupcakes
- What temperature do I preheat the oven to for hot chocolate cupcakes?
- Can I make hot chocolate cupcakes ahead and freeze them?
- Can I make the frosting for hot chocolate cupcakes the day before?
- Should I double the frosting recipe for piping on hot chocolate cupcakes?
- How do I make mini candy cane handles for hot chocolate cupcakes?
- Hot Chocolate Cupcakes
- Ingredients
- Instructions
- Last Step:
- Notes
- Nutrition
- Did you make this recipe?
Essential Ingredients for Hot Chocolate Cupcakes
Every part of this recipe has a job to do. The cupcake base brings the chocolate flavor, the marshmallow buttercream adds a soft and creamy finish, and the toppings turn each cupcake into a tiny hot cocoa moment. If you like simple pantry baking, you will be glad to see how many of these ingredients are everyday staples.
Cupcake ingredients
- 2 cups all-purpose flour
- 2 cups granulated sugar
- 1/2 cup unsweetened cocoa powder
- 1/2 teaspoon salt
- 2 teaspoons baking soda
- 1 teaspoon baking powder
- 1 teaspoon vanilla extract
- 2 eggs
- 1 cup buttermilk
- 1 cup vegetable oil
- 1 cup hot water
Marshmallow buttercream ingredients
- 3/4 cup unsalted butter, softened
- 1 (7 oz) container marshmallow creme
- 1 cup powdered sugar
- 1 teaspoon vanilla extract
Toppings and decor
- Mini candy canes, cut to fit
- Mini marshmallows
- Chocolate chips
- Crushed candy canes
Ingredient notes and helpful swaps
Buttermilk helps keep the cupcakes tender, but if you do not have it on hand, you can make a quick substitute with milk and a little lemon juice or vinegar. The hot water thins the batter, and that is a good thing here because it helps make the crumb soft and moist. The marshmallow creme gives the frosting its hot cocoa feel, while the powdered sugar adds just enough body for spreading or piping.
| Ingredient | What it does | Best swap if needed |
|---|---|---|
| Buttermilk | Creates a tender crumb | Milk with 1 tablespoon lemon juice per cup |
| Marshmallow creme | Gives the frosting its fluffy, sweet finish | Marshmallow fluff |
| Vegetable oil | Keeps the cupcakes moist | Neutral oil like canola |
| Mini candy canes | Makes the mug handle look | Small pretzel rods for a different look |
Special dietary options
Vegan: Use plant-based milk with vinegar in place of buttermilk, swap the eggs for a vegan egg substitute, choose dairy-free butter, and use a vegan marshmallow style frosting if available.
Gluten-free: Replace the all-purpose flour with a 1:1 gluten-free baking blend that already includes xanthan gum.
Low-calorie: Reduce the frosting amount, use a lighter hand with toppings, or make smaller mini cupcakes to help with portion control.
If you want more helpful baking basics, check out my kitchen tips and dessert guides.
How to Prepare the Perfect Hot Chocolate Cupcakes: Step-by-Step Guide
These Hot Chocolate Cupcakes are easy to make, but a few small details really help them turn out soft, rich, and pretty enough for a holiday tray. If you are baking with kids, making dessert for guests, or just want a low-stress recipe after a long day, this process stays friendly from start to finish. The batter will be thin, so do not worry when you see that texture. That is exactly how it should look.
First step: Prep the pans and oven
Preheat your oven to 350 degrees Fahrenheit. Line two muffin tins with cupcake liners so the batter is ready to go once mixed. This first step keeps the process smooth and helps the cupcakes bake evenly.
Second step: Mix the dry ingredients
In a large bowl, whisk together the flour, granulated sugar, cocoa powder, salt, baking soda, and baking powder. Mixing the dry ingredients first helps spread the leavening evenly, which gives you a better rise and a more even chocolate flavor.
Third step: Add the wet ingredients
Add the vanilla extract, eggs, buttermilk, and vegetable oil to the dry mixture. Stir until the batter looks smooth and well combined. At this point, the mixture will already smell like chocolate cake, which is always a nice moment.
Fourth step: Stir in the hot water
Pour in the hot water and mix again. The batter will be thin, and that is perfectly fine. The hot water helps bloom the cocoa and gives the cupcakes that deep hot chocolate taste.
Fifth step: Fill and bake
Spoon the batter into the cupcake liners, filling each one about two-thirds full. Bake for 16 to 18 minutes, or until a toothpick inserted in the center comes out clean. If you are making mini cupcakes, reduce the baking time to about 11 minutes.
Sixth step: Cool completely
Let the cupcakes cool in the pan for a few minutes, then move them to a wire rack. They need to be fully cool before frosting, or the marshmallow buttercream will soften too much and slide off.
Seventh step: Make the marshmallow buttercream
Beat the softened butter until creamy. Add the marshmallow creme and mix until the texture looks fluffy. Then add the powdered sugar and vanilla extract, mixing until smooth. If you want a less buttery flavor, add a little more powdered sugar to taste. For piping, you may want to double the frosting recipe so there is plenty for tall swirls.
Eighth step: Frost and decorate
Spread or pipe the frosting onto the cooled cupcakes. Add mini marshmallows, chocolate chips, and crushed candy canes. Then cut the mini candy canes to fit and press the hook into the side of each cupcake to create the little mug handle. That one small detail makes the cupcakes look like festive cups of hot cocoa.
Once the candy cane handle goes on, the whole tray suddenly looks like a winter party.
Ninth step: Serve and enjoy
Serve the cupcakes right away, or chill them briefly if you want the frosting to set a little. These are lovely on a dessert table, but they are just as nice with a mug of coffee and a quiet evening at home.

Dietary Substitutions to Customize Your Hot Chocolate Cupcakes
One of the best things about baking at home is that you can make small changes to fit your pantry, taste, or nutrition goals. These Hot Chocolate Cupcakes are flexible enough to work for many kitchens, which makes them even more useful for busy households.
Protein and main ingredient alternatives
If you want to change the base recipe, keep the structure in mind. The eggs help with lift and texture, so if you need an egg-free option, use a trusted egg replacer meant for baking. For dairy-free baking, plant milk plus vinegar can stand in for buttermilk, and dairy-free butter can replace the unsalted butter in the frosting. If you are baking for a mixed group, making one batch with substitutes and one standard batch can be a smart move.
Vegetable, sauce, and seasoning modifications
There are no vegetables in this dessert, but there are still a few ways to adjust the flavor profile. Add a tiny pinch of espresso powder to deepen the chocolate taste. Swap vanilla extract for peppermint extract if you want a stronger holiday flavor. If you do not have marshmallow creme, a marshmallow-style spread can work in a pinch, though the frosting texture may vary a little.
- Gluten-free option: Use a 1:1 baking blend for the flour.
- Dairy-free option: Use plant-based butter and a non-dairy milk substitute for the buttermilk.
- Lower-sugar option: Reduce the frosting portion and use fewer candy toppings.
- Mini version: Bake as mini cupcakes and cut baking time to about 11 minutes.
If you are trying to feed a crowd with different needs, these small changes make the recipe easier to share without losing the fun hot cocoa look.
Mastering Hot Chocolate Cupcakes: Advanced Tips and Variations
Once you have made these cupcakes once, you may find yourself wanting to make them again and again. They are easy to personalize, and a few little tricks can make them even more bakery-like. That is especially helpful if you are baking for a party, a bake sale, or a family gathering where presentation matters almost as much as taste.
Pro cooking techniques
Measure the flour carefully so the cupcakes stay soft instead of dense. Mix only until the batter is smooth, because overmixing can make the crumb tough. Use room-temperature eggs and softened butter for smoother blending. If your oven runs hot, check the cupcakes a minute or two early.
Flavor variations
You can add peppermint extract to the batter or frosting for a candy cane version. A tiny bit of cinnamon can bring a warm spiced note that feels lovely in colder months. You can also use white chocolate chips instead of regular chocolate chips for the topping if you want a sweeter finish.
Presentation tips
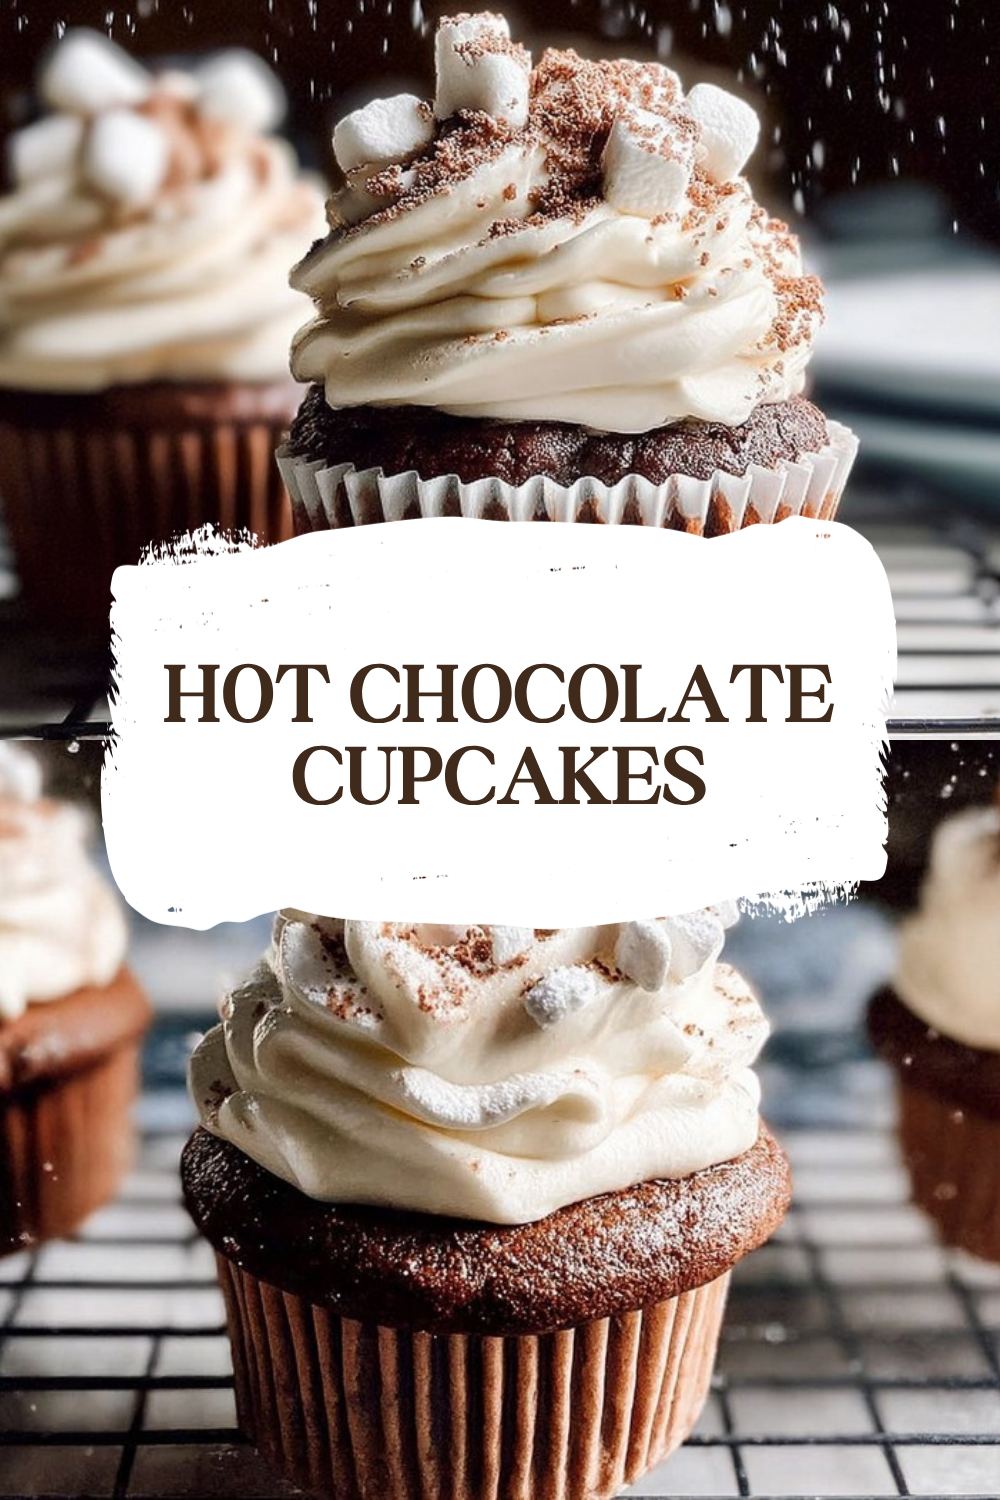
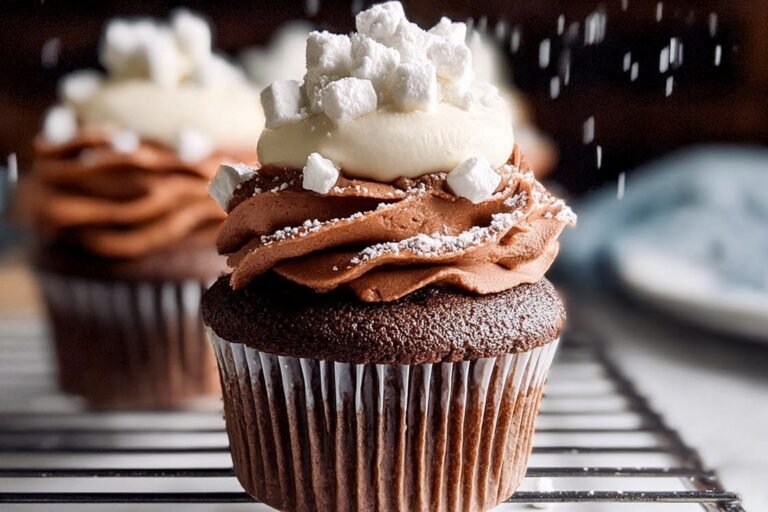
Pipe the frosting in a tall swirl so it looks like whipped hot cocoa foam. Add the mini candy cane handle after frosting while the buttercream is still soft enough to hold it in place. A dusting of crushed candy canes gives the top a pretty sparkle, and a few mini marshmallows finish the mug look beautifully.
Make-ahead options
These cupcakes can be baked ahead and frozen, which is a big help during the holidays. The frosting can be made a day in advance and stored in the fridge, then brought back to room temperature and whipped again the next morning. That means you can break the recipe into smaller tasks instead of trying to do everything at once.
For busy days, making the parts ahead is the secret that turns baking from stressful to easy.
How to Store Hot Chocolate Cupcakes: Best Practices
Because these cupcakes are topped with buttercream and candy decorations, storage matters a little. The good news is that they keep well when you use the right method. That makes them a great choice for planning ahead for parties or saving leftovers for later in the week.
Refrigeration
Store frosted cupcakes in an airtight container in the refrigerator for up to 3 days. If your kitchen is cool, they can sometimes sit at room temperature for a short time before serving, but refrigeration is the safer choice when the frosting is soft or the weather is warm.
Freezing
For longer storage, freeze the unfrosted cupcakes. Let them cool completely, wrap each one individually, and place them in a freezer-safe bag or container. They can stay frozen for up to 2 months. Thaw at room temperature before frosting and decorating.
Reheating and serving
You do not need to reheat these cupcakes in the microwave. In fact, that can melt the buttercream. Instead, let frozen cupcakes thaw on the counter until soft. If the frosting has been chilled, bring it to room temperature before serving for the best texture.
Meal prep considerations
If you like to bake in batches, make the cupcakes one day and frost them the next. You can also prepare the frosting a day ahead and keep it chilled. This makes the recipe very handy for parties, school events, or any week when your calendar feels too full.
FAQs: Frequently Asked Questions About Hot Chocolate Cupcakes
What temperature do I preheat the oven to for hot chocolate cupcakes?
Preheat your oven to 350°F (175°C) for hot chocolate cupcakes. This temperature ensures even baking, allowing the cupcakes to rise perfectly with a moist, fudgy center reminiscent of hot cocoa. Line a standard 12-cup muffin tin with paper liners and fill each about two-thirds full with batter. Bake for 18-22 minutes, or until a toothpick inserted in the center comes out with a few moist crumbs. Avoid higher temps to prevent dry edges or cracking tops. Let them cool in the tin for 5 minutes before transferring to a wire rack. This standard temp works for most ovens; if yours runs hot, drop to 340°F and check at 16 minutes. Proper preheating takes 10-15 minutes—use an oven thermometer for accuracy.
Can I make hot chocolate cupcakes ahead and freeze them?
Yes, hot chocolate cupcakes freeze beautifully for up to 2 months, making them ideal for holiday prep. Bake and cool completely, then wrap unfrosted cupcakes individually in plastic wrap and place in a freezer-safe zip-top bag, squeezing out excess air. Thaw at room temperature for 1-2 hours before frosting. Freezing preserves the rich chocolate flavor and moist texture without sogginess. Avoid freezing frosted cupcakes, as the frosting may weep or separate upon thawing. For best results, label bags with the date. Once thawed, store in an airtight container at room temp for up to 3 days or refrigerate for a week. This method saves time for parties—bake a double batch now and enjoy fresh-tasting treats later.
Can I make the frosting for hot chocolate cupcakes the day before?
Yes, prepare the frosting a day ahead and store it in the fridge overnight for hot chocolate cupcakes. Use a Swiss meringue or buttercream base with marshmallow fluff for that authentic hot cocoa taste—whip until stiff peaks form. Transfer to an airtight container, press plastic wrap directly on the surface to prevent a skin from forming, then cover tightly. The next morning, let it sit at room temp for 30 minutes and re-whip on medium speed for 1-2 minutes to restore fluffiness. It holds shape perfectly for piping or spreading. This advance prep cuts assembly time in half. If it firms up too much, add a teaspoon of milk while whipping. Keeps flavor vibrant and texture smooth for up to 48 hours refrigerated.
Should I double the frosting recipe for piping on hot chocolate cupcakes?
Yes, double the frosting recipe if piping on hot chocolate cupcakes, as the standard amount covers about 12 cupcakes flatly but falls short for generous swirls. The base recipe (typically 2 cups butter, 4 cups powdered sugar, marshmallow fluff, cocoa, and vanilla) yields enough for basic spreading. Doubling ensures tall, mug-like peaks that mimic hot chocolate foam—perfect for the candy cane handles. Pipe using a large round or star tip (like Wilton 1M) starting from the center and swirling outward. Chill piped cupcakes 15 minutes to set before adding handles. Extra frosting stores in the fridge for a week or freezes for a month. This adjustment prevents running out mid-project and gives a professional bakery look.
How do I make mini candy cane handles for hot chocolate cupcakes?
Craft mini candy cane handles for hot chocolate cupcakes by trimming full-sized canes to fit snugly against the frosted “mug” side. Use sharp kitchen scissors or a serrated knife—wear gloves to avoid sticky hands. Cut off the hooked top and straight bottom end, leaving a 2-3 inch curved piece per cupcake. Aim for handles about 1.5 inches tall to match standard cupcake height. Gently press each end into the soft frosting on opposite sides, angling slightly for stability; the frosting’s give holds them secure. Add right after piping while frosting is fresh. For 12 cupcakes, buy a 12-pack of mini canes or trim 6 full ones. They stay crisp for 2 days at room temp. This simple step transforms cupcakes into adorable hot cocoa mugs.
Hot Chocolate Cupcakes
☕ Cozy up with hot chocolate cupcakes that taste like a mug of cocoa, topped with fluffy marshmallow buttercream and festive candy cane handles for pure holiday magic!
🎂 Quick 38-minute bake yields 24 crowd-pleasing treats mimicking steaming mugs—ideal for parties with minimal fuss and maximum wow factor.
- Total Time: 38 minutes
- Yield: 24 cupcakes
Ingredients
– 2 cups all-purpose flour
– 2 cups granulated sugar
– 1/2 cup unsweetened cocoa powder
– 1/2 teaspoon salt
– 2 teaspoons baking soda
– 1 teaspoon baking powder
– 1 teaspoon vanilla extract
– 2 eggs
– 1 cup buttermilk
– 1 cup vegetable oil
– 1 cup hot water
– 3/4 cup unsalted butter, softened
– 1 (7 oz) container marshmallow creme
– 1 cup powdered sugar
– 1 teaspoon vanilla extract
– Mini candy canes, cut to fit
– Mini marshmallows
– Chocolate chips
– Crushed candy canes
Instructions
1-First step: Prep the pans and oven Preheat your oven to 350 degrees Fahrenheit. Line two muffin tins with cupcake liners so the batter is ready to go once mixed. This first step keeps the process smooth and helps the cupcakes bake evenly.
2-Second step: Mix the dry ingredients In a large bowl, whisk together the flour, granulated sugar, cocoa powder, salt, baking soda, and baking powder. Mixing the dry ingredients first helps spread the leavening evenly, which gives you a better rise and a more even chocolate flavor.
3-Third step: Add the wet ingredients Add the vanilla extract, eggs, buttermilk, and vegetable oil to the dry mixture. Stir until the batter looks smooth and well combined. At this point, the mixture will already smell like chocolate cake, which is always a nice moment.
4-Fourth step: Stir in the hot water Pour in the hot water and mix again. The batter will be thin, and that is perfectly fine. The hot water helps bloom the cocoa and gives the cupcakes that deep hot chocolate taste.
5-Fifth step: Fill and bake Spoon the batter into the cupcake liners, filling each one about two-thirds full. Bake for 16 to 18 minutes, or until a toothpick inserted in the center comes out clean. If you are making mini cupcakes, reduce the baking time to about 11 minutes.
6-Sixth step: Cool completely Let the cupcakes cool in the pan for a few minutes, then move them to a wire rack. They need to be fully cool before frosting, or the marshmallow buttercream will soften too much and slide off.
7-Seventh step: Make the marshmallow buttercream Beat the softened butter until creamy. Add the marshmallow creme and mix until the texture looks fluffy. Then add the powdered sugar and vanilla extract, mixing until smooth. If you want a less buttery flavor, add a little more powdered sugar to taste. For piping, you may want to double the frosting recipe so there is plenty for tall swirls.
8-Eighth step: Frost and decorate Spread or pipe the frosting onto the cooled cupcakes. Add mini marshmallows, chocolate chips, and crushed candy canes. Then cut the mini candy canes to fit and press the hook into the side of each cupcake to create the little mug handle. That one small detail makes the cupcakes look like festive cups of hot cocoa.
9-Ninth step: Serve and enjoy Serve the cupcakes right away, or chill them briefly if you want the frosting to set a little. These are lovely on a dessert table, but they are just as nice with a mug of coffee and a quiet evening at home.
Last Step:
Please leave a rating and comment letting us know how you liked this recipe! This helps our business to thrive and continue providing free, high-quality recipes for you.Notes
✂️ Use kitchen scissors to cut mini candy canes for snug handles.
🧁 Double frosting recipe for generous piping coverage.
❄️ Bake and freeze cupcakes ahead; frost fresh for best results.
- Prep Time: 20 minutes
- Cook Time: 18 minutes
- Category: Desserts
- Method: Baked
- Cuisine: American
- Diet: Vegetarian
Nutrition
- Serving Size: 1 cupcake
- Calories: 169 kcal
- Sugar: 19g
- Sodium: 134mg
- Fat: 6g
- Saturated Fat: 4g
- Unsaturated Fat: 2g
- Trans Fat: 0g
- Carbohydrates: 27g
- Fiber: 1g
- Protein: 1g
- Cholesterol: 25mg





