

Why You’ll Love This Dulce De Leche Cheesecake
Imagine sinking your fork into a slice of creamy, decadent Dulce De Leche Cheesecake that feels like a warm hug after a long day. This recipe transforms simple ingredients into something truly special, making it a go-to for home cooks looking to impress without much hassle. Let me tell you, once you try this Dulce De Leche Cheesecake, you’ll find yourself making it on repeat for family gatherings or just a quiet night in.
- Ease of preparation: With just 15 minutes of prep time and a total cook time of about 1 hour, this recipe is straightforward and perfect for busy parents or working professionals. You don’t need fancy tools just a mixer and a springform pan to whip it up, so even if you’re a beginner, you’ll feel confident from start to finish. It’s that simple, letting you spend more time enjoying the results than slaving over the stove.
- Health benefits: Each slice packs in 9.5g of protein and essential nutrients like calcium from the cream cheese, which can support bone health and keep you satisfied. While it’s a treat with 558 calories per slice, you can adjust portions for diet-conscious individuals to fit into a balanced meal plan. Plus, the mix of carbs and fats provides steady energy, making it a smarter dessert choice when enjoyed in moderation.
- Versatility: This Dulce De Leche Cheesecake adapts easily to various dietary needs, whether you’re gluten-free or vegan. For instance, you can swap ingredients for plant-based options, and it’s forgiving enough for students or seniors to customize on the fly. That means food enthusiasts and newlyweds can make it their own, turning it into a fun kitchen experiment every time.
- Distinctive flavor: What really sets this apart is the rich, caramel-like swirl of dulce de leche that adds a dreamy sweetness to the creamy texture. It’s not just another cheesecake; the chocolate chip cookie crust brings a delightful crunch that complements the smooth filling, creating a flavor profile that’s irresistible to travelers and baking enthusiasts alike. Honestly, it’s the kind of dessert that makes every bite feel like a mini vacation.
For more on creating easy dessert recipes, check out our easy dessert recipes section on the blog. And if you’re curious about the basics of dulce de leche, here’s a helpful external resource: learn more about dulce de leche.
Jump to:
- Why You’ll Love This Dulce De Leche Cheesecake
- Essential Ingredients for Dulce De Leche Cheesecake
- Main Ingredients
- Special Dietary Options
- How to Prepare the Perfect Dulce De Leche Cheesecake: Step-by-Step Guide
- First Step: Preheat and Prepare the Crust
- Second Step: Bake the Crust
- Third Step: Mix the Filling
- Fourth Step: Assemble and Swirl
- Fifth Step: Bake in a Water Bath
- Final Step: Cool and Chill
- Dietary Substitutions to Customize Your Dulce De Leche Cheesecake
- Protein and Main Component Alternatives
- Vegetable, Sauce, and Seasoning Modifications
- Mastering Dulce De Leche Cheesecake: Advanced Tips and Variations
- Pro Cooking Techniques
- Flavor Variations
- How to Store Dulce De Leche Cheesecake: Best Practices
- FAQs: Frequently Asked Questions About Dulce De Leche Cheesecake
- What is dulce de leche and how is it used in cheesecake?
- Why should I use a water bath when baking dulce de leche cheesecake?
- Can I make dulce de leche cheesecake ahead of time?
- What is the best crust to pair with dulce de leche cheesecake?
- How can I prevent my dulce de leche cheesecake from cracking?
- Dulce De Leche Cheesecake
- Ingredients
- Instructions
- Last Step:
- Notes
- Nutrition
- Did you make this recipe?
Essential Ingredients for Dulce De Leche Cheesecake
Getting the ingredients right is key to nailing this Dulce De Leche Cheesecake recipe, and I’ve broken it all down for you in a clear list. Each item plays a specific role in building that perfect creamy texture and flavorful base, so let’s dive in and see what makes this dish sing. I’ll also touch on ways to adapt for special diets, keeping it accessible for everyone from busy parents to health-focused foodies.
Main Ingredients
- 1½ cups (180g) chocolate chip cookie crumbs – These form the base of the crust, providing a tasty, crunchy foundation that absorbs moisture and adds a hint of chocolatey goodness for a moreish bite.
- 3 tablespoons (42g) unsalted butter, melted – This helps bind the crust together, creating a sturdy layer that holds up to the creamy filling, and it’s easy to melt for quick prep.
- 2 tablespoons (24g) granulated sugar – Added to the crust for a touch of sweetness that balances the flavors and helps with browning during baking.
- 2 packages (8oz; 454g each) cream cheese, softened – The heart of the filling, giving that ultra-smooth, rich texture that makes cheesecake irresistible; beat it well for the creamiest results.
- ⅔ cup (130g) granulated sugar – Sweetens the filling perfectly, dissolving into the cream cheese to create a velvety consistency without overwhelming the other flavors.
- 2 teaspoons pure vanilla extract – Infuses a warm, aromatic note that enhances the overall taste, making the cheesecake feel homemade and comforting.
- 2 large eggs (100g total), lightly beaten – These add structure and richness to the filling, helping it set up just right for that perfect jiggle when baked.
- ¼ cup (80g) dulce de leche, melted – Swirled in for that signature caramel flavor, it brings a luxurious sweetness that takes this Creamy Cheesecake Recipe to the next level.
| Ingredient Category | Quantity | Purpose |
|---|---|---|
| Crust Components | 1½ cups chocolate chip cookie crumbs, 3 tablespoons unsalted butter, 2 tablespoons granulated sugar | Builds a flavorful base |
| Filling Components | 2 packages cream cheese, ⅔ cup granulated sugar, 2 teaspoons vanilla extract, 2 large eggs, ¼ cup dulce de leche | Creates creamy texture and flavor |
Special Dietary Options
- Vegan: Swap the cream cheese for a plant-based version like cashew or almond-based cream cheese, and use a vegan butter alternative for the crust to keep that melt-in-your-mouth quality while making it dairy-free.
- Gluten-free: Ensure the chocolate chip cookie crumbs are made from gluten-free cookies, and double-check that all other ingredients, like vanilla extract, are certified gluten-free for a worry-free bake.
- Low-calorie: Opt for reduced-fat cream cheese and a sugar substitute like stevia in place of granulated sugar to cut down on calories while maintaining the rich Dulce de Leche flavor.
How to Prepare the Perfect Dulce De Leche Cheesecake: Step-by-Step Guide
This Creamy Dulce De Leche Cheesecake Recipe is all about turning basic steps into a fun baking adventure, and I’m excited to walk you through it. We’ll start with getting everything ready, then move on to mixing and baking for that irresistible result. With a prep time of just 15 minutes and a bake of about 1 hour, it’s perfect for baking enthusiasts who want something special without a ton of fuss.
First Step: Preheat and Prepare the Crust
Preheat your oven to 325°F to ensure even baking right from the start. Combine the 1½ cups (180g) chocolate chip cookie crumbs, 3 tablespoons (42g) melted unsalted butter, and 2 tablespoons (24g) granulated sugar in a bowl until it looks like wet sand. Press this mixture firmly into the bottom and about ¼ inch up the sides of a greased 7-inch springform pan, then wrap the pan tightly in heavy-duty aluminum foil to keep out any water from the bath.
Second Step: Bake the Crust
Pop the pan into the preheated oven and bake for about 10 minutes, or until the crust turns a deep golden brown. This step creates a sturdy base that won’t get soggy. Once it’s done, take it out and let it cool on the counter while you move on to the filling it’s that quick and easy to get this part nailed.
Third Step: Mix the Filling
In a mixer, beat the 2 packages (8oz; 454g each) of softened cream cheese, ⅔ cup (130g) granulated sugar, and 2 teaspoons pure vanilla extract until it’s super smooth and creamy, which takes about 2 minutes. Add the 2 large eggs (100g total), lightly beaten, and mix on medium-low speed until everything is fully incorporated and fluffy don’t overdo it to avoid air bubbles that could crack the top.
Fourth Step: Assemble and Swirl
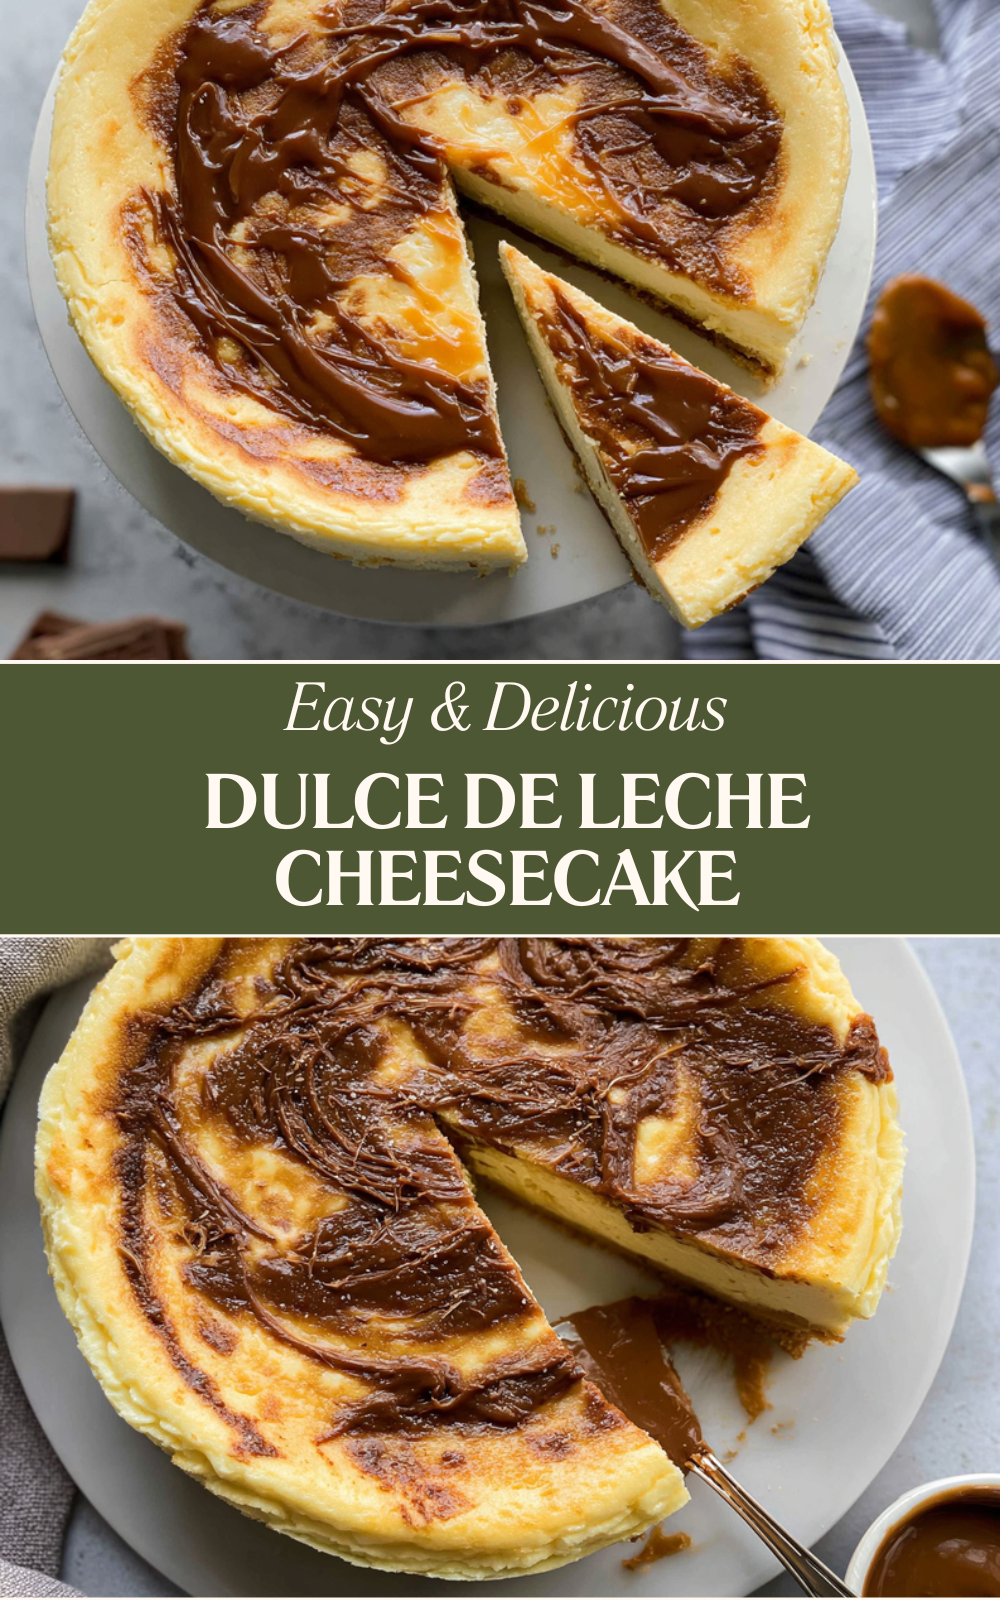
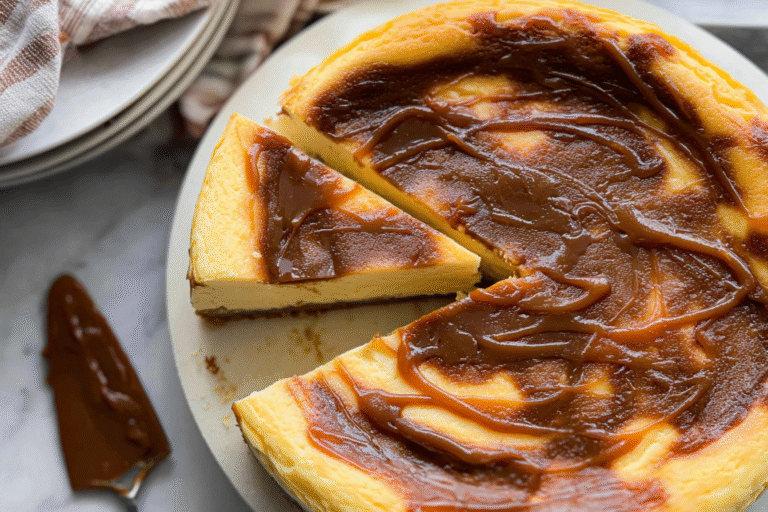
Pour the creamy filling over the cooled crust in the pan, spreading it evenly. Then, pour the ¼ cup (80g) of melted dulce de leche on top and use a knife to swirl it through the filling for that beautiful marbled effect. This is where the magic happens, giving your Rich Dulce De Leche Cheesecake its standout flavor.
Fifth Step: Bake in a Water Bath
Place the springform pan inside a larger baking pan and add hot water to reach about 1 inch up the sides, creating a water bath for even cooking. Bake for 45-50 minutes, until the edges are golden and pulling away from the sides, but the center still jiggles a bit it’s all about that perfect creamy texture.
Final Step: Cool and Chill
Turn off the oven and crack the door open slightly, letting the cheesecake cool inside for 1 hour to prevent cracks. Then, cool it fully at room temperature before refrigerating for at least 4 hours or overnight. For the best experience, let it sit out for 20-30 minutes before serving, and consider garnishing with a drizzle of extra dulce de leche for a showstopping finish. For chocolate dessert ideas that pair well, explore our chocolate dessert ideas on the blog.

Dietary Substitutions to Customize Your Dulce De Leche Cheesecake
Protein and Main Component Alternatives
If you’re looking to tweak the main elements of this Dulce De Leche Cheesecake for different needs, start with the cream cheese and eggs. For a lighter version, swap the cream cheese for Greek yogurt to reduce fat while keeping that creamy consistency, or use silken tofu for a vegan option that still holds its shape nicely. These changes make it adaptable for seniors or those with allergies, ensuring everyone can enjoy a slice.
Vegetable, Sauce, and Seasoning Modifications
When it comes to sauces, replace the dulce de leche with a homemade caramel sauce made from coconut milk for a dairy-free twist, or add a hint of cinnamon to the seasoning for a seasonal flavor boost. For vegetable-based variations, though this recipe doesn’t include veggies, you could experiment with adding pumpkin puree in the fall to make it more nutritious and appealing to families. These tweaks let busy parents and diet-conscious individuals customize without losing the essence of this Cheesecake Recipe with Dulce de Leche.
Mastering Dulce De Leche Cheesecake: Advanced Tips and Variations
Pro Cooking Techniques
To elevate your baking game, always use room-temperature cream cheese for a lump-free batter, and beat it extra for that ultra-creamy texture in your Dulce De Leche Cheesecake. A water bath is essential for even heat, preventing cracks and ensuring a silky center wrap your pan tightly in foil to avoid leaks. For make-ahead options, prepare the crust ahead and store it in the fridge, saving time for your busy schedule.
Flavor Variations
Experiment with different crusts like graham cracker or gingersnap for a fresh take on this Creamy Cheesecake. Add spices such as nutmeg to the filling for a cozy twist, or double the dulce de leche for an extra-rich version that appeals to food enthusiasts. These variations keep things exciting and adaptable to seasonal ingredients.
How to Store Dulce De Leche Cheesecake: Best Practices
Proper storage keeps your Dulce De Leche Cheesecake tasting fresh, and it’s simple to do. For refrigeration, cover the cheesecake tightly and store it in the fridge for up to 5 days, which is ideal for working professionals grabbing a quick treat.
For freezing, let it cool completely, then wrap it in plastic wrap and foil; it freezes well for up to 3 months, perfect for batch cooking and thawing overnight. When reheating, bring it to room temperature for the best texture, avoiding microwaves to maintain that creamy quality. Meal prep tip: Slice and freeze individual portions for easy access during the week.
FAQs: Frequently Asked Questions About Dulce De Leche Cheesecake
What is dulce de leche and how is it used in cheesecake?
Dulce de leche is a thick, caramel-like sauce made by slowly cooking sweetened condensed milk until it turns golden and creamy. In cheesecake, it is often folded into the cream cheese mixture or swirled on top to add a rich, sweet flavor that complements the smooth texture of the cake. You can make it at home by simmering a can of sweetened condensed milk or buy pre-made versions at the store for convenience.
Why should I use a water bath when baking dulce de leche cheesecake?
A water bath provides gentle, even heat to the cheesecake, which prevents the surface from cracking and ensures a smooth, creamy texture. To use it, wrap your springform pan with foil to prevent leaks, then place it in a larger pan filled with hot water about halfway up the sides. Bake as directed, and the moisture from the water bath will help the cake cook evenly without drying out.
Can I make dulce de leche cheesecake ahead of time?
Yes, dulce de leche cheesecake actually benefits from being made ahead. After baking, allow it to cool completely, then refrigerate for at least 4 hours or overnight. This resting time helps the flavors meld and the texture set firmly. Just make sure to remove it from the fridge about 20–30 minutes before serving for the best taste and creaminess.
What is the best crust to pair with dulce de leche cheesecake?
A graham cracker crust is a classic choice for dulce de leche cheesecake as its slightly sweet and buttery flavor balances well with the rich caramel notes. You can also try a gingersnap or digestive biscuit crust for a spiced twist. Press the crust mixture firmly into the pan and bake briefly before adding the filling to create a sturdy base that holds up to the creamy cheesecake.
How can I prevent my dulce de leche cheesecake from cracking?
To reduce cracking, bake the cheesecake at a low temperature and use a water bath to provide consistent moisture and heat. Avoid overmixing the batter to limit air bubbles, and don’t open the oven door frequently while baking. After baking, cool the cheesecake slowly by leaving it in the oven with the door slightly open for about an hour before chilling. These steps help maintain a smooth surface and creamy texture.
Dulce De Leche Cheesecake
🍰 This cheesecake recipe blends a rich dulce de leche topping with a creamy, smooth texture for a decadent dessert experience.
🍮 Enjoy a luscious treat that pairs the sweet caramel flavor of dulce de leche with a chocolate chip cookie crust for extra indulgence.
- Total Time: 1 hour 15 minutes
- Yield: 8 servings
Ingredients
– 1½ cups chocolate chip cookie crumbs for the base of the crust
– 3 tablespoons unsalted butter for binding the crust
– 2 tablespoons granulated sugar for crust sweetness
– 2 packages cream cheese for smooth texture
– ⅔ cup granulated sugar for sweetening the filling
– 2 teaspoons pure vanilla extract for flavor
– 2 large eggs for structure and richness
– ¼ cup dulce de leche for caramel flavor
Instructions
1-First Step: Preheat and Prepare the Crust Preheat your oven to 325°F to ensure even baking right from the start. Combine the 1½ cups (180g) chocolate chip cookie crumbs, 3 tablespoons (42g) melted unsalted butter, and 2 tablespoons (24g) granulated sugar in a bowl until it looks like wet sand. Press this mixture firmly into the bottom and about ¼ inch up the sides of a greased 7-inch springform pan, then wrap the pan tightly in heavy-duty aluminum foil to keep out any water from the bath.
2-Second Step: Bake the Crust Pop the pan into the preheated oven and bake for about 10 minutes, or until the crust turns a deep golden brown. This step creates a sturdy base that won’t get soggy. Once it’s done, take it out and let it cool on the counter while you move on to the filling it’s that quick and easy to get this part nailed.
3-Third Step: Mix the Filling In a mixer, beat the 2 packages (8oz; 454g each) of softened cream cheese, ⅔ cup (130g) granulated sugar, and 2 teaspoons pure vanilla extract until it’s super smooth and creamy, which takes about 2 minutes. Add the 2 large eggs (100g total), lightly beaten, and mix on medium-low speed until everything is fully incorporated and fluffy don’t overdo it to avoid air bubbles that could crack the top.
4-Fourth Step: Assemble and Swirl Pour the creamy filling over the cooled crust in the pan, spreading it evenly. Then, pour the ¼ cup (80g) of melted dulce de leche on top and use a knife to swirl it through the filling for that beautiful marbled effect. This is where the magic happens, giving your Rich Dulce De Leche Cheesecake its standout flavor.
5-Fifth Step: Bake in a Water Bath Place the springform pan inside a larger baking pan and add hot water to reach about 1 inch up the sides, creating a water bath for even cooking. Bake for 45-50 minutes, until the edges are golden and pulling away from the sides, but the center still jiggles a bit it’s all about that perfect creamy texture.
6-Final Step: Cool and Chill Turn off the oven and crack the door open slightly, letting the cheesecake cool inside for 1 hour to prevent cracks. Then, cool it fully at room temperature before refrigerating for at least 4 hours or overnight. For the best experience, let it sit out for 20-30 minutes before serving, and consider garnishing with a drizzle of extra dulce de leche for a showstopping finish. For chocolate dessert ideas that pair well, explore our chocolate dessert ideas on the blog.
Last Step:
Please leave a rating and comment letting us know how you liked this recipe! This helps our business to thrive and continue providing free, high-quality recipes for you.Notes
🧀 Use cream cheese at room temperature for a smooth, lump-free batter.
🔥 Keep the oven door closed during baking to prevent cracks, center should jiggle slightly.
❄️ Cool the cheesecake gradually in the oven with the door cracked to avoid sudden temperature changes.
- Prep Time: 15 minutes
- Refrigeration Time: 4 hours
- Cook Time: 1 hour
- Category: Dessert
- Method: Baking
- Cuisine: American
- Diet: Vegetarian
Nutrition
- Serving Size: 1 slice
- Calories: 558 kcal
- Sugar: 29 g
- Sodium: 371 mg
- Fat: 40.7 g
- Saturated Fat: 24.6 g
- Carbohydrates: 41.5 g
- Protein: 9.5 g
- Cholesterol: 180 mg





