

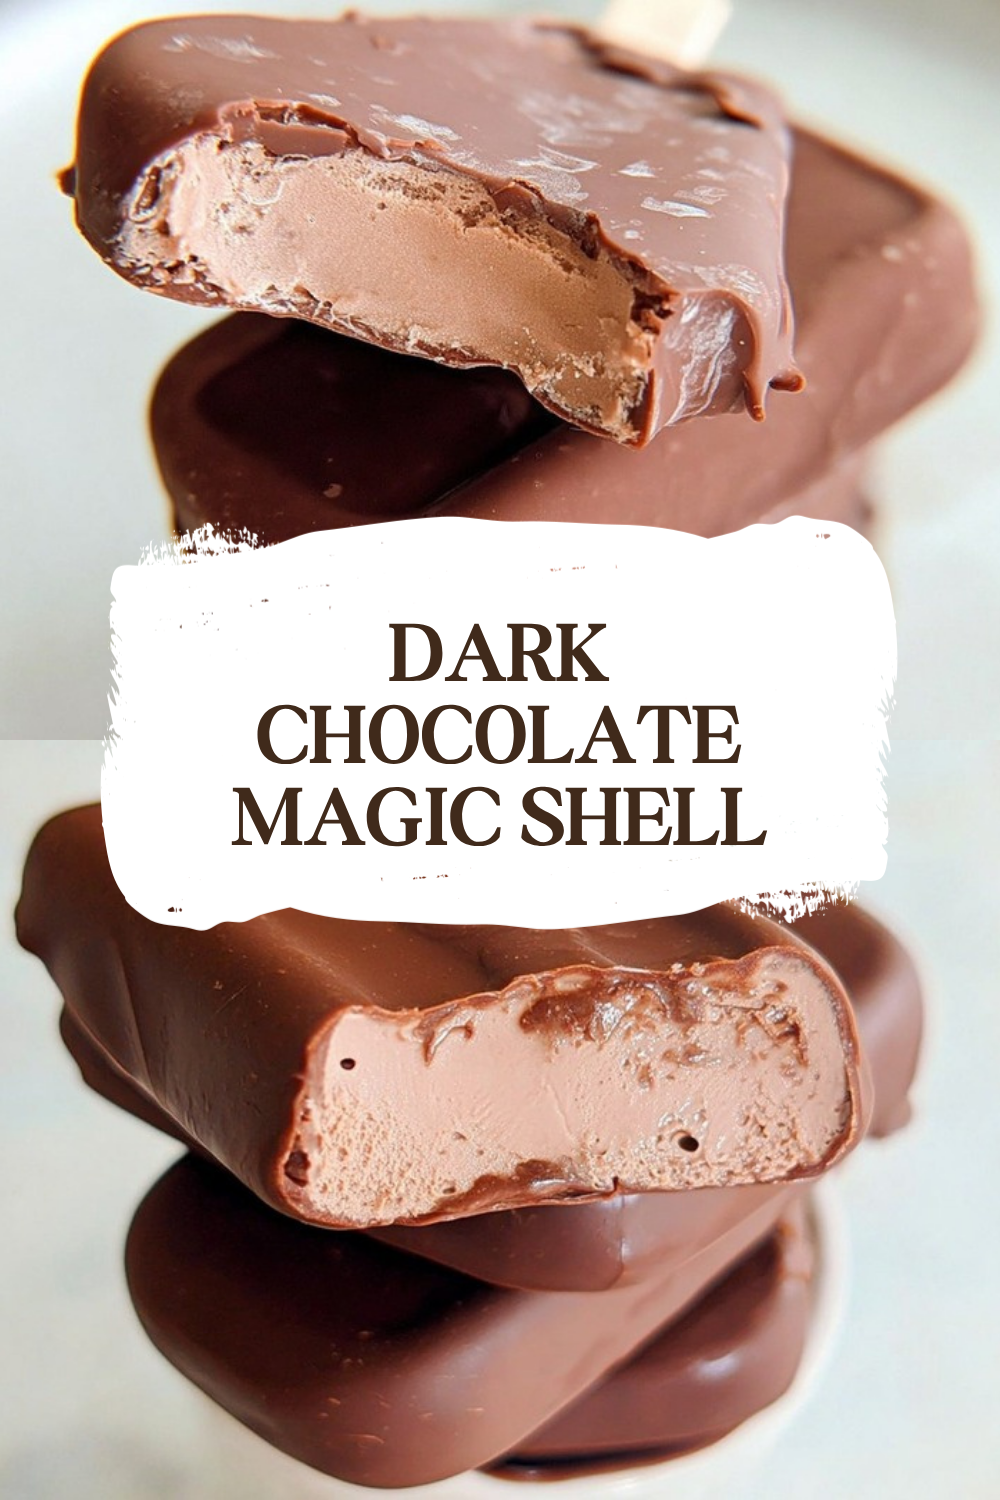
Why You’ll Love This Dark Chocolate Magic Shell
If you have been craving a fast dessert topping that feels a little fancy but takes almost no effort, Dark Chocolate Magic Shell is about to become a regular in your kitchen. It turns simple ice cream into something fun, crackly, and rich in just minutes. Best of all, it only needs two ingredients, so it fits right into busy weeknights, sleepovers, and those cozy fall nights when everyone wants a treat without a lot of fuss.
- Easy to make: This recipe comes together in about 5 minutes of active time, with only a few simple steps. If you can melt chocolate and stir in coconut oil, you can make it.
- Better-for-you choice: When you use raw cacao wafers, this version has no sugar and is a lighter option than many store-bought magic shell sauces. It is a smart pick for diet-conscious eaters who still want dessert.
- Flexible for many eaters: It is naturally dairy-free and can be vegan if your chocolate chips are dairy-free. It also works well for busy parents, students, and anyone who wants a quick dessert fix.
- Rich bittersweet flavor: The raw cacao gives it a deep, bold chocolate taste that feels less sugary and more grown-up. It is a nice match for vanilla ice cream, frozen yogurt, fruit, or even a warm brownie.
Sometimes the simplest desserts are the ones people remember most. That crackly shell over cold ice cream is pure fun.
For more easy sweet ideas, you might also like Savoring Flavors dessert recipes and quick no-bake treats on Savoring Flavors.
Jump to:
- Why You’ll Love This Dark Chocolate Magic Shell
- Essential Ingredients for Dark Chocolate Magic Shell
- Main Ingredients
- Ingredient Notes
- Special Dietary Options
- How to Prepare the Perfect Dark Chocolate Magic Shell: Step-by-Step Guide
- First Step: Set up your bowl and heat source
- Second Step: Melt the chocolate slowly
- Third Step: Stir in the coconut oil
- Fourth Step: Let the mixture cool just a bit
- Fifth Step: Pour over ice cream
- Final Step: Serve right away and save leftovers
- Dietary Substitutions to Customize Your Dark Chocolate Magic Shell
- Protein and Main Component Alternatives
- Vegetable, Sauce, and Seasoning Modifications
- Mastering Dark Chocolate Magic Shell: Advanced Tips and Variations
- Pro cooking techniques
- Flavor variations
- Presentation tips
- Make-ahead options
- How to Store Dark Chocolate Magic Shell: Best Practices
- Refrigeration
- Freezing
- Reheating
- Meal prep considerations
- FAQs: Frequently Asked Questions About Dark Chocolate Magic Shell
- How do you make 2-ingredient dark chocolate magic shell?
- How long does dark chocolate magic shell last?
- What are the ingredients for dark chocolate magic shell?
- How do you use dark chocolate magic shell on ice cream?
- Why does dark chocolate magic shell harden on ice cream?
- Dark Chocolate Magic Shell
- Ingredients
- Instructions
- Last Step:
- Notes
- Nutrition
- Did you make this recipe?
Essential Ingredients for Dark Chocolate Magic Shell
The ingredient list is short, which is part of the charm. Still, every item plays a big role in getting that perfect pour and snap.
Main Ingredients
- 2 tablespoons virgin coconut oil – This helps the chocolate turn into a magic shell as soon as it hits cold ice cream. It also gives the topping a smooth texture.
- 7 ounces bittersweet chocolate chips or roughly 1 1/4 cups chocolate chips – This is the base of the recipe and creates the rich chocolate flavor. Raw cacao wafers are recommended if you want a bittersweet flavor with no sugar.
Ingredient Notes
If you want a stronger chocolate taste, raw cacao wafers are a great choice. They give the topping a deeper, less sweet flavor and work nicely for people who want a sugar-free option. Virgin coconut oil brings a light coconut note, which many people enjoy, but it is still subtle enough to let the chocolate shine.
| Ingredient | Purpose | Best For |
|---|---|---|
| Virgin coconut oil | Helps the topping harden on cold dessert | Crackly shell texture |
| Bittersweet chocolate chips | Creates the chocolate base | Classic magic shell flavor |
| Raw cacao wafers | Adds a sugar-free bittersweet taste | Healthier dessert topping |
Special Dietary Options
- Vegan: Use dairy-free chocolate chips or raw cacao wafers with coconut oil.
- Gluten-free: This recipe is naturally gluten-free as written, but always check the chocolate package label.
- Low-calorie: Use a smaller spoonful over fruit or frozen yogurt instead of a large ice cream scoop.
For a helpful look at ingredient quality, read this guide on whether dark chocolate is healthy and this article on the health benefits of coconut oil.
How to Prepare the Perfect Dark Chocolate Magic Shell: Step-by-Step Guide
This recipe is wonderfully simple, but the method matters. If you take it slowly and watch the heat, you will get a glossy topping that hardens beautifully the moment it touches something cold. The full process takes about 7 minutes total, with around 2 minutes of prep time and about 5 minutes of cooking time.
First Step: Set up your bowl and heat source
Start by placing the chocolate chips in a heatproof bowl. Set the bowl over a pan of simmering water to create a gentle double boiler. This method keeps the chocolate from burning and helps it melt evenly. Make sure the bowl does not touch the water directly, since too much heat can cause the chocolate to seize or scorch.
If you are making dessert for a group, this is a good time to get your ice cream, bowls, and spoons ready. Dark Chocolate Magic Shell comes together fast, so having everything nearby makes serving easier. It is especially handy for sleepovers or family movie nights when everyone is waiting for dessert.
Second Step: Melt the chocolate slowly
Stir the chocolate chips frequently as they begin to soften. Keep the heat gentle and patient. The goal is smooth, glossy chocolate without any burnt bits, so do not rush this part. A small amount of steam is all you need. If you see the chocolate starting to melt around the edges, keep stirring and let the warmth finish the job.
Take your time here. The mixture should look silky and fluid before you add the coconut oil. If you are using raw cacao wafers, the flavor will already be a little deeper and more bittersweet, which makes the finished shell taste rich without needing extra sugar.
Third Step: Stir in the coconut oil
Once the chocolate is mostly melted, stir in 2 tablespoons virgin coconut oil. Continue heating for about 1 minute, just until the oil is fully dissolved into the chocolate. Then turn off the heat. At this point, the mixture should be smooth, shiny, and easy to pour. If you stir well, the coconut oil will blend evenly and help the shell harden properly later.
This is the key step that makes the magic shell act like magic shell. The coconut oil lowers the melting point, so the topping stays pourable at first and then firms up quickly when it hits cold dessert. That quick set is what gives you the fun crackly shell.
Fourth Step: Let the mixture cool just a bit
Before you pour, let the chocolate sit for a short moment so it is warm but not too hot. This helps it cling better to the ice cream instead of running off too fast. A slight cooling period also makes it easier to control the flow if you are using a spoon or ladle.
If the mixture starts to thicken, do not worry. You can warm it gently again for a few seconds over the pan or in the microwave. Just keep the heat low so the texture stays smooth. This is one of those recipes where a little attention goes a long way.
Fifth Step: Pour over ice cream
Using a ladle or spoon, drizzle the chocolate over your ice cream. You will see it harden within a few seconds as it hits the cold surface. That quick set gives you the classic crackly shell people love. Pour in a thin stream for stripes, or cover the whole scoop for a full chocolate cap.
It works beautifully on vanilla ice cream, but do not stop there. Try it on frozen yogurt, banana slices, strawberries, or even a bowl of oats that has been chilled. The crisp shell makes even simple desserts feel special.
Final Step: Serve right away and save leftovers
Serve immediately while the shell is fresh and crunchy. If you have leftovers, store them in a glass container in the refrigerator and reheat gently on the stovetop or in the microwave before using again. You can also keep it at room temperature for up to one month in an airtight container, which makes it easy to use whenever a dessert craving hits.
For the best flavor, remember that this version is healthier than many store-bought magic shell sauces because raw cacao wafers contain no sugar. That makes it a nice dessert topper for people who want a more balanced treat without giving up the fun part.
Quick tip: A little patience during melting gives you the smoothest shell and the best snap.

Dietary Substitutions to Customize Your Dark Chocolate Magic Shell
Protein and Main Component Alternatives
Even though this recipe does not use a protein, you can still make smart swaps based on your preferences or what is in your pantry. If you do not have bittersweet chocolate chips, use a chopped dark chocolate bar with a cocoa content of 70 percent or higher. That gives a rich flavor and usually melts very well.
If you want a dairy-free or vegan version, check the label and choose chocolate that does not contain milk ingredients. Raw cacao wafers are a strong option if you want a sugar-free bittersweet taste. For a slightly sweeter shell, use semi-sweet chips, but keep in mind that the flavor will be less bold.
Vegetable, Sauce, and Seasoning Modifications
This recipe is simple enough that small changes can make it feel fresh. Add a pinch of sea salt for a sweet and salty finish. A tiny splash of vanilla can soften the bitter notes, while a bit of espresso powder can make the chocolate taste deeper and more intense. If you like a little heat, a touch of chili powder works surprisingly well.
For serving ideas, swap ice cream for fruit, yogurt, or frozen banana slices. If you want a thinner drizzle, use slightly less chocolate. If you want a thicker shell, add a bit more coconut oil only if needed, but do so carefully so the coating still hardens quickly.
Mastering Dark Chocolate Magic Shell: Advanced Tips and Variations
Pro cooking techniques
Keep the heat low and steady. That is the biggest secret to smooth chocolate. Stir often, use a heatproof bowl, and do not let the bowl sit too deeply over the simmering water. If your chocolate gets too hot, it can turn grainy. If that happens, remove it from the heat and stir gently until it smooths out again.
When reheating leftovers, use very short bursts in the microwave or a gentle stovetop warm-up. You only want to soften it enough to pour. Overheating can make the shell lose its texture later.
Flavor variations
Try adding a pinch of flaky salt, espresso powder, or cinnamon for a little personality. For a fun twist, top your dessert with crushed nuts, toasted coconut, or sprinkles right after pouring the shell. If you want a deeper flavor for fall, a tiny bit of pumpkin spice can be lovely with vanilla ice cream.
You can also serve it with dairy-free ice cream, which makes it a great option for mixed households where some people want classic dessert and others want a lighter or vegan choice.
Presentation tips
For a pretty finish, drizzle the shell in a zigzag pattern over each scoop. You can also dip the top of a popsicle or frozen banana and let it set on parchment paper. A few chopped nuts or a small pinch of sea salt on top makes it look bakery-style without adding much work.
Make-ahead options
This is a great recipe to prep ahead for parties, after-school treats, or late-night cravings. Make a batch, store it properly, and reheat gently when needed. Since it keeps well at room temperature for up to one month in an airtight container, it is easy to have on hand when dessert needs to happen fast.
How to Store Dark Chocolate Magic Shell: Best Practices
Good storage keeps the texture smooth and ready to use. Since the coconut oil can firm up, you want to keep the topping in the right container and warm it gently before serving again.
Refrigeration
If you are saving leftovers, store them in a glass container in the refrigerator. This works well for short-term storage, especially if you plan to use it again soon. Just remember that it will solidify when chilled, so let it sit for a few minutes or warm it gently before use.
Freezing
For longer storage, you can freeze the shell in an airtight container. It should keep for up to 3 months. When you are ready to use it, thaw it at room temperature first, then warm it gently until pourable again.
Reheating
Reheat slowly on the stovetop over low heat or in the microwave in short bursts. Stir often so the mixture warms evenly. You want it smooth and fluid, not hot and bubbling.
Meal prep considerations
If you like to plan ahead, make a batch on the weekend and keep it ready for quick desserts during the week. It is a nice little shortcut for families, students, or anyone who wants a fast sweet treat without starting from scratch every time.
FAQs: Frequently Asked Questions About Dark Chocolate Magic Shell
How do you make 2-ingredient dark chocolate magic shell?
Making 2-ingredient dark chocolate magic shell is simple and takes about 10 minutes. Melt 1 cup of dark chocolate chips or chopped dark chocolate with 3/4 cup coconut oil in a microwave-safe bowl. Heat in 30-second intervals, stirring between each until smooth. For best results, use refined coconut oil to avoid a coconut flavor. Stir well to combine, then let it cool slightly. Drizzle over ice cream, freeze for 1-2 minutes, and watch it harden into a crackly shell. This recipe yields about 2 cups, perfect for 8-10 servings. Store leftovers as noted below. Pro tip: Add a pinch of sea salt for extra flavor. It’s dairy-free, keto-friendly, and customizable with nuts or espresso powder.
How long does dark chocolate magic shell last?
Store your 2-ingredient dark chocolate magic shell in an airtight container or jar at room temperature, away from direct heat or sunlight, for up to 1 month. Avoid the refrigerator, as it can cause the coconut oil to separate or bloom. If it solidifies, gently reheat in the microwave for 10-15 seconds or over a double boiler, stirring until pourable again. For longer storage, freeze in an airtight container for up to 3 months; thaw at room temp before use. Always check for off smells or discoloration before reusing. This shelf life makes it ideal for meal prep or party batches, saving time on dessert toppings.
What are the ingredients for dark chocolate magic shell?
The basic 2-ingredient dark chocolate magic shell uses 1 cup dark chocolate (70% cocoa or higher for rich flavor) and 3/4 cup coconut oil. Choose high-quality dark chocolate chips or bars without fillers for the best hardening effect. Refined coconut oil keeps the taste neutral; virgin adds a subtle coconut note. Optional add-ins include 1/4 tsp sea salt, vanilla extract, or chili powder for variety. This combo creates the signature snap due to coconut oil’s low melting point (around 76°F). It’s naturally gluten-free, vegan (if chocolate is dairy-free), and low-carb with about 2g net carbs per tablespoon. Scale up easily for larger batches.
How do you use dark chocolate magic shell on ice cream?
Drizzle 2-3 tablespoons of slightly cooled dark chocolate magic shell over your favorite ice cream or frozen yogurt straight from the freezer. The cold surface triggers instant hardening in 1-2 minutes—no extra freezing needed. For fun dips, pour into a bowl and swirl ice cream scoops. It works on popsicles, fruit, or yogurt too. Layer in ice cream cakes or pies for a crunchy topping. Cleanup is easy since it doesn’t stick to bowls. One batch tops 8-10 scoops. Experiment with white chocolate versions or mix-ins like crushed pretzels inside before drizzling. Keeps desserts mess-free and adds 150 calories per 2-tbsp serving with antioxidants from dark chocolate.
Why does dark chocolate magic shell harden on ice cream?
Dark chocolate magic shell hardens due to coconut oil’s unique properties—it melts at 76°F for easy pouring but solidifies below 70°F, like on cold ice cream. The dark chocolate provides structure and flavor without interfering. This creates a crisp, crackly shell in seconds without added stabilizers or sugars. Higher cocoa content (70%+) ensures better snap. If it doesn’t harden fully, your ice cream wasn’t cold enough or the oil ratio was off—use more oil next time. This science makes it superior to regular chocolate toppings. Fun fact: it contains flavanols from dark chocolate, linked to heart health in studies (e.g., 1 oz daily). Perfect for no-bake treats year-round.
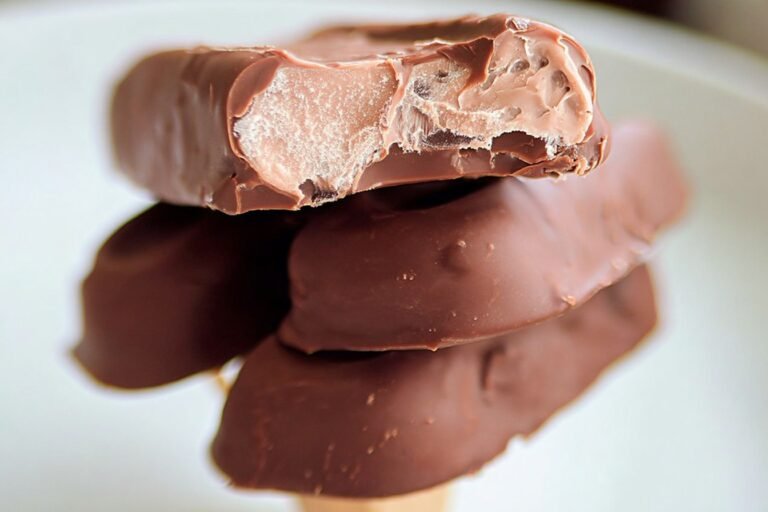
Dark Chocolate Magic Shell
🍦🍫 Crunchy dark chocolate magic shell: 2-ingredient melt hardens instantly on ice cream – healthier bittersweet bliss!
🔮 7-min pantry staple: coconut oil + cacao wafers, stores month for endless sundaes.
- Total Time: 7 minutes
- Yield: 8 servings
Ingredients
– 2 tablespoons virgin coconut oil for hardening the topping on cold dessert
– 7 ounces bittersweet chocolate chips for creating the chocolate base
– raw cacao wafers for adding a sugar-free bittersweet taste
Instructions
1-First Step: Set up your bowl and heat source Start by placing the chocolate chips in a heatproof bowl. Set the bowl over a pan of simmering water to create a gentle double boiler. This method keeps the chocolate from burning and helps it melt evenly. Make sure the bowl does not touch the water directly, since too much heat can cause the chocolate to seize or scorch.
2-Second Step: Melt the chocolate slowly Stir the chocolate chips frequently as they begin to soften. Keep the heat gentle and patient. The goal is smooth, glossy chocolate without any burnt bits, so do not rush this part. A small amount of steam is all you need. If you see the chocolate starting to melt around the edges, keep stirring and let the warmth finish the job.
3-Third Step: Stir in the coconut oil Once the chocolate is mostly melted, stir in 2 tablespoons virgin coconut oil. Continue heating for about 1 minute, just until the oil is fully dissolved into the chocolate. Then turn off the heat. At this point, the mixture should be smooth, shiny, and easy to pour. If you stir well, the coconut oil will blend evenly and help the shell harden properly later.
4-Fourth Step: Let the mixture cool just a bit Before you pour, let the chocolate sit for a short moment so it is warm but not too hot. This helps it cling better to the ice cream instead of running off too fast. A slight cooling period also makes it easier to control the flow if you are using a spoon or ladle.
5-Fifth Step: Pour over ice cream Using a ladle or spoon, drizzle the chocolate over your ice cream. You will see it harden within a few seconds as it hits the cold surface. That quick set gives you the classic crackly shell people love. Pour in a thin stream for stripes, or cover the whole scoop for a full chocolate cap.
6-Final Step: Serve right away and save leftovers Serve immediately while the shell is fresh and crunchy. If you have leftovers, store them in a glass container in the refrigerator and reheat gently on the stovetop or in the microwave before using again. You can also keep it at room temperature for up to one month in an airtight container, which makes it easy to use whenever a dessert craving hits.
Last Step:
Please leave a rating and comment letting us know how you liked this recipe! This helps our business to thrive and continue providing free, high-quality recipes for you.Notes
🌿 Raw cacao wafers – sugar-free intense chocolate flavor.
♻️ Reheat gently – prevents separation, keeps smooth.
🛢️ Virgin coconut oil key – perfect hardening snap.
- Prep Time: 2 minutes
- Cook Time: 5 minutes
- Category: Desserts
- Method: Melted
- Cuisine: American
- Diet: Vegan
Nutrition
- Serving Size: 1 tablespoon
- Calories: 110 kcal
- Sugar: 4 g
- Sodium: 5 mg
- Fat: 10 g
- Saturated Fat: 7 g
- Unsaturated Fat: 3 g
- Trans Fat: 0 g
- Carbohydrates: 7 g
- Fiber: 2 g
- Protein: 1 g
- Cholesterol: 0 mg





