

Why You’ll Love These Christmas Sugar Cookie Bars
If you want a festive treat that feels homemade without taking all day, Christmas Sugar Cookie Bars are a great choice. They give you the soft, chewy flavor of classic sugar cookies in a simple bar form, which means less scooping, less chilling, and less fuss. With a quick prep time and easy frosting, this recipe fits busy holiday schedules well.
- Easy to make: You only need one bowl for the cookie base and a few simple steps before baking. In just 40 minutes total, you can have a tray of holiday bars ready to go.
- Soft and chewy texture: These bars bake up tender with a balanced sweetness that feels rich without being too heavy.
- Fun for holiday gatherings: Festive sprinkles and creamy frosting make them look special for parties, cookie trays, school events, and family get-togethers.
- Flexible for planning ahead: You can bake them 1 to 2 days early, and they also freeze well for later.
For readers who like simple dessert recipes with reliable results, this one is a keeper. If you enjoy easy bakes like this, you might also like easy dessert recipes for busy days and holiday baking ideas for festive gatherings.
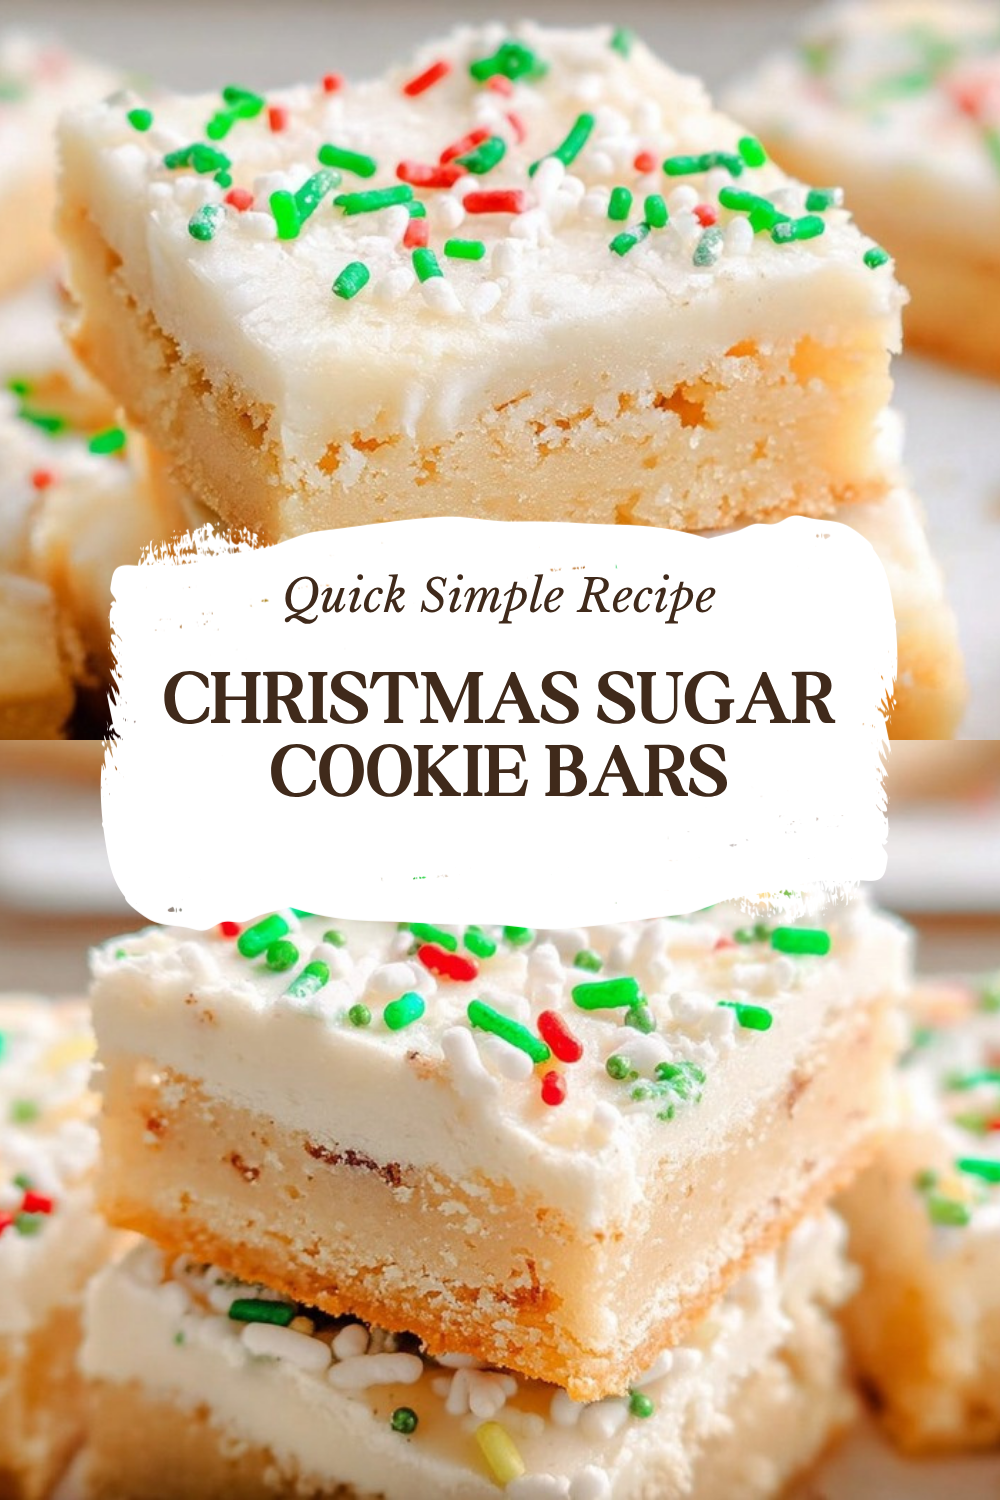
These Christmas Sugar Cookie Bars are soft, chewy, and sweet in just the right way, making them a dependable holiday dessert for bakers of all levels.
There is also a nice balance between comfort and portion control since the recipe makes 9 squares in a 9×9-inch pan. According to the nutrition estimate, each serving has 321 calories, 74 grams of carbohydrates, 3 grams of protein, 1 gram of fat, 10 milligrams of sodium, and 52 grams of sugar. Values may vary, but they give you a helpful idea of what to expect.
Because the bars use simple pantry ingredients, they are easy to shop for and even easier to mix together. The frosting adds a creamy finish, while the festive sprinkles give every square a cheerful holiday look.
Jump to:
- Why You’ll Love These Christmas Sugar Cookie Bars
- Essential Ingredients for Christmas Sugar Cookie Bars
- For the sugar cookie bars
- For the frosting
- Special dietary options
- Helpful ingredient notes
- How to Prepare the Perfect Christmas Sugar Cookie Bars: Step-by-Step Guide
- First Step: Prepare the pan and oven
- Second Step: Cream the butter and sugar
- Third Step: Add the dry ingredients
- Fourth Step: Fold in the sprinkles and spread the dough
- Fifth Step: Bake until lightly golden
- Sixth Step: Make the frosting
- Seventh Step: Frost, decorate, and serve
- Dietary Substitutions to Customize Your Christmas Sugar Cookie Bars
- Protein and main component alternatives
- Vegetable, sauce, and seasoning modifications
- Mastering Christmas Sugar Cookie Bars: Advanced Tips and Variations
- Pro cooking techniques
- Flavor variations
- Presentation tips
- Make-ahead options
- How to Store Christmas Sugar Cookie Bars: Best Practices
- Refrigeration
- Freezing
- Reheating
- Meal prep considerations
- FAQs: Frequently Asked Questions About Christmas Sugar Cookie Bars
- How do I measure flour correctly for Christmas sugar cookie bars?
- Can you freeze Christmas sugar cookie bars?
- How do you store Christmas sugar cookie bars?
- Can I make Christmas sugar cookie bars ahead of time?
- Can I use substitutes like margarine in Christmas sugar cookie bars?
- Christmas Sugar Cookie Bars
- Ingredients
- Instructions
- Last Step:
- Notes
- Nutrition
- Did you make this recipe?
Essential Ingredients for Christmas Sugar Cookie Bars
These Christmas Sugar Cookie Bars come together with basic baking ingredients plus a few festive extras. For the best results, measure carefully and keep the butter softened, not melted. That helps the dough mix smoothly and keeps the texture soft after baking.
For the sugar cookie bars
- 1 stick (1/2 cup) salted butter, softened well, not melted – Gives the bars rich flavor and helps create a soft, chewy base.
- 1 cup sugar – Sweetens the bars and helps with a tender texture.
- 1 large egg – Binds the dough together and adds structure.
- 1 teaspoon vanilla extract – Adds warm flavor that pairs well with the sprinkles.
- 2 cups all-purpose flour – Forms the body of the cookie bars.
- 1 teaspoon baking powder – Helps the bars rise just enough for a soft finish.
- 1/4 cup festive sprinkles – Brings color and holiday cheer to the dough.
For the frosting
- 2 cups powdered sugar – Creates a smooth, sweet frosting base.
- 1 stick (1/2 cup) salted butter, softened – Makes the frosting creamy and rich.
- 3 tablespoons cream cheese, softened – Adds tang and helps balance the sweetness.
- 1 teaspoon vanilla extract – Builds flavor in the frosting.
- 2 tablespoons milk – Loosens the frosting to a spreadable texture.
- Additional sprinkles for topping – Adds a festive finish.
Special dietary options
- Vegan: Use a plant-based butter and a dairy-free cream cheese alternative. Replace the egg with a flax egg or a store-bought egg substitute.
- Gluten-free: Use a 1:1 gluten-free all-purpose flour blend that contains xanthan gum.
- Low-calorie: You can reduce frosting thickness, use fewer sprinkles, or cut smaller squares. The bars will still taste sweet and festive.
Helpful ingredient notes
If your butter is too cold, the dough can be hard to mix. If it is too warm or melted, the bars may spread too much and lose their soft texture. The same goes for cream cheese in the frosting. Let it soften fully so your frosting stays smooth and lump-free.
How to Prepare the Perfect Christmas Sugar Cookie Bars: Step-by-Step Guide
First Step: Prepare the pan and oven
Start by preheating your oven to 350 degrees Fahrenheit. Line a 9×9-inch baking pan with parchment paper, leaving a little overhang on the sides if you can. This makes it much easier to lift the bars out after baking.
Before you begin mixing, check that your butter is softened well but not melted. Real salted butter works best here because it gives the dough flavor and a tender bite. If you are baking in a warm kitchen, keep the butter out just long enough to soften, then get started.
Second Step: Cream the butter and sugar
In a large bowl, beat together the softened butter and sugar until the mixture looks fluffy and light. This step helps add air to the dough, which gives the bars a softer texture after baking. Take your time here and mix until the sugar starts to blend in smoothly.
Next, add the egg and vanilla extract. Continue mixing until everything is well combined. The dough will start to look smoother and richer at this point. If you are using a hand mixer, scrape down the sides of the bowl as needed so nothing gets left behind.
Third Step: Add the dry ingredients
In a separate bowl, measure the flour and baking powder carefully. Spoon the flour into the measuring cup and level it off with a knife so you do not pack in too much. This is important because too much flour can make the bars dry or crumbly. If your baking powder is old, it may not give the bars the right lift, so check the date before you begin.
Gradually beat the flour mixture into the wet ingredients until a thick dough forms. The dough may look dense, but that is what you want. If it feels crumbly, add milk 1 tablespoon at a time until it comes together. Be careful not to add too much, or the bars may turn soft in the wrong way.
Fourth Step: Fold in the sprinkles and spread the dough
Gently stir in the 1/4 cup festive sprinkles. Mix just enough to distribute them through the dough without breaking them up too much. This keeps the colors bright and gives you those cheerful holiday spots throughout the bars.
Spread the dough evenly into the prepared pan. A pastry roller can help press it into an even layer if the dough is sticky or a little stiff. Aim for a level surface so the bars bake evenly. Uneven dough can lead to overbaked edges and a softer center, so this step is worth the extra minute.
Fifth Step: Bake until lightly golden
Bake the bars for about 20 minutes, or until they look golden brown around the edges. The center should look set, not wet, but the bars will still be soft. Avoid overbaking, since these bars are meant to stay tender and chewy.
Once baked, remove the pan from the oven and let the bars cool completely. This part matters because warm bars will melt the frosting. Use the parchment paper to lift the cooled bars out of the pan before frosting.
Sixth Step: Make the frosting
To make the frosting, blend the powdered sugar, softened butter, softened cream cheese, vanilla extract, and milk until smooth. The cream cheese gives the frosting a slight tang that helps balance the sweetness of the bars. If the frosting seems too thick, add a small splash more milk. If it seems too soft, add a bit more powdered sugar.
A smooth frosting is easier to spread and looks more polished on top of the bars. Room temperature cream cheese is important here because cold cream cheese can leave lumps behind. If that happens, keep mixing until the frosting smooths out.
Seventh Step: Frost, decorate, and serve
Spread the frosting generously over the cooled cookie bars. Then add additional sprinkles on top for a bright holiday finish. The frosting layer can be thick or thin depending on your taste, but a generous layer gives the bars that classic festive look.
Cut the bars into squares and serve right away, or let the frosting set for a firmer texture. If you are serving them later, chilling them briefly can help the frosting hold its shape when sliced.
| Recipe Detail | Amount |
|---|---|
| Prep time | 20 minutes |
| Cook time | 20 minutes |
| Total time | 40 minutes |
| Servings | 9 squares |

Dietary Substitutions to Customize Your Christmas Sugar Cookie Bars
Protein and main component alternatives
Although these bars are built around butter, flour, egg, and frosting, you can still make a few changes based on your needs. For a dairy-free version, use a high-fat vegan butter and a dairy-free cream cheese. This works best when the substitutes are firm and not watery, since texture matters a lot in bar cookies.
If you need an egg-free version, try a flax egg or a commercial egg replacer. The bars may be a little more delicate, but they should still hold together well. For gluten-free baking, choose a trusted 1:1 gluten-free baking blend. That gives the best chance of a soft, chewy result close to the original.
Vegetable, sauce, and seasoning modifications
There are no vegetables in this recipe, but you can still play with flavors. Try almond extract instead of part of the vanilla for a slightly different holiday taste. You can also switch the sprinkle colors to match different celebrations, like red and green for Christmas, pastels for winter parties, or gold and white for a more elegant tray.
For a lighter finish, spread a thinner layer of frosting or dust the bars with a little powdered sugar instead of a full frosting top. If you want a richer dessert, you can add a pinch of salt to the frosting for extra contrast. Small changes like these can help the bars fit the event or the people you are serving.
If you are making substitutions, change one thing at a time so you can see how it affects the taste and texture.
Mastering Christmas Sugar Cookie Bars: Advanced Tips and Variations
Pro cooking techniques
A few small habits can make a big difference with Christmas Sugar Cookie Bars. First, use real salted butter softened to room temperature, not melted butter. That helps the dough cream properly and keeps the bars from turning greasy. Second, spoon and level your flour so you do not accidentally add too much. Too much flour is one of the biggest reasons cookie bars turn dry or crumbly.
If you want smooth, even bars, use a pastry roller or the back of a spoon to press the dough into the pan. That helps the batter bake evenly from corner to corner. Also, keep an eye on the oven during the last few minutes. Once the edges turn golden, the bars are usually ready.
Flavor variations
You can make these bars your own with simple flavor changes. Swap the vanilla for almond extract if you want a stronger bakery-style flavor. Add extra holiday sprinkles to the dough or finish with crushed peppermint candy on top for a winter twist.
For a softer, richer frosting, add a little more cream cheese. For a sweeter frosting, add more powdered sugar. You can also tint the frosting with a tiny bit of food coloring if you want a more festive look for parties, gift trays, or classroom treats.
Presentation tips
These bars look best when cut into neat squares with colorful sprinkles visible on top. Use a sharp knife and wipe it clean between cuts for tidy edges. If you are serving them on a dessert board, place them near chocolate treats, berries, or peppermint candies for a pretty holiday spread.
For a more polished look, add the extra sprinkles right after frosting so they stick well. You can also chill the frosted bars briefly before cutting if you want cleaner slices.
Make-ahead options
These bars are ideal for holiday planning because they hold up well for 1 to 2 days ahead. You can bake the bars, cool them, and frost them the day before your event. If needed, store them in the refrigerator until serving time. They also freeze well with careful wrapping, which makes them a smart choice for busy weeks.
How to Store Christmas Sugar Cookie Bars: Best Practices
Refrigeration
Because the frosting contains cream cheese, refrigeration is the safest option for longer storage. Place the bars in an airtight container and keep them in the fridge for 5 to 7 days. To stop them from sticking together, layer parchment paper between rows if needed. Let them come back to room temperature before serving for the softest texture.
Freezing
Christmas Sugar Cookie Bars freeze well for 2 to 3 months. You can freeze them frosted or unfrosted. For the best results, cool them completely and cut them into squares first. Wrap each square tightly in plastic wrap, then add a layer of foil or place them in a freezer bag. If the bars are already frosted, flash-freeze them on a tray for about 1 hour before wrapping so the frosting stays neat.
Reheating
These bars do not need true reheating, but if they are chilled or frozen, let them thaw in the fridge overnight. After that, bring them to room temperature before serving. This helps bring back the soft, chewy texture. Avoid microwaving frosted bars unless you want the frosting to soften or melt.
Meal prep considerations
If you are baking for a holiday party, school event, or family gathering, this recipe works well for meal prep. Make a batch a day or two before, store it properly, and add the final sprinkle topping right before serving if you want a fresh look. That way, the bars stay tidy, flavorful, and ready when you need them.
FAQs: Frequently Asked Questions About Christmas Sugar Cookie Bars
How do I measure flour correctly for Christmas sugar cookie bars?
To avoid crumbly or clumpy dough in Christmas sugar cookie bars, use the spoon-and-scoop method for flour. Lightly spoon flour into your measuring cup, then level it off with the back of a knife—never scoop directly from the bag or pack it down, as this adds up to 20-25% extra flour and dries out the dough. Always weigh flour if possible (about 120g per cup for all-purpose). Check your baking powder’s expiration date too, as old powder won’t give the right rise. Soften real butter and cream cheese to room temperature for smooth mixing without lumps. These steps keep your bars soft and chewy. (78 words)
Can you freeze Christmas sugar cookie bars?
Yes, Christmas sugar cookie bars freeze well for up to 2-3 months, either frosted or unfrosted. For best results, cool bars completely, then cut into squares. Wrap each tightly in plastic wrap, followed by aluminum foil or a freezer bag to prevent freezer burn and frosting smudges. If frosting first, flash-freeze on a tray for 1 hour before wrapping. Thaw in the fridge overnight and bring to room temperature before serving—they’ll taste fresh. Avoid refreezing thawed bars to maintain texture. This makes them perfect for holiday prep. (92 words)
How do you store Christmas sugar cookie bars?
Store Christmas sugar cookie bars in an airtight container at room temperature for up to 3 days, or refrigerate for 5-7 days to keep them fresh and prevent frosting from melting in warm kitchens. Layer with parchment paper to avoid sticking. For longer storage, refrigeration is best due to the cream cheese frosting, which can spoil otherwise. Let them come to room temp before eating for the softest texture. They stay moist thanks to the butter base—about 24 bars from a 9×13 pan fit nicely in a standard container. (89 words)
Can I make Christmas sugar cookie bars ahead of time?
Yes, bake Christmas sugar cookie bars 1-2 days ahead for gatherings—they stay soft and flavorful when stored properly. Prepare the dough, bake, cool, frost, and refrigerate in an airtight container. They’ll hold up well without drying out, thanks to the sugar and butter keeping them moist. For up to a week, keep refrigerated; add sprinkles right before serving for a fresh look. This saves time during busy holidays, yielding about 24 servings from one batch. Avoid making more than 2 days early unless freezing. (85 words)
Can I use substitutes like margarine in Christmas sugar cookie bars?
Stick to real butter for Christmas sugar cookie bars—margarine or spreads alter the texture, making them greasy or flat-tasting due to higher water content and less fat solidity. Use unsalted butter softened (not melted) at room temp for even creaming. If dairy-free, try a high-fat vegan butter like Miyoko’s, but test a small batch as results vary. Doubling works in a 9×13 pan doubled to two pans or one larger, but add 5-10 minutes bake time at 350°F and check doneness. Always spoon flour lightly. (94 words)
Christmas Sugar Cookie Bars
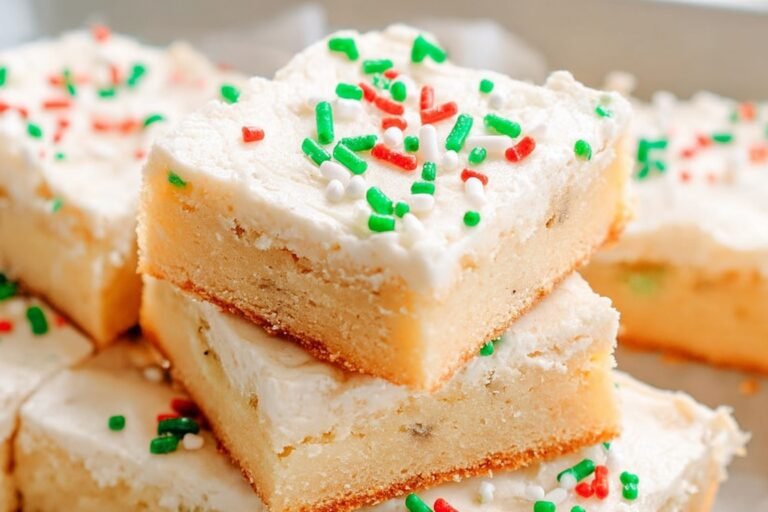
🍪 Dive into soft, chewy sugar cookie bars bursting with festive sprinkles and creamy frosting, skipping the hassle of individual cookies for holiday joy!
🎄 Ready in 40 minutes with no-chill dough, these crowd-pleasing squares deliver classic vanilla sweetness perfect for gifting or parties.
- Total Time: 40 minutes
- Yield: 9 servings
Ingredients
– 1 stick (1/2 cup) salted butter, softened well, not melted for rich flavor and soft, chewy base
– 1 cup sugar for sweetening and tender texture
– 1 large egg for binding and structure
– 1 teaspoon vanilla extract for warm flavor
– 2 cups all-purpose flour for body of the cookie bars
– 1 teaspoon baking powder for rising
– 1/4 cup festive sprinkles for color and holiday cheer
– 2 cups powdered sugar for smooth, sweet frosting base
– 1 stick (1/2 cup) salted butter, softened for creamy and rich frosting
– 3 tablespoons cream cheese, softened for tang and balancing sweetness
– 1 teaspoon vanilla extract for flavor
– 2 tablespoons milk for spreadable texture
– Additional sprinkles for topping for festive finish
Instructions
1-First Step: Prepare the pan and oven Start by preheating your oven to 350 degrees Fahrenheit. Line a 9×9-inch baking pan with parchment paper, leaving a little overhang on the sides if you can. This makes it much easier to lift the bars out after baking. Before you begin mixing, check that your butter is softened well but not melted. Real salted butter works best here because it gives the dough flavor and a tender bite. If you are baking in a warm kitchen, keep the butter out just long enough to soften, then get started.
2-Second Step: Cream the butter and sugar In a large bowl, beat together the softened butter and sugar until the mixture looks fluffy and light. This step helps add air to the dough, which gives the bars a softer texture after baking. Take your time here and mix until the sugar starts to blend in smoothly. Next, add the egg and vanilla extract. Continue mixing until everything is well combined. The dough will start to look smoother and richer at this point. If you are using a hand mixer, scrape down the sides of the bowl as needed so nothing gets left behind.
3-Third Step: Add the dry ingredients In a separate bowl, measure the flour and baking powder carefully. Spoon the flour into the measuring cup and level it off with a knife so you do not pack in too much. This is important because too much flour can make the bars dry or crumbly. If your baking powder is old, it may not give the bars the right lift, so check the date before you begin. Gradually beat the flour mixture into the wet ingredients until a thick dough forms. The dough may look dense, but that is what you want. If it feels crumbly, add milk 1 tablespoon at a time until it comes together. Be careful not to add too much, or the bars may turn soft in the wrong way.
4-Fourth Step: Fold in the sprinkles and spread the dough Gently stir in the 1/4 cup festive sprinkles. Mix just enough to distribute them through the dough without breaking them up too much. This keeps the colors bright and gives you those cheerful holiday spots throughout the bars. Spread the dough evenly into the prepared pan. A pastry roller can help press it into an even layer if the dough is sticky or a little stiff. Aim for a level surface so the bars bake evenly. Uneven dough can lead to overbaked edges and a softer center, so this step is worth the extra minute.
5-Fifth Step: Bake until lightly golden Bake the bars for about 20 minutes, or until they look golden brown around the edges. The center should look set, not wet, but the bars will still be soft. Avoid overbaking, since these bars are meant to stay tender and chewy. Once baked, remove the pan from the oven and let the bars cool completely. This part matters because warm bars will melt the frosting. Use the parchment paper to lift the cooled bars out of the pan before frosting.
6-Sixth Step: Make the frosting To make the frosting, blend the powdered sugar, softened butter, softened cream cheese, vanilla extract, and milk until smooth. The cream cheese gives the frosting a slight tang that helps balance the sweetness of the bars. If the frosting seems too thick, add a small splash more milk. If it seems too soft, add a bit more powdered sugar. A smooth frosting is easier to spread and looks more polished on top of the bars. Room temperature cream cheese is important here because cold cream cheese can leave lumps behind. If that happens, keep mixing until the frosting smooths out.
7-Seventh Step: Frost, decorate, and serve Spread the frosting generously over the cooled cookie bars. Then add additional sprinkles on top for a bright holiday finish. The frosting layer can be thick or thin depending on your taste, but a generous layer gives the bars that classic festive look. Cut the bars into squares and serve right away, or let the frosting set for a firmer texture. If you are serving them later, chilling them briefly can help the frosting hold its shape when sliced.
Last Step:
Please leave a rating and comment letting us know how you liked this recipe! This helps our business to thrive and continue providing free, high-quality recipes for you.Notes
🧈 Soften butter and cream cheese fully to room temp for lump-free results.
📏 Spoon and level flour; avoid scooping to prevent crumbly texture.
❄️ Refrigerate leftovers; freeze wrapped bars up to 2 months.
- Prep Time: 20 minutes
- Cook Time: 20 minutes
- Category: Desserts
- Method: Baked
- Cuisine: American
- Diet: Vegetarian
Nutrition
- Serving Size: 1 square
- Calories: 321 kcal
- Sugar: 52g
- Sodium: 10mg
- Fat: 1g
- Saturated Fat: 1g
- Unsaturated Fat: 0g
- Trans Fat: 0g
- Carbohydrates: 74g
- Fiber: 0g
- Protein: 3g
- Cholesterol: 30mg





