

Why You’ll Love These Chocolate And Mint Desserts
If you enjoy cool mint flavor paired with rich chocolate, these Chocolate Mint Dream Bars are going to hit the sweet spot. This no-bake dessert brings together a crunchy mint cookie crust, creamy peppermint cheesecake filling, smooth chocolate pudding, and plenty of chopped chocolate mint candies. It is the kind of treat that feels fun enough for a holiday table, yet easy enough for a regular weekend bake session.
- Easy to make: These Chocolate And Mint Desserts come together without an oven, which makes them a smart choice when you want a pretty dessert with less fuss. You simply mix, layer, chill, and slice.
- Great for busy days: The active prep time is about 45 minutes, then the refrigerator does the rest. That makes this recipe a good fit for busy parents, students, and working professionals.
- Rich but balanced: Each square offers a mix of creamy, crunchy, and cool flavors. The mint cuts through the chocolate in a way that keeps every bite interesting.
- Flexible for occasions: These Chocolate Mint Desserts work well for St. Patrick’s Day, Christmas, potlucks, birthdays, or simple family nights. They also travel well when packed in a covered dish.
Trust me, once you taste the mix of mint cookie crust, fluffy peppermint layer, and chocolate pudding, you may want to make these bars on repeat.
For readers who like simple sweets with big flavor, this recipe delivers the kind of crowd-pleasing dessert that disappears fast. If you enjoy easy no-bake treats, you may also like the ideas in my favorite no-bake desserts collection and these chocolate dessert recipes.
Chocolate and mint also make a classic pairing because the cool mint notes lighten the sweetness of the chocolate. If you are curious about the flavor match and the comfort-food appeal of chocolate, you can read more at Johns Hopkins Medicine’s guide to chocolate and wellness.
Jump to:
- Why You’ll Love These Chocolate And Mint Desserts
- Essential Ingredients for Chocolate And Mint Desserts
- Main Ingredients
- Special Dietary Options
- How to Prepare the Perfect Chocolate And Mint Desserts: Step-by-Step Guide
- First Step: Prepare the pan
- Second Step: Make the mint cookie crust
- Third Step: Add the peppermint cheesecake layer
- Fourth Step: Make the chocolate pudding layer
- Fifth Step: Assemble the bars
- Sixth Step: Chill and slice
- Seventh Step: Garnish and serve
- Dietary Substitutions to Customize Your Chocolate And Mint Desserts
- Protein and Main Component Alternatives
- Vegetable, Sauce, and Seasoning Modifications
- Mastering Chocolate And Mint Desserts: Advanced Tips and Variations
- Pro cooking techniques
- Flavor variations
- Presentation tips
- Make-ahead options
- How to Store Chocolate And Mint Desserts: Best Practices
- Refrigeration
- Freezing
- Serving from storage
- FAQs: Frequently Asked Questions About Chocolate And Mint Desserts
- What ingredients do I need for chocolate mint dream bars?
- How do you make the crust for chocolate mint dream bars?
- How do you assemble chocolate mint dream bars?
- How should you store chocolate mint dream bars?
- Can you make chocolate mint dream bars ahead or freeze them?
- Chocolate And Mint Desserts
- Ingredients
- Instructions
- Last Step:
- Notes
- Nutrition
- Did you make this recipe?
Essential Ingredients for Chocolate And Mint Desserts
Here is everything you need for these Chocolate Mint Dream Bars. I have listed the ingredients by layer so the prep stays simple and organized. The recipe uses a few store-bought shortcuts, which helps keep the process easy while still giving you a dessert that looks impressive.
Main Ingredients
- 15.25-ounce package mint-filled chocolate sandwich cookies, divided – This forms the crunchy mint cookie crust and also adds a little extra cookie texture in the layers and topping.
- 5 tablespoons unsalted butter – Melted butter binds the cookie crumbs so the crust holds together when sliced.
- 4.6 ounces chopped chocolate mint candies, about 26 candies, divided – These add chewy chocolate mint bursts throughout the bars and on top for garnish.
- 8 ounces cream cheese at room temperature – This is the base of the peppermint cheesecake layer and gives it a smooth, creamy texture.
- 1/2 cup confectioners’ sugar – Sweetens the peppermint layer and helps it stay silky.
- 1/4 teaspoon peppermint extract – Gives the dessert its cool mint flavor without overpowering the chocolate.
- 7 to 10 drops green food coloring – Adds the classic pale green look that makes these Chocolate And Mint Desserts feel festive.
- 1 cup whipped topping, divided – Folded into the peppermint layer for lightness and used again in the topping for a fluffy finish.
- 3.9-ounce box instant chocolate fudge pudding mix – Creates the rich chocolate layer in the middle of the bars.
- 1.5 cups milk – Mixed with the pudding to keep the filling thick and sliceable.
- 8-ounce container whipped topping, divided – Spreads over the pudding for a smooth, creamy final layer.
- Chocolate bar shavings, optional for garnish – Adds a pretty finish and extra chocolate flavor.
Special Dietary Options
- Vegan: Use dairy-free cream cheese, plant-based butter, vegan whipped topping, and a dairy-free chocolate pudding mix. Choose vegan mint sandwich cookies if available.
- Gluten-free: Swap in gluten-free chocolate mint sandwich cookies and confirm the pudding mix and candies are gluten-free.
- Low-calorie: Use reduced-fat cream cheese, light whipped topping, and a lower-sugar pudding mix if it fits your needs.
If you like reading about ingredient swaps for sweet treats, you may also enjoy my baking tips for home cooks.
How to Prepare the Perfect Chocolate And Mint Desserts: Step-by-Step Guide
These bars are simple, but the layers matter. Taking a little care with each step gives you clean slices and pretty, bakery-style presentation. The total time is about 3 hours and 15 minutes, including chilling, so plan ahead if you want to serve them for a party or holiday meal.
First Step: Prepare the pan
Line an 8×8-inch baking pan with parchment paper, leaving enough paper hanging over the sides so you can lift the bars out later. This small step makes removing and slicing the bars much easier. If you are using a disposable baking dish with a cover, that can be handy for transport.
Second Step: Make the mint cookie crust
Pulse 24 mint-filled chocolate sandwich cookies in a food processor until you have fine crumbs. Do not overwork them into a paste. Melt the unsalted butter, then mix it into the crumbs until every bit looks evenly moistened. Press the mixture firmly into the prepared pan in an even layer. A flat-bottomed glass can help smooth the crust so it slices neatly later.
Freeze the crust for at least 30 minutes. This gives it time to firm up and keeps the bottom layer from turning soft once the fillings go on. If you want a thinner crust, press it a little less thick so the bars do not feel too dense at the base.
Third Step: Add the peppermint cheesecake layer
Beat the room temperature cream cheese until it is soft and smooth. Add the confectioners’ sugar, peppermint extract, and 5 drops of green food coloring, then beat until fully combined. If you want a deeper green shade, add a couple more drops until it looks right to you.
Fold in 1 cup of whipped topping gently. Folding keeps the layer light instead of dense. Spread this peppermint layer over the chilled crust in an even layer. This filling should be creamy and easy to spread, almost like a soft mousse.
Fourth Step: Make the chocolate pudding layer
Whisk the instant chocolate fudge pudding mix with 1.5 cups of milk. Use only 1.5 cups, not 2 cups, because the extra-thick texture is what helps the bars hold their shape. Refrigerate the pudding until it begins to set, then spread it gently over the peppermint layer.
This thicker pudding layer is important in Chocolate Mint Desserts because it helps create sharp layers instead of a runny center. If you are making the recipe on a warm day, keep the bowl cold while the pudding thickens.
Fifth Step: Assemble the bars
Chop 20 of the chocolate mint candies and sprinkle them evenly over the crust before adding the peppermint layer. This gives each bite little pockets of candy crunch. Then spread the peppermint cheesecake layer over the candies, followed by the pudding layer. Finish by spreading the remaining whipped topping over the top.
Use a spoon or offset spatula for smooth layers. Move gently so you do not drag the fillings together. The goal is to keep each layer distinct, which is part of what makes these Chocolate And Mint Desserts look so pretty when sliced.
Sixth Step: Chill and slice
Chill the assembled bars in the refrigerator for at least 2 hours, or overnight if you have time. For the cleanest cuts, freeze the finished pan for 30 minutes before slicing. Lift the bars out using the parchment paper edges.
Warm a large knife under hot water, dry it well, and then cut the bars. Wipe the blade between slices for the neatest layers. This is one of the best tricks for getting bakery-style squares at home.
Seventh Step: Garnish and serve
Top the bars with the remaining chopped chocolate mint candies and a sprinkle of chocolate bar shavings, if using. Serve them chilled for the best texture and flavor. The cool peppermint, creamy filling, and rich chocolate taste make these bars feel extra special without much effort.
| Step | Time Needed | Why It Matters |
|---|---|---|
| Crust freezing | 30 minutes | Helps the base stay firm |
| Assembled chilling | 2 hours minimum | Sets the layers for slicing |
| Final freeze before cutting | 30 minutes | Gives cleaner edges |

Dietary Substitutions to Customize Your Chocolate And Mint Desserts
Protein and Main Component Alternatives
Even though this is a dessert, many readers still like to adapt recipes for flavor, texture, or dietary needs. The good news is that these Chocolate Mint Dream Bars are flexible. You can make thoughtful swaps without losing the cool mint-and-chocolate charm that makes them so fun.
For a lighter version, use reduced-fat cream cheese and light whipped topping. For a richer homemade taste, swap the whipped topping with homemade stabilized whipped cream. That can be a nice choice for readers who prefer fewer processed ingredients. If you need a dairy-free version, use plant-based cream cheese, dairy-free butter, and a non-dairy whipped topping.
Vegetable, Sauce, and Seasoning Modifications
Since this is a layered no-bake dessert, the main changes come from the crust, filling, and garnish rather than vegetables or sauces. Still, small flavor adjustments can make a big difference. If you want a stronger mint note, add a tiny bit more peppermint extract, but go slowly so it does not taste too sharp. If you prefer a softer mint flavor, reduce the extract slightly.
For the chocolate layer, stick with the thick instant pudding approach because it gives the bars their structure. If you are serving kids or guests who like sweeter desserts, keep the chocolate shavings light and let the mint candies do the talking. If you are watching sugar, choose lighter toppings and smaller portions. These bars are rich, so even a small square feels satisfying.
Small swaps can help this recipe fit your table better while keeping the same creamy chocolate mint flavor everyone loves.
Mastering Chocolate And Mint Desserts: Advanced Tips and Variations
Once you have made these bars once, it is easy to tweak them for different occasions. A few smart moves can help the layers look cleaner, slice better, and taste even more balanced.
Pro cooking techniques
- Warm the knife before slicing: This helps you get neat squares without dragging the layers.
- Do not thin the pudding: Using only 1.5 cups of milk keeps the middle layer firm enough to stack well.
- Keep the crust even: Press it firmly, but not too thick, so the bars do not feel heavy on the bottom.
- Chill long enough: Overnight chilling gives the cleanest texture and makes serving easier.
Flavor variations
If you want to switch things up, try a few different topping ideas. Crushed mint sandwich cookies make the bars extra crunchy. Extra Andes-style chocolate mint candies create a richer candy layer. Chocolate curls, mini chocolate chips, or a light drizzle of melted chocolate can also work well. If you want a more festive look, add a few pinches of green sprinkles for holidays like Christmas or St. Patrick’s Day.
Presentation tips
Use parchment paper to lift the bars out of the pan, then slice on a cutting board for the cleanest edges. A metal spatula helps move each square to a plate without breaking the layers. If you are serving a crowd, cut the bars into smaller pieces so everyone can enjoy a taste without feeling too full. For a polished finish, add chocolate shavings right before serving.
Make-ahead options
These Chocolate And Mint Desserts are ideal for planning ahead. You can make them the day before, chill them overnight, and slice them just before serving. That makes them a great choice for potlucks, school events, and holiday trays. They also freeze well, which is helpful if you like to prep desserts in batches.
How to Store Chocolate And Mint Desserts: Best Practices
Because these bars contain cream cheese, whipped topping, and pudding, they should stay chilled. Good storage keeps the layers creamy and helps the crust stay firm.
Refrigeration
Store the bars covered in the refrigerator for up to 5 days. Use plastic wrap, foil, or an airtight container. If you use a disposable pan with a lid, that makes transport easier too. Keep them chilled until serving time for the best texture.
Freezing
These bars can be frozen and thawed overnight in the refrigerator before serving. For longer storage, wrap individual slices tightly in plastic wrap, then place them in a freezer bag. They can keep for up to 2 months. Freezing is a great option when you want to prep ahead for holidays or busy weeks.
Serving from storage
Do not leave the bars at room temperature for too long because the filling can soften. If you are taking them to an event, keep them in a cooler until serving. For the prettiest slices, let frozen bars thaw in the refrigerator rather than at room temperature.
FAQs: Frequently Asked Questions About Chocolate And Mint Desserts
What ingredients do I need for chocolate mint dream bars?
To make chocolate mint dream bars, gather these key ingredients: one package of Mint Oreo cookies for the crust, ½ cup melted butter, a bag of Andes mints (chopped for layers), 8 oz cream cheese (softened), 1 cup confectioner’s sugar, 1 tsp peppermint extract, a few drops of green food coloring, 2 cups Cool Whip (divided) or homemade stabilized whipped cream, one box instant chocolate fudge pudding mix, 1½ cups cold milk, and toppings like chocolate shavings and crushed Mint Oreos. These create four distinct layers: a crunchy minty crust, creamy peppermint cheesecake, rich chocolate pudding, and fluffy topping. Measure everything ahead for smooth prep. This no-bake recipe serves 9-12 and takes about 20 minutes active time plus chilling. Double-check for dietary needs, like using dairy-free alternatives if required.
How do you make the crust for chocolate mint dream bars?
Start the crust by pulsing 24 Mint Oreo cookies (whole, with creme filling) in a food processor until they form fine crumbs, about 2 cups total. Mix in ½ cup melted unsalted butter until it resembles wet sand. Press firmly into an 8×8-inch baking dish using the bottom of a glass for an even ¼-inch layer. Freeze for 10-15 minutes to set while preparing other layers—this prevents sogginess. For best results, line the dish with parchment paper for easy removal. This minty Oreo base provides crunch that contrasts perfectly with creamy toppings. Avoid over-processing crumbs to keep texture intact. If no food processor, place cookies in a zip-top bag and crush with a rolling pin.
How do you assemble chocolate mint dream bars?
After chilling the Oreo crust, layer chopped Andes mints evenly over the base for bursts of mint flavor. Spread the prepared peppermint cheesecake layer (cream cheese, sugar, extract, coloring, and 1 cup Cool Whip folded in) smoothly next. Pour the thickened chocolate pudding (whisked with milk and chilled) over that, then top with remaining 1 cup Cool Whip. Refrigerate for at least 2 hours or overnight for clean slices—freeze 30 minutes before cutting for neat edges. Garnish with chocolate shavings, crushed Mint Oreos, and extra Andes pieces. Use an offset spatula for even layers. This order ensures flavors meld without mixing. Total chill time builds structure for party-ready presentation.
How should you store chocolate mint dream bars?
Store chocolate mint dream bars covered in the refrigerator to maintain their creamy texture and prevent melting. Use plastic wrap and foil or an airtight container—they stay fresh up to 5 days. Avoid room temperature exposure beyond 2 hours due to dairy content. For longer storage, freeze slices wrapped individually in plastic then foil; they keep up to 2 months. Thaw overnight in the fridge before serving to restore fluffiness. Label with dates for freshness. If transporting, chill in a cooler. Proper storage keeps the mint-chocolate balance crisp and prevents sogginess in the crust. Serve chilled for the best mouthfeel.
Can you make chocolate mint dream bars ahead or freeze them?
Yes, chocolate mint dream bars are ideal for advance prep. Assemble fully the day before, cover tightly, and refrigerate overnight—flavors intensify. Use stabilized whipped cream (with cornstarch) instead of plain Cool Whip for better hold without weeping. They freeze well too: after initial 2-hour chill, cut into squares, wrap each in plastic wrap, and store in a freezer bag for up to 2 months. Thaw in the fridge 4-6 hours or overnight; avoid microwaving to preserve texture. This makes them perfect for holidays or events. Double the recipe for 9×13 pans to feed crowds. Test a small batch first if new to freezing layered desserts.
Chocolate And Mint Desserts
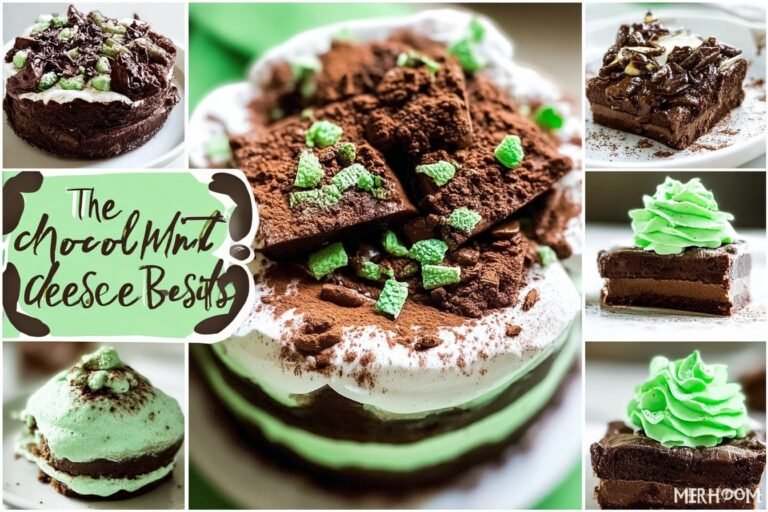
🍫 No-bake chocolate mint dream bars: layered bliss of cookie crust, peppermint cheesecake, chocolate pudding – pure indulgence!
🧁 Festive, make-ahead treat freezes perfectly: creamy, crunchy, minty heaven for holidays or any sweet craving.
- Total Time: 3 hours 45 minutes
- Yield: 16 servings
Ingredients
– 15.25-ounce package mint-filled chocolate sandwich cookies, divided
– 5 tablespoons unsalted butter
– 4.6 ounces chopped chocolate mint candies, about 26 candies, divided
– 8 ounces cream cheese at room temperature
– 1/2 cup confectioners’ sugar
– 1/4 teaspoon peppermint extract
– 7 to 10 drops green food coloring
– 1 cup whipped topping, divided
– 3.9-ounce box instant chocolate fudge pudding mix
– 1.5 cups milk
– 8-ounce container whipped topping, divided
– Chocolate bar shavings, optional for garnish
Instructions
1-First Step: Prepare the pan Line an 8×8-inch baking pan with parchment paper, leaving enough paper hanging over the sides so you can lift the bars out later. This small step makes removing and slicing the bars much easier. If you are using a disposable baking dish with a cover, that can be handy for transport.
2-Second Step: Make the mint cookie crust Pulse 24 mint-filled chocolate sandwich cookies in a food processor until you have fine crumbs. Do not overwork them into a paste. Melt the unsalted butter, then mix it into the crumbs until every bit looks evenly moistened. Press the mixture firmly into the prepared pan in an even layer. A flat-bottomed glass can help smooth the crust so it slices neatly later. Freeze the crust for at least 30 minutes. This gives it time to firm up and keeps the bottom layer from turning soft once the fillings go on. If you want a thinner crust, press it a little less thick so the bars do not feel too dense at the base.
3-Third Step: Add the peppermint cheesecake layer Beat the room temperature cream cheese until it is soft and smooth. Add the confectioners’ sugar, peppermint extract, and 5 drops of green food coloring, then beat until fully combined. If you want a deeper green shade, add a couple more drops until it looks right to you. Fold in 1 cup of whipped topping gently. Folding keeps the layer light instead of dense. Spread this peppermint layer over the chilled crust in an even layer. This filling should be creamy and easy to spread, almost like a soft mousse.
4-Fourth Step: Make the chocolate pudding layer Whisk the instant chocolate fudge pudding mix with 1.5 cups of milk. Use only 1.5 cups, not 2 cups, because the extra-thick texture is what helps the bars hold their shape. Refrigerate the pudding until it begins to set, then spread it gently over the peppermint layer. This thicker pudding layer is important in Chocolate Mint Desserts because it helps create sharp layers instead of a runny center. If you are making the recipe on a warm day, keep the bowl cold while the pudding thickens.
5-Fifth Step: Assemble the bars Chop 20 of the chocolate mint candies and sprinkle them evenly over the crust before adding the peppermint layer. This gives each bite little pockets of candy crunch. Then spread the peppermint cheesecake layer over the candies, followed by the pudding layer. Finish by spreading the remaining whipped topping over the top. Use a spoon or offset spatula for smooth layers. Move gently so you do not drag the fillings together. The goal is to keep each layer distinct, which is part of what makes these Chocolate And Mint Desserts look so pretty when sliced.
6-Sixth Step: Chill and slice Chill the assembled bars in the refrigerator for at least 2 hours, or overnight if you have time. For the cleanest cuts, freeze the finished pan for 30 minutes before slicing. Lift the bars out using the parchment paper edges. Warm a large knife under hot water, dry it well, and then cut the bars. Wipe the blade between slices for the neatest layers. This is one of the best tricks for getting bakery-style squares at home.
7-Seventh Step: Garnish and serve Top the bars with the remaining chopped chocolate mint candies and a sprinkle of chocolate bar shavings, if using. Serve them chilled for the best texture and flavor. The cool peppermint, creamy filling, and rich chocolate taste make these bars feel extra special without much effort.
Last Step:
Please leave a rating and comment letting us know how you liked this recipe! This helps our business to thrive and continue providing free, high-quality recipes for you.Notes
📄 Line pan with parchment overhang for effortless removal.
🥛 Use exactly 1.5 cups milk – keeps pudding thick and stable.
🔪 Warm knife under hot water, dry, for flawless layered slices.
- Prep Time: 45 minutes
- Chilling: 3 hours
- Cook Time: 0 minutes
- Category: Desserts
- Method: No-Bake
- Cuisine: American
- Diet: Vegetarian
Nutrition
- Serving Size: 1 bar
- Calories: 589 kcal
- Sugar: 50 g
- Sodium: 489 mg
- Fat: 32 g
- Saturated Fat: 18 g
- Unsaturated Fat: 14 g
- Trans Fat: 0 g
- Carbohydrates: 72 g
- Fiber: 2 g
- Protein: 7 g
- Cholesterol: 52 mg





