

Why You’ll Love This Bisquick Dumplings
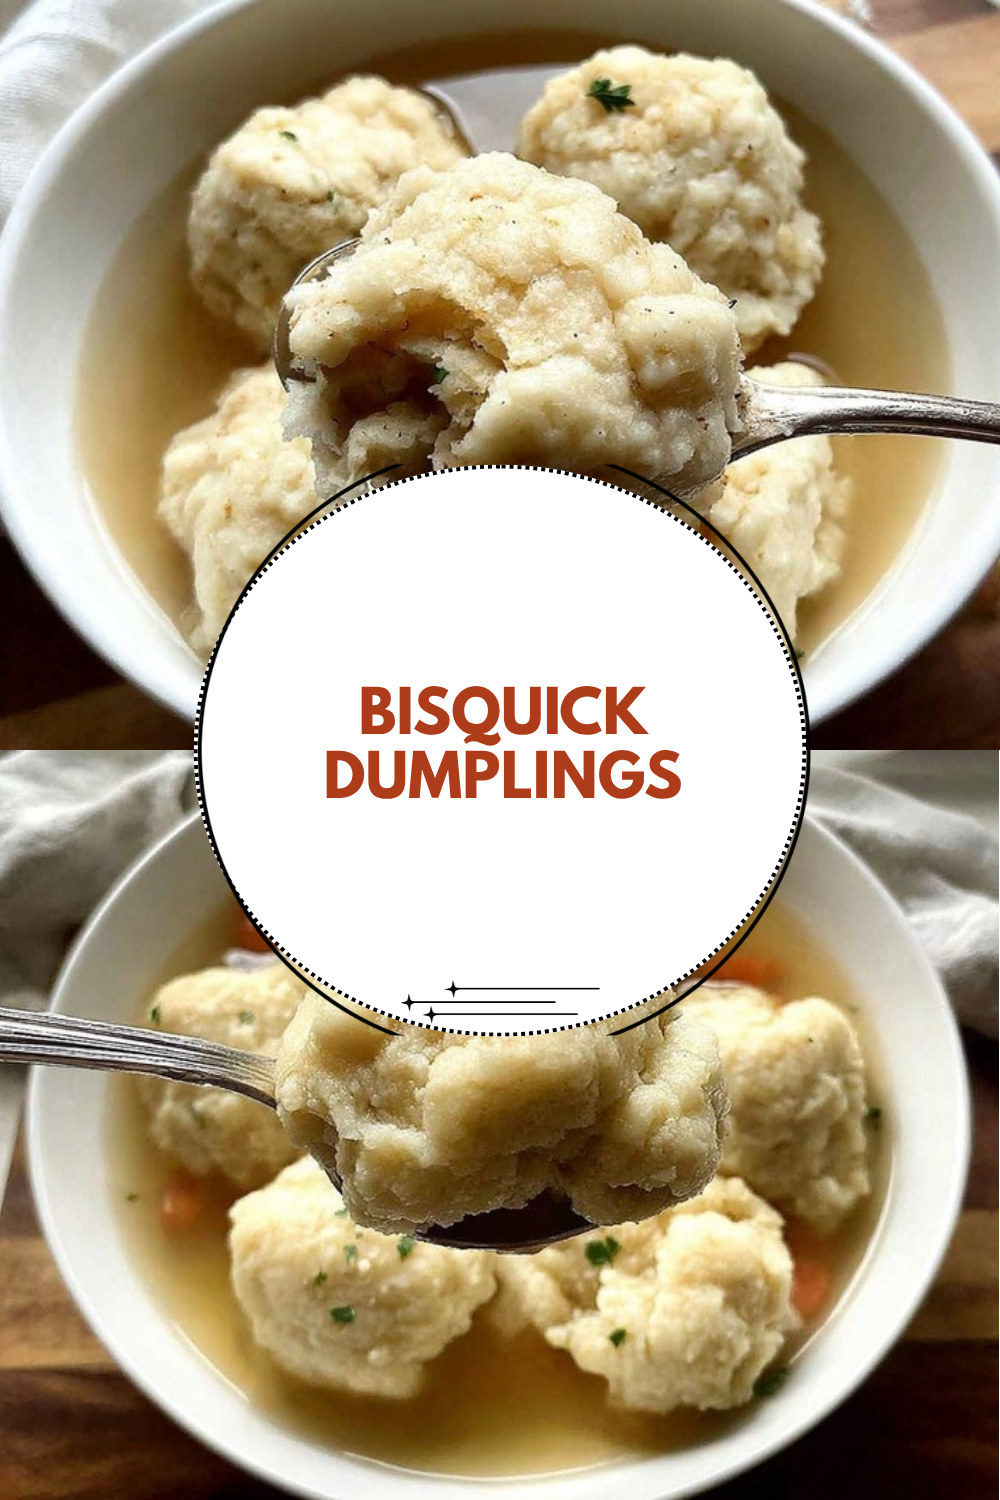
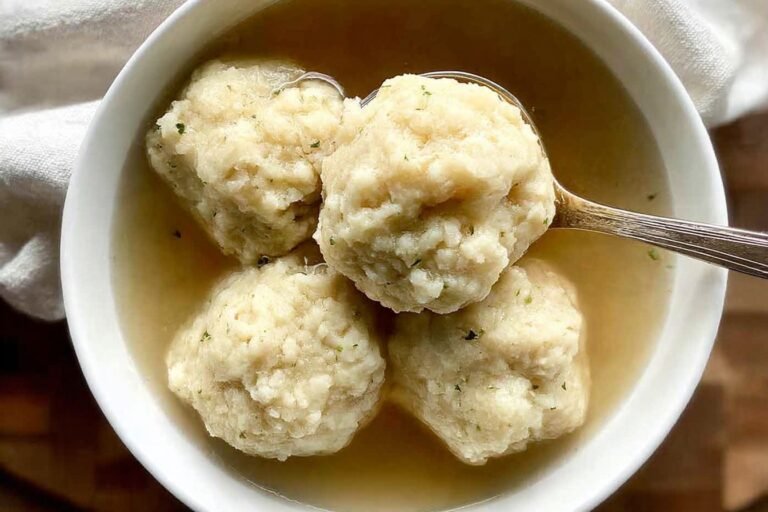
There’s something truly comforting about a bowl of hot stew topped with fluffy, tender dumplings. This Bisquick dumplings recipe delivers that homemade comfort without the fuss of making dough from scratch. Whether you’re a busy parent on a weeknight dinner mission or a student looking for satisfying meals on a budget, these dumplings will become your go-to solution.
Here are the top reasons this recipe deserves a permanent spot in your cooking rotation:
- Ease of preparation: With just two basic ingredients and about 25 minutes from start to finish, this recipe fits perfectly into even the most hectic schedules. No special equipment or advanced skills needed just a bowl, a spoon, and a pot of simmering stew.
- Consistent results: The baking mix takes the guesswork out of measuring flour, salt, and leavening agents. You get fluffy, light dumplings every single time without worrying whether your baking powder is still active or if you’ve measured correctly.
- Versatility: These dumplings work beautifully over savory chicken stew, beef and vegetable soup, or even sweetened fruit sauces for a dessert twist. They adapt to whatever you’re cooking and can be customized with herbs and seasonings to match your main dish.
- Family-friendly appeal: Kids and adults alike love the soft, pillowy texture. They’re mild enough for picky eaters yet satisfying enough to make a hearty meal feel complete. Plus, the recipe yields about 10 dumplings perfect for feeding a hungry family.
This simple recipe proves that homemade comfort food doesn’t have to be complicated. The combination of convenience and satisfying results makes it a winner for any home cook.
Jump to:
- Why You’ll Love This Bisquick Dumplings
- Essential Ingredients for Bisquick Dumplings
- Main Ingredients
- Special Dietary Options
- How to Prepare the Perfect Bisquick Dumplings: Step-by-Step Guide
- Step 1: Prepare Your Stew or Soup Base
- Step 2: Mix the Dough
- Step 3: Drop the Dumplings
- Step 4: Cook Uncovered
- Step 5: Cover and Continue Cooking
- Step 6: Test for Doneness and Serve
- Dietary Substitutions to Customize Your Bisquick Dumplings
- Protein and Main Component Alternatives
- Vegetable, Sauce, and Seasoning Modifications
- Mastering Bisquick Dumplings: Advanced Tips and Variations
- Pro Cooking Techniques
- Flavor Variations
- Presentation Tips
- Make-Ahead Options
- How to Store Bisquick Dumplings: Best Practices
- Refrigeration
- Freezing
- Reheating
- Meal Prep Considerations
- FAQs: Frequently Asked Questions About Bisquick Dumplings
- How do you make Bisquick dumplings for stew?
- Can I substitute water for milk when making Bisquick dumplings?
- Why do my Bisquick dumplings dissolve while cooking and how do I fix it?
- Why are my Bisquick dumplings heavy and not fluffy?
- What heat level should I use after adding Bisquick dumplings to stew?
- Bisquick Dumplings
- Ingredients
- Instructions
- Last Step:
- Notes
- Nutrition
- Did you make this recipe?
Essential Ingredients for Bisquick Dumplings
One of the best things about this recipe is its short ingredient list. You likely have everything you need in your pantry right now. Here’s what you’ll need to make these tender, fluffy dumplings:
Main Ingredients
- 2 cups baking mix – This pre-mixed blend contains flour, shortening, salt, and leavening agents, saving you measuring time and guaranteeing consistent texture. The leavening in the mix helps the dumplings puff up beautifully during cooking.
- 2/3 cup milk – Milk binds the dough together and adds richness. The protein and fat content in milk creates a more tender crumb compared to water. Cold milk works best for keeping the shortening in the baking mix solid until cooking time.
Special Dietary Options
Good news for those with dietary restrictions this recipe can be adapted several ways:
- Vegan option: Substitute the milk with an equal amount of unsweetened plant-based milk (soy, oat, or almond work well) or even water in a pinch. The texture will be slightly less rich but still delicious.
- Gluten-free alternative: Use a gluten-free baking mix designed for biscuits or pancakes. Follow the same ratios and cooking method for comparable results.
- Lower calorie: Use skim milk or unsweetened almond milk to reduce the fat content while maintaining acceptable texture and moisture.
How to Prepare the Perfect Bisquick Dumplings: Step-by-Step Guide
Making fluffy Bisquick dumplings is straightforward, but a few key techniques make the difference between good results and great ones. Follow these detailed steps for dumplings that turn out light and tender every time.
Step 1: Prepare Your Stew or Soup Base
Before mixing the dumpling dough, have your stew or soup ready and at the right temperature. The liquid should be at a gentle boil not a rolling boil when you add the dumplings. If your stew is too hot, the outside of the dumplings will cook too quickly while the inside stays raw. Too cool, and they won’t cook through properly.
Bring your stew to a boil, then reduce the heat to maintain a gentle simmer. You want small bubbles breaking the surface occasionally. This temperature control is essential for proper dumpling cooking, so don’t skip this step.
Step 2: Mix the Dough
In a medium bowl, combine the baking mix and milk. Here’s where technique matters most:
- Use a fork or spoon to stir the ingredients together
- Mix just until a soft dough forms this typically takes about 30 seconds of stirring
- Stop mixing as soon as the dry ingredients are moistened
- Small lumps in the dough are perfectly fine and actually desirable
Critical tip: Resist the urge to keep stirring. Overworked dough develops gluten strands that make dumplings tough and chewy instead of tender and fluffy. Think of it like making biscuits the less you handle the dough, the better the texture.
The dough should be soft and slightly sticky, holding together when you scoop it but not so wet that it pours off the spoon. If it seems too loose, add another tablespoon of baking mix. If it’s too dry to hold together, sprinkle in a little more milk.
Step 3: Drop the Dumplings
Using a tablespoon or small cookie scoop, drop rounded spoonfuls of dough directly onto the simmering stew. Space them about an inch apart because they will expand significantly during cooking often doubling or even tripling in size.
For uniform dumplings, try to make each spoonful roughly the same size. This ensures even cooking throughout the batch. Aim for about 10 dumplings total, which works well for most standard pot sizes.
Don’t stir the pot after adding the dumplings. Stirring breaks them apart and interferes with the cooking process. Just drop them on top and leave them be.
Step 4: Cook Uncovered
After dropping all the dumplings into the pot, immediately reduce the heat to a low simmer. You want to maintain gentle bubbling without a full rolling boil. Cook the dumplings uncovered for 10 minutes.
This uncovered cooking period serves an important purpose: it allows the bottoms of the dumplings to set and cook through from the direct heat of the stew below. The tops remain slightly underdone during this phase, which is exactly what you want.
Step 5: Cover and Continue Cooking
After the initial 10 minutes of uncovered cooking, place a tight-fitting lid on the pot. Cover and cook for an additional 10 minutes on low heat. This covered cooking time steams the tops of the dumplings, completing the cooking process.
The combination of direct heat from below and trapped steam from above creates the perfect environment for fluffy, fully-cooked dumplings. Resist the temptation to peek during this stage removing the lid releases the steam that’s essential for proper cooking.
Step 6: Test for Doneness and Serve
After the full 20 minutes of cooking time (10 uncovered plus 10 covered), test a dumpling to make sure it’s done. Insert a toothpick or knife into the center of one dumpling. It should come out clean or with just a few moist crumbs, not wet batter.
The dumplings should look puffed and slightly dry on top. You can also cut one open to check the inside should be cooked through, fluffy, and bread-like in texture, not gummy or raw.
Serve the dumplings immediately alongside your stew or soup. They’re best enjoyed fresh, while still hot and fluffy. Simply ladle the stew into bowls, making sure each serving gets a dumpling or two on top.

Dietary Substitutions to Customize Your Bisquick Dumplings
This basic recipe serves as a wonderful foundation, but you can make several substitutions based on dietary needs, ingredient availability, or personal preferences.
Protein and Main Component Alternatives
While these dumplings typically top savory stews containing meat, you can easily adapt them for different protein situations:
- Vegetarian stews: The dumplings themselves contain no meat, making them perfect for topping vegetable-based soups and stews. Try them over mushroom and barley soup, lentil stew, or a hearty vegetable medley.
- Added protein: Mix in some shredded cheese or nutritional yeast to boost the protein content of the dumplings themselves. About 1/4 cup of shredded cheese adds flavor and protein without changing the texture significantly.
- Reduced dairy: For those avoiding dairy, use water or unsweetened non-dairy milk in place of regular milk. The dumplings will be slightly less rich but still satisfying.
Vegetable, Sauce, and Seasoning Modifications
The flavor of your dumplings can be easily customized to complement whatever dish you’re serving them with:
- Fresh herbs: Add 1-2 tablespoons of chopped fresh herbs like sage, rosemary, or thyme to the dough for dumplings that complement poultry or vegetable dishes beautifully.
- Dried seasonings: Garlic powder, onion powder, or dried parsley mixed into the dough add savory depth. Start with 1/2 teaspoon of your chosen seasoning and adjust to taste.
- Sweet variations: For dessert dumplings, add 1-2 tablespoons of sugar and a dash of cinnamon to the dough. These work wonderfully baked over fruit sauces like apple sauce or berry compote.
- Butter enhancement: Adding a tablespoon of melted butter to the dough improves both flavor and texture, especially if you’re using a lower-fat baking mix or reduced-fat milk.
The beauty of this recipe lies in its adaptability. Whether you’re cooking for picky kids, health-conscious adults, or anyone in between, you can modify these dumplings to suit just about any preference or dietary requirement.
Mastering Bisquick Dumplings: Advanced Tips and Variations
Once you’ve mastered the basic technique, these advanced tips will help you achieve even better results and inspire you to try creative variations.
Pro Cooking Techniques
Small adjustments in your technique can make a big difference in the final product:
- Temperature control: The single most important factor is maintaining the right heat level. After adding dumplings, immediately reduce to a low simmer. Boiling causes dumplings to break apart; simmering too low means they won’t cook through. Find that sweet spot where gentle bubbles occasionally break the surface.
- Don’t peek: During the covered cooking time, keep that lid on. Every time you check, you release steam and lower the temperature, which affects the final texture.
- Size matters: Keep dumplings uniform in size for even cooking. Larger ones may need an extra minute or two, while smaller ones cook faster.
- High altitude adjustments: If you live at high altitude, increase the cooking time by 3-5 minutes. Lower air pressure affects how quickly foods cook.
Flavor Variations
Transform this basic recipe into something special with these flavor additions:
| Variation | Additions | Best Paired With |
|---|---|---|
| Herbed Dumplings | 1 tbsp fresh chopped parsley, 1 tsp dried thyme | Chicken stew, vegetable soup |
| Cheese Dumplings | 1/2 cup shredded cheddar cheese | Beef stew, chili |
| Garlic Herb | 1/2 tsp garlic powder, 1 tbsp fresh chives | Any savory stew |
| Sweet Cinnamon | 2 tbsp sugar, 1/2 tsp cinnamon | Fruit compote, apple sauce |
Presentation Tips
Make your dish look as good as it tastes with simple plating techniques:
- Serve in wide, shallow bowls so dumplings are visible on top
- Garnish with fresh herbs that match what’s in your stew
- For a pretty dessert presentation, dust sweet dumplings with powdered sugar just before serving
- Serve immediately for the fluffiest texture and best presentation
Make-Ahead Options
While dumplings are best cooked fresh, you can do some prep work ahead of time:
- Pre-measure the baking mix and milk in separate containers
- When ready to serve, simply combine and drop onto simmering stew
- The entire process from mixing to serving takes only about 25 minutes
- Leftover cooked dumplings can be stored, though they’re best enjoyed fresh
For a sweet treat that’s reminiscent of these comforting dumplings, check out our easy peach cobbler recipe it uses similar techniques for a delicious dessert.
How to Store Bisquick Dumplings: Best Practices
Bisquick dumplings are definitely best enjoyed fresh, but if you have leftovers, proper storage helps maintain their quality for later enjoyment.
Refrigeration
For short-term storage, place leftover dumplings in an airtight container in the refrigerator. They’ll keep for 2-3 days, though the texture will become denser over time as they absorb moisture from the stew.
If possible, store the dumplings separately from the stew. This prevents them from becoming too soggy. If they’re already mixed in with the stew, that’s fine just know they’ll have a softer texture when reheated.
Freezing
Freezing cooked dumplings is possible but results vary. For best results:
- Freeze dumplings separately from the stew whenever possible
- Wrap individually or place in a single layer in a freezer container
- Freeze for up to 2 months
- Thaw in the refrigerator before reheating
Note that frozen and reheated dumplings will have a denser, moister texture than freshly made ones. They’re still tasty but won’t have the same fluffy quality.
Reheating
To reheat refrigerated dumplings:
- In stew: Gently warm the stew on the stovetop over low heat until the dumplings are heated through. Avoid boiling, which breaks them down further.
- Separate dumplings: Wrap in foil and warm in a 300°F oven for 10-15 minutes, or microwave on 50% power for 30-60 seconds.
- From frozen: Thaw overnight in the refrigerator first, then reheat using the methods above.
Meal Prep Considerations
The best approach for meal prep is to make the dumplings fresh when you’re ready to serve. Since they only take 25 minutes from start to finish, they’re perfect for weeknight dinners. Prep your stew in advance (many taste better after a day or two anyway), then make fresh dumplings when you reheat it.
This strategy gives you the convenience of meal prep while still enjoying the fluffy, tender texture of freshly made dumplings. It’s the best of both worlds for busy home cooks.
FAQs: Frequently Asked Questions About Bisquick Dumplings
How do you make Bisquick dumplings for stew?
To make Bisquick dumplings, mix 2 cups of Bisquick baking mix with ⅔ cup of milk in a bowl until a soft dough forms—stir just until combined, about 30 seconds, to avoid tough results. Drop the dough by rounded tablespoonfuls (about 10-12 dumplings) onto the top of your simmering stew or soup. Do not stir after adding. Cover the pot tightly and simmer on low heat for 10 minutes uncovered, then 10 more minutes covered. This steams the dumplings to fluffy perfection. Test doneness by inserting a toothpick; it should come out clean. Yields 10-12 dumplings, perfect for 4-6 servings of stew. For best results, use full-fat milk and ensure your stew is at a gentle simmer before adding. (92 words)
Can I substitute water for milk when making Bisquick dumplings?
Yes, you can use water instead of milk for Bisquick dumplings, but expect a slightly denser texture and milder flavor since milk adds richness and tenderness. Use the same ratio: 2 cups Bisquick to ⅔ cup cold water. Stir gently to form a soft dough, then drop spoonfuls into simmering stew. Cover and cook 10 minutes uncovered, then 10 minutes covered on low heat. If the dough feels too sticky, add a tablespoon more Bisquick. This substitution works well in a pinch or for dairy-free diets, though buttermilk or even plant-based milk can mimic milk’s moisture better for fluffier results. Always avoid overmixing to prevent chewiness. (104 words)
Why do my Bisquick dumplings dissolve while cooking and how do I fix it?
Bisquick dumplings dissolve if the stew boils too vigorously, the dough is too wet, or they’re stirred after adding. To prevent this, bring stew to a gentle simmer first, then drop firm tablespoon-sized dough balls (2 cups Bisquick + ⅔ cup milk, minimally mixed) on top without stirring. Reduce heat to low, cover tightly, and cook 10 minutes uncovered followed by 10 minutes covered. If dough seems loose, chill it 10 minutes before dropping or add 1-2 tablespoons more Bisquick. High altitude? Increase simmer time by 5 minutes. This method keeps dumplings intact and fluffy every time. (98 words)
Why are my Bisquick dumplings heavy and not fluffy?
Heavy Bisquick dumplings usually result from overmixing the dough, which develops gluten for a tough texture, or incorrect ratios like too much liquid. Use exactly 2 cups Bisquick and ⅔ cup cold milk; stir with a fork just until moistened—lumps are okay. Over-handling or warm ingredients also deflate air pockets. Drop into gently simmering stew (not boiling), cover, and cook 10 minutes uncovered then 10 covered on low. For extra lift, add 1 teaspoon baking powder or let dough rest 5 minutes. Fresh Bisquick and room-temperature stew base help too. Follow these steps for light, airy dumplings that float beautifully. (102 words)
What heat level should I use after adding Bisquick dumplings to stew?
After dropping Bisquick dumplings into stew, immediately reduce heat to a low simmer—around 180-200°F if using a thermometer—to cook them gently without breaking apart. Boiling vigorously causes dissolving or sinking. Cover the pot tightly right away to trap steam, which makes them rise. Cook 10 minutes uncovered to set the bottoms, then 10 minutes covered. Avoid peeking or stirring, as this drops temperature and toughens them. If your stove runs hot, use a diffuser. Electric slow cookers work on high for the first 10 minutes then low. This precise heat control ensures tender, fluffy dumplings in every batch. (101 words)
Bisquick Dumplings
🥟 Fluffy Bisquick dumplings transform any stew into cozy comfort—ready in 25 minutes from pantry staples.
🍲 Drop-and-simmer ease yields light, tender bites that soak up rich broth perfectly.
- Total Time: 25 minutes
- Yield: 10 dumplings
Ingredients
– 2 cups baking mix
– 2/3 cup milk
Instructions
1-Step 1: Prepare Your Stew or Soup Base: Before mixing the dumpling dough, have your stew or soup ready and at the right temperature. The liquid should be at a gentle boil not a rolling boil when you add the dumplings. If your stew is too hot, the outside of the dumplings will cook too quickly while the inside stays raw. Too cool, and they won’t cook through properly. Bring your stew to a boil, then reduce the heat to maintain a gentle simmer. You want small bubbles breaking the surface occasionally. This temperature control is essential for proper dumpling cooking, so don’t skip this step.
2-Step 2: Mix the Dough: In a medium bowl, combine the baking mix and milk. Here’s where technique matters most:* Use a fork or spoon to stir the ingredients together* Mix just until a soft dough forms this typically takes about 30 seconds of stirring* Stop mixing as soon as the dry ingredients are moistened* Small lumps in the dough are perfectly fine and actually desirable The dough should be soft and slightly sticky, holding together when you scoop it but not so wet that it pours off the spoon. If it seems too loose, add another tablespoon of baking mix. If it’s too dry to hold together, sprinkle in a little more milk.
3-Step 3: Drop the Dumplings: Using a tablespoon or small cookie scoop, drop rounded spoonfuls of dough directly onto the simmering stew. Space them about an inch apart because they will expand significantly during cooking often doubling or even tripling in size. For uniform dumplings, try to make each spoonful roughly the same size. This ensures even cooking throughout the batch. Aim for about 10 dumplings total, which works well for most standard pot sizes. Don’t stir the pot after adding the dumplings. Stirring breaks them apart and interferes with the cooking process. Just drop them on top and leave them be.
4-Step 4: Cook Uncovered: After dropping all the dumplings into the pot, immediately reduce the heat to a low simmer. You want to maintain gentle bubbling without a full rolling boil. Cook the dumplings uncovered for 10 minutes. This uncovered cooking period serves an important purpose: it allows the bottoms of the dumplings to set and cook through from the direct heat of the stew below. The tops remain slightly underdone during this phase, which is exactly what you want.
5-Step 5: Cover and Continue Cooking: After the initial 10 minutes of uncovered cooking, place a tight-fitting lid on the pot. Cover and cook for an additional 10 minutes on low heat. This covered cooking time steams the tops of the dumplings, completing the cooking process. The combination of direct heat from below and trapped steam from above creates the perfect environment for fluffy, fully-cooked dumplings. Resist the temptation to peek during this stage removing the lid releases the steam that’s essential for proper cooking.
6-Step 6: Test for Doneness and Serve: After the full 20 minutes of cooking time (10 uncovered plus 10 covered), test a dumpling to make sure it’s done. Insert a toothpick or knife into the center of one dumpling. It should come out clean or with just a few moist crumbs, not wet batter. The dumplings should look puffed and slightly dry on top. You can also cut one open to check the inside should be cooked through, fluffy, and bread-like in texture, not gummy or raw. Serve the dumplings immediately alongside your stew or soup. They’re best enjoyed fresh, while still hot and fluffy. Simply ladle the stew into bowls, making sure each serving gets a dumpling or two on top.
Last Step:
Please leave a rating and comment letting us know how you liked this recipe! This helps our business to thrive and continue providing free, high-quality recipes for you.Notes
🔥 Use gentle simmer after dropping to prevent dissolving.
🧈 Stir in butter or herbs like thyme for richer flavor.
✋ Avoid overworking dough for maximum fluffiness.
- Prep Time: 5 minutes
- Cook Time: 20 minutes
- Category: Side Dishes
- Method: Simmer
- Cuisine: American
- Diet: Vegetarian
Nutrition
- Serving Size: 1 dumpling
- Calories: 110 kcal
- Sugar: 2 g
- Sodium: 400 mg
- Fat: 4 g
- Saturated Fat: 1 g
- Unsaturated Fat: 3 g
- Trans Fat: 0 g
- Carbohydrates: 16 g
- Fiber: 0.5 g
- Protein: 2 g
- Cholesterol: 2 mg





