

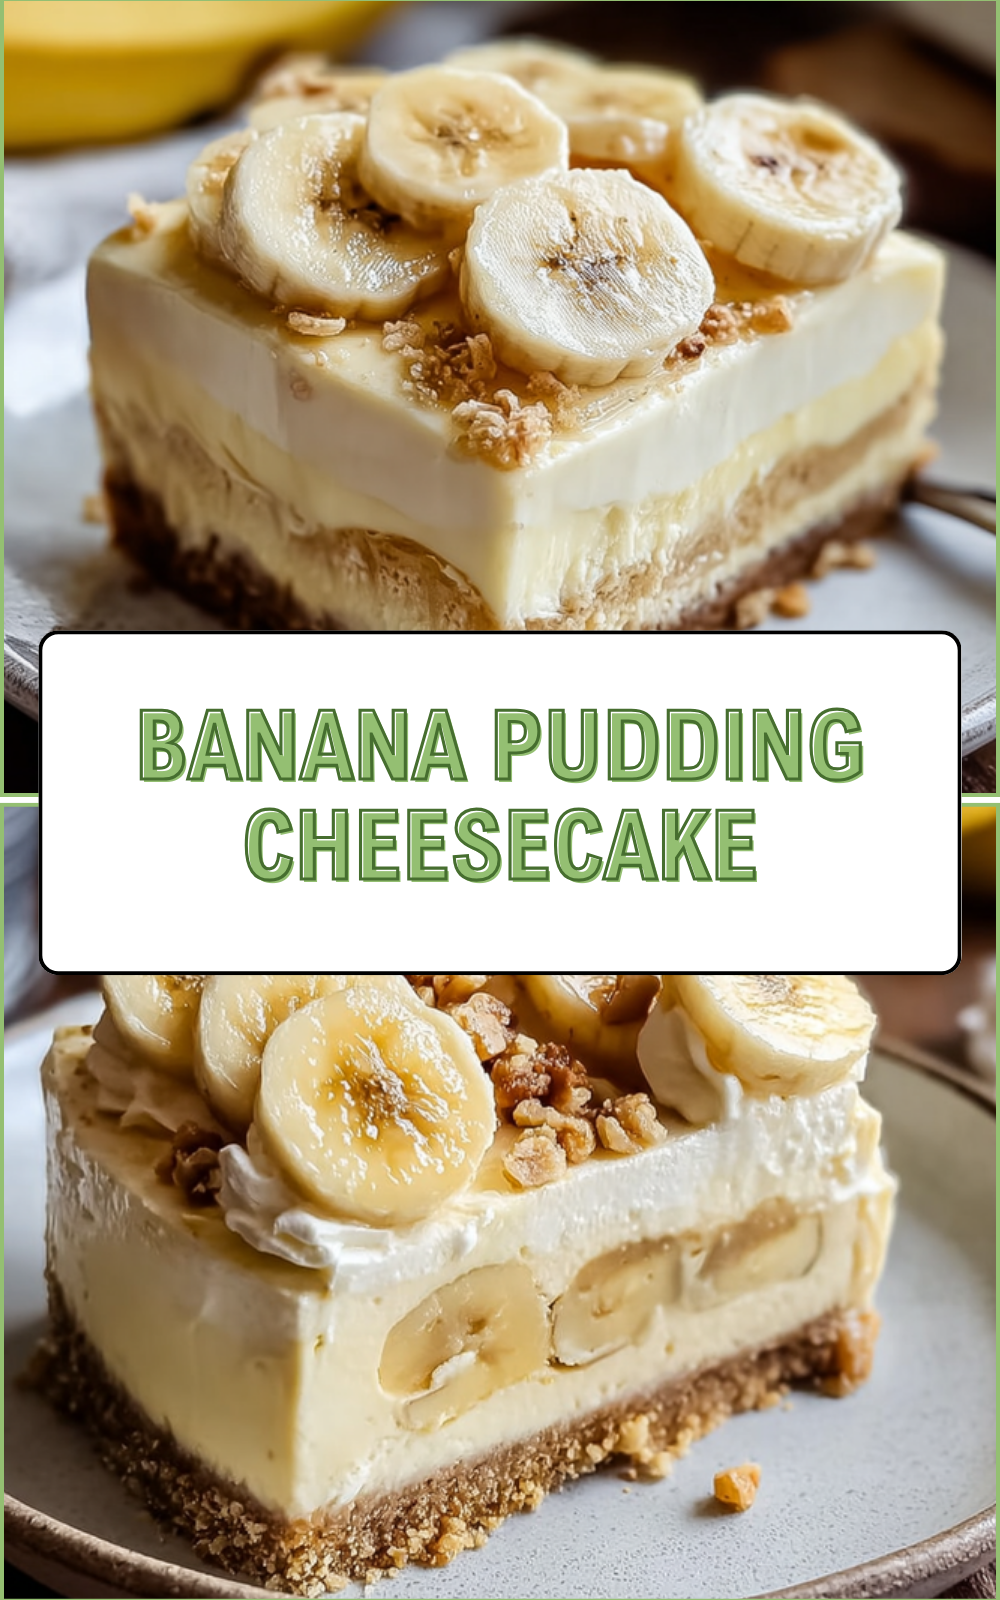
Why You’ll Love This Banana Pudding Cheesecake
This banana pudding cheesecake combines the creamy goodness of classic cheesecake with the sweet, familiar taste of banana pudding, making it a hit for anyone craving a simple dessert. It’s easy to whip up in your own kitchen, perfect for busy days when you want something special without the fuss. Plus, it offers a fun twist on traditional recipes that will delight family and friends alike.
One reason this recipe stands out is its ease of preparation. This banana pudding cheesecake recipe is simple and quick to make, requiring minimal ingredients and straightforward steps, making it perfect for busy bakers who want delicious results without spending hours in the kitchen. You’ll appreciate how it delivers a nutritious dessert packed with bananas, which provide potassium, fiber, and essential vitamins, supporting wellness while satisfying sweet cravings. Its versatility also shines through, as you can adapt it to suit dietary restrictions like vegan or gluten-free options by swapping ingredients, ensuring everyone can enjoy this treat.
Beyond convenience, the distinctive flavor of banana pudding cheesecake is truly unique. The creamy, luscious blend of banana pudding with classic cheesecake creates a unique flavor profile that stands out from traditional cheesecakes, offering a delightful twist on a beloved dessert. For more ideas on healthy desserts, check out our healthy dessert recipes page for inspiration. Whether you’re a home cook or a baking enthusiast, this recipe brings joy to the table with its approachable steps and customizable nature.
Jump to:
- Why You’ll Love This Banana Pudding Cheesecake
- Essential Ingredients for Banana Pudding Cheesecake
- How to Prepare the Perfect Banana Pudding Cheesecake: Step-by-Step Guide
- Additional Baking Tips
- Dietary Substitutions to Customize Your Banana Pudding Cheesecake
- Mastering Banana Pudding Cheesecake: Advanced Tips and Variations
- How to Store Banana Pudding Cheesecake: Best Practices
- FAQs: Frequently Asked Questions About Banana Pudding Cheesecake
- Can I make banana pudding cheesecake ahead of time?
- What type of pudding mix should I use for banana pudding cheesecake?
- How do I prevent the bananas from browning in the cheesecake?
- Can I freeze banana pudding cheesecake?
- What crust works best for banana pudding cheesecake?
- Banana Pudding Cheesecake
- Ingredients
- Instructions
- Last Step:
- Notes
- Nutrition
- Did you make this recipe?
Essential Ingredients for Banana Pudding Cheesecake
Gathering the right ingredients is key to making a banana pudding cheesecake that turns out perfectly every time. This section breaks down what you’ll need for the crust, filling, and toppings, focusing on fresh, quality items for the best results. Let’s look at the precise list to ensure you have everything measured correctly.
- Crust: 3 cups (180 grams) crushed whole wafers
- Crust: ¼ cup (50 grams) granulated sugar
- Crust: 5 tablespoons (70 grams) unsalted butter, melted and cooled
- Filling: 32 ounces (905 grams) cream cheese, softened to room temperature
- Filling: 1 cup (250 grams) mashed ripe banana (about 2 large bananas)
- Filling: ½ cup (115 grams) full-fat sour cream at room temperature
- Filling: 1 cup (200 grams) granulated sugar
- Filling: 1 box (3.4 oz) dry instant banana cream pudding mix
- Filling: 1 teaspoon pure vanilla extract
- Filling: 4 large eggs at room temperature
- Optional Toppings: 2 cups whipped cream or whipped topping
- Optional Toppings: 1 to 2 sliced bananas
- Optional Toppings: 10 to 20 whole wafers
These ingredients form the base of your banana pudding cheesecake, with each measurement designed for a balanced flavor and texture. For special dietary options, you can make this recipe vegan by using plant-based cream cheese and egg substitutes like flaxseed meal. If you’re aiming for gluten-free, swap the crushed whole wafers with gluten-free cookies, and for a low-calorie version, opt for light cream cheese and natural sweeteners to keep things tasty yet lighter.
How to Prepare the Perfect Banana Pudding Cheesecake: Step-by-Step Guide
Creating a banana pudding cheesecake is straightforward, especially with this detailed guide that walks you through each stage. Start by preheating your oven and gathering your tools for a smooth process. Follow the steps closely to achieve that creamy texture and crunchy base everyone loves.
First, preheat the oven to 325°F (163°C) and line the bottom of a 9-inch springform pan with parchment paper. Prepare the crust by mixing 3 cups of crushed whole wafers, ¼ cup of granulated sugar, and 5 tablespoons of melted unsalted butter until evenly moistened, then press it firmly into the pan and bake for 10 minutes to set it. Allow the crust to cool while you move on to the filling.
In a large bowl, beat 32 ounces of softened cream cheese until smooth, then add 1 cup of mashed ripe banana and ½ cup of full-fat sour cream, mixing well for a creamy base. Next, incorporate 1 cup of granulated sugar, 1 box of dry instant banana cream pudding mix, and 1 teaspoon of pure vanilla extract into the mixture. Lightly beat 4 large eggs separately and gently fold them in to avoid overmixing.
Wrap the springform pan with 2 to 3 layers of aluminum foil to prevent water leakage, and place it inside an oven bag with sides rolled down for extra protection. Pour the filling over the cooled crust and smooth the top evenly. Place the wrapped pan in a roasting pan with about 1 inch of boiling water, then bake for 70 to 80 minutes until the edges are set and the center slightly jiggles.
After baking, turn off the oven, crack the door, and leave the cheesecake inside for 1 hour to cool gradually and prevent cracking. Remove it from the oven and let it cool completely on a rack, then refrigerate for 5 to 6 hours or overnight until fully chilled. Before serving, loosen the cheesecake from the pan edges, remove the springform, and garnish with 2 cups of whipped cream, 1 to 2 sliced bananas, and 10 to 20 whole wafers as desired. For variations, like vegan adaptations, substitute ingredients at each step as mentioned in the dietary section.
Additional Baking Tips
To ensure your banana pudding cheesecake comes out perfect, always use very ripe bananas with brown spots for the best flavor and mash them thoroughly. Keep all ingredients at room temperature to achieve a smooth texture, and remember not to prepare the pudding mix add it dry for the right consistency. If you’re using a different pan size, adjust quantities and baking times accordingly for even results.

Dietary Substitutions to Customize Your Banana Pudding Cheesecake
Adapting recipes to fit your needs is simple with banana pudding cheesecake, allowing you to enjoy it while meeting dietary preferences. Whether you’re cutting calories or avoiding certain ingredients, these swaps keep the dessert delicious and inclusive. Let’s explore how to tweak the recipe without losing its charm.
For protein and main component alternatives, replace cream cheese with cashew-based or tofu-based options for vegan versions, and use flaxseed or chia seeds as egg replacers. If you want a lower-fat or higher-protein twist, swap in Greek yogurt or silken tofu to maintain that creamy feel. When it comes to vegetable, sauce, and seasoning modifications, add cinnamon or nutmeg for a warm flavor, or use coconut milk to boost creaminess in vegan preparations.
Seasonal variations can include mashed pumpkin or sweet potato for a fall vibe, while gluten-free crusts work well with almond flour or crushed gluten-free cookies. These substitutions ensure you can enjoy a banana pudding cheesecake tailored to your taste preferences and dietary requirements without compromising on flavor or texture. For more healthy eating ideas, visit a resource like health benefits of bananas to see how bananas add value.
Mastering Banana Pudding Cheesecake: Advanced Tips and Variations
Once you’re comfortable with the basics, take your banana pudding cheesecake to the next level with expert techniques and creative ideas. These tips help refine your baking skills and add excitement to the recipe. Think of this as your guide to making the dessert even more special for any occasion.
Use a water bath during baking to prevent cracks and ensure a smooth, creamy texture in your banana pudding cheesecake, as it helps with even heat distribution. For flavor variations, try adding caramel swirls, peanut butter ribbons, or toasted nuts to enhance texture and taste, giving your dessert a personal touch. Presentation is key too, so garnish with fresh banana slices, whipped cream, or a sprinkle of cinnamon to make it visually appealing.
Make-ahead options are great for busy schedules; prepare the cheesecake a day in advance to let flavors meld perfectly and store it properly for freshness. Incorporating these subtle variations and expert tips will make your banana pudding cheesecake a standout dessert, ideal for sharing with friends and family. Remember, experimenting with these elements keeps things fun and rewarding in the kitchen.
| Tip Category | Description |
|---|---|
| Baking Technique | Use a water bath for even baking |
| Flavor Add-ins | Incorporate caramel or nuts |
| Storage | Make ahead and refrigerate |
How to Store Banana Pudding Cheesecake: Best Practices
Proper storage keeps your banana pudding cheesecake fresh and tasty, so it’s important to handle it right after baking. Follow these guidelines to maintain its quality whether you’re enjoying it right away or saving for later. With the right methods, this dessert stays delightful for days.
Store the banana pudding cheesecake in an airtight container or cover it tightly with plastic wrap, and keep it refrigerated for up to 4-5 days to maintain freshness. For longer storage, wrap it securely in plastic wrap and aluminum foil before freezing, where it can last up to 2 months; thaw it overnight in the refrigerator before serving. It’s best enjoyed chilled, so avoid reheating but let it sit at room temperature for 15-20 minutes to soften slightly.
Meal prep considerations include portioning the cheesecake and storing individual servings in airtight containers for easy access during the week. This way, you can grab a slice whenever you need a quick treat, making it convenient for busy parents or working professionals.
FAQs: Frequently Asked Questions About Banana Pudding Cheesecake
Can I make banana pudding cheesecake ahead of time?
Yes, banana pudding cheesecake can be made up to four days in advance. After preparing, cover it tightly with plastic wrap or store it in an airtight container and keep it refrigerated. For best texture and presentation, add any fresh banana slices or whipped cream toppings just before serving.
What type of pudding mix should I use for banana pudding cheesecake?
The recipe calls for instant banana cream pudding mix to achieve the right flavor and texture. If banana cream is unavailable, instant banana or vanilla pudding mix can be substituted. Avoid cook-and-serve pudding mixes, as they do not set properly in the cheesecake filling.
How do I prevent the bananas from browning in the cheesecake?
To keep the banana slices fresh and prevent browning, toss them lightly in lemon juice or a citrus-based juice before adding them to the cheesecake. Adding fresh bananas right before serving also helps maintain their color and texture.
Can I freeze banana pudding cheesecake?
Yes, banana pudding cheesecake freezes well for up to one month. Wrap it tightly with plastic wrap and aluminum foil to prevent freezer burn. Thaw overnight in the refrigerator before serving. Note that toppings like fresh bananas or whipped cream are best added after thawing.
What crust works best for banana pudding cheesecake?
A classic graham cracker crust pairs perfectly with banana pudding cheesecake, providing a sweet and slightly crunchy base. You can also use vanilla wafer crumbs for added flavor. Press the crust firmly into the pan and bake briefly before adding the filling for best results.
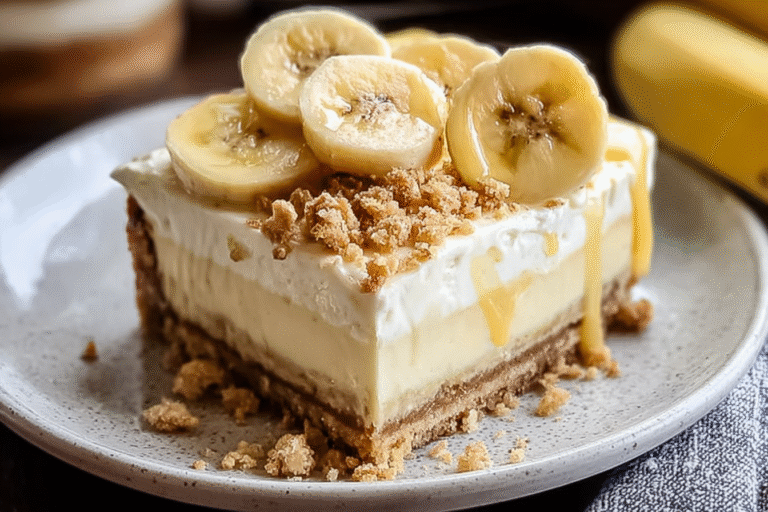
Banana Pudding Cheesecake
🍌 This Banana Pudding Cheesecake combines the creamy richness of cheesecake with the sweet, comforting flavor of banana pudding for a truly indulgent dessert.
🍰 Enjoy the satisfying crunchy wafer crust that adds texture and balance to every bite, making this a delightful treat to share with family and friends.
- Total Time: 8 hours including chilling
- Yield: 10-12 servings
Ingredients
– 3 cups (180 grams) crushed whole wafers for crust
– ¼ cup (50 grams) granulated sugar for crust
– 5 tablespoons (70 grams) unsalted butter, melted and cooled for crust
– 32 ounces (905 grams) cream cheese, softened to room temperature for filling
– 1 cup (250 grams) mashed ripe banana (about 2 large bananas) for filling
– ½ cup (115 grams) full-fat sour cream at room temperature for filling
– 1 cup (200 grams) granulated sugar for filling
– 1 box (3.4 oz) dry instant banana cream pudding mix for filling
– 1 teaspoon pure vanilla extract for filling
– 4 large eggs at room temperature for filling
– 2 cups whipped cream or whipped topping for optional toppings
– 1 to 2 sliced bananas for optional toppings
– 10 to 20 whole wafers for optional toppings
Instructions
1-First, preheat the oven to 325°F (163°C) and line the bottom of a 9-inch springform pan with parchment paper. Prepare the crust by mixing 3 cups of crushed whole wafers, ¼ cup of granulated sugar, and 5 tablespoons of melted unsalted butter until evenly moistened, then press it firmly into the pan and bake for 10 minutes to set it. Allow the crust to cool while you move on to the filling.
2-In a large bowl, beat 32 ounces of softened cream cheese until smooth, then add 1 cup of mashed ripe banana and ½ cup of full-fat sour cream, mixing well for a creamy base. Next, incorporate 1 cup of granulated sugar, 1 box of dry instant banana cream pudding mix, and 1 teaspoon of pure vanilla extract into the mixture. Lightly beat 4 large eggs separately and gently fold them in to avoid overmixing.
3-Wrap the springform pan with 2 to 3 layers of aluminum foil to prevent water leakage, and place it inside an oven bag with sides rolled down for extra protection. Pour the filling over the cooled crust and smooth the top evenly. Place the wrapped pan in a roasting pan with about 1 inch of boiling water, then bake for 70 to 80 minutes until the edges are set and the center slightly jiggles.
4-After baking, turn off the oven, crack the door, and leave the cheesecake inside for 1 hour to cool gradually and prevent cracking. Remove it from the oven and let it cool completely on a rack, then refrigerate for 5 to 6 hours or overnight until fully chilled. Before serving, loosen the cheesecake from the pan edges, remove the springform, and garnish with 2 cups of whipped cream, 1 to 2 sliced bananas, and 10 to 20 whole wafers as desired. For variations, like vegan adaptations, substitute ingredients at each step as mentioned in the dietary section.
Last Step:
Please leave a rating and comment letting us know how you liked this recipe! This helps our business to thrive and continue providing free, high-quality recipes for you.Notes
🍌 Use very ripe bananas with brown spots for best flavor.
🧀 Ensure all ingredients are at room temperature for a smooth texture.
💧 The water bath prevents cracking and ensures even baking.
- Prep Time: 40 minutes
- Chilling Time: 6 hours
- Cook Time: 1 hour 20 minutes
- Category: Dessert
- Method: Baking
- Cuisine: American
- Diet: Vegetarian
Nutrition
- Serving Size: 1 slice (approximate)
- Calories: 480 kcal
- Sugar: 34 grams
- Sodium: 320 mg
- Fat: 30 grams
- Saturated Fat: 18 grams
- Unsaturated Fat: 10 grams
- Trans Fat: 0 grams
- Carbohydrates: 45 grams
- Fiber: 2 grams
- Protein: 7 grams
- Cholesterol: 110 mg





