

Why You’ll Love This Banana Katsu
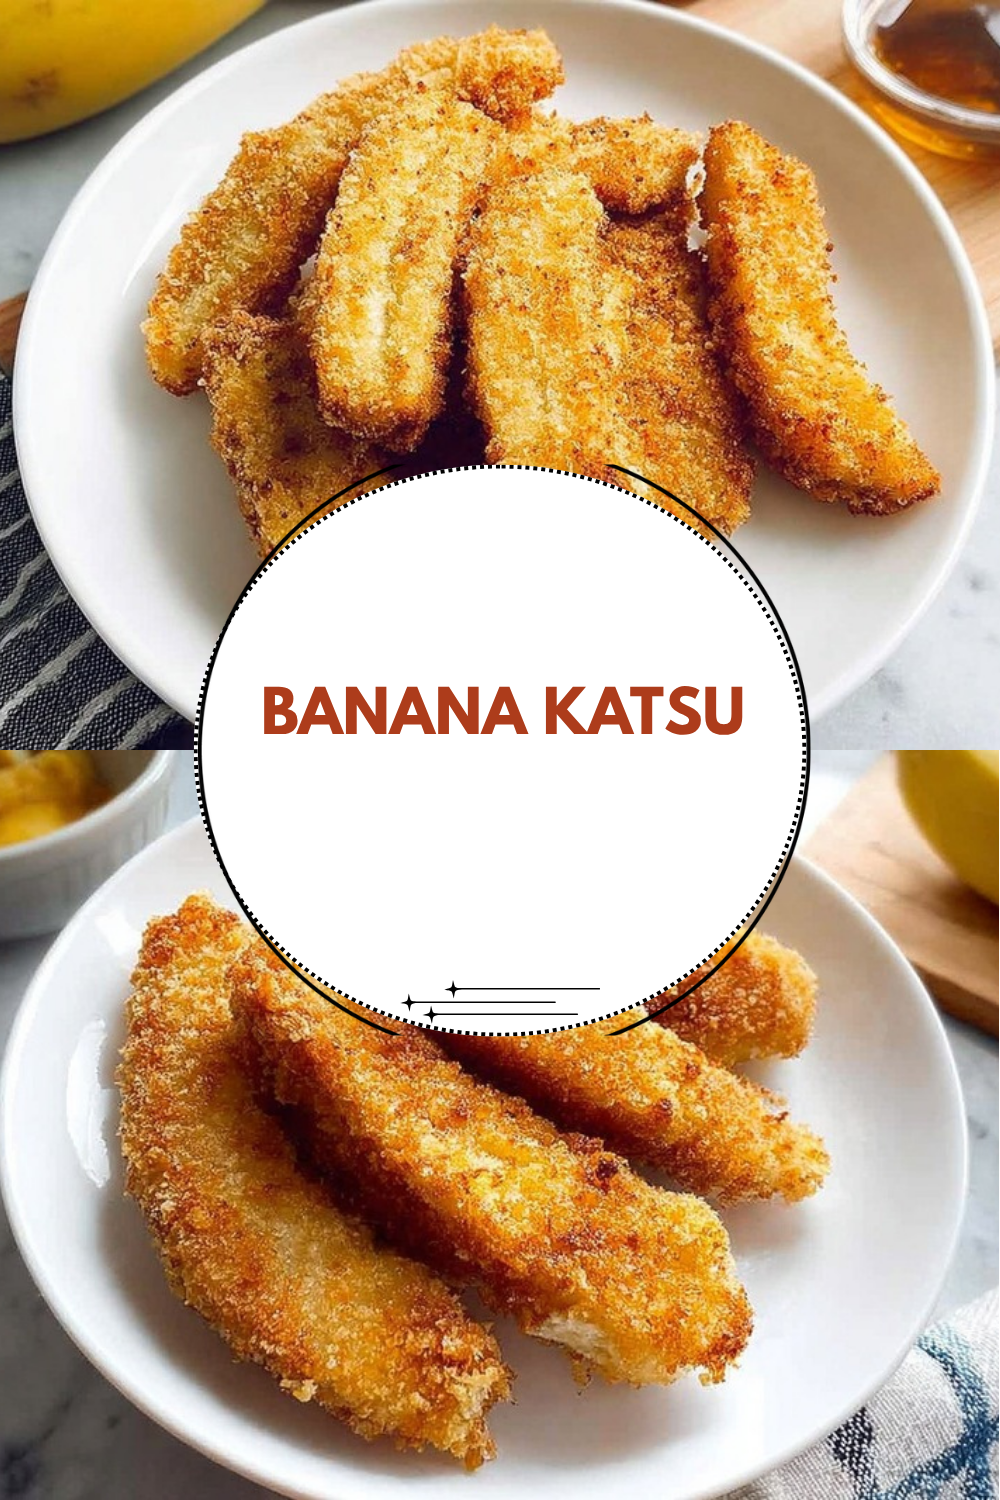
If you’re looking for a dessert that comes together in just 15 minutes with pantry staples, this Banana Katsu recipe is about to become your new favorite treat. This Japanese-inspired creation takes ripe bananas and transforms them into something truly magical through the simple technique of panko frying. The result? A dessert that hits all the right notes without requiring fancy equipment or hard-to-find ingredients.
Here’s why this crispy panko fried bananas recipe deserves a spot in your regular rotation:
- Ease of preparation: With just 10 minutes of prep and 5 minutes of cooking time, you can have a impressive dessert on the table faster than ordering takeout. The three-step coating process is straightforward enough for beginners, and there’s no need for special equipment beyond a standard pan and thermometer.
- Nutritional benefits: Bananas pack a serious nutritional punch with potassium, fiber, and natural sweetness that means you need less added sugar. Each serving contains just 204 calories, making this a lighter dessert option that still satisfies sweet cravings. The eggs in the coating add a modest protein boost of 5g per serving.
- Versatility: This recipe adapts beautifully to different cooking methods. Don’t want to deep fry? The air fryer method works wonderfully. Need a gluten-free version? Simply swap the panko for gluten-free breadcrumbs. Serving a crowd? Double the batch without doubling the effort.
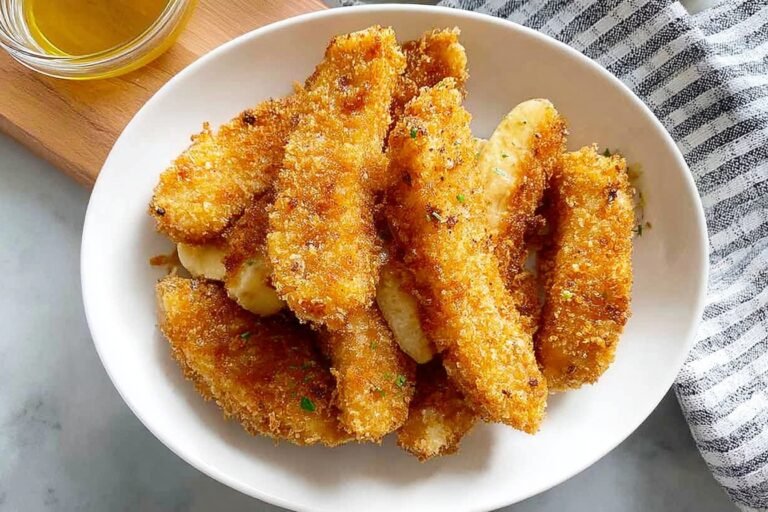
- Irresistible texture contrast: The real magic of banana katsu lies in its texture. The shatteringly crisp panko exterior gives way to warm, creamy banana inside. This contrast between crunchy and soft, hot and cool (especially when served with ice cream) creates a dessert experience that feels far more sophisticated than the simple ingredients suggest.
Jump to:
- Why You’ll Love This Banana Katsu
- Essential Ingredients for Banana Katsu
- Main Ingredients
- Special Dietary Options
- How to Prepare the Perfect Banana Katsu: Step-by-Step Guide
- Step 1: Set Up Your Coating Station
- Step 2: Prepare the Bananas
- Step 3: Apply the Three-Stage Coating
- Step 4: Heat Your Oil
- Step 5: Fry to Golden Perfection
- Step 6: Drain and Serve
- Dietary Substitutions to Customize Your Banana Katsu
- Protein and Main Component Alternatives
- Vegetable, Sauce, and Seasoning Modifications
- Mastering Banana Katsu: Advanced Tips and Variations
- Pro Cooking Techniques
- Air Fryer Method for Crispy Panko Fried Bananas
- Flavor Variations Worth Trying
- Presentation Tips
- How to Store Banana Katsu: Best Practices
- Refrigeration Guidelines
- Freezing Options
- Reheating for Best Results
- Meal Prep Considerations
- FAQs: Frequently Asked Questions About Banana Katsu
- What kind of bananas are best for banana katsu?
- Can you make banana katsu in an air fryer?
- What oil should I use to fry banana katsu?
- How long do you fry banana katsu and at what temperature?
- What do you serve banana katsu with?
- Banana Katsu
- Ingredients
- Instructions
- Last Step:
- Notes
- Nutrition
- Did you make this recipe?
Essential Ingredients for Banana Katsu
Creating the perfect crispy panko fried bananas starts with gathering the right ingredients. Each component plays a specific role in building flavor, texture, and that signature crunch that makes this dessert so addictive.
Main Ingredients
- 2 ripe yellow bananas – Look for bananas with brown spots or slight bruising, as these deliver maximum sweetness and the soft interior texture that contrasts beautifully with the crispy coating
- 1/2 cup panko breadcrumbs – Japanese-style breadcrumbs create a lighter, crispier texture than regular breadcrumbs thanks to their larger, flakier pieces that fry up shatteringly crunchy
- 2 large eggs, beaten – Acts as the binding agent that helps the panko adhere to the banana slices while adding a subtle richness
- Cornstarch for dusting – Creates a dry surface on the banana that allows the egg wash to stick properly, ensuring the coating stays attached during frying
- Oil for frying – Canola, vegetable, or peanut oil work best due to their high smoke points; you’ll need about 1 inch depth in your pan
- Powdered sugar for sprinkling (optional) – Adds a pretty finish and extra sweetness that melts slightly into the warm coating
- Vanilla ice cream for serving (optional) – The cold creaminess provides perfect contrast to the hot, crispy banana katsu
Special Dietary Options
Good news for those with dietary restrictions: this banana katsu recipe adapts easily to various needs without sacrificing flavor or texture.
Vegan adaptation: Replace the beaten eggs with a mixture of 2 tablespoons cornstarch and 3 tablespoons plant milk (oat or soy work well) to create a sticky coating agent. Use vegan-friendly panko (most brands are, but check labels) and skip the ice cream or use a dairy-free alternative.
Gluten-free version: Simply substitute the panko breadcrumbs with gluten-free panko (widely available at most grocery stores) or crushed gluten-free cornflakes for a slightly different but equally delicious crunch.
Lower-calorie option: Use the air fryer method described in the tips section to significantly reduce oil usage while maintaining that signature crispy exterior. Each air-fried serving contains even fewer calories than the traditional fried version.
How to Prepare the Perfect Banana Katsu: Step-by-Step Guide
Making banana katsu at home is surprisingly simple when you break it down into clear steps. The key lies in proper preparation and maintaining the right oil temperature throughout the frying process.
Step 1: Set Up Your Coating Station
Before you even slice your bananas, create an assembly line that makes the coating process smooth and mess-free. You’ll need four shallow dishes arranged in a row: one for cornstarch, one for beaten eggs, one for panko breadcrumbs, and a clean plate or baking sheet for your coated banana slices.
This setup, often called mise en place in professional kitchens, prevents you from getting sticky fingers everywhere and ensures each banana slice gets evenly coated. Having everything ready before you start means you can work quickly once the oil is hot, which is crucial for maintaining the right frying temperature.
Step 2: Prepare the Bananas
Peel your ripe bananas and place them on a cutting board. Cut each banana in half crosswise, creating two shorter pieces. Then slice each half lengthwise, giving you four slices per banana. With two bananas, you’ll end up with about eight perfect pieces for coating.
Pro tip: If your bananas are very ripe and soft, handle them gently to keep the slices intact. Slightly firmer ripe bananas are easier to work with, but the softest ones taste the sweetest.
Step 3: Apply the Three-Stage Coating
Now comes the transformation that turns simple banana slices into crispy panko fried bananas:
Dust with cornstarch: Take each banana slice and gently coat it in cornstarch. Shake off any excess you want a thin, even layer that’s just enough to absorb surface moisture and give the egg something to grab onto. This step is crucial because cornstarch ensures coating adherence throughout the frying process.
Dip in egg: Transfer the cornstarch-dusted slice to the beaten eggs. Turn it over to coat completely, then lift and let the excess egg drip back into the dish. Too much egg will make the coating soggy, so don’t skip this draining step.
Coat with panko: Press the egg-washed banana into the panko breadcrumbs, turning to coat all sides. Gently pat the crumbs onto the surface to ensure good adhesion. Place the coated slice on your waiting plate and repeat with remaining pieces.
Step 4: Heat Your Oil
Pour about 1 inch of oil into a deep skillet or heavy-bottomed pan. You need enough oil to come halfway up the sides of your banana slices for even cooking. Heat the oil over medium heat until it reaches 350°F.
Use a kitchen thermometer for accuracy this isn’t the time to guess. Oil that’s too cool will make your banana katsu greasy and soggy, while oil that’s too hot will burn the coating before the banana warms through. If you don’t have a thermometer, test by dropping a few panko crumbs into the oil. They should sizzle immediately and turn golden within 30 seconds.
Step 5: Fry to Golden Perfection
Carefully lower 3-4 coated banana slices into the hot oil. Don’t overcrowd the pan, as this drops the oil temperature and leads to uneven cooking. Fry for 2-3 minutes on the first side until deep golden brown, then flip and cook the other side for another 2-3 minutes.
Throughout frying, monitor your oil temperature and adjust the heat as needed to maintain 325-350°F. The slices should sizzle actively but not violently. You’re looking for a rich golden-brown color on the exterior, which indicates the panko has reached peak crispiness.
| Frying Stage | Temperature | Time | Visual Cue |
|---|---|---|---|
| Heating oil | 350°F | 5-8 minutes | Shimmering surface |
| First side | 325-350°F | 2-3 minutes | Golden brown edges |
| Second side | 325-350°F | 2-3 minutes | Deep golden brown |
Step 6: Drain and Serve
Remove the fried banana katsu slices with a slotted spoon or tongs and transfer them to a wire rack set over paper towels. The rack keeps air circulating underneath, preventing the bottom from getting soggy. Let them drain for about 30 seconds any longer and the coating starts to soften from the banana’s internal steam.
Transfer to serving plates and dust generously with powdered sugar while still warm. Add a scoop of vanilla ice cream on the side if you’re going all out. The contrast between hot, crispy banana katsu and cold, creamy ice cream is absolutely divine.
Timing tip: This entire recipe takes just 15 minutes from start to finish 10 minutes of prep and 5 minutes of active cooking. Have your ice cream ready and your serving plates waiting so you can serve these immediately while the coating is at its crispiest.

Dietary Substitutions to Customize Your Banana Katsu
Protein and Main Component Alternatives
While bananas are the star of this recipe, you can apply the same panko-frying technique to other fruits and ingredients. Firm fruits like pineapple rings, apple slices, or even mango cheeks work beautifully with this coating method. Each brings its own natural sweetness and texture to the crispy coating treatment.
For those wanting to explore healthier dessert options, consider using slightly green plantains instead of sweet bananas. They contain less sugar and offer a more neutral base that you can season with cinnamon or a savory spice blend for an entirely different flavor profile.
Vegetable, Sauce, and Seasoning Modifications
The basic banana katsu recipe serves as a canvas for countless flavor variations. Try adding 1/2 teaspoon of cinnamon to the panko breadcrumbs for a warm spice note that complements the banana’s sweetness. A pinch of cardamom or nutmeg creates a more complex flavor profile.
For sauces, think beyond powdered sugar. A drizzle of salted caramel creates a sophisticated sweet-salty contrast. Chocolate sauce turns this into a decadent sundae-style dessert. For a tropical twist, try a coconut caramel sauce or a drizzle of sweetened condensed milk.
Those who enjoy Japanese desserts might appreciate serving banana katsu with a drizzle of kuromitsu (Japanese brown sugar syrup) or a scoop of matcha ice cream. The earthy, slightly bitter matcha provides perfect balance to the sweet, crispy banana.
Mastering Banana Katsu: Advanced Tips and Variations
Once you’ve mastered the basic technique, these advanced tips will help you achieve consistently perfect results and inspire creative variations to keep things interesting.
Pro Cooking Techniques
The single most important factor in achieving that restaurant-quality crunch is oil temperature management. Use a clip-on thermometer that attaches to your pan so you can monitor heat continuously. When you add cold banana slices to the oil, the temperature drops compensate by briefly increasing the heat, then lowering it once the temperature recovers.
For extra-crispy results, try a double-coating technique. After the first panko coating, dip the slice back into the egg and then into the panko again. This creates a thicker, crunchier shell that stays crispy longer.
Air Fryer Method for Crispy Panko Fried Bananas
The air fryer offers a fantastic lower-oil alternative with excellent results. Preheat your air fryer to 400°F. After coating your banana slices, brush each one with about 1 teaspoon of oil on all sides. Arrange in a single layer in the basket don’t overlap or they won’t cook evenly.
Air fry for 4-5 minutes, then flip each slice, brush with another teaspoon of oil, and air fry for another 4-5 minutes until deeply golden. The results are impressively crispy with significantly less oil than pan-frying. According to research on banana nutrition, this cooking method preserves more of the fruit’s natural nutrients while still delivering that satisfying crunch.
Flavor Variations Worth Trying
Transform your banana katsu with these creative flavor combinations:
- Choco-Banana Katsu: Press mini chocolate chips into the banana before coating, or drizzle melted chocolate over the finished slices
- Coconut Crunch: Mix 2 tablespoons of shredded coconut into the panko for tropical flavor and extra texture
- Spiced Delight: Add cinnamon, ginger, and a pinch of cloves to the cornstarch for warm spices in every bite
- Vanilla Bean: Split a vanilla bean and scrape the seeds into the beaten eggs for aromatic depth
Presentation Tips
Make your banana katsu look as good as it tastes with these plating suggestions. Use long rectangular plates to showcase the golden slices in a row. Dust with powdered sugar using a fine mesh strainer for an even, professional-looking coating. Add height by leaning the slices against a scoop of ice cream.
For dinner parties, serve on individual small plates with a quenelle of ice cream and an artistic drizzle of sauce. A sprig of fresh mint adds color contrast and a refreshing aroma.
How to Store Banana Katsu: Best Practices
While banana katsu is definitely best enjoyed fresh and hot, you might find yourself with leftovers or wanting to prep ahead for a gathering. Here’s how to handle storage without sacrificing too much of that signature crispiness.
Refrigeration Guidelines
Cooked banana katsu can be stored in an airtight container in the refrigerator for up to 2 days. Place parchment paper between layers to prevent sticking. However, be aware that refrigeration softens the crispy coating, so you’ll want to reheat before serving.
Freezing Options
For longer storage, freeze the uncooked, coated banana slices on a baking sheet until solid, then transfer to a freezer bag. They’ll keep for up to 3 months. Fry directly from frozen, adding an extra 30-60 seconds to the cooking time. This method is perfect for batch prepping when you find great bananas on sale.
Reheating for Best Results
Skip the microwave it will make your crispy panko fried bananas soggy. Instead, reheat in a 350°F oven or toaster oven for 5-7 minutes until heated through and the coating re-crisps. An air fryer works even better, taking just 3-4 minutes at 375°F to restore that fresh-from-the-pan crunch.
Meal Prep Considerations
If you’re planning to serve banana katsu for a party, you can prep the coated slices up to 4 hours ahead and refrigerate them on a parchment-lined baking sheet. Bring them to room temperature for 15 minutes before frying so the oil temperature doesn’t drop too dramatically when you add them.
FAQs: Frequently Asked Questions About Banana Katsu
What kind of bananas are best for banana katsu?
Choose ripe yellow bananas that are soft with some bruising or brown spots for banana katsu. These deliver the ideal sweet, fruity flavor and creamy texture that holds up during frying without falling apart. Firmer green bananas lack sweetness and can turn mushy, while overripe ones may disintegrate in hot oil. Test ripeness by gently squeezing—if they yield slightly under pressure, they’re ready. For best results, slice them into 1-inch thick rounds to maintain shape. If your bananas aren’t ripe enough, place them in a paper bag with an apple to speed ripening in 1-2 days. This simple step ensures consistent results every time you make this crispy dessert.
Can you make banana katsu in an air fryer?
Yes, air frying banana katsu is a healthier alternative to deep-frying with great results. Slice ripe bananas into 1-inch pieces, dredge in flour, dip in beaten egg, then coat with panko breadcrumbs. Lightly brush or spray both sides with neutral oil like canola. Preheat your air fryer to 400°F and cook for 8-10 minutes, flipping halfway, until golden and crispy. Avoid overcrowding the basket for even air circulation. This method uses less oil while keeping the signature crunch. Serve immediately with powdered sugar or ice cream. Pro tip: Double-coat the breadcrumbs for extra crispiness, and check doneness early to prevent over-browning.
What oil should I use to fry banana katsu?
Opt for oils with high smoke points like canola, vegetable, or peanut oil when frying banana katsu. These stay stable at 325-350°F, preventing burning and off-flavors. Fill a deep pot or fryer with 2-3 inches of oil and heat gradually using a thermometer for accuracy. Peanut oil adds a subtle nutty taste that pairs well with bananas. Avoid olive or butter, as they smoke too quickly. Fry 2-3 minutes per side until deep golden brown, then drain on paper towels. Maintain temperature by frying in small batches. This keeps the coating shatteringly crisp. Leftover oil can be strained and reused once for similar frying tasks.
How long do you fry banana katsu and at what temperature?
Fry banana katsu slices for 2-3 minutes per side at 325-350°F until golden brown and crispy. Heat oil in a deep pot to this range using a thermometer—too low makes them greasy, too high burns the coating. Prep by slicing ripe bananas 1-inch thick, flouring, egg-washing, and panko-coating. Fry 4-6 pieces at a time to avoid dropping the temperature. Remove with a slotted spoon and drain on a wire rack over paper towels. Test one slice first to adjust time based on your stove. Inside should be warm and soft, outside crunchy. Cool slightly before serving to lock in crispness. Total active fry time per batch: under 10 minutes.
What do you serve banana katsu with?
Banana katsu is best served warm, dusted with powdered sugar and paired with vanilla ice cream for a classic dessert contrast of hot crunch and cold creaminess. Drizzle with chocolate sauce, caramel, or honey for extra indulgence. In Japanese style, try matcha ice cream or whipped cream. For a tropical twist, add coconut flakes or rum sauce. Portion 3-4 slices per person as a snack or dessert. It’s also great with fresh berries or yogurt dip. Keep it simple to highlight the banana’s sweetness. Nutrition note: One serving (3 slices) offers about 250 calories, mostly from natural sugars and carbs—perfect post-meal treat. Leftovers reheat well in a 350°F oven for 5 minutes to restore crisp.
Banana Katsu
🍌 Indulge in crispy panko-crusted bananas with a gooey, sweet center—a unique dessert twist on classic katsu.
🥮 Quick to fry up, perfect for snack time or after-dinner treat that’s surprisingly addictive.
- Total Time: 15 minutes
- Yield: 4 servings
Ingredients
– 2 ripe yellow bananas
– 1/2 cup panko breadcrumbs
– 2 large eggs, beaten
– Cornstarch for dusting
– Oil for frying
– Powdered sugar for sprinkling (optional)
– Vanilla ice cream for serving (optional)
Instructions
1-Step 1: Set Up Your Coating Station Before you even slice your bananas, create an assembly line that makes the coating process smooth and mess-free. You’ll need four shallow dishes arranged in a row: one for cornstarch, one for beaten eggs, one for panko breadcrumbs, and a clean plate or baking sheet for your coated banana slices. This setup, often called mise en place in professional kitchens, prevents you from getting sticky fingers everywhere and ensures each banana slice gets evenly coated. Having everything ready before you start means you can work quickly once the oil is hot, which is crucial for maintaining the right frying temperature.
2-Step 2: Prepare the Bananas Peel your ripe bananas and place them on a cutting board. Cut each banana in half crosswise, creating two shorter pieces. Then slice each half lengthwise, giving you four slices per banana. With two bananas, you’ll end up with about eight perfect pieces for coating.
3-Step 3: Apply the Three-Stage Coating Now comes the transformation that turns simple banana slices into crispy panko fried bananas: Dust with cornstarch: Take each banana slice and gently coat it in cornstarch. Shake off any excess you want a thin, even layer that’s just enough to absorb surface moisture and give the egg something to grab onto. This step is crucial because cornstarch ensures coating adherence throughout the frying process. Dip in egg: Transfer the cornstarch-dusted slice to the beaten eggs. Turn it over to coat completely, then lift and let the excess egg drip back into the dish. Too much egg will make the coating soggy, so don’t skip this draining step. Coat with panko: Press the egg-washed banana into the panko breadcrumbs, turning to coat all sides. Gently pat the crumbs onto the surface to ensure good adhesion. Place the coated slice on your waiting plate and repeat with remaining pieces.
4-Step 4: Heat Your Oil Pour about 1 inch of oil into a deep skillet or heavy-bottomed pan. You need enough oil to come halfway up the sides of your banana slices for even cooking. Heat the oil over medium heat until it reaches 350°F. Use a kitchen thermometer for accuracy this isn’t the time to guess. Oil that’s too cool will make your banana katsu greasy and soggy, while oil that’s too hot will burn the coating before the banana warms through. If you don’t have a thermometer, test by dropping a few panko crumbs into the oil. They should sizzle immediately and turn golden within 30 seconds.
5-Step 5: Fry to Golden Perfection Carefully lower 3-4 coated banana slices into the hot oil. Don’t overcrowd the pan, as this drops the oil temperature and leads to uneven cooking. Fry for 2-3 minutes on the first side until deep golden brown, then flip and cook the other side for another 2-3 minutes. Throughout frying, monitor your oil temperature and adjust the heat as needed to maintain 325-350°F. The slices should sizzle actively but not violently. You’re looking for a rich golden-brown color on the exterior, which indicates the panko has reached peak crispiness.
6-Step 6: Drain and Serve Remove the fried banana katsu slices with a slotted spoon or tongs and transfer them to a wire rack set over paper towels. The rack keeps air circulating underneath, preventing the bottom from getting soggy. Let them drain for about 30 seconds any longer and the coating starts to soften from the banana’s internal steam. Transfer to serving plates and dust generously with powdered sugar while still warm. Add a scoop of vanilla ice cream on the side if you’re going all out. The contrast between hot, crispy banana katsu and cold, creamy ice cream is absolutely divine.
Last Step:
Please leave a rating and comment letting us know how you liked this recipe! This helps our business to thrive and continue providing free, high-quality recipes for you.Notes
🍌 Choose very ripe bananas with brown spots for peak sweetness and creaminess.
🍲 For air fryer: brush with oil, 400°F for 4-5 min per side.
🌾 Dust with cornstarch first to help coating stick perfectly.
- Prep Time: 10 minutes
- Cook Time: 5 minutes
- Category: Desserts
- Method: Deep-Frying
- Cuisine: Japanese
Nutrition
- Serving Size: 1 serving
- Calories: 204 kcal
- Sugar: 8 g
- Sodium: 143 mg
- Fat: 3 g
- Saturated Fat: 1 g
- Unsaturated Fat: 2 g
- Trans Fat: 0.01 g
- Carbohydrates: 39 g
- Fiber: 2 g
- Protein: 5 g
- Cholesterol: 82 mg





