

No Churn Vanilla Ice Cream Recipe: A Creamy Treat With No Ice Cream Maker
If you have been craving a homemade dessert that tastes rich, smooth, and classic, this No Churn Vanilla Ice Cream Recipe is about to become a favorite in your kitchen. It uses just three simple ingredients, takes only a few minutes to mix, and skips the ice cream machine completely. That makes it a great pick for busy parents, students, working professionals, and anyone who wants a sweet treat without a lot of fuss.
For readers who love easy desserts, this recipe fits right in with the kind of simple cooking that makes life feel a little easier. If you enjoy quick treats like easy homemade desserts or want more frozen ideas to serve after dinner, this one delivers big flavor with very little effort. Vanilla is also a flavor that pairs well with just about everything, which means this base can stand on its own or work as the starting point for all kinds of fun toppings and mix-ins.
Cold, creamy, and lightly sweet, this no churn ice cream is the kind of dessert that feels special without asking much from you.
Jump to:
- No Churn Vanilla Ice Cream Recipe: A Creamy Treat With No Ice Cream Maker
- Why You’ll Love This No Churn Vanilla Ice Cream Recipe
- Easy enough for any home cook
- Classic flavor with a creamy texture
- Flexible for different tastes
- A dessert that feels a little special
- Essential Ingredients for No Churn Vanilla Ice Cream Recipe
- Main ingredients
- Helpful notes on the ingredients
- Special dietary options
- How to Prepare the Perfect No Churn Vanilla Ice Cream Recipe: Step-by-Step Guide
- Step 1: Prepare your ingredients and tools
- Step 2: Mix the vanilla and condensed milk
- Step 3: Whip the cream to stiff peaks
- Step 4: Fold in the vanilla mixture
- Step 5: Transfer to a freezer-safe container
- Step 6: Freeze until firm
- Step 7: Serve and enjoy
- Protein and Main Component Alternatives
- Alternative cream choices
- Vanilla options
- What to avoid
- Vegetable, Sauce, and Seasoning Modifications
- Mix-ins that work well
- Sauces and toppings
- Seasoning-style flavor twists
- Mastering No Churn Vanilla Ice Cream Recipe: Advanced Tips and Variations
- Pro cooking techniques
- Flavor variations
- Presentation tips
- Make-ahead options
- How to Store No Churn Vanilla Ice Cream Recipe: Best Practices
- Refrigeration
- Freezing
- Serving from frozen
- Meal prep considerations
- FAQs: Frequently Asked Questions About No Churn Vanilla Ice Cream Recipe
- What ingredients do I need for no-churn vanilla ice cream?
- How do you make no-churn vanilla ice cream step by step?
- How long does no-churn vanilla ice cream need to freeze?
- Can I substitute ingredients in no-churn vanilla ice cream like using whipping cream or vanilla beans?
- Can I add mix-ins to no-churn vanilla ice cream and what works best?
- No Churn Vanilla Ice Cream Recipe
- Ingredients
- Instructions
- Last Step:
- Notes
- Nutrition
- Did you make this recipe?
Why You’ll Love This No Churn Vanilla Ice Cream Recipe
Easy enough for any home cook
- Only a few ingredients are needed, and there is no cooking step, which keeps the process simple and stress-free.
- The active prep time is just a few minutes, so you can make it even on a busy weeknight.
- No ice cream maker is needed, which is a big win if your kitchen setup is small or you simply do not own one.
Classic flavor with a creamy texture
- The sweetened condensed milk gives the ice cream a silky texture and helps prevent ice crystals.
- Heavy cream whipped to stiff peaks creates that airy, scoopable feel everyone loves.
- Vanilla adds a warm, familiar taste that works for kids, adults, and dessert lovers of all ages.
Flexible for different tastes
- You can use vanilla extract, a vanilla bean, or even vanilla bean paste for a deeper flavor.
- Mix-ins like crushed cookies or chocolate chips can be folded in for extra fun.
- It can be served plain, topped with sauce, or placed beside pies, brownies, and cakes.
A dessert that feels a little special
- Visible vanilla flecks from a vanilla bean make the ice cream look bakery-worthy.
- The flavor is rich enough for guests but simple enough for everyday cravings.
- It is the kind of dessert that makes a regular night feel more like a celebration.
For readers curious about vanilla itself, this guide from WebMD’s overview of vanilla’s benefits is a useful read. If you want a closer look at the richness of the dairy component, heavy cream nutrition facts and benefits can also be helpful.
Essential Ingredients for No Churn Vanilla Ice Cream Recipe
This recipe keeps things beautifully short, which is one reason people come back to it again and again. Even so, each ingredient matters. Using the right measurements helps the ice cream set properly and keeps the texture smooth instead of icy.
Main ingredients
- 1 pint (2 cups) heavy cream – This is the base that whips into volume and gives the ice cream its fluffy texture.
- 1 14 ounce can sweetened condensed milk – This adds sweetness, richness, and softness so the ice cream scoops easily.
- 1 tablespoon vanilla extract or 1 vanilla bean – This provides the classic vanilla flavor; the bean gives flecks and a deeper aroma.
Helpful notes on the ingredients
- Heavy cream should be cold before whipping so it reaches stiff peaks faster and holds its shape well.
- Sweetened condensed milk is not the same as evaporated milk, so make sure you grab the right can.
- If using a vanilla bean, split it open and scrape out the seeds for the fullest flavor.
Special dietary options
- Vegan: Use full-fat coconut cream instead of heavy cream and a dairy-free sweetened condensed milk alternative.
- Gluten-free: The recipe is naturally gluten-free as written, but check labels on condensed milk and add-ins.
- Low-calorie: Use smaller portions, lighter toppings, and avoid heavy mix-ins if you want a more modest treat.
| Ingredient | Amount | Purpose |
|---|---|---|
| Heavy cream | 1 pint (2 cups) | Creates the fluffy, creamy base |
| Sweetened condensed milk | 1 14 ounce can | Adds sweetness and smooth texture |
| Vanilla extract or vanilla bean | 1 tablespoon or 1 bean | Provides classic vanilla flavor |
How to Prepare the Perfect No Churn Vanilla Ice Cream Recipe: Step-by-Step Guide
Step 1: Prepare your ingredients and tools
Before you begin, gather a large mixing bowl, a hand mixer or stand mixer, a small bowl, a spatula, and a freezer-safe container. If you want the best possible texture, chill the mixing bowl and beaters for a few minutes first. That small step helps the cream whip more quickly. It also gives you a head start on creating a smooth, airy base.
If you are using a vanilla bean, slice the pod in half lengthwise. Then scrape out the seeds with the back of a knife. This is where the rich vanilla flavor comes from, and those tiny flecks look beautiful once the ice cream is frozen.
Step 2: Mix the vanilla and condensed milk
In a small bowl, combine the vanilla bean seeds or 1 tablespoon vanilla extract with the 14 ounce can of sweetened condensed milk. Stir until the mixture looks even and the vanilla is fully blended in. If you are using vanilla bean paste instead, you can swap it in for extra flavor and those pretty specks.
This mixture is simple, but it matters a lot. The condensed milk gives the ice cream sweetness and body, while the vanilla provides the flavor that ties everything together. Mixing these first helps them distribute evenly later.
Step 3: Whip the cream to stiff peaks
Pour the 1 pint (2 cups) heavy cream into your chilled bowl. Whip on high speed until stiff peaks form. This usually takes just a few minutes, depending on your mixer. You will know it is ready when the cream holds its shape and the peaks stand up firmly when you lift the beaters.
Do not stop too early, or the ice cream may turn out too soft. At the same time, keep an eye on it so you do not overwhip. You want a thick, stable cream that still looks smooth and glossy. That is the sweet spot.
For the best texture, whip the cream until it holds firm peaks. This gives the finished ice cream structure and helps it freeze beautifully.
Step 4: Fold in the vanilla mixture
Turn the mixer to low speed and slowly add the vanilla and condensed milk mixture to the whipped cream. You can also use a spatula and gently fold it in by hand. Either way, the goal is to keep as much air in the mixture as possible. That air is what gives the ice cream its light, scoopable feel.
Move slowly and scrape the sides of the bowl as needed. Once the mixture looks fully combined, stop mixing. Overmixing can knock out too much air, which may leave the ice cream denser than you want.
Step 5: Transfer to a freezer-safe container
Pour the finished mixture into a freezer-safe container. A loaf pan, lidded storage container, or shallow freezer dish all work well. Smooth the top with a spatula so it freezes evenly. If you want to add mix-ins like crushed cookies or chocolate chips, fold them in just before transferring to the container.
For the cleanest scoops later, press a piece of plastic wrap or parchment paper directly on top of the surface before covering the container. This helps reduce ice crystals and keeps the top from drying out.
Step 6: Freeze until firm
Freeze for at least 6 hours or overnight. The longer freeze time is usually best, especially if you want a firmer, scoopable texture. If you are planning ahead for guests or a weekend dessert, overnight is the safest choice. Because this recipe does not use an ice cream maker, the freezer does all the work for you.
When you are ready to serve, let the ice cream sit at room temperature for 5 to 10 minutes so it softens slightly. That short rest makes scooping much easier and gives you prettier servings.
Step 7: Serve and enjoy
Scoop the ice cream into bowls, cones, or dessert glasses. Serve it plain, or add toppings such as hot fudge, caramel, sprinkles, fresh berries, or chopped nuts. It also tastes great beside fruit pie, brownies, pound cake, or warm cobbler. If you are hosting, this is one of those desserts that looks impressive even though it was almost effortless.
Protein and Main Component Alternatives
This recipe is built around dairy, so the main choice is how you want to handle the cream and vanilla. If you need a swap, there are still a few paths that can work depending on your taste and dietary needs.
Alternative cream choices
- Whipping cream: You can use 35% fat whipping cream in place of heavy cream, though the final texture may be a little less rich.
- Half and half: This is not a great direct substitute because it does not whip well and can lead to icier ice cream.
- Coconut cream: For a dairy-free version, full-fat coconut cream is the closest stand-in for texture and body.
Vanilla options
- Vanilla extract: This is the easiest option and works well for everyday homemade ice cream.
- Vanilla bean: Great when you want a deeper vanilla flavor and tiny black flecks throughout the dessert.
- Vanilla bean paste: A handy middle ground if you want the look of vanilla bean without scraping a pod.
What to avoid
Lower-fat dairy options usually do not give the same creamy result. Since this dessert depends on whipped cream for structure, trimming too much fat often means more ice crystals and a less scoopable texture. If you want the most reliable batch, stick with full-fat ingredients.
Vegetable, Sauce, and Seasoning Modifications
Even though this is a sweet dessert, you can still play with flavors in ways that feel fresh and fun. Think of vanilla ice cream as a blank canvas that loves toppings, sauces, and a few well-chosen add-ins.
Mix-ins that work well
- Crushed cookies for a cookies and cream feel
- Chocolate chips or mini chocolate chunks
- Brownie pieces for a richer dessert
- Toasted nuts for crunch
- Fresh berries for a bright, fruity touch
Sauces and toppings
- Hot fudge
- Caramel sauce
- Strawberry sauce
- Whipped cream
- Chopped nuts
- Sprinkles
Seasoning-style flavor twists
If you want to change the flavor without changing the whole recipe, try a tiny pinch of cinnamon, a little espresso powder, or a splash of almond extract. These additions can give the dessert a different personality while keeping the same no churn base. Just use a light hand so the vanilla still shines through.
For a seasonal touch, top the ice cream with peach compote in summer, apple pie filling in fall, or crushed peppermint during the holidays. This is a simple recipe, but it can still fit just about any occasion.
Mastering No Churn Vanilla Ice Cream Recipe: Advanced Tips and Variations
Pro cooking techniques
Start with very cold cream and a chilled bowl if you can. That gives the cream a better chance of whipping quickly and holding air. Also, fold gently when combining the mixtures. A light touch helps preserve the fluffy texture that makes no churn ice cream work so well.
Another smart move is to freeze the container on a flat shelf, not a crowded freezer door. The colder and steadier the freezing environment, the better the texture will be. If your freezer runs warm, place the container toward the back where the temperature is more stable.
Flavor variations
Once you have the base recipe down, the flavor options open up fast. Add crushed sandwich cookies for a classic cookies and cream style. Fold in mini chocolate chips for extra texture. You can also mix in a ribbon of caramel or fudge after pouring the base into the container for a swirled effect.
If you want something a little fancier, try pairing the vanilla with toasted coconut, chopped pecans, or a berry compote. The mild sweetness of the base goes well with both rich and fruity flavors.
Presentation tips
Serve the ice cream in small bowls with a cookie on the side for a simple but polished look. If you are serving guests, add a drizzle of sauce and a few fresh berries on top. A sprig of mint can make the bowl look extra fresh without much effort.
Make-ahead options
This is one of the easiest desserts to prep ahead of time. Make it the night before a party, then leave it in the freezer until you are ready to serve. If you want to save even more time, mix the vanilla and condensed milk ahead of time and keep it chilled in the fridge for a short while before folding it into the whipped cream.
When you need a dessert that feels homemade but fits a packed schedule, this no churn version is hard to beat.
How to Store No Churn Vanilla Ice Cream Recipe: Best Practices
Refrigeration
Ice cream should not sit in the refrigerator for long because it will soften too much and lose its texture. If you need to pause for a short time before freezing, keep the mixture chilled in the fridge for only a brief period.
Freezing
Store the finished ice cream in a freezer-safe container with a tight lid. For the best results, press parchment paper or plastic wrap against the surface before closing the lid. This helps keep the texture smooth and reduces freezer burn. The ice cream is best within 1 to 2 weeks, though it may still be safe after that if stored properly.
Serving from frozen
There is no reheating step for this dessert. Instead, let it rest at room temperature for 5 to 10 minutes before scooping so it softens just enough to serve easily. If it becomes too hard in the freezer, that short rest usually fixes the problem.
Meal prep considerations
This dessert is great for make-ahead planning because it stays ready in the freezer until you need it. If you are preparing it for a dinner party or family meal, make it at least the day before. That way, you are not rushing while guests are arriving. You can also portion leftovers into smaller containers for easy single servings later.

FAQs: Frequently Asked Questions About No Churn Vanilla Ice Cream Recipe
What ingredients do I need for no-churn vanilla ice cream?
For a simple no-churn vanilla ice cream, you’ll need 2 cups (1 pint) heavy cream with at least 36% milk fat, one 14-ounce can of sweetened condensed milk, and 1 tablespoon pure vanilla extract (or seeds from 1 vanilla bean for flecks and deeper flavor). These three ingredients create a creamy base without an ice cream maker. Heavy cream whips into stiff peaks for structure, sweetened condensed milk adds sweetness and prevents iciness, and vanilla provides classic taste. Measure precisely for best texture. This yields about 1 quart, perfect for 6-8 servings. No eggs or cooking required—prep takes under 15 minutes. (78 words)
How do you make no-churn vanilla ice cream step by step?
Start by chilling a large bowl and beaters. Whip 2 cups heavy cream on medium-high until stiff peaks form (about 3-5 minutes)—it should hold shape like soft whipped topping. In another bowl, stir 14-ounce can sweetened condensed milk with 1 tablespoon vanilla extract (or scraped vanilla bean seeds). Gently fold the vanilla mixture into the whipped cream using a spatula or low-speed mixer to keep it airy—avoid deflating. Transfer to a freezer-safe loaf pan or container lined with plastic wrap. Smooth top, cover tightly, and freeze 6-8 hours or overnight until firm. Scoop and serve. Total time: 10 minutes active + freezing. (112 words)
How long does no-churn vanilla ice cream need to freeze?
Freeze no-churn vanilla ice cream for at least 6 hours, but overnight (8-12 hours) gives the creamiest, scoopable texture without ice crystals. It firms up quickly due to the sweetened condensed milk’s sugars, which lower the freezing point. After 6 hours, check by pressing the top—it should feel solid. For best results, place in the coldest part of your freezer (0°F or below). Once frozen, it stays good for 1-2 weeks covered. Let soften 5-10 minutes at room temp before scooping for easy portions. This method skips churning, so no constant stirring needed. (98 words)
Can I substitute ingredients in no-churn vanilla ice cream like using whipping cream or vanilla beans?
Yes, use 35% fat whipping cream instead of heavy cream (36%+ fat)—whip to stiff peaks for similar results, though it may be slightly less rich. For vanilla, swap 1 tablespoon extract with seeds from 1 fresh vanilla bean (split and scrape pod) for intense flavor and visible specks. Avoid lower-fat options like half-and-half or low-fat condensed milk, as they reduce creaminess and increase iciness—stick to full-fat for pro texture. No other subs tested, but these tweaks keep it simple. Always whip cream cold for volume. (92 words)
Can I add mix-ins to no-churn vanilla ice cream and what works best?
Absolutely—fold in 1-1.5 cups mix-ins after combining whipped cream and vanilla mixture, just before freezing. Popular options: crushed cookies (like Oreos), chocolate chips, brownie bits, fresh berries, or nuts. Distribute evenly to avoid sinking. For example, ½ cup mini chocolate chips adds chocolatey bursts without overpowering vanilla. Chill mix-ins first to prevent melting the base. This customizes your ice cream easily—no machine required. Freeze as usual. Store extras airtight up to 2 weeks; soften before adding more for sundaes. Pairs great with fruit pies or cake. (96 words)
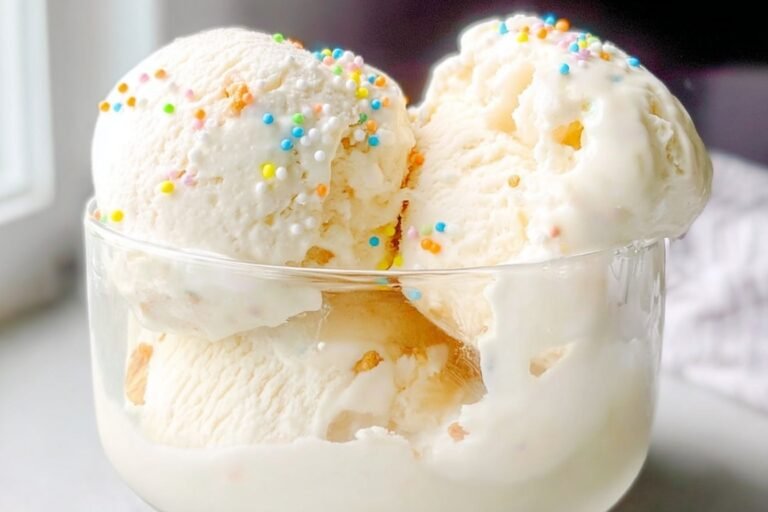
No Churn Vanilla Ice Cream Recipe
🍦🍨 Ultra-creamy no-churn vanilla ice cream: rich condensed milk magic yields scoopable perfection sans machine!
❄️ 10-min effortless prep: freezes overnight into sundae-ready bliss for hot days or desserts.
- Total Time: 6 hours 10 minutes
- Yield: 10 servings
Ingredients
– 1 pint (2 cups) Heavy cream Creates the fluffy, creamy base
– 1 14 ounce can Sweetened condensed milk Adds sweetness and smooth texture
– 1 tablespoon or 1 bean Vanilla extract or vanilla bean Provides classic vanilla flavor
Instructions
1-Step 1: Prepare your ingredients and tools Before you begin, gather a large mixing bowl, a hand mixer or stand mixer, a small bowl, a spatula, and a freezer-safe container. If you want the best possible texture, chill the mixing bowl and beaters for a few minutes first. That small step helps the cream whip more quickly. It also gives you a head start on creating a smooth, airy base. If you are using a vanilla bean, slice the pod in half lengthwise. Then scrape out the seeds with the back of a knife. This is where the rich vanilla flavor comes from, and those tiny flecks look beautiful once the ice cream is frozen.
2-Step 2: Mix the vanilla and condensed milk In a small bowl, combine the vanilla bean seeds or 1 tablespoon vanilla extract with the 14 ounce can of sweetened condensed milk. Stir until the mixture looks even and the vanilla is fully blended in. If you are using vanilla bean paste instead, you can swap it in for extra flavor and those pretty specks. This mixture is simple, but it matters a lot. The condensed milk gives the ice cream sweetness and body, while the vanilla provides the flavor that ties everything together. Mixing these first helps them distribute evenly later.
3-Step 3: Whip the cream to stiff peaks Pour the 1 pint (2 cups) heavy cream into your chilled bowl. Whip on high speed until stiff peaks form. This usually takes just a few minutes, depending on your mixer. You will know it is ready when the cream holds its shape and the peaks stand up firmly when you lift the beaters. Do not stop too early, or the ice cream may turn out too soft. At the same time, keep an eye on it so you do not overwhip. You want a thick, stable cream that still looks smooth and glossy. That is the sweet spot. For the best texture, whip the cream until it holds firm peaks. This gives the finished ice cream structure and helps it freeze beautifully.
4-Step 4: Fold in the vanilla mixture Turn the mixer to low speed and slowly add the vanilla and condensed milk mixture to the whipped cream. You can also use a spatula and gently fold it in by hand. Either way, the goal is to keep as much air in the mixture as possible. That air is what gives the ice cream its light, scoopable feel. Move slowly and scrape the sides of the bowl as needed. Once the mixture looks fully combined, stop mixing. Overmixing can knock out too much air, which may leave the ice cream denser than you want.
5-Step 5: Transfer to a freezer-safe container Pour the finished mixture into a freezer-safe container. A loaf pan, lidded storage container, or shallow freezer dish all work well. Smooth the top with a spatula so it freezes evenly. If you want to add mix-ins like crushed cookies or chocolate chips, fold them in just before transferring to the container. For the cleanest scoops later, press a piece of plastic wrap or parchment paper directly on top of the surface before covering the container. This helps reduce ice crystals and keeps the top from drying out.
6-Step 6: Freeze until firm Freeze for at least 6 hours or overnight. The longer freeze time is usually best, especially if you want a firmer, scoopable texture. If you are planning ahead for guests or a weekend dessert, overnight is the safest choice. Because this recipe does not use an ice cream maker, the freezer does all the work for you. When you are ready to serve, let the ice cream sit at room temperature for 5 to 10 minutes so it softens slightly. That short rest makes scooping much easier and gives you prettier servings.
7-Step 7: Serve and enjoy Scoop the ice cream into bowls, cones, or dessert glasses. Serve it plain, or add toppings such as hot fudge, caramel, sprinkles, fresh berries, or chopped nuts. It also tastes great beside fruit pie, brownies, pound cake, or warm cobbler. If you are hosting, this is one of those desserts that looks impressive even though it was almost effortless.
Last Step:
Please leave a rating and comment letting us know how you liked this recipe! This helps our business to thrive and continue providing free, high-quality recipes for you.Notes
🌿 Vanilla bean/paste = premium flecks & aroma boost.
🥄 Whip cream stiff – airy structure prevents icy texture.
🍫 Fold in cookies/chips post-mix for custom chunks.
- Prep Time: 10 minutes
- Freezing: 6 hours
- Cook Time: 0 minutes
- Category: Desserts
- Method: No-Churn
- Cuisine: American
- Diet: Vegetarian
Nutrition
- Serving Size: 1/2 cup
- Calories: 280 kcal
- Sugar: 24 g
- Sodium: 60 mg
- Fat: 20 g
- Saturated Fat: 13 g
- Unsaturated Fat: 7 g
- Trans Fat: 0 g
- Carbohydrates: 22 g
- Fiber: 0 g
- Protein: 3 g
- Cholesterol: 80 mg





