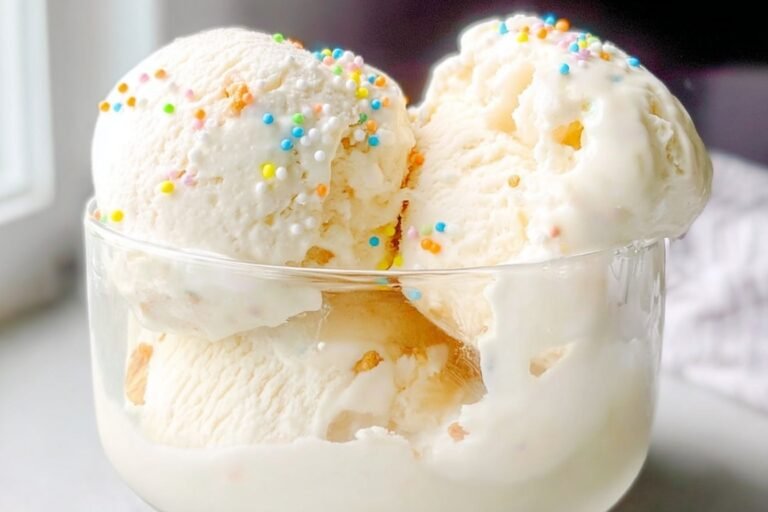
Ingredients
– 1 pint (2 cups) Heavy cream Creates the fluffy, creamy base
– 1 14 ounce can Sweetened condensed milk Adds sweetness and smooth texture
– 1 tablespoon or 1 bean Vanilla extract or vanilla bean Provides classic vanilla flavor
Instructions
1-Step 1: Prepare your ingredients and tools Before you begin, gather a large mixing bowl, a hand mixer or stand mixer, a small bowl, a spatula, and a freezer-safe container. If you want the best possible texture, chill the mixing bowl and beaters for a few minutes first. That small step helps the cream whip more quickly. It also gives you a head start on creating a smooth, airy base. If you are using a vanilla bean, slice the pod in half lengthwise. Then scrape out the seeds with the back of a knife. This is where the rich vanilla flavor comes from, and those tiny flecks look beautiful once the ice cream is frozen.
2-Step 2: Mix the vanilla and condensed milk In a small bowl, combine the vanilla bean seeds or 1 tablespoon vanilla extract with the 14 ounce can of sweetened condensed milk. Stir until the mixture looks even and the vanilla is fully blended in. If you are using vanilla bean paste instead, you can swap it in for extra flavor and those pretty specks. This mixture is simple, but it matters a lot. The condensed milk gives the ice cream sweetness and body, while the vanilla provides the flavor that ties everything together. Mixing these first helps them distribute evenly later.
3-Step 3: Whip the cream to stiff peaks Pour the 1 pint (2 cups) heavy cream into your chilled bowl. Whip on high speed until stiff peaks form. This usually takes just a few minutes, depending on your mixer. You will know it is ready when the cream holds its shape and the peaks stand up firmly when you lift the beaters. Do not stop too early, or the ice cream may turn out too soft. At the same time, keep an eye on it so you do not overwhip. You want a thick, stable cream that still looks smooth and glossy. That is the sweet spot. For the best texture, whip the cream until it holds firm peaks. This gives the finished ice cream structure and helps it freeze beautifully.
4-Step 4: Fold in the vanilla mixture Turn the mixer to low speed and slowly add the vanilla and condensed milk mixture to the whipped cream. You can also use a spatula and gently fold it in by hand. Either way, the goal is to keep as much air in the mixture as possible. That air is what gives the ice cream its light, scoopable feel. Move slowly and scrape the sides of the bowl as needed. Once the mixture looks fully combined, stop mixing. Overmixing can knock out too much air, which may leave the ice cream denser than you want.
5-Step 5: Transfer to a freezer-safe container Pour the finished mixture into a freezer-safe container. A loaf pan, lidded storage container, or shallow freezer dish all work well. Smooth the top with a spatula so it freezes evenly. If you want to add mix-ins like crushed cookies or chocolate chips, fold them in just before transferring to the container. For the cleanest scoops later, press a piece of plastic wrap or parchment paper directly on top of the surface before covering the container. This helps reduce ice crystals and keeps the top from drying out.
6-Step 6: Freeze until firm Freeze for at least 6 hours or overnight. The longer freeze time is usually best, especially if you want a firmer, scoopable texture. If you are planning ahead for guests or a weekend dessert, overnight is the safest choice. Because this recipe does not use an ice cream maker, the freezer does all the work for you. When you are ready to serve, let the ice cream sit at room temperature for 5 to 10 minutes so it softens slightly. That short rest makes scooping much easier and gives you prettier servings.
7-Step 7: Serve and enjoy Scoop the ice cream into bowls, cones, or dessert glasses. Serve it plain, or add toppings such as hot fudge, caramel, sprinkles, fresh berries, or chopped nuts. It also tastes great beside fruit pie, brownies, pound cake, or warm cobbler. If you are hosting, this is one of those desserts that looks impressive even though it was almost effortless.
Last Step:
Please leave a rating and comment letting us know how you liked this recipe! This helps our business to thrive and continue providing free, high-quality recipes for you.Notes
🌿 Vanilla bean/paste = premium flecks & aroma boost.
🥄 Whip cream stiff – airy structure prevents icy texture.
🍫 Fold in cookies/chips post-mix for custom chunks.
- Prep Time: 10 minutes
- Freezing: 6 hours
- Cook Time: 0 minutes
- Category: Desserts
- Method: No-Churn
- Cuisine: American
- Diet: Vegetarian
Nutrition
- Serving Size: 1/2 cup
- Calories: 280 kcal
- Sugar: 24 g
- Sodium: 60 mg
- Fat: 20 g
- Saturated Fat: 13 g
- Unsaturated Fat: 7 g
- Trans Fat: 0 g
- Carbohydrates: 22 g
- Fiber: 0 g
- Protein: 3 g
- Cholesterol: 80 mg