

Why You’ll Love This Green Beans
There’s something genuinely magical about a side dish that manages to be both incredibly simple and absolutely delicious. These sauteed green beans with garlic are exactly that kind of recipe the one you’ll find yourself making again and again because it just works every single time. Whether you’re a busy parent scrambling to get dinner on the table or a cooking enthusiast looking for that perfect side to complement your main course, this green beans recipe delivers on every front.
What makes this dish truly special isn’t just how good it tastes (though the garlicky, crispy finish is pretty spectacular). It’s how effortlessly it fits into your life. Let me break down exactly why this recipe deserves a permanent spot in your kitchen rotation:
- Ease of preparation: With just 13 minutes total time from start to finish, this easy sauteed green beans recipe fits perfectly into even the most hectic weeknight schedule. The straightforward blanch-and-saute method means you can have a restaurant-quality side dish on the table faster than you could order takeout. No fancy equipment or complicated techniques required just a pot, a skillet, and about 10 minutes of hands-on cooking.
- Health benefits: Green beans pack an impressive nutritional punch, delivering vitamins A and C, fiber, and essential minerals in every serving. At just 102 calories per serving, they’re a guilt-free addition to any meal. The minimal cooking process preserves their vibrant color and nutrients, making this dish as nourishing as it is delicious.
- Versatility: This recipe adapts beautifully to whatever you’re serving. Pair them with grilled steak for a classic dinner, toss them into a pasta dish, or serve alongside your holiday roast. They work equally well for casual family meals and elegant dinner parties. Plus, the basic technique welcomes endless variations add ginger for Asian flair or sprinkle with parmesan for an Italian twist.
- Distinctive flavor: The combination of quickly blanched beans and freshly minced garlic sauteed until golden creates layers of flavor that belie the simple ingredient list. That crispy, aromatic garlic clings to each bean, delivering bursts of savory goodness in every bite. It’s the kind of dish that makes people ask for the recipe after the first taste.
Jump to:
- Why You’ll Love This Green Beans
- Essential Ingredients for Green Beans
- Main Ingredients
- Special Dietary Options
- How to Prepare the Perfect Green Beans: Step-by-Step Guide
- Step 1: Prepare Your Ingredients
- Step 2: Blanch the Green Beans
- Step 3: Cool and Dry the Beans
- Step 4: Saute with Garlic
- Step 5: Season and Serve
- Dietary Substitutions to Customize Your Green Beans
- Protein and Main Component Alternatives
- Vegetable, Sauce, and Seasoning Modifications
- Mastering Green Beans: Advanced Tips and Variations
- Pro Cooking Techniques
- Flavor Variations
- Presentation Tips
- Make-Ahead Options
- How to Store Green Beans: Best Practices
- Refrigeration Guidelines
- Freezing Options
- Reheating Best Practices
- Meal Prep Considerations
- FAQs: Frequently Asked Questions About Green Beans
- How do you make sautéed green beans with garlic?
- How should you prepare garlic for sautéed green beans?
- How long do you boil green beans before sautéing?
- Can you prepare green beans ahead of time for cooking?
- What dishes pair well with sautéed green beans with garlic?
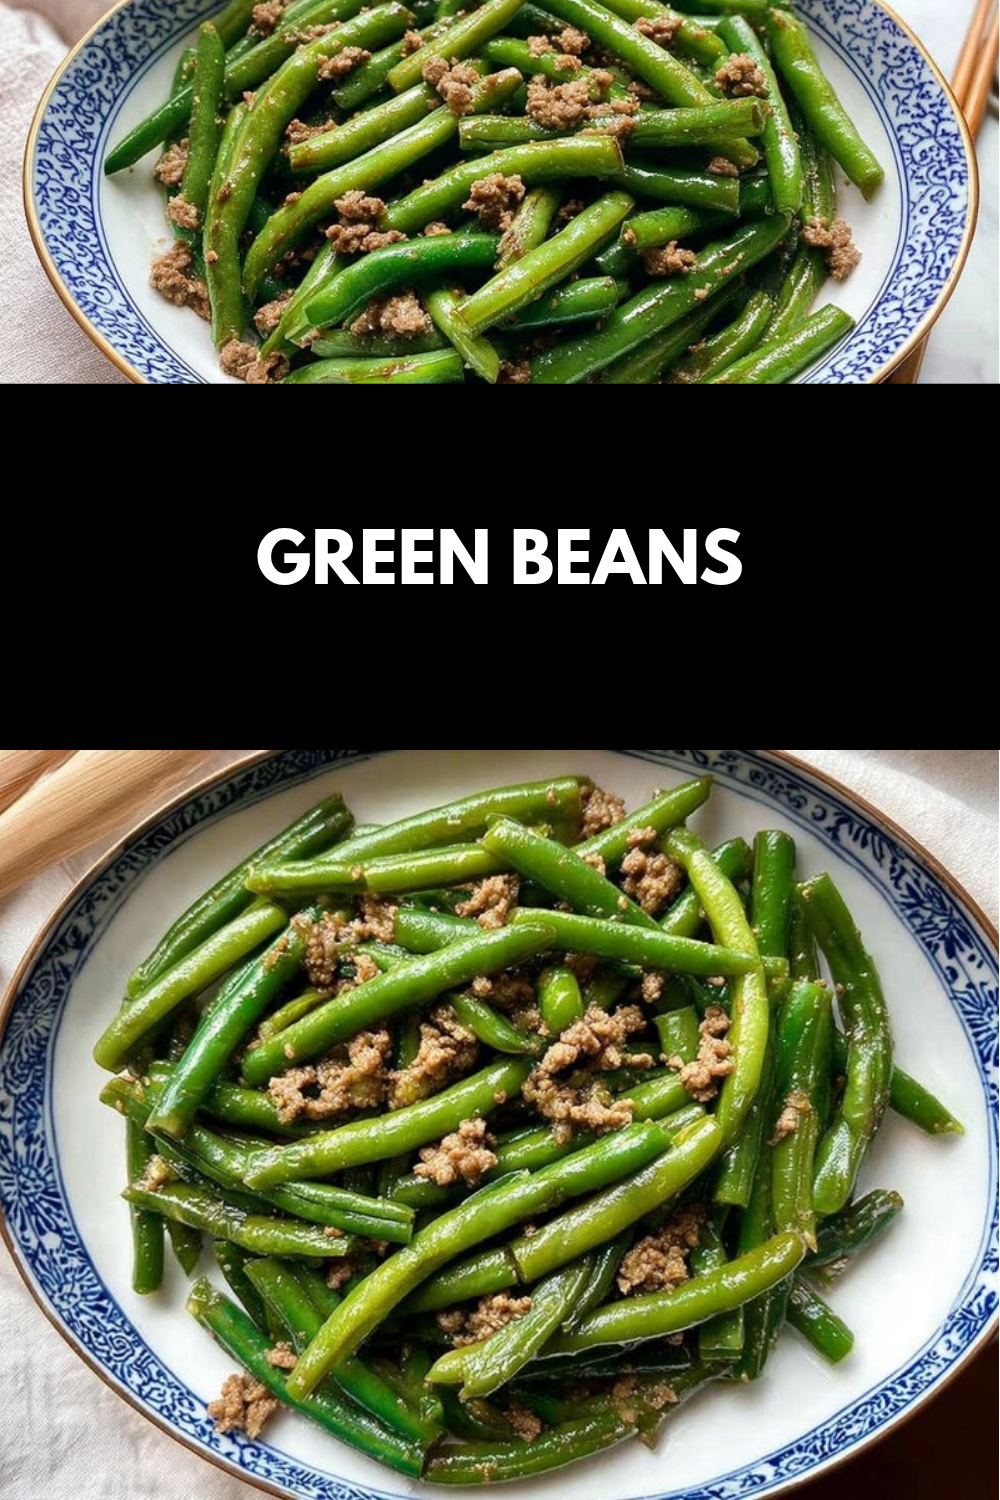
- Green Beans
- Ingredients
- Instructions
- Last Step:
- Notes
- Nutrition
- Did you make this recipe?
Essential Ingredients for Green Beans
One of the beauties of this sauteed green beans with garlic recipe is its short, straightforward ingredient list. Each component plays a specific role in creating the final dish, so quality matters. Here’s everything you’ll need to make this recipe a success:
Main Ingredients
- 250g (8oz) fresh green beans, trimmed The star of the show! Look for beans that are bright green, firm, and snap crisply when bent. Avoid any that look wilted, spotted, or feel limp. Fresh beans will have a sweet, grassy flavor and satisfying crunch that frozen beans simply can’t match.
- 1 tsp salt for blanching This seasons the beans from the inside out as they cook. The salt penetrates the beans during the brief boiling period, enhancing their natural flavor rather than just sitting on the surface.
- 1 tbsp extra virgin olive oil or butter for sauteing Choose olive oil for a lighter, more Mediterranean flavor profile, or butter for a richer, more indulgent finish. Both work beautifully, so pick based on your mood and what you’re serving alongside.
- 2 garlic cloves, finely minced (about 2 tsp), use a knife to mince, no garlic press or jarred garlic This is non-negotiable for the best results. Knife-minced garlic has a drier texture that crisps up beautifully in the pan, while garlic press or jarred versions contain excess moisture that leads to steaming instead of frying. The difference in the final dish is remarkable.
- 1/8 tsp salt for seasoning A final seasoning that brings all the flavors together. Start with this amount and adjust to your taste some prefer a more pronounced saltiness while others like to let the natural bean flavor shine.
- A pinch of black pepper Just enough to add a subtle warmth and complexity without overpowering the delicate garlic and bean flavors.
Special Dietary Options
- Vegan: Use olive oil instead of butter the recipe is naturally vegan-friendly when you make this simple swap.
- Gluten-free: Good news! This recipe is naturally gluten-free with no modifications needed.
- Low-calorie: Already a light option at 102 calories per serving, you can reduce the oil to 1/2 tablespoon if you’re watching calories closely.
Pro tip: Fresh ingredients make all the difference here. Since this recipe has so few components, each one really shines through. Splurge on good olive oil, fresh garlic (never jarred!), and the freshest beans you can find.
How to Prepare the Perfect Green Beans: Step-by-Step Guide
Now that you have all your ingredients ready, let’s walk through the cooking process. This sauteed green beans method might seem simple, but each step has been refined to give you the best possible results. Follow along, and you’ll have perfectly cooked beans with crispy garlic in no time.
Step 1: Prepare Your Ingredients
Before you turn on any heat, get everything prepped and ready. This mise en place approach makes the actual cooking go smoothly and prevents any last-minute scrambling.
Start by trimming your green beans. You only need to trim the stem end that’s the part that was attached to the plant. The tapered tip can stay unless it looks scraggly or damaged. Some people prefer to snap the ends off by hand, which works fine, but a knife gives you a cleaner, more uniform look. You can keep the beans whole for an elegant presentation, or cut them into 2-inch pieces if you prefer bite-sized portions both ways work beautifully.
Next, peel and mince your garlic. Remember, we’re doing this by hand with a knife, not a garlic press. Start by smashing the cloves with the side of your knife blade to loosen the skins. Peel them, then mince finely with a rocking motion. You want small, even pieces that will cook uniformly and become those coveted crispy bits. Set your minced garlic aside in a small pile don’t press it or pack it tight, as air circulation helps keep it dry.
Step 2: Blanch the Green Beans
Fill a large saucepan with water and bring it to a rolling boil over high heat. Add 1 teaspoon of salt the water should taste slightly salty, like a mild broth. This salt isn’t just for flavor; it helps set the bright green color of the beans.
Once the water is boiling vigorously, add your trimmed green beans all at once. Give them a quick stir to ensure they’re all submerged, then set your timer for exactly 4 minutes. Watch them transform from a dull, raw green to a brilliant, vibrant emerald color.
After 4 minutes, test a bean by piercing it with a fork or taking a small bite. It should be bright green and barely tender cooked through but still with a definite crispness when you bite into it. If it feels too crunchy, give it another 30 seconds, but don’t go much longer. Remember, these beans will cook for another 2 minutes in the skillet, so slightly undercooking at this stage is actually perfect.
Step 3: Cool and Dry the Beans
Drain the blanched beans in a colander, then immediately rinse them under cold running water to stop the cooking process. This shock of cold water preserves both the bright color and the crisp texture. Let the water run over them for about 30 seconds until they’re cool enough to handle comfortably.
Here’s a step many people skip but shouldn’t: shake off as much excess water as possible. Wet beans will steam rather than saute, and you won’t get that nice slight char and the garlic won’t crisp up properly. Give the colander several good shakes, then spread the beans on a clean kitchen towel or paper towels and pat them dry. Taking an extra minute here makes a noticeable difference in the final dish.
Step 4: Saute with Garlic
Now for the transformation! Place a large skillet over medium-high heat and add your tablespoon of olive oil or butter. Let it heat until it shimmers (for oil) or melts and starts to foam slightly (for butter). You want the pan nice and hot so the garlic sizzles immediately upon contact.
Add your green beans and minced garlic to the hot pan simultaneously. This timing is important adding them together means the garlic has exactly enough time to crisp up as the beans warm through. Use a wooden spoon or spatula to stir, or if you’re feeling confident, toss the pan to coat everything evenly.
Cook for 2 minutes, stirring or tossing frequently. Watch the garlic carefully you’re looking for it to turn a lovely golden brown and become slightly crispy. You’ll smell that gorgeous garlic aroma filling your kitchen. If the garlic starts browning too quickly, lower the heat slightly. The beans should be heated through and might have some light charred spots, which add wonderful flavor.
Step 5: Season and Serve
Sprinkle the 1/8 teaspoon of salt and your pinch of black pepper over the beans. Toss everything together one final time to distribute the seasonings evenly. Taste a bean does it need more salt? Adjust if necessary, keeping in mind that the beans were already salted during blanching.
Transfer your finished garlic green beans to a serving dish immediately and serve warm. They’re at their absolute best straight from the pan, when the garlic is still crispy and the beans are perfectly tender-crisp. The entire cooking process from blanching to serving takes just about 13 minutes, making this an ideal last-minute addition to any meal.
| Preparation Stage | Time Required | Key Indicator |
|---|---|---|
| Prep (trimming, mincing) | 5 minutes | All ingredients ready |
| Blanching | 4 minutes | Bright green, barely tender |
| Cooling and drying | 2 minutes | Beans dry to touch |
| Sauteing | 2 minutes | Garlic golden and crispy |
| Total Time | ~13 minutes | Ready to serve! |

Dietary Substitutions to Customize Your Green Beans
While this green beans recipe is wonderfully delicious as written, sometimes you need to adapt based on dietary needs, ingredient availability, or simply personal preference. Here are some smart substitutions that maintain the spirit of the dish while accommodating different requirements.
Protein and Main Component Alternatives
Although this recipe is designed as a side dish, you can easily transform it into a more substantial meal. Try adding toasted slivered almonds or pine nuts for protein and a pleasant crunch that complements the beans beautifully. For a heartier version, toss in some crispy pancetta or bacon bits during the last minute of cooking the salty, savory notes pair wonderfully with the garlic.
If you’re serving vegans or those avoiding dairy, stick with olive oil rather than butter. The olive oil version has a cleaner, brighter flavor that many people actually prefer. For a creamier finish without dairy, try a sprinkle of nutritional yeast at the end, which adds a subtle cheesy flavor and extra nutrients.
Vegetable, Sauce, and Seasoning Modifications
The basic technique works beautifully with other vegetables too. Thinly sliced zucchini, snap peas, or asparagus can be prepared using this same blanch-and-saute method. You can even mix vegetables for a colorful medley just adjust blanching times accordingly, as different vegetables cook at different rates.
For sauce variations, a splash of soy sauce or tamari at the end creates an umami-rich finish. A squeeze of fresh lemon juice brightens everything up. For Asian-inspired sauteed green beans with garlic, add minced ginger along with the garlic and finish with a drizzle of sesame oil and a sprinkle of sesame seeds. A pinch of red pepper flakes adds gentle heat for those who like a little spice.
Herbs can also transform this dish. Fresh thyme or rosemary added with the garlic brings an earthy, aromatic quality. Fresh parsley or chives sprinkled over the finished dish add color and a fresh flavor hit. Experiment with what you have on hand this recipe is remarkably forgiving.
Mastering Green Beans: Advanced Tips and Variations
Ready to take your sauteed green beans to the next level? These advanced tips and creative variations will help you master this dish and keep it exciting no matter how often you make it.
Pro Cooking Techniques
The secret to restaurant-quality results lies in the details. First, ensure your skillet is properly heated before adding the oil a drop of water should sizzle and evaporate immediately. When sauteing, don’t overcrowd the pan; if you’re doubling the recipe, work in batches or use two skillets. Overcrowding drops the temperature and leads to steaming instead of that gorgeous saute.
For perfectly crispy garlic every time, make sure your minced garlic is as dry as possible before it hits the pan. Excess moisture from a garlic press or jarred garlic creates steam that prevents crisping. Some chefs even spread their minced garlic on a paper towel for a few minutes before cooking to remove any remaining moisture.
Flavor Variations
Once you’ve mastered the basic recipe, try these delicious variations:
- Mediterranean Style: Add halved cherry tomatoes and kalamata olives during the last minute of cooking. Finish with crumbled feta cheese and a squeeze of lemon.
- Asian Fusion: Add minced fresh ginger with the garlic, and finish with sesame oil and toasted sesame seeds. A splash of rice vinegar adds brightness.
- Garlicky Parmesan: After sauteing, remove from heat and toss with freshly grated parmesan cheese and a pinch of red pepper flakes.
- Lemon Herb: Finish with lemon zest, fresh lemon juice, and chopped fresh herbs like parsley, dill, or tarragon.
Presentation Tips
They say we eat with our eyes first, and these garlic green beans can look as good as they taste. Serve them on a platter rather than in a bowl to show off their vibrant color. Garnish with fresh herbs or a light sprinkle of paprika for color contrast. If you’ve made them with whole beans, arrange them neatly rather than dumping them in a pile that extra few seconds of effort makes your dish look professionally prepared.
Make-Ahead Options
For busy schedules, this recipe offers excellent make-ahead potential. You can blanch the beans up to a day in advance cool, dry thoroughly, and store them in an airtight container in the refrigerator. When it’s time to serve, just pull them out and saute with fresh garlic. They’ll taste just as fresh as if you’d made them entirely in the moment, and you’ll have most of the work done ahead of time.
This make-ahead strategy is perfect for holiday meals or dinner parties when you’re juggling multiple dishes. While your main course rests, your beans can be sauteing everything hits the table hot and perfectly timed.
How to Store Green Beans: Best Practices
Proper storage ensures your green beans stay fresh and delicious whether you’re storing raw beans, prepped ingredients, or leftovers. Here’s everything you need to know about keeping them at their best.
Refrigeration Guidelines
Store fresh, untrimmed green beans in a plastic bag in the vegetable crisper drawer of your refrigerator. They’ll keep for about 5-7 days when stored properly. Don’t wash them until you’re ready to use them, as excess moisture promotes spoilage. If you’ve already trimmed them, use within 2-3 days for best quality.
Cooked sauteed green beans can be stored in an airtight container in the refrigerator for 3-4 days. However, the garlic will lose its crispness and the beans may soften slightly. For the best eating experience, this dish is definitely best served fresh.
Freezing Options
If you want to store blanched beans for longer periods, freezing works beautifully. After blanching, cooling, and thoroughly drying the beans, spread them in a single layer on a baking sheet and freeze until solid. Then transfer to a freezer bag, removing as much air as possible. This method prevents the beans from clumping together, so you can grab just what you need. Frozen blanched beans will keep for up to 3 months.
Reheating Best Practices
To reheat leftover sauteed green beans with garlic, skip the microwave, which makes them soggy. Instead, heat a small amount of oil in a skillet over medium-high heat and saute them briefly just until heated through. This method helps restore some of the original texture. You can add a tiny bit of fresh garlic at this stage to refresh the flavor.
Meal Prep Considerations
For meal prep purposes, store the blanched beans separately from any seasonings or aromatics. When you’re ready to eat, simply saute them fresh with garlic and seasonings. This approach gives you freshly cooked flavor with minimal prep time during busy weekdays. Just like preparing desserts ahead for a dinner party, a little advance planning with vegetables makes weeknight cooking so much smoother.
If you’re planning to use the beans in a grain bowl or salad, the blanched version works perfectly straight from the refrigerator no need to saute at all. Their crisp-tender texture holds up beautifully in cold preparations.
FAQs: Frequently Asked Questions About Green Beans
How do you make sautéed green beans with garlic?
Start with 1 pound fresh green beans, trimmed by snapping off the stem ends. Boil them in salted water for 4 minutes until bright green and crisp-tender, then drain and pat dry. In a skillet over medium-high heat, warm 2 tablespoons extra virgin olive oil or butter. Add 3-4 cloves finely minced garlic (knife-minced for best texture) and cook for 30-60 seconds until golden and fragrant, stirring constantly to prevent burning. Toss in the green beans, season with salt and black pepper, and sauté for 2 minutes until heated through and coated. This quick method yields crispy garlic bits and vibrant beans. Total time: 15 minutes. Serves 4 as a side. Pro tip: Dry beans well after boiling to avoid steaming.
How should you prepare garlic for sautéed green beans?
Finely mince fresh garlic cloves by hand with a knife for the best flavor and texture—aim for small, even pieces. This prevents the garlic from becoming wet and pasty, which happens with a press or jarred paste. Knife-minced garlic sautés evenly, turning golden and crispy without spitting or burning quickly. Use 3-4 cloves per pound of beans. Avoid jarred garlic due to its sour preservatives and mushy consistency that ruins the dish. Prep just before cooking to keep it potent. This simple step elevates the dish with nutty, aromatic garlic that clings perfectly to the beans, making it a standout side.
How long do you boil green beans before sautéing?
Boil fresh green beans for exactly 4 minutes in a pot of boiling salted water. They should turn bright green and remain barely tender with a crisp bite—test by piercing with a fork. Overboiling makes them mushy. Immediately drain and plunge into ice water or pat dry thoroughly to stop cooking and remove excess moisture. This blanching step preserves color, texture, and nutrients while prepping them for quick sautéing. Pat dry again before adding to the skillet to ensure they crisp up with garlic instead of steaming. Perfect for busy weeknights, keeping beans flavorful and vibrant.
Can you prepare green beans ahead of time for cooking?
Yes, blanch green beans up to 1 day ahead: boil for 4 minutes, drain, cool in ice water, dry well, and store in an airtight container in the fridge. When ready, sauté with garlic in a hot skillet for just 2 minutes to reheat and infuse flavor—no loss in quality. This saves time for meal prep or holidays. Dry them meticulously to avoid sogginess. They hold up better than fully cooked leftovers. For longer storage, freeze blanched beans up to 3 months, thawing before sautéing. Keeps the dish fresh-tasting and convenient.
What dishes pair well with sautéed green beans with garlic?
These versatile green beans complement nearly any main: grilled steak or chicken for Western meals, roasted pork tenderloin or salmon for elegant dinners, stir-fries or teriyaki for Asian flair (add ginger and sesame oil), burgers or meatloaf for comfort food, even pies like shepherd’s pie. Their garlicky crunch cuts richness in creamy pastas or fatty roasts. Nutritious (low-cal, high-fiber), they balance plates visually and textually. Try with lemon chicken, beef stir-fry, or holiday ham. One batch fits multiple cuisines, making it a go-to side that elevates everyday and special meals alike.
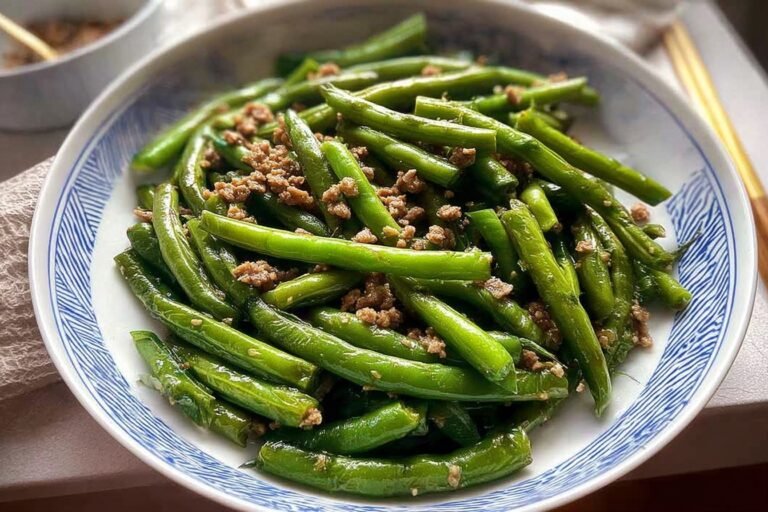
Green Beans
🌱 Crisp-tender green beans sautéed with golden garlic—quick, nutrient-packed side bursting with flavor and vitamins A & C!
🧄 13-minute simple recipe that’s healthy, versatile, and restaurant-quality—elevates any meal effortlessly!
- Total Time: 13 minutes
- Yield: 2 servings
Ingredients
– 250g (8oz) fresh green beans, trimmed
– 1 tsp salt for blanching
– 1 tbsp extra virgin olive oil or butter for sauteing
– 2 garlic cloves, finely minced (about 2 tsp)
– 1/8 tsp salt for seasoning
– A pinch of black pepper
Instructions
1-Step 1: Prepare Your Ingredients Before you turn on any heat, get everything prepped and ready. This mise en place approach makes the actual cooking go smoothly and prevents any last-minute scrambling. Start by trimming your green beans. You only need to trim the stem end that’s the part that was attached to the plant. The tapered tip can stay unless it looks scraggly or damaged. Some people prefer to snap the ends off by hand, which works fine, but a knife gives you a cleaner, more uniform look. You can keep the beans whole for an elegant presentation, or cut them into 2-inch pieces if you prefer bite-sized portions both ways work beautifully. Next, peel and mince your garlic. Remember, we’re doing this by hand with a knife, not a garlic press. Start by smashing the cloves with the side of your knife blade to loosen the skins. Peel them, then mince finely with a rocking motion. You want small, even pieces that will cook uniformly and become those coveted crispy bits. Set your minced garlic aside in a small pile don’t press it or pack it tight, as air circulation helps keep it dry.
2-Step 2: Blanch the Green Beans Fill a large saucepan with water and bring it to a rolling boil over high heat. Add 1 teaspoon of salt the water should taste slightly salty, like a mild broth. This salt isn’t just for flavor; it helps set the bright green color of the beans. Once the water is boiling vigorously, add your trimmed green beans all at once. Give them a quick stir to ensure they’re all submerged, then set your timer for exactly 4 minutes. Watch them transform from a dull, raw green to a brilliant, vibrant emerald color. After 4 minutes, test a bean by piercing it with a fork or taking a small bite. It should be bright green and barely tender cooked through but still with a definite crispness when you bite into it. If it feels too crunchy, give it another 30 seconds, but don’t go much longer. Remember, these beans will cook for another 2 minutes in the skillet, so slightly undercooking at this stage is actually perfect.
3-Step 3: Cool and Dry the Beans Drain the blanched beans in a colander, then immediately rinse them under cold running water to stop the cooking process. This shock of cold water preserves both the bright color and the crisp texture. Let the water run over them for about 30 seconds until they’re cool enough to handle comfortably. Here’s a step many people skip but shouldn’t: shake off as much excess water as possible. Wet beans will steam rather than saute, and you won’t get that nice slight char and the garlic won’t crisp up properly. Give the colander several good shakes, then spread the beans on a clean kitchen towel or paper towels and pat them dry. Taking an extra minute here makes a noticeable difference in the final dish.
4-Step 4: Saute with Garlic Now for the transformation! Place a large skillet over medium-high heat and add your tablespoon of olive oil or butter. Let it heat until it shimmers (for oil) or melts and starts to foam slightly (for butter). You want the pan nice and hot so the garlic sizzles immediately upon contact. Add your green beans and minced garlic to the hot pan simultaneously. This timing is important adding them together means the garlic has exactly enough time to crisp up as the beans warm through. Use a wooden spoon or spatula to stir, or if you’re feeling confident, toss the pan to coat everything evenly. Cook for 2 minutes, stirring or tossing frequently. Watch the garlic carefully you’re looking for it to turn a lovely golden brown and become slightly crispy. You’ll smell that gorgeous garlic aroma filling your kitchen. If the garlic starts browning too quickly, lower the heat slightly. The beans should be heated through and might have some light charred spots, which add wonderful flavor.
5-Step 5: Season and Serve Sprinkle the 1/8 teaspoon of salt and your pinch of black pepper over the beans. Toss everything together one final time to distribute the seasonings evenly. Taste a bean does it need more salt? Adjust if necessary, keeping in mind that the beans were already salted during blanching. Transfer your finished garlic green beans to a serving dish immediately and serve warm. They’re at their absolute best straight from the pan, when the garlic is still crispy and the beans are perfectly tender-crisp. The entire cooking process from blanching to serving takes just about 13 minutes, making this an ideal last-minute addition to any meal.
Last Step:
Please leave a rating and comment letting us know how you liked this recipe! This helps our business to thrive and continue providing free, high-quality recipes for you.Notes
✂️ Trim only the stem ends of green beans; keep whole for elegant presentation.
🧄 Always mince garlic fresh with a knife—avoids burning and ensures crispiness.
❄️ Blanch beans ahead, dry, and refrigerate for super-fast sautéing later.
- Prep Time: 5 minutes
- Cook Time: 8 minutes
- Category: Side Dish
- Method: Sauté
- Cuisine: Western
- Diet: Vegan
Nutrition
- Serving Size: 4 oz
- Calories: 102 kcal
- Sugar: 4g
- Sodium: 153mg
- Fat: 7g
- Saturated Fat: 1g
- Unsaturated Fat: 6g
- Trans Fat: 0g
- Carbohydrates: 9g
- Fiber: 3g
- Protein: 2g
- Cholesterol: 0mg





