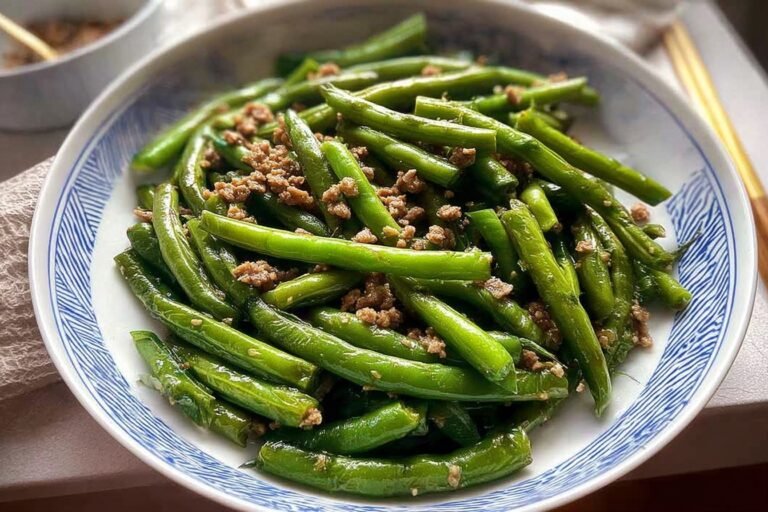
Ingredients
– 250g (8oz) fresh green beans, trimmed
– 1 tsp salt for blanching
– 1 tbsp extra virgin olive oil or butter for sauteing
– 2 garlic cloves, finely minced (about 2 tsp)
– 1/8 tsp salt for seasoning
– A pinch of black pepper
Instructions
1-Step 1: Prepare Your Ingredients Before you turn on any heat, get everything prepped and ready. This mise en place approach makes the actual cooking go smoothly and prevents any last-minute scrambling. Start by trimming your green beans. You only need to trim the stem end that’s the part that was attached to the plant. The tapered tip can stay unless it looks scraggly or damaged. Some people prefer to snap the ends off by hand, which works fine, but a knife gives you a cleaner, more uniform look. You can keep the beans whole for an elegant presentation, or cut them into 2-inch pieces if you prefer bite-sized portions both ways work beautifully. Next, peel and mince your garlic. Remember, we’re doing this by hand with a knife, not a garlic press. Start by smashing the cloves with the side of your knife blade to loosen the skins. Peel them, then mince finely with a rocking motion. You want small, even pieces that will cook uniformly and become those coveted crispy bits. Set your minced garlic aside in a small pile don’t press it or pack it tight, as air circulation helps keep it dry.
2-Step 2: Blanch the Green Beans Fill a large saucepan with water and bring it to a rolling boil over high heat. Add 1 teaspoon of salt the water should taste slightly salty, like a mild broth. This salt isn’t just for flavor; it helps set the bright green color of the beans. Once the water is boiling vigorously, add your trimmed green beans all at once. Give them a quick stir to ensure they’re all submerged, then set your timer for exactly 4 minutes. Watch them transform from a dull, raw green to a brilliant, vibrant emerald color. After 4 minutes, test a bean by piercing it with a fork or taking a small bite. It should be bright green and barely tender cooked through but still with a definite crispness when you bite into it. If it feels too crunchy, give it another 30 seconds, but don’t go much longer. Remember, these beans will cook for another 2 minutes in the skillet, so slightly undercooking at this stage is actually perfect.
3-Step 3: Cool and Dry the Beans Drain the blanched beans in a colander, then immediately rinse them under cold running water to stop the cooking process. This shock of cold water preserves both the bright color and the crisp texture. Let the water run over them for about 30 seconds until they’re cool enough to handle comfortably. Here’s a step many people skip but shouldn’t: shake off as much excess water as possible. Wet beans will steam rather than saute, and you won’t get that nice slight char and the garlic won’t crisp up properly. Give the colander several good shakes, then spread the beans on a clean kitchen towel or paper towels and pat them dry. Taking an extra minute here makes a noticeable difference in the final dish.
4-Step 4: Saute with Garlic Now for the transformation! Place a large skillet over medium-high heat and add your tablespoon of olive oil or butter. Let it heat until it shimmers (for oil) or melts and starts to foam slightly (for butter). You want the pan nice and hot so the garlic sizzles immediately upon contact. Add your green beans and minced garlic to the hot pan simultaneously. This timing is important adding them together means the garlic has exactly enough time to crisp up as the beans warm through. Use a wooden spoon or spatula to stir, or if you’re feeling confident, toss the pan to coat everything evenly. Cook for 2 minutes, stirring or tossing frequently. Watch the garlic carefully you’re looking for it to turn a lovely golden brown and become slightly crispy. You’ll smell that gorgeous garlic aroma filling your kitchen. If the garlic starts browning too quickly, lower the heat slightly. The beans should be heated through and might have some light charred spots, which add wonderful flavor.
5-Step 5: Season and Serve Sprinkle the 1/8 teaspoon of salt and your pinch of black pepper over the beans. Toss everything together one final time to distribute the seasonings evenly. Taste a bean does it need more salt? Adjust if necessary, keeping in mind that the beans were already salted during blanching. Transfer your finished garlic green beans to a serving dish immediately and serve warm. They’re at their absolute best straight from the pan, when the garlic is still crispy and the beans are perfectly tender-crisp. The entire cooking process from blanching to serving takes just about 13 minutes, making this an ideal last-minute addition to any meal.
Last Step:
Please leave a rating and comment letting us know how you liked this recipe! This helps our business to thrive and continue providing free, high-quality recipes for you.Notes
✂️ Trim only the stem ends of green beans; keep whole for elegant presentation.
🧄 Always mince garlic fresh with a knife—avoids burning and ensures crispiness.
❄️ Blanch beans ahead, dry, and refrigerate for super-fast sautéing later.
- Prep Time: 5 minutes
- Cook Time: 8 minutes
- Category: Side Dish
- Method: Sauté
- Cuisine: Western
- Diet: Vegan
Nutrition
- Serving Size: 4 oz
- Calories: 102 kcal
- Sugar: 4g
- Sodium: 153mg
- Fat: 7g
- Saturated Fat: 1g
- Unsaturated Fat: 6g
- Trans Fat: 0g
- Carbohydrates: 9g
- Fiber: 3g
- Protein: 2g
- Cholesterol: 0mg