

Why You’ll Love This Rice Krispie Treat Cheesecake
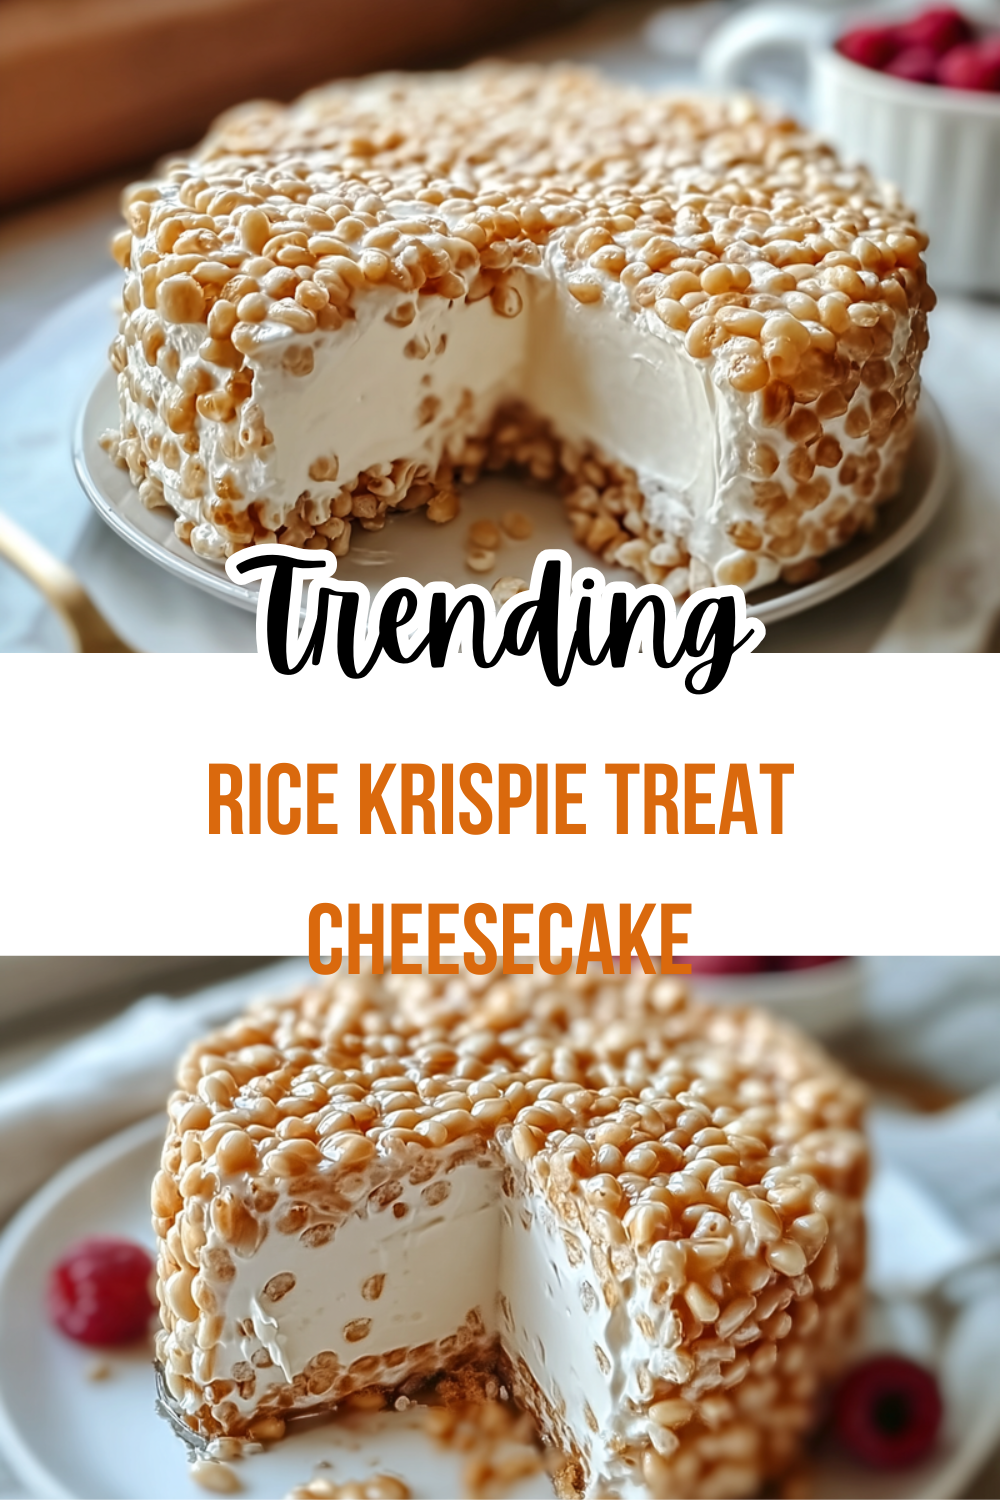
If you’re craving a dessert that’s fun, quick, and full of that irresistible crunch, this Rice Krispie Treat Cheesecake is about to become your new favorite. Imagine combining the classic, chewy goodness of Rice Krispies with a smooth, creamy filling that feels light as a cloud it’s perfect for those hot summer days when you don’t want to turn on the oven. This no-bake cheesecake features a Rice Krispies cereal crust and a light, fluffy marshmallow cream cheese filling, making it an ideal dessert for warm weather. Not only does it deliver a unique twist on traditional cheesecake, but it’s also super adaptable for different tastes and diets, which we’ll dive into later.
One of the best parts is how easy it is to throw together, with a prep time of just 25 minutes and a total time of about 2 hours and 30 minutes including chilling. You get all the joy of baking without the hassle, which is a win for busy parents or anyone short on time. Plus, the Rice Krispie Treat Cheesecake packs in some nice perks, like options for reduced sugar or even gluten-free swaps, helping you stick to a balanced lifestyle while enjoying something sweet. It’s versatile enough to fit into family gatherings or a quiet night in, and that nostalgic crunch paired with creamy layers makes every bite feel special and satisfying.
Let’s not forget how this recipe shines for health-conscious folks you can tweak it with lighter ingredients to cut down on calories without losing that wow factor. Whether you’re a student looking for a quick study break treat or a working professional needing a simple dessert, this recipe brings people together around the table. For more ideas on easy desserts, check out our easy no-bake recipes on the blog. Overall, it’s all about creating those memorable moments with minimal effort, and that’s what makes this Rice Krispie Treat Cheesecake a standout choice for home cooks everywhere.
Jump to:
- Why You’ll Love This Rice Krispie Treat Cheesecake
- Essential Ingredients for Rice Krispie Treat Cheesecake
- For the Crust
- For the Filling
- For the Garnish
- How to Prepare the Perfect Rice Krispie Treat Cheesecake: Step-by-Step Guide
- Step 1: Prepare Your Pan and Ingredients
- Step 2: Make the Crust
- Step 3: Whip Up the Filling
- Step 4: Add Garnish and Chill
- Dietary Substitutions to Customize Your Rice Krispie Treat Cheesecake
- Protein and Main Component Alternatives
- Vegetable, Sauce, and Seasoning Modifications
- Mastering Rice Krispie Treat Cheesecake: Advanced Tips and Variations
- Pro Cooking Techniques
- Flavor Variations and Storage Hacks
- How to Store Rice Krispie Treat Cheesecake: Best Practices
- FAQs: Frequently Asked Questions About Rice Krispie Treat Cheesecake
- Can I make Rice Krispie Treat Cheesecake without a springform pan?
- How long should I chill the cheesecake before serving?
- Will the Rice Krispies crust become soggy or too hard after refrigeration?
- Can this cheesecake be made gluten-free?
- Is it possible to prepare Rice Krispie Treat Cheesecake ahead of time?
- Rice Krispie Treat Cheesecake
- Ingredients
- Instructions
- Last Step:
- Notes
- Nutrition
- Did you make this recipe?
Essential Ingredients for Rice Krispie Treat Cheesecake
Gathering the right ingredients is the first step to nailing this Rice Krispie Treat Cheesecake, and it’s all about keeping things simple yet effective. This recipe uses everyday items that blend together to create that perfect balance of crunch and creaminess. Below, you’ll find a comprehensive list of everything needed, pulled directly from the recipe, formatted for easy shopping and measuring. Remember, precise quantities make a big difference, so measure carefully to get that ideal texture.
For the Crust
- 6 cups Rice Krispies cereal
- 1/4 cup salted butter
- 10 oz miniature marshmallows
For the Filling
- 8 oz cream cheese, softened
- 1/2 cup sugar
- 1 teaspoon vanilla extract
- 7 oz marshmallow creme or fluff
- 8 oz whipped topping, thawed
For the Garnish
- Whipped cream
- Cubed Rice Krispy Treat squares
These ingredients come together to form a delightful treat that’s not only tasty but also flexible for dietary tweaks, like using gluten-free cereals. For more on how certain ingredients boost nutrition, check out health benefits of marshmallow root, which can relate to the marshmallows in this recipe.
How to Prepare the Perfect Rice Krispie Treat Cheesecake: Step-by-Step Guide
Getting this Rice Krispie Treat Cheesecake just right is easier than you might think, and the no-bake method keeps things stress-free. Start by prepping your space and ingredients to make the process smooth and enjoyable it’s all about that hands-on fun without the heat. This no-bake cheesecake features a Rice Krispies cereal crust and a light, fluffy marshmallow cream cheese filling, ideal for warm days when you want something cool and delicious.
Step 1: Prepare Your Pan and Ingredients
Grease a 9- or 10-inch springform pan with cooking spray to ensure easy removal later this tip makes a world of difference. Measure out all your ingredients ahead of time, like softening the cream cheese so it blends without lumps. This step sets you up for success and keeps the recipe flowing smoothly, just like in our favorite kitchen hacks.
Step 2: Make the Crust
Melt the butter and miniature marshmallows together over low heat until they’re smooth and gooey stir constantly to avoid any burning mishaps. Once melted, mix in the 6 cups of Rice Krispies cereal until everything is evenly coated. Press this mixture firmly into the bottom and sides of your prepared pan, then let it set for about 20 minutes to firm up.
Step 3: Whip Up the Filling
In a separate bowl, beat the softened cream cheese, sugar, and vanilla extract until it’s super smooth and creamy. Add the marshmallow creme and mix well to keep that fluffy texture. Gently fold in the whipped topping to maintain the airiness, then spread this filling evenly over your set crust for that perfect layer.
Step 4: Add Garnish and Chill
Garnish the top with piped whipped cream around the edges and place cubed Rice Krispy Treat squares in the center for a fun finish. Pop the whole thing in the refrigerator and chill for at least 2 hours this helps everything set nicely. For more tips on no-bake treats, explore our gluten-free desserts page, which has similar ideas.
Drawing from the directions, the total prep time is 25 minutes, with chilling taking at least 2 hours, making this a quick win for busy schedules.

Dietary Substitutions to Customize Your Rice Krispie Treat Cheesecake
One of the coolest things about this Rice Krispie Treat Cheesecake is how you can tweak it to fit your needs, whether you’re watching your diet or trying something new. It’s all about making the recipe your own while keeping that signature crunch and cream. For instance, variations can be made with gluten-free cereals or dairy substitutes, allowing everyone to enjoy it.
Protein and Main Component Alternatives
Swap out regular cream cheese for tofu-based or nut-based options if you’re going vegan they add a protein boost and keep the creaminess intact. If gluten is a concern, stick with certified gluten-free Rice Krispies to maintain that crispy base without any issues. Folks with lactose intolerance can use coconut or almond cream cheese for a dairy-free twist that still tastes amazing.
Vegetable, Sauce, and Seasoning Modifications
Boost the flavor with extracts like vanilla or almond to cut down on extra sugar while adding a nice depth. Try mixing in purees from veggies like pumpkin for moisture and a subtle sweetness that sneaks in some nutrients. Don’t forget seasonings such as cinnamon or citrus zest to give your cheesecake a seasonal vibe, making it even more personalized for your tastes.
Mastering Rice Krispie Treat Cheesecake: Advanced Tips and Variations
Once you’ve got the basics down, leveling up your Rice Krispie Treat Cheesecake is all about little tricks that make it even better. Think of it as your chance to play around and create something truly unique, like adding swirls of flavors or fun garnishes. Variations can include gluten-free cereals or dairy substitutes, and you can prepare it a day ahead, though the crust might soften a bit over time.
Pro Cooking Techniques
Start by tempering your cream cheese so it mixes without clumps, giving you that silky smooth filling every time. Use a double boiler for melting the marshmallows to get a perfect, even texture that blends seamlessly. For presentation, dust the top with a bit of powdered sugar or add fresh mint for a pop of color that makes it look as good as it tastes.
Flavor Variations and Storage Hacks
Mix in extras like peanut butter swirls or chocolate chips to amp up the fun, or try fruit preserves for a fruity twist. If you’re prepping ahead, freeze the base and thaw it when needed to keep things fresh it’s a game-changer for busy weeks. Adjusting sugar to taste helps dial in the sweetness, ensuring your version is just right for any occasion.
| Variation Idea | Key Change | Benefit |
|---|---|---|
| Gluten-Free Version | Use gluten-free cereal | Safe for gluten-sensitive eaters |
| Vegan Option | Dairy-free substitutes | More inclusive for plant-based diets |
| Flavor Boost | Add extracts or fruits | Enhances taste variety |
How to Store Rice Krispie Treat Cheesecake: Best Practices
Keeping your Rice Krispie Treat Cheesecake fresh is key to enjoying it at its best, and it’s simpler than you might think. After all the effort you put in, proper storage helps maintain that crave-worthy crunch and cream. Tips include storing the dessert refrigerated to keep it fresh, and it can be prepared a day ahead though the crust may lose some crispness over time.
- Refrigerate in an airtight container for up to 5 days to lock in freshness.
- Freeze by wrapping tightly in plastic and foil; it lasts up to 2 months without losing quality.
- Thaw overnight in the fridge to preserve the texture no microwaving needed.
- Portion it out for meal prep, making it easy to grab a slice for on-the-go moments.
This method not only keeps your cheesecake tasting great but also makes it convenient for weekly meals or events.
FAQs: Frequently Asked Questions About Rice Krispie Treat Cheesecake
Can I make Rice Krispie Treat Cheesecake without a springform pan?
Yes, you can use a well-greased 9-inch round cake pan as an alternative, but a springform pan is preferred because it makes removing and slicing the cheesecake much easier. Other pan types haven’t been tested with this recipe, so results may vary.
How long should I chill the cheesecake before serving?
Chill the cheesecake in the refrigerator for at least 2 hours. This resting time allows the filling to firm up for clean slices and helps the Rice Krispies crust maintain its texture.
Will the Rice Krispies crust become soggy or too hard after refrigeration?
The Rice Krispies crust stays pleasantly crisp without becoming soggy or overly hard. The cheesecake filling helps keep the crust balanced, making each bite soft yet crunchy even after chilling.
Can this cheesecake be made gluten-free?
Yes, you can make it gluten-free by choosing gluten-free rice cereal and ensuring that other ingredients like marshmallows and cream cheese are gluten-free. Be cautious as some Rice Krispies brands contain malt flavoring that has gluten.
Is it possible to prepare Rice Krispie Treat Cheesecake ahead of time?
The cheesecake is best made on the day of serving or the day before to keep the crust crisp and fresh. Preparing it more than two days in advance can affect both the freshness and the texture of the crust.
Rice Krispie Treat Cheesecake
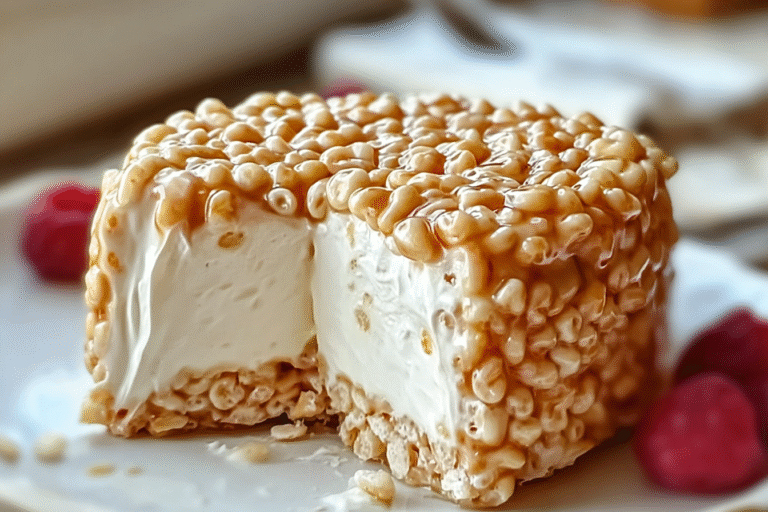
🍰 Rice Krispy Treat No Bake Cheesecake Recipe with Crunchy Layers offers a delightful combination of creamy cheesecake and crispy cereal for a refreshing dessert.
❄️ This no-bake dessert is perfect for warm weather, providing a light and airy treat without the need for an oven.
- Total Time: 2 hours 30 minutes
- Yield: 8 servings
Ingredients
– 6 cups Rice Krispies cereal for the crust
– 1/4 cup salted butter for the crust
– 10 oz miniature marshmallows for the crust
– 8 oz cream cheese, softened for the filling
– 1/2 cup sugar for the filling
– 1 teaspoon vanilla extract for the filling
– 7 oz marshmallow creme or fluff for the filling
– 8 oz whipped topping, thawed for the filling
– Whipped cream for the garnish
– Cubed Rice Krispy Treat squares for the garnish
Instructions
1-Step 1: Prepare Your Pan and Ingredients Grease a 9- or 10-inch springform pan with cooking spray to ensure easy removal later this tip makes a world of difference. Measure out all your ingredients ahead of time, like softening the cream cheese so it blends without lumps. This step sets you up for success and keeps the recipe flowing smoothly, just like in our favorite kitchen hacks.
2-Step 2: Make the Crust Melt the butter and miniature marshmallows together over low heat until they’re smooth and gooey stir constantly to avoid any burning mishaps. Once melted, mix in the 6 cups of Rice Krispies cereal until everything is evenly coated. Press this mixture firmly into the bottom and sides of your prepared pan, then let it set for about 20 minutes to firm up.
3-Step 3: Whip Up the Filling In a separate bowl, beat the softened cream cheese, sugar, and vanilla extract until it’s super smooth and creamy. Add the marshmallow creme and mix well to keep that fluffy texture. Gently fold in the whipped topping to maintain the airiness, then spread this filling evenly over your set crust for that perfect layer.
4-Step 4: Add Garnish and Chill Garnish the top with piped whipped cream around the edges and place cubed Rice Krispy Treat squares in the center for a fun finish. Pop the whole thing in the refrigerator and chill for at least 2 hours this helps everything set nicely. For more tips on no-bake treats, explore our gluten-free desserts page, which has similar ideas.
Last Step:
Please leave a rating and comment letting us know how you liked this recipe! This helps our business to thrive and continue providing free, high-quality recipes for you.Notes
🍽️ Use a springform pan for easy removal.
❄️ Keep the dessert refrigerated to maintain freshness.
🍬 Adjust sugar amounts to suit your preferred sweetness level.
🌾 Substitute gluten-free cereals or dairy alternatives for dietary needs.
⏳ Prepare a day ahead; note crust may lose some crispness over time.
- Prep Time: 25 minutes
- Chilling Time: 2 hours
- Category: Dessert
- Method: No-Bake
- Cuisine: American
Nutrition
- Serving Size: 1 slice





