

Why You’ll Love This Christmas Tree Brownies
Imagine gathering with family during the holidays, the kitchen filled with the sweet scent of chocolate and the excitement of creating something special. These Christmas Tree Brownies are not just a treat; they’re a fun way to bring joy to your table with their festive shape and easy preparation. You’ll appreciate how this recipe fits into busy schedules while offering a delightful mix of flavors that make every bite feel like a holiday memory.
This recipe shines for its simplicity, using everyday ingredients that turn into adorable tree-shaped desserts without needing advanced skills. It’s adaptable too, so you can tweak it for different tastes or needs, making it a hit for everyone from kids to adults. Plus, the combination of rich chocolate from the brownie mix and vibrant decorations creates a fun, festive vibe that’s perfect for sharing at parties or cozy nights in.
Key Reasons to Try It
- Ease of preparation: This Christmas Tree Brownies recipe is straightforward and quick, ideal for those hectic holiday times. Just follow the simple steps, and you’ll have treats ready in no time.
- Health benefits: While indulgent, these brownies can incorporate wholesome swaps, like using lower-sugar options, to keep things balanced and enjoyable without guilt.
- Versatility: You can easily modify the recipe for various dietary preferences, ensuring it’s a crowd-pleaser no matter who stops by.
- Distinctive flavor: The blend of chocolatey goodness with holiday-inspired decorations gives these brownies a unique taste and look that captures the spirit of the season.
To get more ideas, check out our baking tips section for extra inspiration on holiday treats.
Jump to:
- Why You’ll Love This Christmas Tree Brownies
- Key Reasons to Try It
- Essential Ingredients for Christmas Tree Brownies
- Main Ingredients List
- How to Prepare the Perfect Christmas Tree Brownies: Step-by-Step Guide
- Dietary Substitutions to Customize Your Christmas Tree Brownies
- Mastering Christmas Tree Brownies: Advanced Tips and Variations
- Pro Tips for Better Results
- How to Store Christmas Tree Brownies: Best Practices
- FAQs: Frequently Asked Questions About Christmas Tree Brownies
- How do I make Christmas Tree Brownies step by step?
- What ingredients are best for making moist Christmas Tree Brownies?
- Can I make Christmas Tree Brownies gluten-free?
- How should I store Christmas Tree Brownies to keep them fresh?
- What are some creative decorating ideas for Christmas Tree Brownies?
- Christmas Tree Brownies
- Ingredients
- Instructions
- Last Step:
- Notes
- Nutrition
- Did you make this recipe?
Essential Ingredients for Christmas Tree Brownies
Gathering the right ingredients is the first step to making your Christmas Tree Brownies turn out just right. This recipe keeps things simple with items you might already have on hand or can easily pick up. Let’s break down what you’ll need to create these festive delights.
Remember, the key is using fresh, quality ingredients to enhance the flavor and texture. Below is a complete list based on the recipe, ensuring you have everything measured out clearly for success.
Main Ingredients List
- Brownie mix for one 8″x8″ pan (according to package directions)
- 1 tub white vanilla icing (amount not specified)
- Green food coloring (40-50 drops)
- Small round sprinkles for decoration
- Small star sprinkles for decoration
- Candy canes (cut into 1.5″ pieces) for tree trunks, optional
This structured list makes it easy to shop and prepare, with each ingredient’s quantity stated upfront. For instance, the green food coloring’s drops ensure a vibrant color without overwhelming the icing.
How to Prepare the Perfect Christmas Tree Brownies: Step-by-Step Guide
Creating Christmas Tree Brownies is a rewarding process that anyone can enjoy, even if you’re new to baking. Start by setting up your kitchen with all the tools you’ll need, like a baking pan and mixing bowls. Follow these steps closely for the best results, and you’ll have a batch of festive treats in no time.
- Line an 8″x8″ baking pan with aluminum foil and spray with cooking spray to keep everything from sticking.
- Prepare the brownie mix as directed on the package and bake it according to the instructions, which typically takes about 20-30 minutes.
- Allow the brownies to cool completely, which should take around 1.5 hours, so they hold their shape when you cut them.
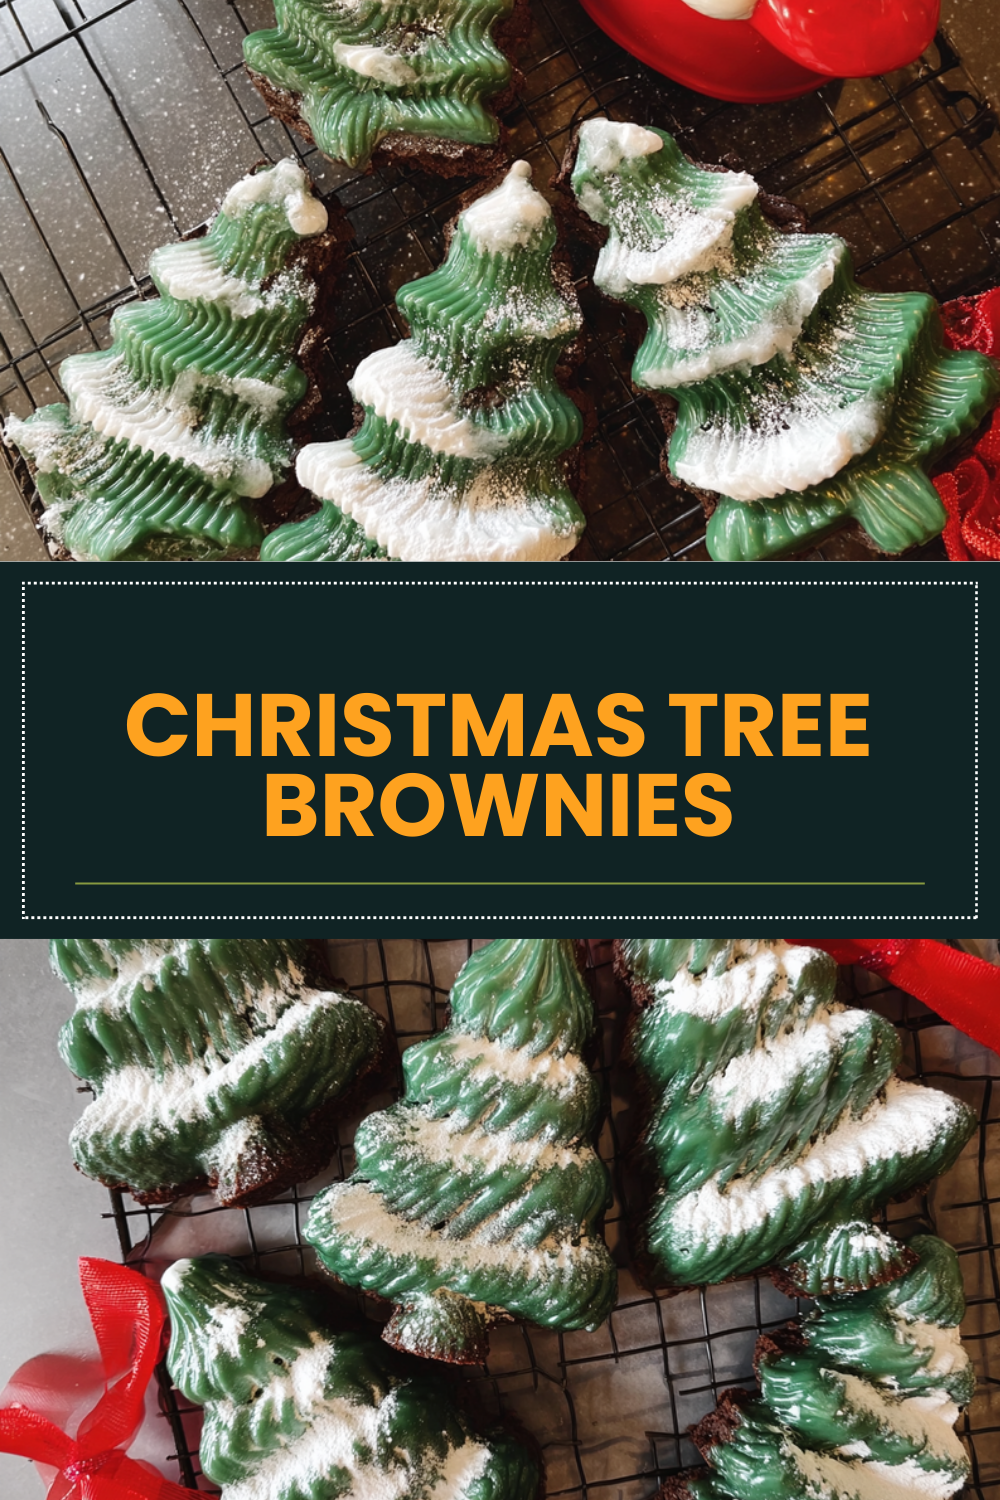
- Remove the brownies from the pan and cut them into 12 triangles by making three rows and then cutting in alternating diagonals for that tree shape.
- Unwrap the candy canes and cut them into 1.5-inch pieces to serve as tree trunks, then press the sharp end into the bottom of each brownie triangle.
- Spoon about half of the icing into a bowl and mix in 40-50 drops of green food coloring until you get the shade you want.
- Transfer the green icing to a sealable plastic bag and snip off a small corner to make piping easier.
- Starting at the top of each brownie triangle, pipe the icing in a zigzag pattern going downward to look like tree branches.
- Decorate with small round sprinkles and add a small star sprinkle on top of each tree for a finishing touch.
- Optionally, let the icing harden overnight in an airtight container to keep everything fresh.
For more on baking basics, visit our holiday recipes page to explore other easy ideas that complement this one.
| Step | Time Required |
|---|---|
| Baking | About 20-30 minutes |
| Cooling | Approximately 1.5 hours |
| Decorating | 15-30 minutes |

Dietary Substitutions to Customize Your Christmas Tree Brownies
Making Christmas Tree Brownies adaptable means everyone at your gathering can enjoy them, no matter their dietary needs. With a few simple swaps, you can tailor this recipe to fit various preferences while keeping the fun and flavor intact. Let’s look at some easy changes you can make.
For example, if you’re baking for someone who avoids dairy, swapping butter for a plant-based option works wonders. Here are the details to help you customize:
- Protein and Main Component Alternatives: For a plant-based option, replace eggs with flax or chia seeds mixed with water; use coconut oil or vegan margarine instead of butter for dairy-free needs.
- Vegetable, Sauce, and Seasoning Modifications: Include pumpkin puree as a moistening agent; experiment with mint or orange zest for seasonal twists; swap regular sugar with coconut sugar or maple syrup for natural sweetness.
When you make these adjustments, the brownies stay delicious and inclusive, turning a simple recipe into something special for all.
Mastering Christmas Tree Brownies: Advanced Tips and Variations
Once you’re comfortable with the basics, take your Christmas Tree Brownies to the next level with some expert advice. These tips can help you refine your technique and add creative flair. For starters, focus on even baking to get that perfect texture every time.
Pro Tips for Better Results
- Visualize the triangle cuts with skewers before slicing for better shapes, as this helps avoid mistakes.
- Attach candy cane trunks before icing to prevent any damage to your decorations.
- Use buttercream frosting instead of store-bought icing for a firmer finish that holds up well.
- Pretzel sticks make a good alternative to candy canes for trunks if you want a salty crunch.
- Baking in a round pan and cutting like a pizza slice reduces waste but may require trimming edges for neat trees.
- Store brownies in an airtight container to keep the icing firm and make transport easier.
Pro cooking techniques like precise temperature control ensure a tender crumb. Flavor variations might include spices like cinnamon, while presentation tips involve garnishing with colored icing.
How to Store Christmas Tree Brownies: Best Practices
Keeping your Christmas Tree Brownies fresh is key to enjoying them later, especially during the busy holiday season. Proper storage helps maintain that moist texture and vibrant decorations. Follow these guidelines to keep your treats tasting great.
- Refrigeration: Store in an airtight container for up to one week.
- Freezing: Wrap tightly and freeze for up to three months, then thaw at room temperature.
- Reheating: Warm briefly in the microwave or oven to bring back softness.
- Meal prep considerations: Prepare batches ahead and store portions individually for easy planning.
FAQs: Frequently Asked Questions About Christmas Tree Brownies
How do I make Christmas Tree Brownies step by step?
To make Christmas Tree Brownies, start by baking a batch of your favorite brownies in a rectangular pan. Once cooled, cut the brownies into small triangles. Prepare green-tinted frosting using buttercream or cream cheese icing and pipe it onto each triangle in a swirl to mimic tree branches. Decorate with small candy sprinkles, mini M&Ms, or edible glitter to resemble ornaments. Finally, add a small star-shaped candy or a yellow sprinkle at the top to complete the tree look. Chill the brownies for about 30 minutes before serving to set the frosting.
What ingredients are best for making moist Christmas Tree Brownies?
For moist Christmas Tree Brownies, choose ingredients like unsweetened cocoa powder, melted butter, and eggs at room temperature. Using brown sugar instead of white sugar adds extra moisture and a richer flavor. Incorporate a bit of strong brewed coffee or vanilla extract to enhance the chocolate taste. Avoid overbaking by checking doneness with a toothpick inserted in the center—it should come out with a few moist crumbs. These tips help ensure your brownies stay tender and delicious.
Can I make Christmas Tree Brownies gluten-free?
Yes, you can make Christmas Tree Brownies gluten-free by substituting regular flour with a 1:1 gluten-free baking flour mix. Make sure the blend contains xanthan gum or add a small amount (about 1/4 teaspoon) to help with texture and binding. Double-check that all additional ingredients, such as cocoa powder, baking powder, and candies used for decoration, are gluten-free. Baking times remain similar, but watch closely as GF brownies can sometimes bake faster or slower depending on the mix.
How should I store Christmas Tree Brownies to keep them fresh?
Store Christmas Tree Brownies in an airtight container at room temperature for up to three days. To preserve the frosting, keep the brownies away from direct sunlight or heat, which can cause the icing to melt. For longer storage, refrigerate them for up to a week, but bring to room temperature before serving for the best texture. You can also freeze unfrosted brownies wrapped tightly in plastic wrap and foil for up to three months, then decorate after thawing.
What are some creative decorating ideas for Christmas Tree Brownies?
Beyond classic green frosting and candy ornaments, try using shredded coconut dyed green for a textured look, or pipe on white icing to simulate snow. Add small pretzel sticks as tree trunks or use edible gold and silver pearls as ornaments for an elegant touch. For a fun twist, sprinkle crushed peppermint candies or drizzle melted white chocolate. These decorating ideas add festive flair and can be tailored easily to suit different tastes and party themes.
Christmas Tree Brownies
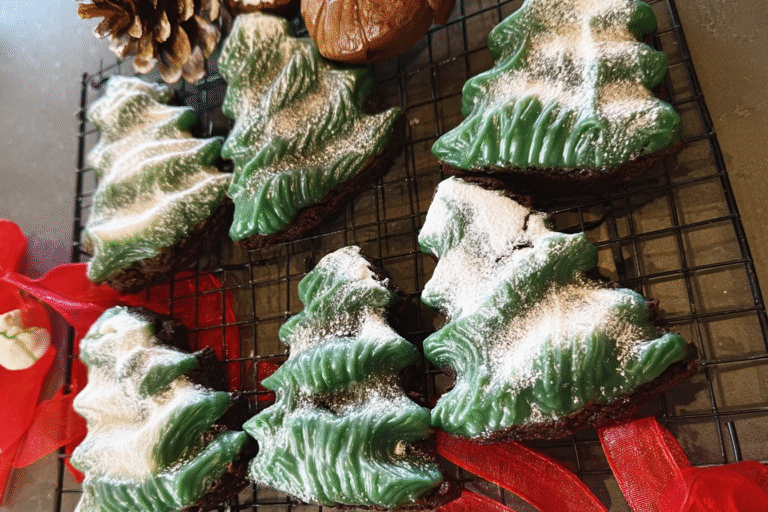
🎄 Christmas Tree Brownies are an easy and festive holiday treat that brings joy to any celebration.
🌟 This recipe features simple steps and fun decorations, perfect for holiday parties or gifting.
- Total Time: 2 hours 5 minutes
- Yield: 12 brownies shaped as Christmas trees 1x
Ingredients
Brownie mix for one 8″x8″ pan (according to package directions)
1 tub white vanilla icing
Green food coloring (40-50 drops)
Small round sprinkles for decoration
Small star sprinkles for decoration
Candy canes (cut into 1.5″ pieces) for tree trunks, optional
Instructions
1-Line an 8″x8″ baking pan: with aluminum foil and spray with cooking spray to keep everything from sticking.
2-Prepare the brownie mix: as directed on the package and bake it according to the instructions, which typically takes about 20-30 minutes.
3-Allow the brownies to cool completely: which should take around 1.5 hours, so they hold their shape when you cut them.
4-Remove the brownies from the pan and cut them into 12 triangles: by making three rows and then cutting in alternating diagonals for that tree shape.
5-Unwrap the candy canes and cut them into 1.5-inch pieces: to serve as tree trunks, then press the sharp end into the bottom of each brownie triangle.
6-Spoon about half of the icing into a bowl and mix in 40-50 drops of green food coloring: until you get the shade you want.
7-Transfer the green icing to a sealable plastic bag: and snip off a small corner to make piping easier.
8-Starting at the top of each brownie triangle, pipe the icing in a zigzag pattern: going downward to look like tree branches.
9-Decorate with small round sprinkles: and add a small star sprinkle on top of each tree for a finishing touch.
10-Optionally, let the icing harden overnight in an airtight container: to keep everything fresh.
Last Step:
Please leave a rating and comment letting us know how you liked this recipe! This helps our business to thrive and continue providing free, high-quality recipes for you.Notes
🎯 Visualize triangle cuts with skewers before slicing for better shapes.
🍬 Attach candy cane trunks before applying icing to avoid damage.
🍥 Buttercream frosting can be used instead of store-bought icing for a firmer finish.
- Prep Time: 10 minutes
- Cooling Time: 1 hour 30 minutes
- Cook Time: 25 minutes
- Category: Dessert
- Method: Baking, Decorating
- Cuisine: American
- Diet: Vegetarian
Nutrition
- Serving Size: 1 brownie triangle
- Calories: Approx. 250 per serving
- Sugar: 25g
- Sodium: 150mg
- Fat: 15g
- Saturated Fat: 5g
- Unsaturated Fat: Not specified
- Trans Fat: 0g
- Carbohydrates: 30g
- Fiber: 1g
- Protein: 3g
- Cholesterol: 20mg





