

Why You’ll Love This Dirt Cake
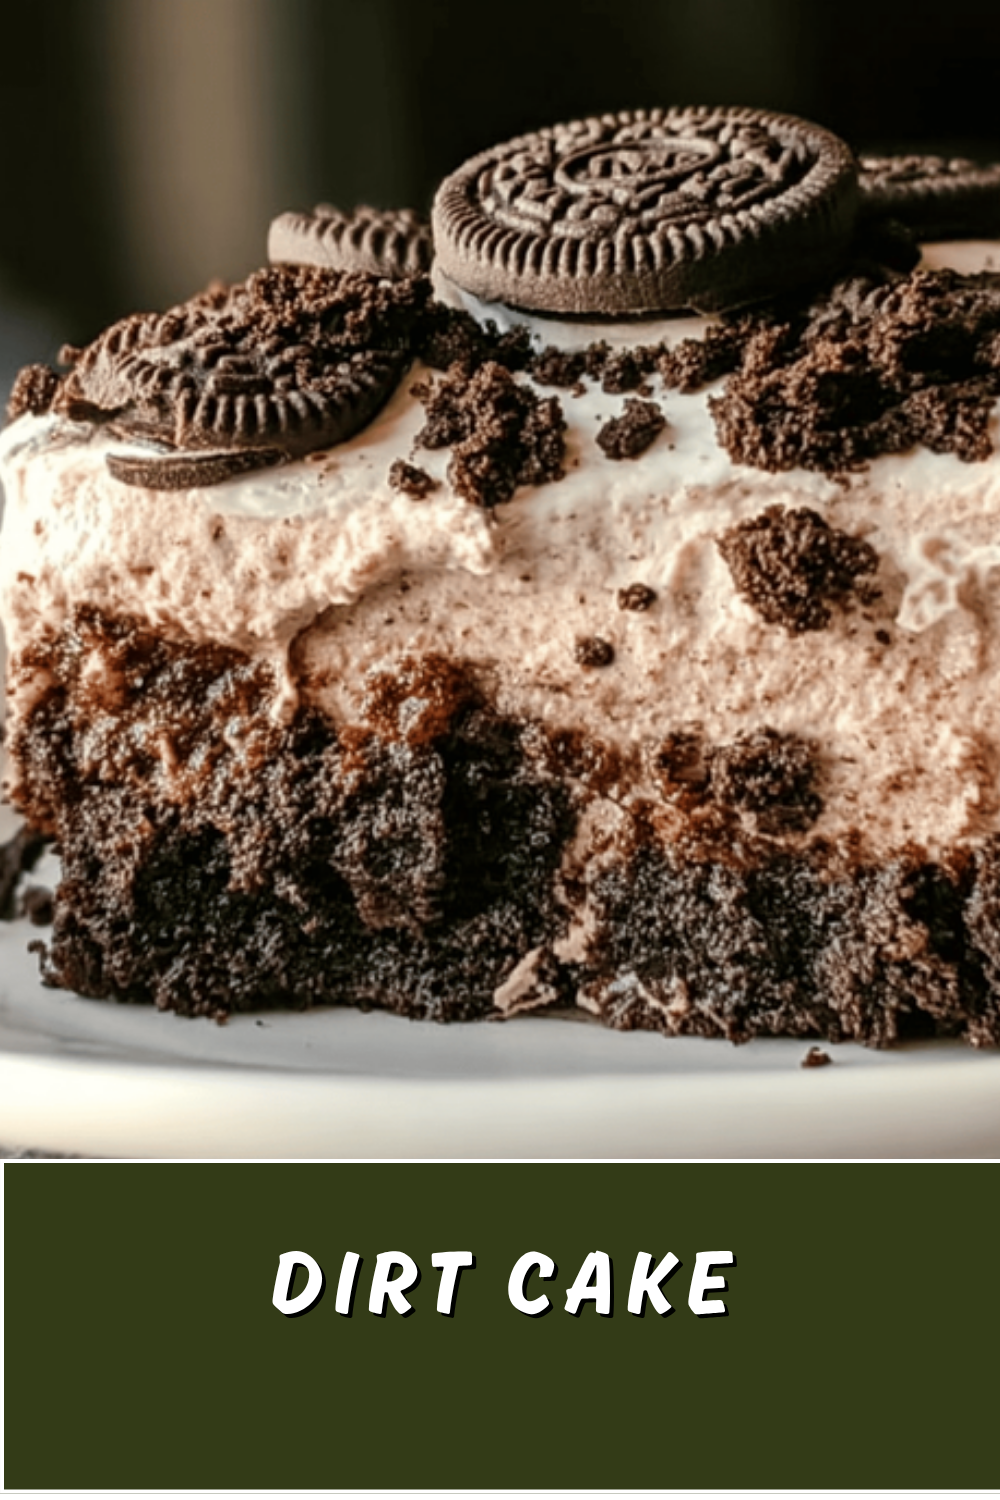
This dirt cake is a hit for its simplicity and fun vibe, especially when you’re short on time but want something special. With just a few steps involving creamy pudding and crunchy cookies, it’s perfect for busy parents or beginners in the kitchen. You’ll enjoy how it turns everyday ingredients into a treat that kids and adults alike adore at family gatherings.
One key reason is the ease of pulling everything together without any baking, saving you energy on hot days or busy evenings. Plus, it’s versatile for various diets, like using plant-based swaps to make it vegan, which helps include everyone at the table. When you mix the creamy pudding with crunchy cookies, you get that ideal balance that makes every bite satisfying and full of texture.
Beyond that, this recipe supports wellness by incorporating options that fit low-calorie needs, so it’s not just indulgent but mindful too. Imagine serving it at a potluck and watching it disappear quickly, thanks to its kid-friendly appeal. Whether you’re a student whipping up a quick dessert or a working professional prepping ahead, this dirt cake fits right into your routine and brings joy to shared moments.
Key Features That Stand Out
- Minimal prep time keeps things straightforward for anyone.
- Nutrient balance from ingredients like milk and pudding adds a wholesome touch.
- Easily adapt it for gluten-free or vegan preferences without losing flavor.
- The mix of smooth and crunchy elements creates a memorable taste every time.
For more ideas on simple desserts, check out our collection of easy no-bake recipes on the blog.
Jump to:
- Why You’ll Love This Dirt Cake
- Key Features That Stand Out
- Essential Ingredients for Dirt Cake
- Main Ingredients List
- Special Dietary Options
- How to Prepare the Perfect Dirt Cake: Step-by-Step Guide
- Step-by-Step Instructions
- Dietary Substitutions to Customize Your Dirt Cake
- Protein and Main Component Alternatives
- Vegetable, Sauce, and Seasoning Modifications
- Mastering Dirt Cake: Advanced Tips and Variations
- Expert Advice for Better Results
- How to Store Dirt Cake: Best Practices
- Storage Tips at a Glance
- FAQs: Frequently Asked Questions About Dirt Cake
- What ingredients do I need to make dirt cake?
- How do I assemble dirt cake for the best texture?
- Can dirt cake be made ahead of time and stored?
- Is dirt cake gluten-free or can it be made gluten-free?
- What are some creative ways to decorate dirt cake?
- Dirt Cake
- Ingredients
- Instructions
- Last Step:
- Notes
- Nutrition
- Did you make this recipe?
Essential Ingredients for Dirt Cake
Gathering the right ingredients is the first step to making this delightful dirt cake, and they all come together to create that signature creamy and crunchy texture. Based on the recipe, you’ll need precise amounts to ensure success, whether you’re aiming for the classic version or a customized one. Let’s break it down into a clear list so you can shop and prepare with confidence.
Main Ingredients List
- 3½ cups milk (preferably 2% or whole milk)
- 6.8 ounces instant French vanilla pudding mix (two 3.4 oz packages; instant vanilla or chocolate pudding mix can be substituted)
- 28 chocolate sandwich cookies (one 14-ounce package, divided into chopped and crushed portions; other types of sandwich cookies may be used)
- ½ cup butter, softened to room temperature (salted or unsalted)
- 8 ounces cream cheese, softened to room temperature
- 1 cup powdered sugar
- 8 ounces whipped topping, thawed (extra creamy recommended; homemade whipped topping can be used)
- Gummy candies (optional for decoration)
This list covers everything you need, pulling straight from the recipe details to make sure nothing is missed. Each item plays a role, like the milk helping the pudding set just right, or the cookies adding that fun crunch.
Special Dietary Options
If you’re adjusting for dietary needs, consider these swaps: use plant-based cream cheese for a vegan twist, or go with gluten-free cookies to keep it safe for everyone. These changes let you enjoy the same great taste while meeting restrictions, making the dessert even more adaptable.
For inspiration on similar treats, visit the top pudding recipes page to explore more options.
How to Prepare the Perfect Dirt Cake: Step-by-Step Guide
Getting started with dirt cake is all about following simple steps that lead to a tasty result, and it only takes about 20 minutes of active time before chilling. Begin by pulling together your ingredients and setting up your workspace to keep things organized and fun. This no-bake recipe lets you layer flavors and textures without much fuss, making it ideal for home cooks or busy families.
Step-by-Step Instructions
- Prepare the pudding mixture: Whisk the instant French vanilla pudding mix and milk together until combined, then refrigerate to set.
- Prepare the cookies: Remove 8 cookies and chop them into ¼-inch pieces for texture; crush the remaining cookies into fine crumbs using a food processor or rolling pin.
- Make the creamy mixture: Cream together the softened butter and cream cheese until smooth. Beat in the powdered sugar until smooth. Add the chilled pudding mixture and beat on low speed to combine. Carefully fold in the whipped topping until uniform, avoiding overbeating.
- Assemble in a trifle dish or serving container: Layer 2 cups of the pudding mixture, followed by ½ cup of the crushed cookies, and ¼ cup of the chopped cookies. Repeat the layers, ending with a final topping of crushed cookies.
- Add gummy candies on top or between layers as desired.
- Cover and refrigerate for at least 12 hours (overnight) to allow the flavors and textures to meld.
- Serve chilled, using a spoon or fun scoopers for presentation.
These steps ensure the cake sets properly, giving you that perfect blend of creamy and crunchy. For a vegan version, swap in plant-based ingredients at each step without changing the timing.
To see more no-bake ideas, check out this Preppy Kitchen Dirt Cake Recipe for additional tips.

Dietary Substitutions to Customize Your Dirt Cake
Customizing dirt cake for different diets keeps it enjoyable for all, like swapping cream cheese for plant-based options to make it vegan friendly. These changes help maintain the dessert’s creamy texture and flavor while fitting needs like gluten-free or low-calorie preferences. Let’s look at how to tweak the main components and add-ins for the best results.
Protein and Main Component Alternatives
- Substitute cream cheese with plant-based alternatives for vegan options.
- Use lactose-free or light dairy products to suit dietary restrictions.
Vegetable, Sauce, and Seasoning Modifications
- Incorporate seasonal fruits or natural extracts to enhance flavor.
- Replace traditional pudding mix with homemade or allergen-friendly varieties.
These tweaks keep the essence of the dessert intact, so it feels just as special no matter the adjustments.
Mastering Dirt Cake: Advanced Tips and Variations
Taking your dirt cake to the next level means trying out some pro techniques, like whipping the cream cheese and topping separately for a lighter texture. You can play with flavors by swapping in mint extract or different cookies to keep things exciting. Presentation is key too, so using clear dishes makes the layers pop and adds visual appeal for parties.
Expert Advice for Better Results
- Whip cream cheese and topping separately for optimal texture.
- Experiment with different cookie types or add flavored extracts like mint or coffee.
- Use clear layered dishes or individual servings for visual appeal.
- Prepare in advance and store properly to enhance flavor melding and save time.
This approach helps create a dessert that’s not only tasty but also fun to share, as one reader shared: “Adding those chopped cookie pieces really makes it feel like digging into real dirt!”
For more dessert inspiration, explore Delish No-Bake Desserts.
How to Store Dirt Cake: Best Practices
Proper storage keeps your dirt cake fresh and delicious, so always cover it in an airtight container to lock in flavors. You can refrigerate it for up to 3 to 5 days, which makes it great for meal prep. Freezing works too, holding it for a month if wrapped tightly, but thaw it slowly in the fridge to keep the texture just right.
Storage Tips at a Glance
| Method | Duration | Tips |
|---|---|---|
| Refrigeration | 3 to 5 days | Store in an airtight container to preserve freshness. |
| Freezing | Up to 1 month | Thaw slowly in the refrigerator without using a microwave. |
This method ensures your cake stays enjoyable over time, perfect for planning ahead.
FAQs: Frequently Asked Questions About Dirt Cake
What ingredients do I need to make dirt cake?
To make a classic dirt cake, you’ll need crushed chocolate sandwich cookies (like Oreos), instant pudding mix (usually vanilla or chocolate), milk, cream cheese or whipped topping for creaminess, and gummy worms for decoration. Some recipes also include butter and powdered sugar to create a richer filling. The cookies create a crumbly “dirt” texture, while the pudding mixture adds sweetness and smoothness.
How do I assemble dirt cake for the best texture?
Start by mixing the pudding according to the package instructions and then fold in cream cheese or whipped topping for a light, creamy filling. In a serving dish, layer crushed cookies followed by the pudding mixture, repeating until all ingredients are used. Finish with a top layer of crushed cookies to mimic dirt. Chill the dessert for at least 4 hours or overnight to allow the layers to set and flavors to meld.
Can dirt cake be made ahead of time and stored?
Yes, dirt cake can be prepared in advance and stored in the refrigerator for up to 3 days. Cover it tightly with plastic wrap or store in an airtight container to keep it fresh and prevent moisture from softening the cookie crumbs. Avoid freezing if you want to maintain the best texture, as thawing can cause the pudding to separate.
Is dirt cake gluten-free or can it be made gluten-free?
Traditional dirt cake is not gluten-free because it uses regular chocolate sandwich cookies containing wheat. However, you can make a gluten-free version by substituting with gluten-free chocolate cookies. Ensure the pudding mix and all other ingredients are labeled gluten-free. This allows people with gluten sensitivities to enjoy the dessert safely.
What are some creative ways to decorate dirt cake?
To create a fun and inviting presentation, add gummy worms partially buried in the top cookie layer to mimic “worms in dirt.” You can also sprinkle edible flowers, small candy rocks, or crushed nuts for variety. Some use green tinted coconut flakes as “grass” around the edges. Decorating ideas like these make dirt cake popular for kids’ parties and themed events.
Dirt Cake
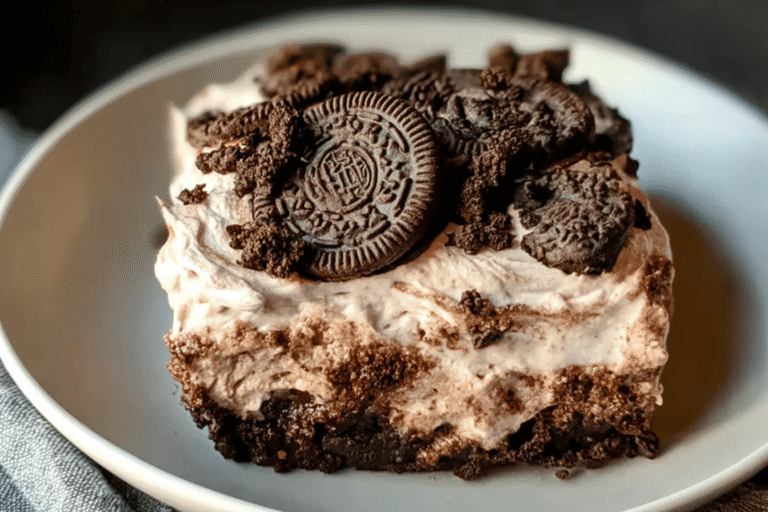
🍪 Delight in the creamy richness and crunchy texture of the Oreo Dirt Cake, a fun no-bake dessert perfect for gatherings.
🎉 This easy-to-make layered pudding treat is ideal for preparing ahead, combining smooth vanilla pudding with chocolate sandwich cookies for an irresistible experience.
- Total Time: 12 hours 20 minutes
- Yield: 8-10 servings
Ingredients
– 3½ cups milk (preferably 2% or whole milk)
– 6.8 ounces instant French vanilla pudding mix (two 3.4 oz packages; instant vanilla or chocolate pudding mix can be substituted)
– 28 chocolate sandwich cookies (one 14-ounce package, divided into chopped and crushed portions; other types of sandwich cookies may be used)
– ½ cup butter, softened to room temperature (salted or unsalted)
– 8 ounces cream cheese, softened to room temperature
– 1 cup powdered sugar
– 8 ounces whipped topping, thawed (extra creamy recommended; homemade whipped topping can be used)
– Gummy candies (optional for decoration)
Instructions
1-Prepare the pudding mixture: Whisk the instant French vanilla pudding mix and milk together until combined, then refrigerate to set.
2-Prepare the cookies: Remove 8 cookies and chop them into ¼-inch pieces for texture; crush the remaining cookies into fine crumbs using a food processor or rolling pin.
3-Make the creamy mixture: Cream together the softened butter and cream cheese until smooth. Beat in the powdered sugar until smooth. Add the chilled pudding mixture and beat on low speed to combine. Carefully fold in the whipped topping until uniform, avoiding overbeating.
4-Assemble in a trifle dish or serving container: Layer 2 cups of the pudding mixture, followed by ½ cup of the crushed cookies, and ¼ cup of the chopped cookies. Repeat the layers, ending with a final topping of crushed cookies.
5-Add gummy candies on top or between layers as desired.
6-Cover and refrigerate for at least 12 hours (overnight) to allow the flavors and textures to meld.
7-Serve chilled, using a spoon or fun scoopers for presentation.
Last Step:
Please leave a rating and comment letting us know how you liked this recipe! This helps our business to thrive and continue providing free, high-quality recipes for you.Notes
🍫 Use instant French vanilla pudding mix for best creaminess; chocolate pudding gives an earthier look.
🍪 Chopped cookie pieces add texture and enhance the “dirt” effect.
🧈 Ensure butter and cream cheese are softened for smooth mixing and fold in whipped topping carefully to preserve fluffiness.
- Prep Time: 20 minutes
- Chilling time: 12 hours
- Cook Time: 0 minutes
- Category: Dessert
- Method: No-Bake
- Cuisine: American
- Diet: Vegetarian
Nutrition
- Serving Size: 1/2 cup
- Calories: 333
- Sugar: 33.8 g
- Sodium: 407 mg
- Fat: 18.3 g
- Saturated Fat: 9.4 g
- Carbohydrates: 47.9 g
- Fiber: 0.9 g
- Protein: 4.2 g
- Cholesterol: 35.4 mg





