

Why You’ll Love These Peanut Butter Eggs
If you love easy no-bake treats, these Peanut Butter Eggs are the kind of recipe that feels like a win from the first bite. They bring together a creamy peanut butter center and a smooth chocolate shell, which makes them taste like a homemade candy shop treat without the fuss. With just a few pantry staples, you can make a sweet dessert that works for holidays, gifting, snack trays, or a quick chocolate craving.
- Easy to make: This Peanut Butter Eggs recipe takes about 20 minutes of prep and 30 minutes of chilling, so the total time is only about 50 minutes. You do not need a mixer, oven, or special candy tools.
- Great for busy days: Because the filling comes together in one bowl and the eggs are chilled instead of baked, this recipe is perfect for home cooks, parents, students, and anyone who wants a fast homemade dessert.
- Flexible for different diets: You can swap in crunchy peanut butter, natural peanut butter, almond butter, or cashew butter. You can also use dark chocolate or white chocolate coatings if that fits your taste better.
- Classic sweet flavor: The mix of salty peanut butter and milk chocolate gives these homemade Peanut Butter Eggs a rich, balanced flavor that feels familiar and special at the same time.
These homemade treats are a fun way to make something sweet with very little effort, and they store well too, which makes them great for make-ahead dessert planning.
If you like easy candy-style desserts, you may also enjoy easy no-bake desserts and simple chocolate treats from the blog.
For readers interested in ingredient basics, the discussion on peanut butter nutrition from Healthline is a helpful read, and the chocolate health notes from the Mayo Clinic add useful context.
Jump to:
- Why You’ll Love These Peanut Butter Eggs
- Essential Ingredients for Peanut Butter Eggs
- Main ingredients
- Ingredient notes and smart swaps
- Ingredient table at a glance
- How to Prepare the Perfect Peanut Butter Eggs: Step-by-Step Guide
- Step 1: Melt the peanut butter base
- Step 2: Add the sugar, salt, and vanilla
- Step 3: Shape the eggs
- Step 4: Chill until firm
- Step 5: Melt the chocolate
- Step 6: Dip and decorate
- Step 7: Let them set and serve
- Dietary Substitutions to Customize Your Peanut Butter Eggs
- Protein and main component alternatives
- Vegetable, sauce, and seasoning modifications
- Mastering Peanut Butter Eggs: Advanced Tips and Variations
- Pro cooking techniques
- Flavor variations
- Presentation tips
- Make-ahead options
- How to Store Peanut Butter Eggs: Best Practices
- Refrigeration
- Freezing
- Meal prep considerations
- FAQs: Frequently Asked Questions About Peanut Butter Eggs
- What ingredients are in homemade peanut butter eggs?
- How do you make peanut butter eggs at home?
- Can you use different chocolate for peanut butter eggs?
- What can I use instead of peanut butter in peanut butter eggs?
- How long do homemade peanut butter eggs last and how should I store them?
- Peanut Butter Eggs
- Ingredients
- Instructions
- Last Step:
- Notes
- Nutrition
- Did you make this recipe?
Essential Ingredients for Peanut Butter Eggs
These Peanut Butter Eggs use a short ingredient list, which is one reason they are so popular. Every item matters for texture, flavor, and coating, so measure carefully for the best results. The filling should be sweet but firm enough to shape, while the chocolate should melt smoothly for dipping.
Main ingredients
- 1 cup creamy peanut butter: This gives the filling its rich flavor and soft center. Creamy peanut butter works best for smooth shaping.
- 1/2 cup unsalted butter: Butter helps the mixture melt together and creates a softer, creamier bite.
- 2 cups powdered sugar: Powdered sugar sweetens the filling and helps it hold its egg shape.
- 1/4 teaspoon salt: Salt balances the sweetness and brings out the peanut butter flavor.
- 1 teaspoon vanilla extract: Vanilla adds warmth and makes the filling taste more like classic candy.
- 2 cups milk chocolate for dipping: Milk chocolate forms the shell and gives the finished eggs a sweet, smooth finish.
Ingredient notes and smart swaps
If you want more texture, use crunchy peanut butter instead of creamy. Natural peanut butter also works, but it may be softer, so you might need a little extra powdered sugar. Almond butter and cashew butter are also good choices, but adjust the sugar for consistency so the filling stays firm enough to shape.
Special dietary options:
- Vegan: Use plant-based butter and dairy-free chocolate chips or bars.
- Gluten-free: This recipe is naturally gluten-free if your chocolate is certified gluten-free.
- Lower sugar: You can reduce the powdered sugar slightly, but the filling may be softer and harder to shape.
Ingredient table at a glance
| Ingredient | Amount | Why it matters |
|---|---|---|
| Creamy peanut butter | 1 cup | Creates the base flavor and smooth texture |
| Unsalted butter | 1/2 cup | Helps the filling blend and soften |
| Powdered sugar | 2 cups | Sweetens and firms the mixture |
| Salt | 1/4 teaspoon | Balances the sweetness |
| Vanilla extract | 1 teaspoon | Adds warm flavor |
| Milk chocolate | 2 cups | Creates the candy shell |
How to Prepare the Perfect Peanut Butter Eggs: Step-by-Step Guide
Making Peanut Butter Eggs at home is simple, but a few small details help the filling hold its shape and the chocolate coating stay neat. The main idea is to make a firm peanut butter mixture, chill it well, and dip quickly so the chocolate sets smoothly. Wear gloves if the mixture feels sticky, and keep your sheet pan lined with parchment or wax paper before you start.
Step 1: Melt the peanut butter base
Place the peanut butter and unsalted butter in a medium bowl. Microwave until melted, then stir until smooth. If the mixture still looks a little lumpy, microwave it for an extra 10 seconds and stir again. This first step gives you a creamy base that blends evenly with the sugar.
Step 2: Add the sugar, salt, and vanilla
Mix in the salt and vanilla extract first, then add the powdered sugar gradually. Stir well after each addition so the mixture stays smooth and does not clump. As you mix, it should turn into a soft dough that is thick enough to shape into eggs. If you are using almond butter, cashew butter, or natural peanut butter, add a little more sugar if the mixture feels too soft.
Step 3: Shape the eggs
Scoop the mixture into 2-tablespoon portions. Roll each portion into a ball, then gently pinch and shape it into an egg. Place each one on a lined sheet pan. This recipe makes 12 eggs, so try to keep the sizes even for better dipping and serving. If the filling sticks to your hands, chill it for a few minutes or wear gloves to make shaping easier.
Step 4: Chill until firm
Move the shaped eggs to the fridge or freezer. Chilling is important because cold eggs are much easier to dip in warm chocolate. A fridge chill of about 30 minutes works well, but a shorter freeze can also help if you are in a hurry. The eggs should feel firm on the outside before you coat them.
Step 5: Melt the chocolate
Put the milk chocolate in a microwave-safe bowl and melt it in 30-second bursts, stirring between each round. Stop as soon as the chocolate is smooth. Overheating can make it thick and hard to work with, so stir often. If you want, you can also use white chocolate or dark chocolate for a different look and flavor.
Step 6: Dip and decorate
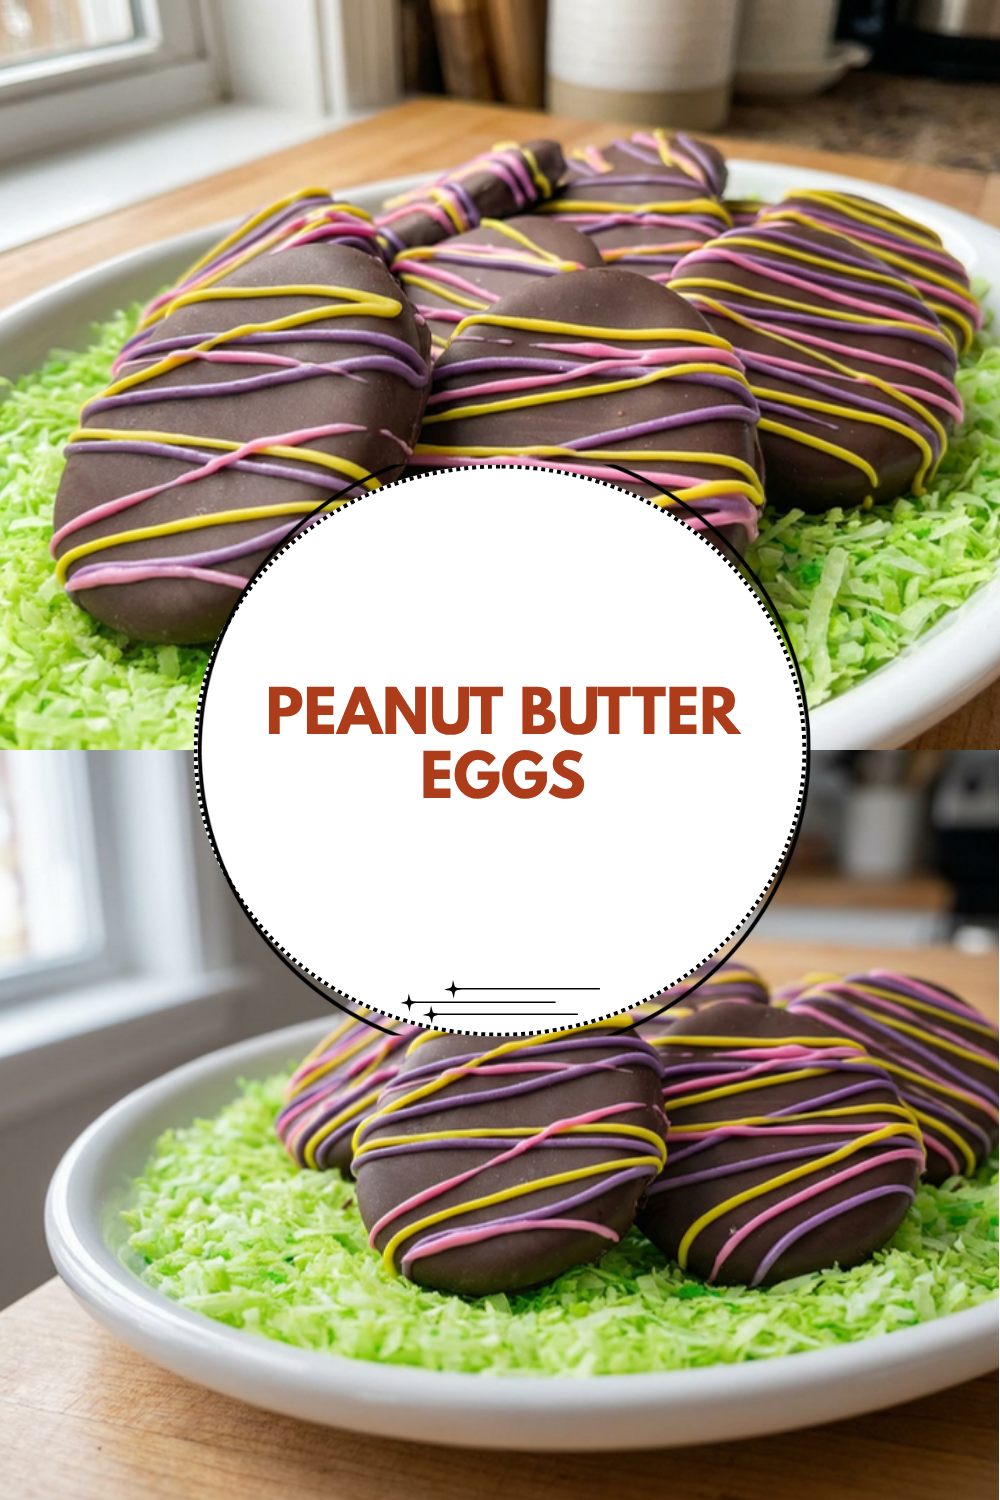
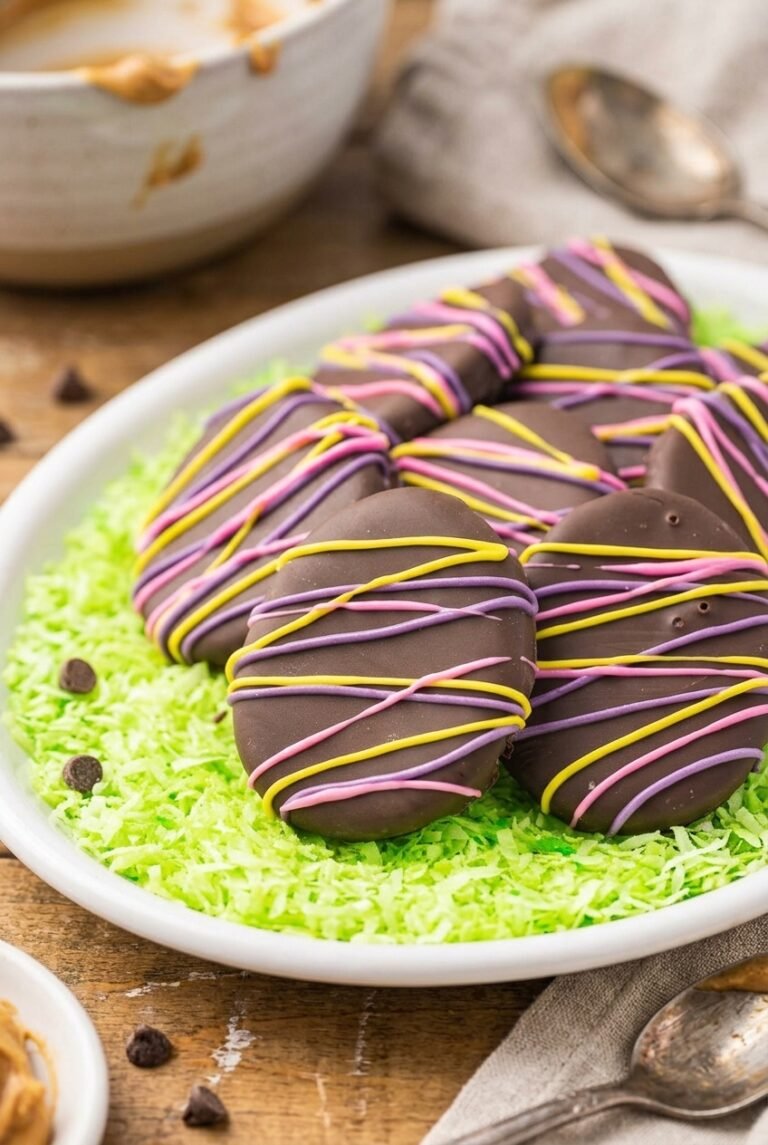
Take the chilled eggs from the fridge or freezer and dip them into the melted chocolate one at a time. Work quickly so the filling does not soften. Tap off the extra chocolate and place each coated egg back on the lined pan. Drizzle with extra melted chocolate if you want a decorative finish.
Step 7: Let them set and serve
Let the chocolate harden at room temperature, or chill again for faster setting. Once the coating is firm, the Peanut Butter Eggs are ready to serve. You can enjoy them right away or store them for later in an airtight container.
Quick tip: chilled eggs dip cleaner, so if the coating starts slipping, pop the tray back into the fridge for a few minutes before finishing the batch.

Dietary Substitutions to Customize Your Peanut Butter Eggs
Protein and main component alternatives
Although this recipe is built around peanut butter, you can change the nut butter to fit your pantry or dietary needs. Almond butter gives the filling a lighter, slightly nutty flavor. Cashew butter makes the center richer and more buttery. Sunflower seed butter can work too if you need a nut-free option, though the flavor will be different.
For the chocolate coating, dark chocolate gives a deeper taste that balances the sweet filling, while white chocolate creates a softer, sweeter candy-style finish. If you want a swirl effect, use half milk chocolate and half white chocolate. Just remember that different chocolates may set at different speeds, so test a small batch first if you are trying a new coating.
Vegetable, sauce, and seasoning modifications
This recipe does not use vegetables or sauces, but you can still make small flavor changes. A pinch of cinnamon adds warmth, while a tiny bit of extra vanilla makes the filling taste more dessert-like. If you want a less sweet filling, reduce the powdered sugar slightly and rely on a richer chocolate coating for balance.
For a lower sugar version, use a slightly smaller amount of powdered sugar and choose dark chocolate instead of milk chocolate. For a smoother finish, warm the chocolate slowly and stir often so it stays easy to dip. If the mixture is too soft, add more sugar; if it is too firm, let it sit for a few minutes before shaping.
Mastering Peanut Butter Eggs: Advanced Tips and Variations
Once you make this Peanut Butter Eggs recipe once, it becomes easy to adjust for different tastes and occasions. A few small tricks can help you get cleaner shapes, smoother dipping, and a more polished finish. These tips are especially useful if you are making the candy for gifts, parties, or holiday trays.
Pro cooking techniques
Use gloves when shaping the filling if the mixture feels sticky. This makes the process faster and keeps the eggs smooth. If the peanut butter mixture seems too soft, chill it briefly before shaping. If the chocolate thickens while you dip, warm it again in short microwave bursts and stir until smooth.
For the cleanest coating, dip the eggs quickly while they are still cold. Let the excess chocolate drip off before placing them on the tray. A fork or dipping tool can help, but a quick hand dip works fine too. If the coating looks uneven, a second light drizzle can hide the rough spots.
Flavor variations
There are many easy ways to change the flavor without changing the structure of the recipe. Try crunchy peanut butter for a little texture. Use natural peanut butter if that is what you have, but expect a softer filling. Almond butter and cashew butter both make nice swaps, especially when you want a different nut flavor.
For the outside, milk chocolate gives the classic candy taste, but dark chocolate adds a richer contrast. White chocolate makes the eggs look festive, which is great for spring trays or gift boxes. You can also sprinkle a little sea salt on top before the coating sets for a sweet-salty finish.
Presentation tips
Drizzle the finished eggs with extra melted chocolate for a bakery-style look. If you are serving them for Easter, place them in mini paper cups or a decorative box. A simple tray lined with parchment also looks neat and keeps the candy easy to grab.
Make-ahead options
These eggs are ideal for planning ahead. You can shape the filling a day early, chill it overnight, and dip the next day. You can also make the full batch and freeze the finished candies for later. That makes them a smart choice for busy weeks when you want dessert ready to go.
How to Store Peanut Butter Eggs: Best Practices
Proper storage keeps Peanut Butter Eggs tasting fresh and helps the chocolate shell stay firm. Because the filling is soft, it is best to store them in a cool place rather than leaving them out too long. The good news is that they keep well, so they are great for make-ahead treats and holiday prep.
Refrigeration
Store the eggs in an airtight container in the refrigerator for short-term storage. To keep them from sticking together, place parchment between layers. They should stay fresh for about 1 to 2 weeks when chilled properly. If you want the best texture, let them sit at room temperature for a few minutes before serving.
Freezing
For longer storage, freeze the eggs for up to 3 months. Wrap each one individually or place them in a freezer-safe bag with parchment between layers. Label the container with the date so you can keep track of freshness. When you want to eat them, thaw them in the fridge overnight.
Meal prep considerations
If you are making a batch for a party, gift box, or snack prep, make the eggs a few days ahead and keep them refrigerated until needed. Avoid leaving them at room temperature for more than 2 hours, especially in warm weather, because the chocolate may soften. This recipe is one of those treats that is easy to batch, store, and share.
FAQs: Frequently Asked Questions About Peanut Butter Eggs
What ingredients are in homemade peanut butter eggs?
Homemade peanut butter eggs require just six basic ingredients: 1 cup creamy peanut butter, 1/4 cup unsalted butter (softened), 2 cups powdered sugar, 1/4 teaspoon salt, 1 teaspoon vanilla extract, and 12 ounces milk chocolate chips or bars for coating. These create a sweet, creamy filling similar to Reese’s with a chocolate shell. Measure everything precisely for the right texture—too much peanut butter makes it oily, while extra powdered sugar firms it up. Melt the chocolate gently in a double boiler or microwave in 30-second bursts, stirring between each. This simple list keeps the recipe quick and pantry-friendly, ready in under an hour. Prep the filling first by mixing peanut butter, butter, sugar, salt, and vanilla until smooth, then chill before shaping.
How do you make peanut butter eggs at home?
To make peanut butter eggs, start by beating 1 cup peanut butter, 1/4 cup softened butter, 2 cups powdered sugar, 1/4 tsp salt, and 1 tsp vanilla until a dough forms. Chill for 30 minutes, then shape into 20-24 egg shapes (about 1-2 tbsp each) on a parchment-lined tray. Freeze 15 minutes. Melt 12 oz milk chocolate chips with 1 tbsp shortening in a microwave (30-second intervals, stirring). Dip each egg using a fork, tap off excess, and place on parchment. Drizzle extra chocolate if desired. Refrigerate 20 minutes to set. Store in an airtight container in the fridge up to 2 weeks or freeze for 3 months. This no-bake method yields 20 eggs with perfect shape and crunch—total time is 1 hour plus chilling.
Can you use different chocolate for peanut butter eggs?
Yes, swap milk chocolate for dark, white, or even candy melts in peanut butter eggs. Use 12 oz chips of your choice—dark adds bitterness to balance sweetness, white chocolate gives a creamy Easter vibe (dye it pastel with food coloring for designs). Melt with 1 tbsp shortening for smooth dipping. The process stays simple: chill shaped peanut butter filling, dip frozen eggs, and set on parchment. Test a small batch first, as white chocolate sets quicker and firmer. For variety, mix half milk and half white for a swirled top. This flexibility makes eggs customizable for holidays—kids love colorful versions. Always stir melted chocolate well to avoid lumps, ensuring even coating every time.
What can I use instead of peanut butter in peanut butter eggs?
Replace peanut butter with almond, cashew, or sunflower seed butter for nut-free options in these eggs. Use 1 cup of any smooth nut or seed butter, but adjust for consistency—unsweetened varieties need extra 1/4-1/2 cup powdered sugar. Mix with 1/4 cup butter, 2 cups powdered sugar, salt, and vanilla as usual. Taste and tweak sweetness before chilling and shaping. Almond butter yields a lighter flavor, cashew a richer creaminess. For allergies, no-nut spreads work but may soften faster, so freeze eggs longer before dipping in chocolate. This swap keeps the recipe intact, producing 20 eggs with similar texture. Experiment in small batches to nail your perfect combo—great for dietary needs without sacrificing taste.
How long do homemade peanut butter eggs last and how should I store them?
Homemade peanut butter eggs stay fresh 1-2 weeks in the fridge in an airtight container, layered with parchment to prevent sticking. For longer storage, freeze up to 3 months—wrap individually in plastic, then bag. Thaw in fridge overnight for best texture. Avoid room temperature over 2 hours to prevent melting, especially in warm weather. If they soften, re-chill briefly before serving. Each egg has about 150-200 calories, depending on size. Label freezer bags with dates for easy tracking. This method preserves the creamy center and crisp shell, making them ideal for Easter baskets or gifting. Pro tip: bring to room temp 10 minutes before eating for peak flavor.
Peanut Butter Eggs
🥜🍫 Creamy peanut butter eggs encased in snappy milk chocolate – homemade Reese’s rival without factory fillers!
🥚 20-min no-bake bliss chills to Easter-ready treats; customizable nut butters for endless peanutty perfection.
- Total Time: 50 minutes
- Yield: 12 eggs
Ingredients
– 1 cup creamy peanut butter for base flavor and smooth texture
– 1/2 cup unsalted butter for blending and softening the filling
– 2 cups powdered sugar for sweetening and firming the mixture
– 1/4 teaspoon salt for balancing the sweetness
– 1 teaspoon vanilla extract for warm flavor
– 2 cups milk chocolate for candy shell
Instructions
1-Step 1: Melt the peanut butter base Place the peanut butter and unsalted butter in a medium bowl. Microwave until melted, then stir until smooth. If the mixture still looks a little lumpy, microwave it for an extra 10 seconds and stir again. This first step gives you a creamy base that blends evenly with the sugar.
2-Step 2: Add the sugar, salt, and vanilla Mix in the salt and vanilla extract first, then add the powdered sugar gradually. Stir well after each addition so the mixture stays smooth and does not clump. As you mix, it should turn into a soft dough that is thick enough to shape into eggs. If you are using almond butter, cashew butter, or natural peanut butter, add a little more sugar if the mixture feels too soft.
3-Step 3: Shape the eggs Scoop the mixture into 2-tablespoon portions. Roll each portion into a ball, then gently pinch and shape it into an egg. Place each one on a lined sheet pan. This recipe makes 12 eggs, so try to keep the sizes even for better dipping and serving. If the filling sticks to your hands, chill it for a few minutes or wear gloves to make shaping easier.
4-Step 4: Chill until firm Move the shaped eggs to the fridge or freezer. Chilling is important because cold eggs are much easier to dip in warm chocolate. A fridge chill of about 30 minutes works well, but a shorter freeze can also help if you are in a hurry. The eggs should feel firm on the outside before you coat them.
5-Step 5: Melt the chocolate Put the milk chocolate in a microwave-safe bowl and melt it in 30-second bursts, stirring between each round. Stop as soon as the chocolate is smooth. Overheating can make it thick and hard to work with, so stir often. If you want, you can also use white chocolate or dark chocolate for a different look and flavor.
6-Step 6: Dip and decorate Take the chilled eggs from the fridge or freezer and dip them into the melted chocolate one at a time. Work quickly so the filling does not soften. Tap off the extra chocolate and place each coated egg back on the lined pan. Drizzle with extra melted chocolate if you want a decorative finish.
7-Step 7: Let them set and serve Let the chocolate harden at room temperature, or chill again for faster setting. Once the coating is firm, the Peanut Butter Eggs are ready to serve. You can enjoy them right away or store them for later in an airtight container.
Last Step:
Please leave a rating and comment letting us know how you liked this recipe! This helps our business to thrive and continue providing free, high-quality recipes for you.Notes
🧤 Wear gloves when shaping sticky PB dough for mess-free hands.
🔥 Microwave PB-butter lumps extra 10 seconds for silky base.
🍫 Dip super-chilled eggs quickly; reheat chocolate gently if thickening.
- Prep Time: 20 minutes
- Chilling: 30 minutes
- Category: Desserts
- Method: No-Cook
- Cuisine: American
- Diet: Vegetarian
Nutrition
- Serving Size: 1 egg
- Calories: 423 kcal
- Sugar: 37g
- Sodium: 147mg
- Fat: 29g
- Saturated Fat: 13g
- Unsaturated Fat: 14g
- Trans Fat: 0.3g
- Carbohydrates: 42g
- Fiber: 3g
- Protein: 6g
- Cholesterol: 20mg





