

Homemade Dog Treats You Can Make in Minutes
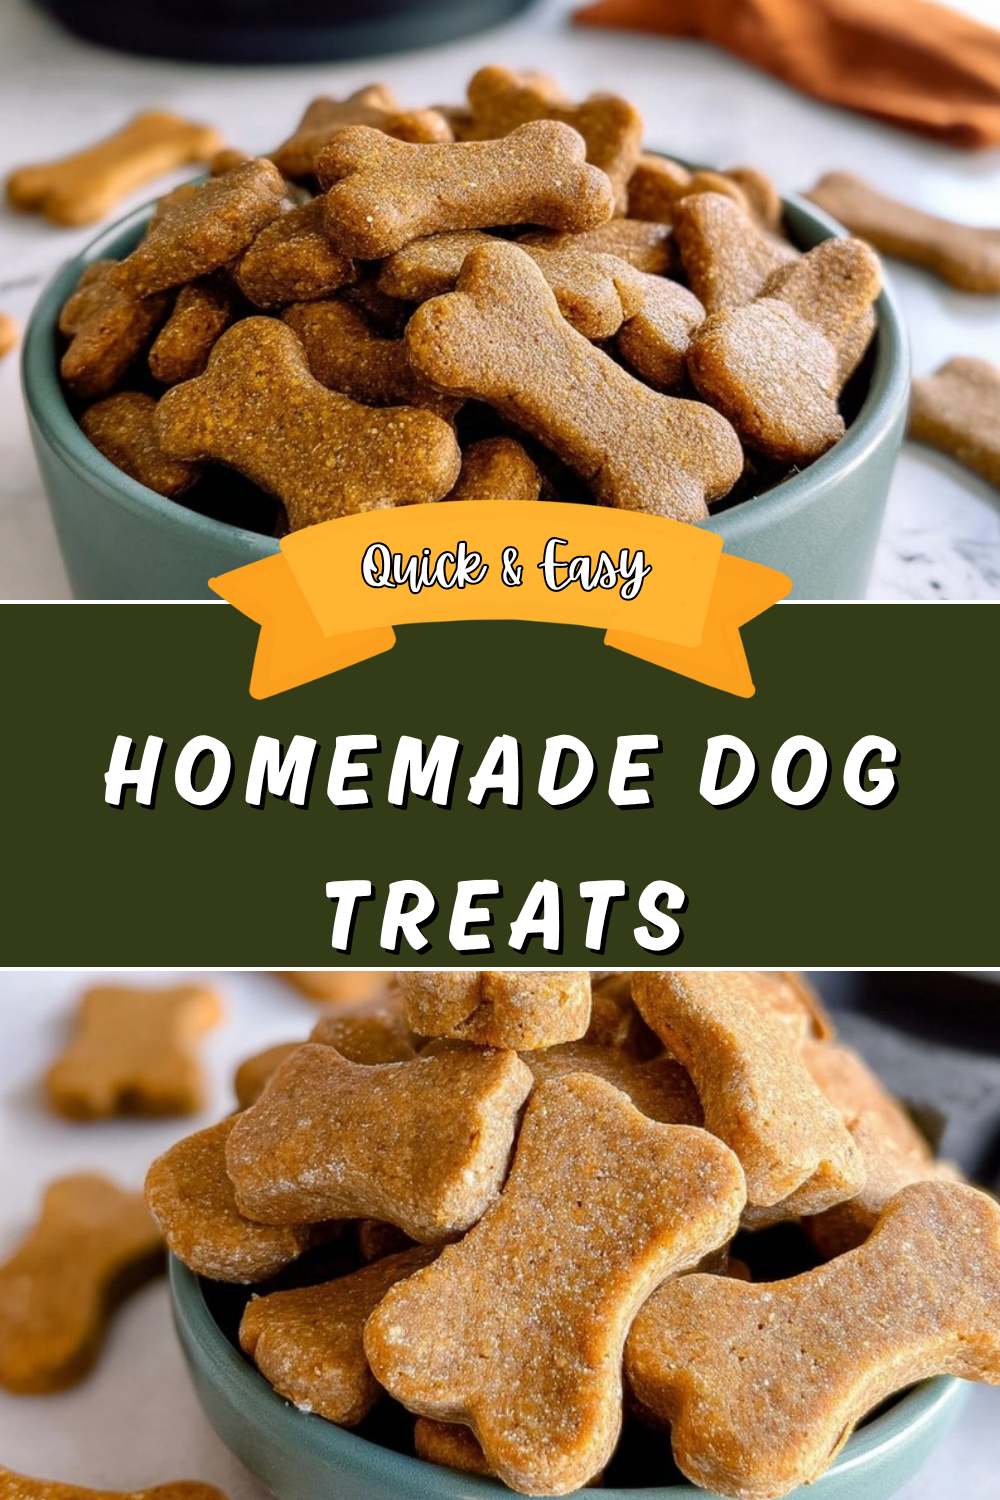
If you have ripe bananas sitting on the counter and a jar of natural peanut butter in the pantry, you are already halfway to making Homemade Dog Treats your pup will be excited about. This simple recipe uses just three ingredients, comes together fast, and bakes into wholesome snacks that feel a lot more special than anything from a store shelf. It is the kind of recipe busy home cooks appreciate because it fits easily into a regular day.
Before you get started, it helps to know that these treats are made with dog-friendly ingredients only. The oats give the dough structure, the bananas add natural sweetness, and the peanut butter brings that irresistible flavor dogs seem to go wild for. For more ideas on simple pet-friendly baking, you may also like this easy homemade dog treat recipe from another trusted kitchen resource.
Homemade treats are a fun way to show your dog a little extra love, and this recipe keeps things simple enough for even a first-time baker.
Jump to:
- Homemade Dog Treats You Can Make in Minutes
- Why You’ll Love This Homemade Dog Treats Recipe
- Ingredients for Homemade Dog Treats
- How to Prepare the Perfect Homemade Dog Treats: Step-by-Step Guide
- First Step: Prep the oven and baking sheet
- Second Step: Turn the oats into oat flour
- Third Step: Mix in the bananas and peanut butter
- Fourth Step: Fix the texture if needed
- Fifth Step: Roll and shape the dough
- Sixth Step: Bake until dry and golden
- Final Step: Cool and serve
- Dietary Substitutions to Customize Your Homemade Dog Treats
- Protein and Main Component Alternatives
- Vegetable, Sauce, and Seasoning Modifications
- Mastering Homemade Dog Treats: Advanced Tips and Variations
- Pro cooking techniques
- Flavor variations
- Presentation tips
- Make-ahead options
- How to Store Homemade Dog Treats
- Nutrition Facts for Homemade Dog Treats
- FAQs: Frequently Asked Questions About Homemade Dog Treats
- What ingredients do I need for simple homemade dog treats with peanut butter?
- Can dogs eat peanut butter in homemade treats, and which kind is safe?
- How do I bake homemade peanut butter dog treats?
- How do I store homemade dog treats made with oats and peanut butter?
- What if my homemade dog treat dough is too sticky to roll out?
- Homemade Dog Treats
- Ingredients
- Instructions
- Last Step:
- Notes
- Nutrition
- Did you make this recipe?
Why You’ll Love This Homemade Dog Treats Recipe
- Easy preparation: You only need 15 minutes of prep time and a few basic kitchen tools. There is no fancy mixing, no long list of ingredients, and no complicated steps. Even if you are juggling work, family, or classes, this recipe fits into a busy schedule.
- Wholesome ingredients: These Homemade Dog Treats use oats, ripe bananas, and natural peanut butter. Oats offer fiber, bananas bring potassium, and peanut butter adds protein and healthy fats. Each treat is around 40 calories, which makes them a nice occasional snack.
- Flexible for your kitchen: You can grind the oats in a food processor, blender, or coffee grinder. If you do not have cookie cutters, just cut the dough into squares. This recipe works well with common pantry staples.
- Big flavor for pups: The mix of banana and peanut butter gives these treats a smell and taste dogs usually cannot resist. That means you may have a very enthusiastic helper sitting by the oven door.
Another nice bonus is that you know exactly what is in each bite. There are no preservatives, no mystery fillers, and no ingredients you cannot pronounce. If you enjoy making simple snacks from scratch for your family, this kind of recipe feels right at home in your kitchen. For another helpful read on oats in dog treats, check out this guide to the benefits of oats for dogs.
Ingredients for Homemade Dog Treats
Here is the full ingredient list for this recipe. Be sure to use dog-safe peanut butter with no xylitol, added sugar, salt, or extra oils.
- 2 cups oats, whole oats, 1-minute oats, or instant oats without added sugars or ingredients
- 2 medium ripe bananas
- 1/2 cup natural peanut butter, only peanuts as the ingredient, with no added oils, sugars, salt, or xylitol
Optional rolling flour: whole wheat flour, more ground oats, or another dog-safe flour, as needed for dusting the work surface.
How to Prepare the Perfect Homemade Dog Treats: Step-by-Step Guide
First Step: Prep the oven and baking sheet
Start by preheating your oven to 300°F, or 150°C. Line a baking sheet with parchment paper so the treats do not stick. This low baking temperature helps the treats dry out slowly, which gives them a nice crisp texture without burning the bottoms too quickly. Since these treats are small, setting up the pan first saves time once the dough is ready.
Second Step: Turn the oats into oat flour
Add the 2 cups of oats to a food processor, blender, or coffee grinder and pulse until they become a fine powder. You are basically making oat flour. This step matters because the fine texture helps the dough hold together better and makes rolling easier. If you only have a blender, work in short bursts so the oats do not clump up too much.
Third Step: Mix in the bananas and peanut butter
Peel the bananas and add them to the ground oats along with 1/2 cup natural peanut butter. Blend or process until a sticky dough forms. If you are mixing by hand, mash the bananas very well first, then stir everything together in a large bowl. The dough should be soft and a little tacky, but still workable.
Fourth Step: Fix the texture if needed
If the dough feels too sticky, chill it for 20 to 30 minutes. You can also add a little more oat flour or whole wheat flour, one tablespoon at a time, until it becomes easier to handle. This is a very normal part of working with ripe bananas, so do not worry if the dough looks a little messy at first. A short chill often makes the biggest difference.
Fifth Step: Roll and shape the dough
Lightly flour your work surface with whole wheat flour, more ground oats, or another dog-safe flour. Roll the dough out to about 1/4 inch thick. That thickness is a sweet spot because it helps the treats bake evenly, stay a little crisp, and avoid over-browning. If you want, you can cut them into fun shapes with cookie cutters. If not, a knife works just fine for simple squares or rectangles.
Sixth Step: Bake until dry and golden
Place the cut treats on the prepared baking sheet with a little space between each one. Bake for 25 to 30 minutes, or until the treats look puffed, dry, and dark golden brown on the bottoms. Every oven runs a little differently, so begin checking near the 25-minute mark. If your treats are very small, they may bake a bit faster. A first batch is a good chance to see how your oven behaves.
Final Step: Cool and serve
Let the treats cool completely before serving them to your dog. They will firm up as they cool, which makes them easier to store and nicer for your pup to chew. Once cooled, you can serve one as a reward, add one to a training routine, or tuck a few away for later. This recipe makes approximately 40 treats, depending on the size of your cutter.
| Recipe Detail | Amount |
|---|---|
| Prep time | 15 minutes |
| Cook time | 30 minutes |
| Total time | 45 minutes |
| Yield | About 40 treats |
| Oven temperature | 300°F, 150°C |

Dietary Substitutions to Customize Your Homemade Dog Treats
Protein and Main Component Alternatives
If you need a small adjustment, the main ingredient swap is usually about the flour base rather than the peanut butter. Oats are the most reliable choice because they bind well and are easy to find. If you are out of oats, you can use more ground oats made fresh in a blender or coffee grinder, or a dog-safe flour that works for your pup.
For a little extra variety, you can mix in small amounts of frozen blueberries or a pinch of egg shell powder if your vet says it is okay. These additions can change the flavor and texture a bit, so start small. Because dogs can be sensitive to new foods, it is smart to test one ingredient change at a time.
Vegetable, Sauce, and Seasoning Modifications
This recipe does not need seasoning, which is part of the charm. Dogs do not need salt, sugar, or spice, and keeping the ingredient list short is usually best. If you want to try a seasonal twist, a small amount of mashed pumpkin or a few blueberries can be folded in with the dough. Just keep the texture in mind and add a little more oat flour if the dough becomes too soft.
When choosing peanut butter, always read the label carefully. The only safe kind for this recipe is natural peanut butter with peanuts as the sole ingredient. Avoid any jar with xylitol, which is dangerous for dogs, along with added oils and sweeteners. For dogs with known food sensitivities, ask your vet before offering a new treat.
Mastering Homemade Dog Treats: Advanced Tips and Variations
Pro cooking techniques
For the best texture, roll the dough to about 1/4 inch thick and keep the pieces fairly even in size. That helps them bake at the same rate. If you like a firmer treat, leave them in the oven for a few extra minutes, but watch closely so the bottoms do not get too dark. A cooling rack also helps them dry out a bit more after baking.
If you do not own a food processor, do not let that stop you. A blender or coffee grinder works well for turning oats into flour. Then you can mix the mashed banana and peanut butter by hand. This recipe is very forgiving, which is one reason it is such a favorite for home bakers.
Flavor variations
You can keep things classic or add a small twist. Frozen blueberries are a popular add-in, and they bring a little color too. Some dog owners also add a bit of egg shell powder for calcium, but that should only be done if you know it is safe for your dog and used in the proper amount. Since the base recipe already has a good flavor, even small changes go a long way.
Presentation tips
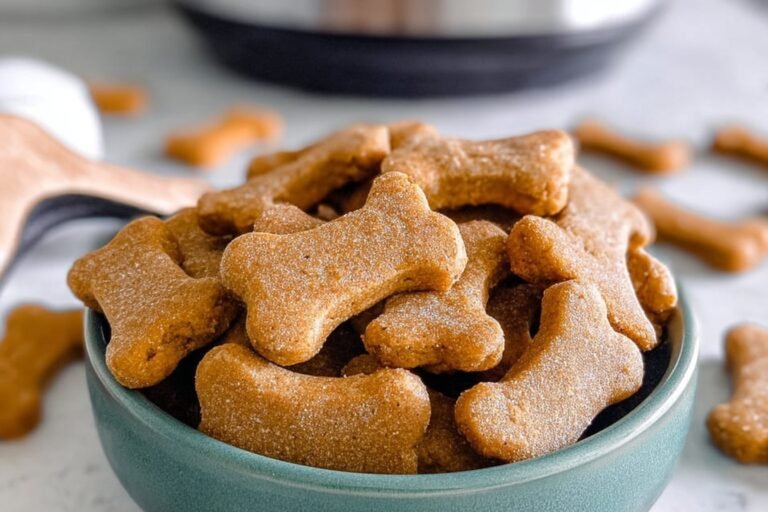
Cookie cutters make the treats look cute for gift bags, holidays, or pet birthdays. Bone shapes are always a hit, but hearts and stars are fun too. If you want less fuss, simply slice the dough into neat squares. Dogs will not care what shape they are, but humans always seem to enjoy a pretty batch.
Make-ahead options
This recipe is perfect for batch baking. Since it makes about 40 treats, you can bake once and have snacks ready for the week. If you are meal prepping for your pup, freeze part of the batch right away so you always have some on hand. Homemade treats have no preservatives, so making them ahead and freezing them is a smart move.
How to Store Homemade Dog Treats
Once the treats are completely cool, store them in an airtight container. At room temperature, they will keep for up to 1 week. In the fridge, they stay fresh for up to 2 weeks. If you want them to last even longer, freeze them.
For freezing, place the treats in a freezer-safe bag or container and label it with the date. They can be frozen for longer storage and will stay firmer that way too. When you are ready to use them, let them thaw at room temperature before serving. Because homemade treats do not contain preservatives, they have a shorter shelf life than store-bought versions, so always check for any odd smell, discoloration, or moisture before giving one to your dog.
| Storage Method | How Long It Lasts | Best For |
|---|---|---|
| Room temperature | Up to 1 week | Short-term use in cool, dry spaces |
| Fridge | Up to 2 weeks | Keeping treats a little fresher |
| Freezer | Longer storage | Batch baking and firmer treats |
Nutrition Facts for Homemade Dog Treats
Each treat is about 40 calories, depending on the size of your cutter. That makes them a nice occasional snack for most dogs when given in moderation. The oats, bananas, and peanut butter bring a mix of carbohydrates, protein, fat, and fiber, along with small amounts of vitamins and minerals.
- Calories: 40 kcal
- Carbohydrates: 5 g
- Protein: 1 g
- Fat: 2 g
- Sodium: 15 mg
- Potassium: 57 mg
- Fiber: 1 g
- Sugar: 1 g
- Vitamins and minerals: vitamin A, vitamin C, calcium, and iron
As with any treat, keep portions sensible and adjust based on your dog’s size, diet, and activity level.
FAQs: Frequently Asked Questions About Homemade Dog Treats
What ingredients do I need for simple homemade dog treats with peanut butter?
These easy homemade dog treats use just three ingredients: 1 cup natural peanut butter (only peanuts, no xylitol, sugars, or oils), 2-3 ripe bananas, and 2-3 cups oats (whole, 1-minute, or instant without additives). Mash the bananas until smooth, mix in peanut butter, then stir in oats gradually until a dough forms. Natural peanut butter is key because processed versions can harm dogs. This recipe yields about 30-40 treats depending on cutter size. Always check labels to avoid toxic additives. Prep time is 15 minutes, plus baking. These treats are grain-inclusive but oat-based for binding and digestibility.
Can dogs eat peanut butter in homemade treats, and which kind is safe?
Yes, dogs can safely eat natural peanut butter in moderation as part of homemade treats, but only varieties listing peanuts as the sole ingredient—no xylitol (toxic to dogs), added sugars, or hydrogenated oils. Xylitol causes rapid blood sugar drops and liver failure in dogs, even in small amounts. Use 1 cup for a standard batch. Combine with mashed ripe bananas (2-3) and oats (2-3 cups) for a complete recipe. Test a small amount first if your dog has allergies. Vets recommend peanut butter for its healthy fats and protein, but limit to 10% of daily calories to avoid pancreatitis.
How do I bake homemade peanut butter dog treats?
Preheat oven to 300°F (150°C). Roll dough ¼-inch thick on a surface dusted with oat flour or whole wheat flour to prevent sticking. Cut into shapes with cookie cutters or squares. Place on parchment-lined baking sheets. Bake 25-30 minutes until treats puff up and edges turn dark golden brown—do not overbake to keep them crisp outside and chewy inside. Cool completely on racks; they harden as they cool. This low temp ensures even drying without burning. Yields crisp treats lasting weeks if stored properly. Monitor first batch for your oven’s quirks.
How do I store homemade dog treats made with oats and peanut butter?
Store cooled treats in an airtight container at room temperature for up to 1 week, in the refrigerator for 2 weeks, or freeze for 2-3 months. Freezing preserves freshness best—thaw at room temp before serving. Label containers with dates. Avoid moisture to prevent mold; check for off smells or discoloration before giving to your dog. Room temp works in cool, dry climates. A batch of 30-40 treats from 1 cup peanut butter, bananas, and oats provides plenty. This keeps them safe and maintains texture—crisp and chewy.
What if my homemade dog treat dough is too sticky to roll out?
If dough sticks, chill it in the fridge for 20-30 minutes to firm up. Add oat flour, ground oats, or whole wheat flour 1 tablespoon at a time until workable—start with blender-ground oats if no food processor. Press dough directly into a parchment-lined pan and score into squares instead of rolling. Aim for ¼-inch thickness for even baking at 300°F for 25-30 minutes. This fixes stickiness from ripe bananas or warm peanut butter. Test small batch tweaks; sorghum or cassava flours may crumble more than oats. Results in perfect, non-sticky treats every time.
Homemade Dog Treats
🐶 Treat your furry bestie to easy, 3-ingredient homemade goodies packed with natural flavors they’ll beg for more!
🍌 Healthy, preservative-free banana-oat-peanut butter bites – quick to bake and perfect for happy, tail-wagging rewards!
- Total Time: 45 minutes
- Yield: 40 treats
Ingredients
Instructions
1-First Step: Prep the oven and baking sheet Start by preheating your oven to 300°F, or 150°C. Line a baking sheet with parchment paper so the treats do not stick. This low baking temperature helps the treats dry out slowly, which gives them a nice crisp texture without burning the bottoms too quickly. Since these treats are small, setting up the pan first saves time once the dough is ready.
2-Second Step: Turn the oats into oat flour Add the 2 cups of oats to a food processor, blender, or coffee grinder and pulse until they become a fine powder. You are basically making oat flour. This step matters because the fine texture helps the dough hold together better and makes rolling easier. If you only have a blender, work in short bursts so the oats do not clump up too much.
3-Third Step: Mix in the bananas and peanut butter Peel the bananas and add them to the ground oats along with 1/2 cup natural peanut butter. Blend or process until a sticky dough forms. If you are mixing by hand, mash the bananas very well first, then stir everything together in a large bowl. The dough should be soft and a little tacky, but still workable.
4-Fourth Step: Fix the texture if needed If the dough feels too sticky, chill it for 20 to 30 minutes. You can also add a little more oat flour or whole wheat flour, one tablespoon at a time, until it becomes easier to handle. This is a very normal part of working with ripe bananas, so do not worry if the dough looks a little messy at first. A short chill often makes the biggest difference.
5-Fifth Step: Roll and shape the dough Lightly flour your work surface with whole wheat flour, more ground oats, or another dog-safe flour. Roll the dough out to about 1/4 inch thick. That thickness is a sweet spot because it helps the treats bake evenly, stay a little crisp, and avoid over-browning. If you want, you can cut them into fun shapes with cookie cutters. If not, a knife works just fine for simple squares or rectangles.
6-Sixth Step: Bake until dry and golden Place the cut treats on the prepared baking sheet with a little space between each one. Bake for 25 to 30 minutes, or until the treats look puffed, dry, and dark golden brown on the bottoms. Every oven runs a little differently, so begin checking near the 25-minute mark. If your treats are very small, they may bake a bit faster. A first batch is a good chance to see how your oven behaves.
7-Final Step: Cool and serve Let the treats cool completely before serving them to your dog. They will firm up as they cool, which makes them easier to store and nicer for your pup to chew. Once cooled, you can serve one as a reward, add one to a training routine, or tuck a few away for later. This recipe makes approximately 40 treats, depending on the size of your cutter.
Last Step:
Please leave a rating and comment letting us know how you liked this recipe! This helps our business to thrive and continue providing free, high-quality recipes for you.Notes
🥜 Always use natural peanut butter with only peanuts – no xylitol or additives which can be toxic to dogs!
❄️ Chill sticky dough for 20-30 minutes or add more oat flour for easier rolling.
📦 Freeze extras for longer freshness and firmer texture straight from the freezer.
- Prep Time: 15 minutes
- Cook Time: 30 minutes
- Category: Pet Treats
- Method: Baked
- Diet: Dog-Safe
Nutrition
- Serving Size: 1 treat
- Calories: 40 kcal
- Sugar: 1 g
- Sodium: 15 mg
- Fat: 2 g
- Saturated Fat: 0.5 g
- Unsaturated Fat: 1.5 g
- Trans Fat: 0 g
- Carbohydrates: 5 g
- Fiber: 1 g
- Protein: 1 g
- Cholesterol: 0 mg





