

Why You’ll Love This Whole Wheat Bread Recipe
This Whole Wheat Bread Recipe is the kind of bake that fits real life. It uses simple pantry ingredients, gives you a soft homemade loaf, and fills your kitchen with that warm bread smell that makes everyone wander in to check the oven. If you have been wanting a loaf that feels doable on a busy weeknight or during a quiet weekend, this one is a great place to start.
- Easy enough for beginners: The sponge method gives the dough a head start, so the process feels manageable even if you are new to bread baking. The steps are clear, the rise times are forgiving, and the loaf pan helps the bread hold its shape.
- Good for everyday eating: Whole wheat flour brings more fiber and a nutty flavor, making this a satisfying choice for toast, sandwiches, and breakfast slices. For readers who like to learn more about whole grain benefits, see these whole grain benefits from Healthline.
- Flexible for many households: This homemade whole wheat bread works well for busy parents, students, and working professionals because it can be made ahead, frozen, or adapted with part bread flour for a lighter crumb.
- Great flavor and texture: Honey, butter, and a little lemon juice give the loaf a soft, balanced taste while helping tame the natural bitterness that sometimes comes with whole wheat flour.
With a little patience during the rises, you will end up with a loaf that feels bakery worthy but still practical for everyday baking.
If you enjoy simple homemade baking, you may also like pairing this loaf with a cozy bowl from our kitchen, such as summer corn chowder or black bean and corn salad.
Jump to:
- Why You’ll Love This Whole Wheat Bread Recipe
- Essential Ingredients for Whole Wheat Bread Recipe
- Ingredients for the sponge
- Ingredients for the dough
- Optional oat topping
- Special dietary options
- How to Prepare the Perfect Whole Wheat Bread Recipe: Step-by-Step Guide
- First step: Make the sponge
- Second step: Mix in the dough ingredients
- Third step: Knead until smooth and elastic
- Fourth step: Let the dough rise
- Fifth step: Shape the loaf
- Sixth step: Proof before baking
- Seventh step: Add the oat topping if you want it
- Eighth step: Bake the bread
- Ninth step: Cool and slice
- Dietary Substitutions to Customize Your Whole Wheat Bread Recipe
- Protein and main component alternatives
- Vegetable, sauce, and seasoning modifications
- Mastering Whole Wheat Bread Recipe: Advanced Tips and Variations
- Pro cooking techniques
- Flavor variations
- Presentation tips
- Make-ahead options
- How to Store Whole Wheat Bread Recipe: Best Practices
- FAQs: Frequently Asked Questions About Whole Wheat Bread Recipe
- What type of yeast works best for whole wheat bread recipe?
- Can I substitute bread flour for some whole wheat flour in bread recipe?
- How can I tell if whole wheat bread is fully baked?
- Can I use low-fat or non-dairy milk in whole wheat bread recipe?
- Can I freeze whole wheat bread dough or the baked loaf?
- Whole Wheat Bread Recipe
- Ingredients
- Instructions
- Last Step:
- Notes
- Nutrition
- Did you make this recipe?
Essential Ingredients for Whole Wheat Bread Recipe
For the best results, use fresh whole wheat flour and measure carefully. This recipe is built in two parts: the sponge and the dough. That extra step gives the bread better flavor, better rise, and a softer crumb.
Ingredients for the sponge
- 1 cup water, warmed to about 110°F (43°C) – wakes up the yeast and helps start the sponge.
- 1/3 cup whole milk, warmed to about 110°F (43°C) – adds richness and tenderness.
- 2 and 1/4 teaspoons active dry or instant yeast, 1 standard packet – helps the dough rise.
- 2 cups whole wheat flour – forms the base of the sponge and builds flavor.
Ingredients for the dough
- 3 tablespoons honey – adds gentle sweetness and supports browning.
- 3 tablespoons unsalted butter, softened – brings softness and a richer taste.
- 1 teaspoon fresh lemon juice, or apple cider vinegar as a substitute – balances the earthy taste of whole wheat.
- 1 and 1/3 cups whole wheat flour, plus more as needed – builds the final dough.
- 1 and 1/4 teaspoons salt – sharpens flavor and helps control fermentation.
Optional oat topping
- 1 beaten egg white – helps the oats stick and gives a glossy finish.
- 1 tablespoon whole oats – adds a rustic look and a light nutty crunch.
Special dietary options
- Vegan: Replace the milk with unsweetened oat milk or soy milk, and swap the butter for a plant-based butter. Skip the egg white topping or brush with plant milk instead.
- Gluten-free: This recipe depends on standard whole wheat flour for structure, so it is not suitable for gluten-free baking as written. A separate gluten-free bread formula would be needed.
- Low-calorie: Reduce the honey slightly if you want a less sweet loaf, and skip the oat topping. The bread still bakes up well with the same method.
| Ingredient | Amount | Why it matters |
|---|---|---|
| Water | 1 cup | Activates the yeast and starts the sponge |
| Whole milk | 1/3 cup | Adds tenderness and flavor |
| Whole wheat flour | 4 and 1/3 cups total, plus more as needed | Creates the bread’s structure and hearty texture |
| Honey | 3 tablespoons | Gives mild sweetness and color |
| Butter | 3 tablespoons | Softens the crumb |
| Salt | 1 and 1/4 teaspoons | Balances flavor |
How to Prepare the Perfect Whole Wheat Bread Recipe: Step-by-Step Guide
First step: Make the sponge
Start by whisking together the warmed water, warmed milk, and yeast in a large bowl or the bowl of a stand mixer. Once the mixture looks evenly blended, stir in 2 cups of whole wheat flour until you get a thick batter. This sponge gives the yeast time to wake up and helps the final loaf taste better and feel softer.
Cover the bowl loosely and let it sit at room temperature for 60 to 90 minutes, or until it has doubled in size. If your kitchen is cool, place the bowl in a slightly warm spot. The sponge should look puffy and airy when it is ready.
Second step: Mix in the dough ingredients
To the sponge, add the honey, softened butter, lemon juice, 1 and 1/3 cups whole wheat flour, and salt. Mix with a dough hook or by hand for about 3 minutes. At this stage, the dough should start pulling away from the bowl sides while still feeling soft.
If the dough feels too sticky, add flour 1 tablespoon at a time. Whole wheat bread dough should be slightly tacky, not dry. A little stickiness is normal, and resisting the urge to add too much flour helps the finished loaf stay tender.
Third step: Knead until smooth and elastic
Knead the dough for 8 to 10 minutes, either in a mixer or by hand. This is one of the most important steps in any Whole Wheat Bread Recipe because kneading develops gluten, which gives the loaf structure and a better rise. The dough should feel elastic and slightly tacky.
To check it, poke the dough gently with a finger. It should spring back slowly. If it feels overly wet, use a tiny bit more flour. If it starts to feel stiff or dry, stop adding flour right away and keep kneading instead.
Fourth step: Let the dough rise
Lightly oil a large bowl and place the dough inside. Turn it once so all sides are coated, then cover the bowl. Let the dough rise in a warm place for 1.5 to 2 hours, or until doubled in size.
This second rise helps the loaf become lighter and less dense. If you have time, an overnight fridge rise can also work for the shaped dough later on, which is helpful for busy schedules. For more ideas on pairing homemade bread with fresh meals, you might like our Mexican street corn salad.
Fifth step: Shape the loaf
Grease a 9×5-inch loaf pan. Then deflate the risen dough gently and turn it onto a floured surface. Roll it into an 8×15-inch rectangle. Starting from the 8-inch side, roll the dough tightly into an 8-inch log. Place it seam-side down in the pan.
This step is important because the loaf pan gives the bread structure. Freeform shapes are not a good match for this recipe, since whole wheat dough needs support to rise evenly.
Sixth step: Proof before baking
Cover the pan and let the dough proof until it rises about 1 inch above the pan edges. This usually takes 45 to 60 minutes. The loaf should look noticeably puffy and lighter before it goes into the oven.
While it proofs, preheat your oven to 350°F (177°C) with the rack in the lower third. Proper oven placement helps the bottom and middle bake evenly without overbrowning the top too quickly.
Seventh step: Add the oat topping if you want it
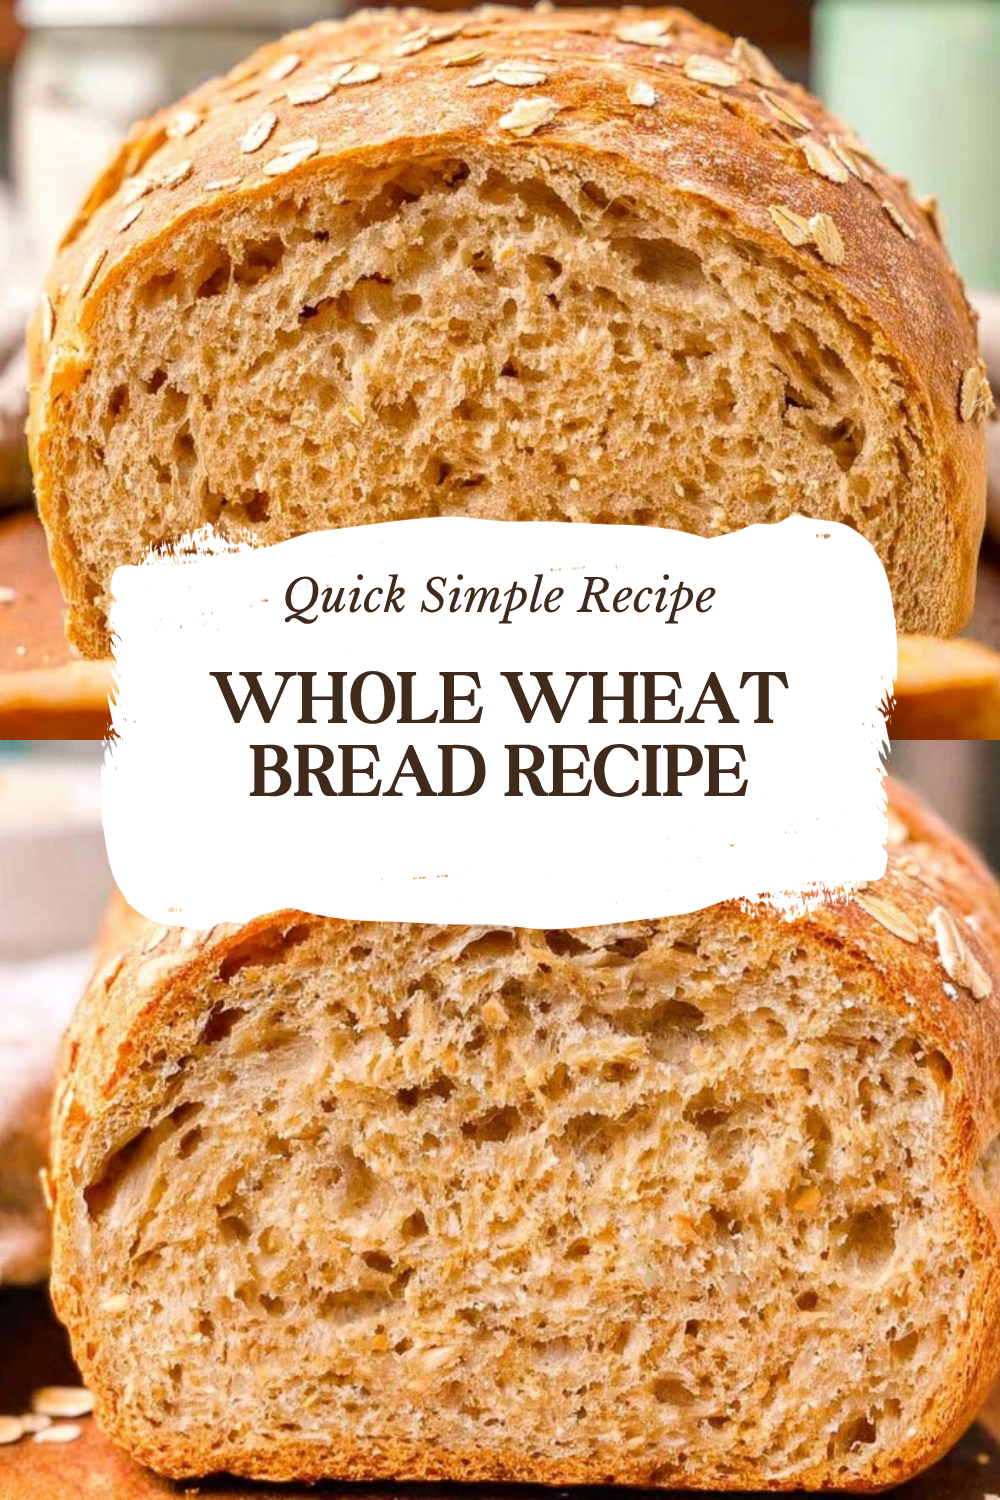
For a rustic look, brush the top with 1 beaten egg white and sprinkle 1 tablespoon whole oats over the surface. This topping is optional, but it adds visual appeal and a light nutty touch. If you prefer a softer top, you can leave it plain.
Eighth step: Bake the bread
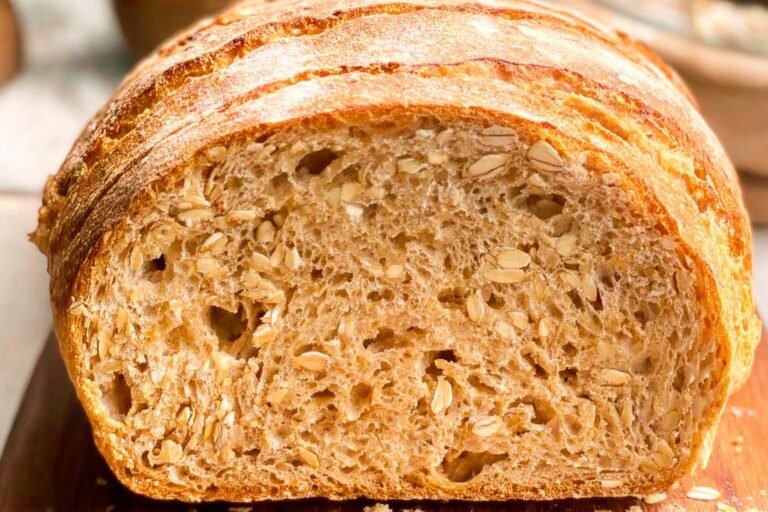
Bake the loaf for 36 to 40 minutes. It should turn golden brown and sound hollow when tapped. If the top begins to brown too quickly, tent it loosely with foil for the rest of the bake. The most reliable way to check doneness is with a thermometer. The internal temperature should reach 195 to 200°F (90 to 93°C).
Oven styles vary, so begin checking near the 36-minute mark. A fully baked loaf will feel firm, not squishy in the center. That makes a big difference when you slice it later.
Ninth step: Cool and slice
Let the bread cool briefly in the pan, then turn it out onto a rack. Cooling on a rack helps steam escape so the crust stays pleasant instead of soggy. Try to wait before slicing, since cutting too soon can make the inside gummy.
Once the loaf is fully cool, slice it for toast, sandwiches, or simple buttered pieces. Store covered at room temperature for up to 1 week.
If you want the softest crumb, do not rush the cooling time. Bread still finishes setting as it cools.

Dietary Substitutions to Customize Your Whole Wheat Bread Recipe
Protein and main component alternatives
This recipe is already flexible, which makes it a useful homemade loaf for many households. If you want a lighter crumb, replace up to 1 cup of the whole wheat flour with bread flour. The higher protein in bread flour strengthens the dough and gives the loaf a taller rise while keeping the same basic method.
If you are baking for someone who prefers dairy-free food, use unsweetened almond, oat, or soy milk in place of whole milk. Whole milk gives the richest texture, but plant-based milk still works well as long as it is warmed first. If you remove the dairy milk, you can add a small extra spoonful of plant butter or oil for more softness.
For the butter, a plant-based butter substitute can work nicely. The loaf will still have a good crumb and a pleasant flavor, though the taste will be a little lighter.
Vegetable, sauce, and seasoning modifications
Because this is a bread recipe, the main swaps are more about flavor and serving style than vegetables or sauces. Still, you can change the experience by serving it with soups, spreads, or toppings that suit the season. For a cozy meal, it goes well with chowders. For a brighter plate, serve it with salads or simple olive oil and herbs.
You can also adjust the topping. Skip the egg white if you want a simpler loaf, or leave off the oats for a plain crust. Apple cider vinegar can stand in for lemon juice if that is what you have on hand, and it still helps balance the flavor of the whole wheat.
For readers who like more grain-based meal ideas, our quinoa black bean corn tacos make a great hearty lunch alongside a slice of homemade bread.
Mastering Whole Wheat Bread Recipe: Advanced Tips and Variations
Pro cooking techniques
One of the biggest keys to success with a Whole Wheat Bread Recipe is patience. Whole wheat flour absorbs more liquid than white flour, so the dough should stay soft and tacky. If it feels too dry, the finished loaf may bake up dense. Knead for at least 8 minutes so the gluten has time to build.
Fresh flour matters too. Older whole wheat flour can taste bitter or stale, so use a fresh bag if possible. If your kitchen runs cold, let the dough rise in an off oven with the light on or in another warm spot. That small change can make a big difference in the rise.
Flavor variations
If you want a slightly different loaf, try replacing some of the whole wheat flour with bread flour for a lighter result. You can also brush the top with melted butter after baking for a softer crust. For a rustic finish, keep the oat topping. It gives the loaf a homemade look and a gentle nutty note.
Lemon juice is not only for taste. It helps mellow the strong flavor that some people notice in whole wheat bread. If you do not have lemon juice, apple cider vinegar works just as well.
Presentation tips
Let the loaf cool fully before slicing into even pieces for a clean look. Serve it on a wooden board with butter, jam, soup, or eggs. The oat topping makes the loaf look especially nice for brunch or weekend meals, and it helps the bread feel a little more special without extra work.
Make-ahead options
If you want to save time, prepare the sponge ahead of time or shape the loaf and freeze it before the final rise. You can also freeze baked bread. This makes the recipe practical for meal prep, family dinners, and anyone who wants fresh bread without starting from scratch each time. The loaf is also a good fit for batch baking, but it is best to make separate batches instead of doubling one dough for the most reliable texture.
How to Store Whole Wheat Bread Recipe: Best Practices
Freshly baked whole wheat bread keeps well, especially when you cool it fully before storing. For short-term storage, keep the loaf covered at room temperature for up to 1 week. A bread bag, airtight container, or wrapped loaf all work well as long as the bread is protected from air.
If you want to freeze it, you have two good options. You can freeze the shaped unbaked loaf before its final rise, then thaw it overnight in the fridge and let it rise before baking. Or you can freeze the baked loaf once it is fully cool. If freezing baked bread, slice it first if you want easy grab and go portions.
To reheat, thaw the bread at room temperature or toast slices straight from frozen. If the crust has softened, warm the loaf in a 350°F (175°C) oven for about 10 minutes. That helps bring back a fresher feel.
Whole wheat bread is best when you store it quickly after cooling, since the natural oils in the flour can shorten shelf life compared with white bread.
FAQs: Frequently Asked Questions About Whole Wheat Bread Recipe
What type of yeast works best for whole wheat bread recipe?
Active dry yeast or instant yeast both work great for this whole wheat bread recipe. Instant yeast can be mixed directly into the dry ingredients for faster activation, cutting rise times by 10-20 minutes. With active dry yeast, dissolve it first in warm water (around 105°F or 40°C) with a pinch of sugar to proof it—bubbles should appear within 5-10 minutes. Whole wheat flour absorbs more liquid and ferments slower, so expect the first rise to take 1-1.5 hours and the second about 45 minutes in a warm spot. Always check the expiration date on yeast packets for reliable results. If your kitchen is cold, place the bowl in an off oven with the light on for steady warmth. This ensures a fluffy crumb despite the denser whole wheat grains.
Can I substitute bread flour for some whole wheat flour in bread recipe?
Yes, replace up to 1 cup of whole wheat flour with bread flour for a taller, airier loaf with better rise—the higher protein in bread flour (12-14%) strengthens gluten in heavy whole wheat dough. Use the same recipe steps: mix, knead 8-10 minutes until smooth, and let rise as directed. This tweak lightens texture without losing whole grain nutrition, yielding about 10% more volume. Avoid swapping more than 25% or the nutty flavor fades. For example, in a 4-cup flour recipe, try 3 cups whole wheat + 1 cup bread flour. Knead on a lightly floured surface, and bake in a greased 9×5-inch pan at 375°F (190°C) for 35-40 minutes. Test doneness at 200°F internal temp for perfect results every time.
How can I tell if whole wheat bread is fully baked?
Use an instant-read thermometer for accuracy—the bread is done when the center hits 195-200°F (90-93°C), preventing a gummy core common in dense whole wheat loaves. Visual cues include a deep golden crust that sounds hollow when tapped. Baking time is typically 35-45 minutes in a preheated 375°F (190°C) oven, but start checking at 30 minutes to avoid overbaking, which dries it out. Rotate the pan halfway for even browning. If no thermometer, insert a toothpick—it should come out clean. Cool in the pan 10 minutes, then on a wire rack for 1-2 hours before slicing to set the structure. This method works reliably across ovens and altitudes.
Can I use low-fat or non-dairy milk in whole wheat bread recipe?
Yes, low-fat milk, skim, or non-dairy options like almond, oat, or soy milk work as substitutes for whole milk, though whole milk gives the richest texture and tenderness from its fat content. Non-dairy milks may need slight adjustment—add 1-2 teaspoons extra fat like oil or butter if using very low-fat versions to mimic whole milk’s moisture. Heat all to 105-110°F (40-43°C) before mixing with yeast. In tests, oat milk produces a similar soft crumb, while almond adds subtle nuttiness that pairs well with whole wheat. Follow the recipe’s hydration ratio closely, as whole wheat soaks up more liquid. Expect minor rise differences, but loaves still bake up moist and flavorful in 40 minutes.
Can I freeze whole wheat bread dough or the baked loaf?
Absolutely—freeze shaped dough balls in greased loaf pans covered tightly with plastic wrap for up to 3 months; thaw overnight in the fridge, then let rise 1-2 hours before baking as usual. For baked bread, cool completely, slice if desired, wrap in plastic and foil, and freeze up to 3 months. Thaw at room temp or toast slices directly from frozen. This preserves freshness better than room storage, where whole wheat bread lasts 3-4 days max due to higher oil content. Label with dates to track. Pro tip: Brush thawed loaves with water and reheat at 350°F (175°C) for 10 minutes to refresh crust. Freezing maintains nutrition and flavor without waste.
Whole Wheat Bread Recipe
🍞🌾 Soft tall whole wheat bread: simple sponge starter yields nutty wholesome loaf – healthier sandwich hero!
🥖 5-hr beginner bake: fresh daily slices, freezes perfectly for convenience.
- Total Time: 5 hours 10 minutes
- Yield: 12 slices
Ingredients
– 1 cup water, warmed to about 110°F (43°C) for wakes up the yeast and helps start the sponge.
– 1/3 cup whole milk, warmed to about 110°F (43°C) for adds richness and tenderness.
– 2 and 1/4 teaspoons active dry or instant yeast, 1 standard packet for helps the dough rise.
– 2 cups whole wheat flour for forms the base of the sponge and builds flavor.
– 3 tablespoons honey for adds gentle sweetness and supports browning.
– 3 tablespoons unsalted butter, softened for brings softness and a richer taste.
– 1 teaspoon fresh lemon juice, or apple cider vinegar as a substitute for balances the earthy taste of whole wheat.
– 1 and 1/3 cups whole wheat flour, plus more as needed for builds the final dough.
– 1 and 1/4 teaspoons salt for sharpens flavor and helps control fermentation.
– 1 beaten egg white for helps the oats stick and gives a glossy finish.
– 1 tablespoon whole oats for adds a rustic look and a light nutty crunch.
Instructions
1-First step: Make the sponge Start by whisking together the warmed water, warmed milk, and yeast in a large bowl or the bowl of a stand mixer. Once the mixture looks evenly blended, stir in 2 cups of whole wheat flour until you get a thick batter. This sponge gives the yeast time to wake up and helps the final loaf taste better and feel softer. Cover the bowl loosely and let it sit at room temperature for 60 to 90 minutes, or until it has doubled in size. If your kitchen is cool, place the bowl in a slightly warm spot. The sponge should look puffy and airy when it is ready.
2-Second step: Mix in the dough ingredients To the sponge, add the honey, softened butter, lemon juice, 1 and 1/3 cups whole wheat flour, and salt. Mix with a dough hook or by hand for about 3 minutes. At this stage, the dough should start pulling away from the bowl sides while still feeling soft. If the dough feels too sticky, add flour 1 tablespoon at a time. Whole wheat bread dough should be slightly tacky, not dry. A little stickiness is normal, and resisting the urge to add too much flour helps the finished loaf stay tender.
3-Third step: Knead until smooth and elastic Knead the dough for 8 to 10 minutes, either in a mixer or by hand. This is one of the most important steps in any Whole Wheat Bread Recipe because kneading develops gluten, which gives the loaf structure and a better rise. The dough should feel elastic and slightly tacky. To check it, poke the dough gently with a finger. It should spring back slowly. If it feels overly wet, use a tiny bit more flour. If it starts to feel stiff or dry, stop adding flour right away and keep kneading instead.
4-Fourth step: Let the dough rise Lightly oil a large bowl and place the dough inside. Turn it once so all sides are coated, then cover the bowl. Let the dough rise in a warm place for 1.5 to 2 hours, or until doubled in size. This second rise helps the loaf become lighter and less dense. If you have time, an overnight fridge rise can also work for the shaped dough later on, which is helpful for busy schedules. For more ideas on pairing homemade bread with fresh meals, you might like our Mexican street corn salad.
5-Fifth step: Shape the loaf Grease a 9×5-inch loaf pan. Then deflate the risen dough gently and turn it onto a floured surface. Roll it into an 8×15-inch rectangle. Starting from the 8-inch side, roll the dough tightly into an 8-inch log. Place it seam-side down in the pan. This step is important because the loaf pan gives the bread structure. Freeform shapes are not a good match for this recipe, since whole wheat dough needs support to rise evenly.
6-Sixth step: Proof before baking Cover the pan and let the dough proof until it rises about 1 inch above the pan edges. This usually takes 45 to 60 minutes. The loaf should look noticeably puffy and lighter before it goes into the oven. While it proofs, preheat your oven to 350°F (177°C) with the rack in the lower third. Proper oven placement helps the bottom and middle bake evenly without overbrowning the top too quickly.
7-Seventh step: Add the oat topping if you want it For a rustic look, brush the top with 1 beaten egg white and sprinkle 1 tablespoon whole oats over the surface. This topping is optional, but it adds visual appeal and a light nutty touch. If you prefer a softer top, you can leave it plain.
8-Eighth step: Bake the bread Bake the loaf for 36 to 40 minutes. It should turn golden brown and sound hollow when tapped. If the top begins to brown too quickly, tent it loosely with foil for the rest of the bake. The most reliable way to check doneness is with a thermometer. The internal temperature should reach 195 to 200°F (90 to 93°C). Oven styles vary, so begin checking near the 36-minute mark. A fully baked loaf will feel firm, not squishy in the center. That makes a big difference when you slice it later.
9-Ninth step: Cool and slice Let the bread cool briefly in the pan, then turn it out onto a rack. Cooling on a rack helps steam escape so the crust stays pleasant instead of soggy. Try to wait before slicing, since cutting too soon can make the inside gummy. Once the loaf is fully cool, slice it for toast, sandwiches, or simple buttered pieces. Store covered at room temperature for up to 1 week.
Last Step:
Please leave a rating and comment letting us know how you liked this recipe! This helps our business to thrive and continue providing free, high-quality recipes for you.Notes
🧇 Sponge rise key – develops flavor, better texture.
👆 Keep tacky soft – overflour dries loaf.
🌡️ Thermometer doneness: 195°F perfect crumb.
- Prep Time: 30 minutes
- Rising: 4 hours
- Cook Time: 38 minutes
- Category: Breads
- Method: Baked
- Cuisine: American
- Diet: Vegetarian
Nutrition
- Serving Size: 1 slice
- Calories: 150 kcal
- Sugar: 4 g
- Sodium: 200 mg
- Fat: 3 g
- Saturated Fat: 1.5 g
- Unsaturated Fat: 1.5 g
- Trans Fat: 0 g
- Carbohydrates: 28 g
- Fiber: 4 g
- Protein: 5 g
- Cholesterol: 10 mg





