

Why You’ll Love This Espresso Cheesecake Recipe
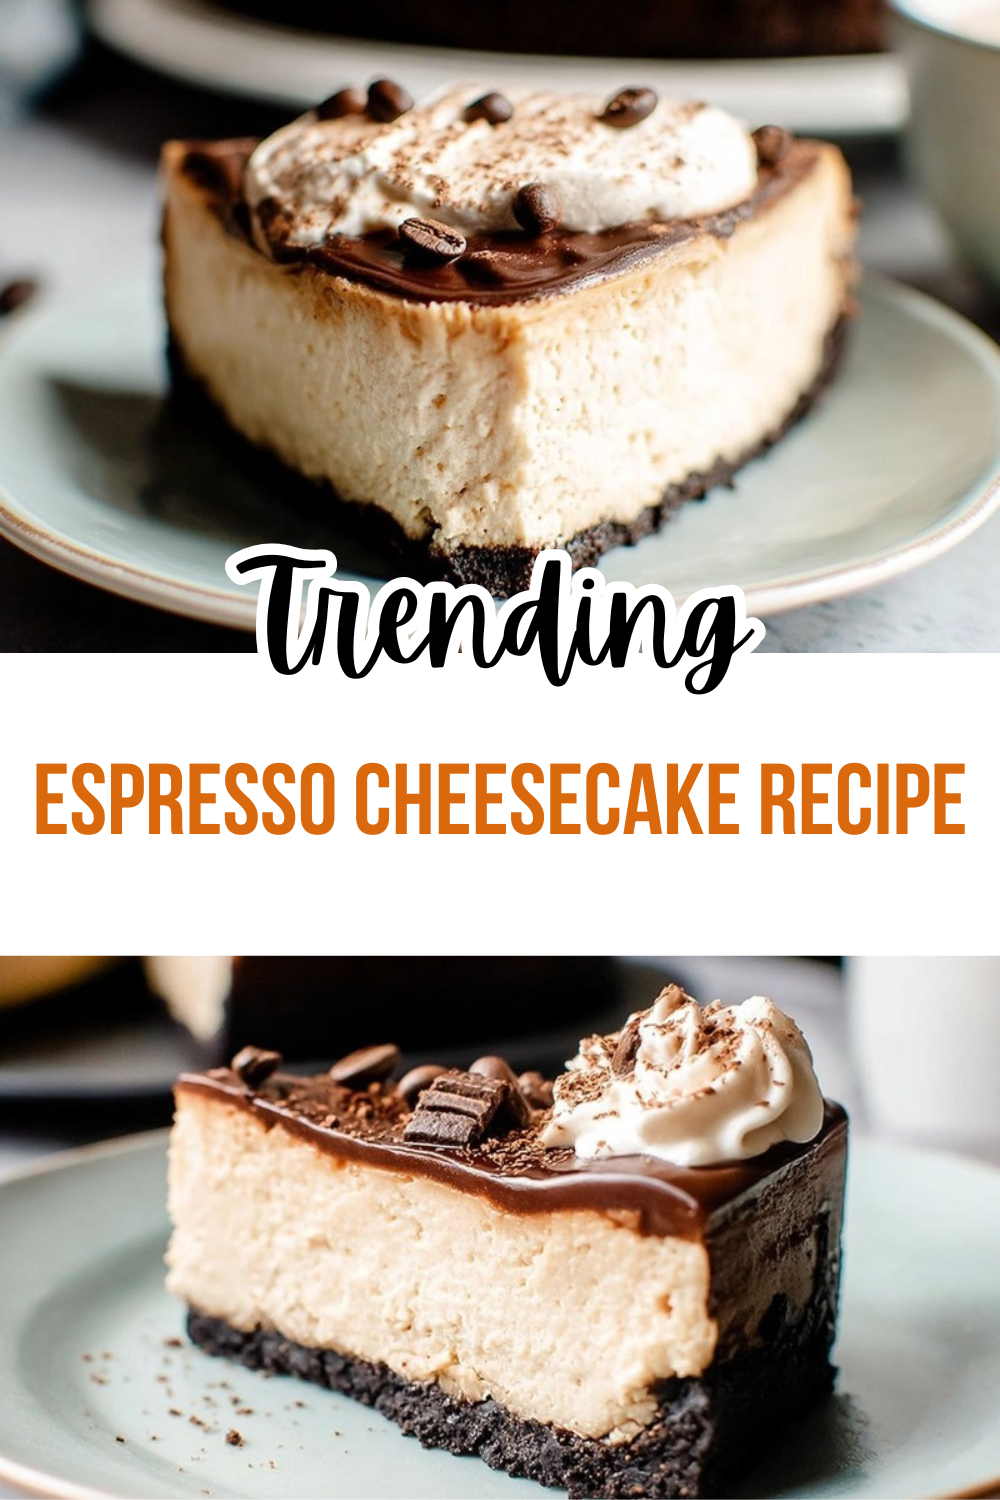
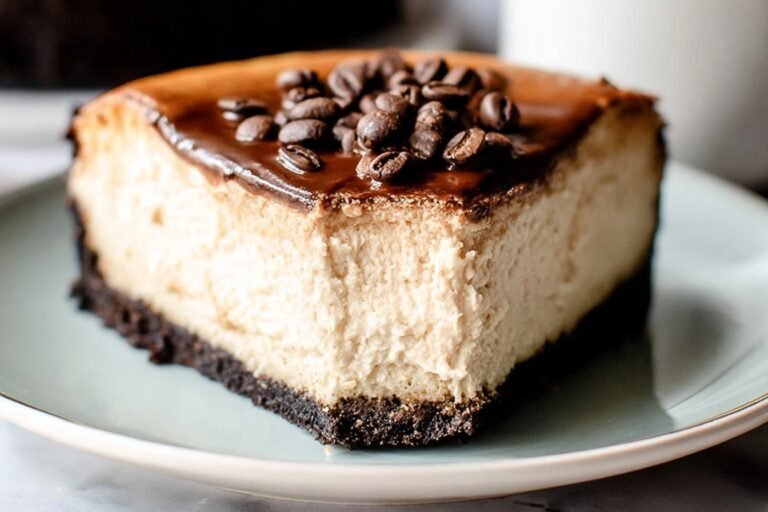
If you love rich desserts with a bold coffee kick, this Espresso Cheesecake Recipe is one you will want to make again and again. It brings together a silky cream cheese filling, a chocolate cookie crust, and a glossy chocolate ganache for a dessert that feels special without being hard to make.
- Easy enough for home bakers: The steps are straightforward, and the crust, filling, and topping all come together with basic kitchen tools. Most of the work is hands-off while the cheesecake bakes and chills.
- Rich flavor with simple ingredients: You get the deep taste of espresso, smooth cream cheese, and bittersweet chocolate in every bite. If you enjoy desserts with a grown-up flavor, this one stands out right away.
- Great for planning ahead: This cheesecake tastes even better after a long chill, so it is a smart choice for parties, holidays, and busy weeks. It can also be made a day ahead, which helps the flavors blend beautifully.
- Easy to dress up or keep simple: Add the optional cream cheese frosting, chocolate shavings, and espresso beans for a bakery-style finish, or serve it plain with ganache for a cleaner look.
For readers who enjoy coffee-flavored sweets, this cheesecake gives you that bold espresso taste without feeling overly heavy or overly sweet.
According to the health benefits of drinking espresso, coffee-based treats can be a fun way to enjoy that familiar flavor in dessert form. And if you are curious about ingredients, cream cheese nutrition facts and benefits can help you better understand what goes into this classic filling.
Jump to:
- Why You’ll Love This Espresso Cheesecake Recipe
- Ingredients for Espresso Cheesecake Recipe
- For the crust
- For the filling
- For the ganache topping
- For the optional cream cheese frosting
- How to Prepare the Perfect Espresso Cheesecake Recipe: Step-by-Step Guide
- First Step: Prepare the pan and oven
- Second Step: Make the chocolate cookie crust
- Third Step: Mix the cheesecake filling
- Fourth Step: Fill and bake the cheesecake
- Fifth Step: Cool the cheesecake slowly
- Sixth Step: Make the chocolate ganache
- Seventh Step: Add the optional frosting
- Final Step: Slice and serve
- Dietary Substitutions to Customize Your Espresso Cheesecake Recipe
- Protein and Main Component Alternatives
- Vegetable, Sauce, and Seasoning Modifications
- Mastering Espresso Cheesecake Recipe: Advanced Tips and Variations
- Pro cooking techniques
- Flavor variations
- Presentation tips
- Make-ahead options
- How to Store Espresso Cheesecake Recipe: Best Practices
- Refrigeration
- Freezing
- Reheating
- Meal prep considerations
- Nutrition Information
- FAQs: Frequently Asked Questions About Espresso Cheesecake Recipe
- How long does espresso cheesecake last in the fridge?
- Can you freeze espresso cheesecake?
- What are common mistakes to avoid in espresso cheesecake recipe?
- Can I use instant espresso powder in cheesecake instead of brewed coffee?
- How do I serve espresso cheesecake for best flavor?
- Espresso Cheesecake Recipe
- Ingredients
- Instructions
- Last Step:
- Notes
- Nutrition
- Did you make this recipe?
Ingredients for Espresso Cheesecake Recipe
For the crust
- 2 cups chocolate cookie crumbs, about 20 cookies, not double stuffed
- 6 tablespoons melted butter
- 1/4 teaspoon salt
For the filling
- 24 ounces softened cream cheese, 3 packages
- 3/4 cup granulated sugar
- 3 tablespoons flour
- 1/4 cup espresso or strong coffee, cooled
- 1/2 cup heavy whipping cream
- 1 teaspoon vanilla extract
- 3 large eggs, room temperature
For the ganache topping
- 1/4 cup heavy whipping cream
- 4 ounces bittersweet or dark chocolate, roughly chopped
For the optional cream cheese frosting
- 4 ounces softened cream cheese
- 4 tablespoons softened butter
- 1/2 teaspoon vanilla extract
- 3/4 to 1 cup powdered sugar
- Espresso beans, optional
How to Prepare the Perfect Espresso Cheesecake Recipe: Step-by-Step Guide
First Step: Prepare the pan and oven
Preheat your oven to 350°F. Lightly spray a springform pan with non-stick spray so the cheesecake releases more easily after chilling. This recipe works best with a 9-inch springform pan, since that gives the filling room to bake evenly.
Set out the cream cheese, eggs, and butter if they are not already at room temperature. Softened ingredients blend more smoothly, which helps give the filling its silky texture.
Second Step: Make the chocolate cookie crust
Place the chocolate cookies in a food processor and pulse until they become fine crumbs. Use whole chocolate sandwich cookies, filling included, for the best flavor and texture. In a mixing bowl, stir the crumbs with melted butter and salt until the mixture looks evenly moistened.
Press the crust mixture into the bottom of the springform pan and about 1 inch up the sides. Try to pack it firmly, but do not press so hard that it becomes dense. Bake the crust for 10 minutes, then set it aside to cool while you make the filling.
Third Step: Mix the cheesecake filling
Beat the softened cream cheese until smooth and creamy. This step matters because any lumps will show up in the finished cheesecake. Add the granulated sugar, flour, and cooled espresso or strong coffee, then mix until combined.
Next, pour in the heavy whipping cream and vanilla extract. Beat for 1 to 2 minutes, just until the mixture looks silky and even. Then add the eggs one at a time, mixing only until each egg disappears into the batter. This helps prevent too much air from getting into the cheesecake.
One of the best ways to avoid cracks is simple: mix gently once the eggs go in and do not overbeat the batter.
Fourth Step: Fill and bake the cheesecake
Pour the filling into the cooled crust. Tap the pan lightly on the counter to release air bubbles. This small step helps the cheesecake bake with a smoother top.
Bake at 350°F for 15 minutes. Then reduce the oven temperature to 200°F and continue baking for 55 to 60 minutes. The center should jiggle slightly when you gently move the pan, while the sides should look set.
If you have ever wondered why cheesecake cracking happens, the answer is often heat and fast cooling. This low-and-slow baking method helps the filling stay creamy instead of dry or crumbly.
Fifth Step: Cool the cheesecake slowly
When baking is finished, turn off the oven and leave the cheesecake inside for 30 minutes. Then crack the oven door slightly and let it cool for another 15 minutes. This gradual cooling helps reduce the chance of cracks forming on the surface.
After that, remove the cheesecake and place it on a wire rack until fully cool. Once it reaches room temperature, refrigerate it for at least 8 hours or overnight. The long chill is what gives the cheesecake its clean slices and rich, set texture.
Sixth Step: Make the chocolate ganache
When the cheesecake is fully chilled, make the ganache. Heat the heavy whipping cream until it just comes to a boil, then pour it over the chopped chocolate in a bowl. Let it sit for 1 to 2 minutes, then whisk until smooth.
Pour the ganache over the chilled cheesecake and spread it gently with a spatula. You can cover the whole top or leave a little cheesecake showing around the edges, depending on the look you want.
Seventh Step: Add the optional frosting
If you want a more decorated finish, beat the softened cream cheese and butter until light and fluffy. Add the vanilla extract and powdered sugar, then mix until fully combined. Add a little more powdered sugar if you want a thicker frosting.
Pipe the frosting around the edges of the cheesecake. Finish with chocolate shavings and espresso beans if you want that bakery-style touch. These toppings are optional, but they look beautiful and add extra flavor.
Final Step: Slice and serve
For the cleanest slices, use a sharp knife dipped in hot water and wiped dry between cuts. Serve the cheesecake chilled for the best texture and strongest espresso flavor. This dessert is rich, silky, and perfect after dinner with coffee or tea.
| Recipe Detail | Time or Amount |
|---|---|
| Prep time | 15 minutes |
| Cook time | 1 hour 15 minutes |
| Total time | About 1 hour 30 minutes plus chilling time |
| Chill time | At least 8 hours or overnight |
| Yield | 1 9-inch cheesecake |

Dietary Substitutions to Customize Your Espresso Cheesecake Recipe
Protein and Main Component Alternatives
The main ingredient in this cheesecake is cream cheese, and it gives the dessert its classic rich texture. If you need a lighter-style dessert, you can look for reduced-fat cream cheese, though the texture may be slightly less dense. For a more budget-friendly version, buy store-brand cream cheese and chocolate sandwich cookies, since both work well in this recipe.
If you need to avoid caffeine, use decaf espresso or decaf strong coffee. You will still get that deep coffee flavor without the extra boost. If you prefer a stronger mocha taste, you can also add a little more cooled espresso to the filling, but keep the batter balanced so it does not turn thin.
Vegetable, Sauce, and Seasoning Modifications
This dessert does not use vegetables, but you can still change the flavor profile with small swaps. Try vanilla bean paste instead of vanilla extract for a deeper aroma, or use dark chocolate with a higher cacao percentage for a more bittersweet finish. If you want a sweeter topping, use the optional cream cheese frosting and add a few more chocolate shavings on top.
For a lighter serving style, skip the frosting and keep only the ganache. You can also pair each slice with fresh raspberries for a tart contrast that cuts through the richness. That makes the cheesecake feel a little brighter without changing the base recipe.
Mastering Espresso Cheesecake Recipe: Advanced Tips and Variations
Pro cooking techniques
Good texture starts with room-temperature ingredients. Cold cream cheese tends to stay lumpy, which makes the batter harder to smooth out. Beat the cream cheese thoroughly before adding the sugar, flour, and espresso, then mix gently after the eggs go in.
Another helpful trick is to cool the cheesecake slowly inside the oven. Sudden temperature changes can lead to cracks, so the gentle resting time matters. If you want an even smoother finish, wrap the bottom of the springform pan before baking and place it on a baking sheet for easier handling.
Flavor variations
You can adjust this Espresso Cheesecake Recipe to suit different tastes. For a deeper chocolate note, use dark chocolate shavings and a bittersweet ganache. For a more decorative dessert, pipe the cream cheese frosting in swirls instead of around the edge only.
Another easy variation is to top each slice with a tiny spoonful of whipped cream and a single espresso bean. If you like a little more crunch, add extra cookie crumbs along the serving plate. That creates a pretty contrast with the silky filling.
Presentation tips
Presentation matters, especially when you are serving guests. A smooth ganache layer looks beautiful under the chocolate shavings, and the optional espresso beans give the cheesecake a polished bakery look. Clean slices make the biggest difference, so chill the cheesecake well before cutting.
You can also serve it on a simple white plate to make the dark chocolate and coffee tones stand out. If you are making dessert for a dinner party, garnish each slice right before serving so the toppings stay neat.
Make-ahead options
This cheesecake is a great make-ahead dessert. In fact, the flavor gets better after it sits overnight. If your schedule is busy, bake it one day before you plan to serve it, then add the ganache and frosting closer to serving time.
For longer planning, freeze plain cheesecake slices without ganache, then finish them after thawing. That makes this recipe helpful for holidays, birthdays, and weekends when you want dessert ready to go.
How to Store Espresso Cheesecake Recipe: Best Practices
Refrigeration
Store leftover cheesecake in an airtight container in the refrigerator for up to 5 days. For the best texture, wrap individual slices or place them in a covered container so they do not dry out or pick up fridge odors. If you want the freshest flavor, eat it within the first 2 to 4 days.
Freezing
To freeze cheesecake, let it cool fully and chill first. Freeze slices without ganache, wrap them in parchment, then place them in a Ziplock bag or other freezer-safe bag. It will keep well for up to 3 months. When you are ready to serve, thaw in the fridge overnight and add the ganache after thawing.
Reheating
Cheesecake is best served cold, so reheating is not needed. If a slice feels too firm after freezing, let it rest in the refrigerator until soft enough to cut and eat. Avoid microwaving, since it can change the texture and make the filling too soft.
Meal prep considerations
This dessert is a smart choice for meal prep because it holds up well when made ahead. You can bake it a day in advance, chill it overnight, and decorate it just before serving. That gives you less work on the day of your event and better flavor all around.
Nutrition Information
Each serving contains approximately 628 calories, 47g carbohydrates, 8g protein, 46g fat, 26g saturated fat, 1g trans fat, 160mg cholesterol, 460mg sodium, 394mg potassium, 1g fiber, 34g sugar, 1463 IU vitamin A, 1mg vitamin C, 101mg calcium, and 3mg iron.
FAQs: Frequently Asked Questions About Espresso Cheesecake Recipe
How long does espresso cheesecake last in the fridge?
Espresso cheesecake stays fresh in the refrigerator for 2 to 4 days when stored properly. To maximize freshness, cut it into individual slices and place them in an airtight container or wrap tightly with plastic wrap before refrigerating. This prevents the cheesecake from absorbing other fridge odors and drying out. Avoid leaving it at room temperature for more than 2 hours to prevent bacterial growth. For best texture, let it chill fully before slicing, and consume within the first 2 days if you prefer a creamier consistency. Always check for any off smells or discoloration before eating. Label the container with the date made. If you notice moisture buildup, pat dry with a paper towel to maintain that rich espresso flavor. Proper storage keeps the crust crisp and the filling smooth.
Can you freeze espresso cheesecake?
Yes, you can freeze espresso cheesecake for up to 3 months. First, let it cool completely in the fridge, then remove any toppings like whipped cream or chocolate ganache to avoid sogginess. Slice into portions for easy thawing. Wrap each slice individually in parchment paper, then place in a freezer-safe Ziplock bag, squeezing out excess air. This method protects against freezer burn and preserves the bold espresso taste. To thaw, transfer slices to the fridge for 4-6 hours or overnight. Avoid microwaving, as it can alter the texture. Once thawed, add fresh toppings and serve chilled. Freezing works best for plain slices without delicate garnishes. Test one slice first to ensure your freezer maintains consistent temperatures below 0°F for optimal results.
What are common mistakes to avoid in espresso cheesecake recipe?
Common pitfalls in espresso cheesecake include overmixing the batter, which incorporates too much air and leads to cracks; mix on low speed just until combined. Another issue is baking at too high a temperature—aim for 325°F in a water bath to ensure even cooking and prevent curdling. Skipping the water bath often causes uneven baking and sinking centers. Don’t open the oven door early to check doneness; use a thermometer for 150-155°F internal temp. Rushing the cooling process traps steam, causing cracks—cool in the oven with the door ajar for 1 hour, then room temp for 2 more. Use room-temperature ingredients for smooth blending. Finally, press the crust firmly but not too hard to avoid a dense base. These steps yield a creamy, crack-free espresso cheesecake every time.
Can I use instant espresso powder in cheesecake instead of brewed coffee?
Yes, instant espresso powder works perfectly as a substitute in espresso cheesecake recipes, offering concentrated flavor without added liquid. Use 1-2 tablespoons dissolved in 2 tablespoons hot water to replace brewed espresso or strong coffee. This prevents a watery batter that could affect baking time and texture. Stir until fully dissolved before adding to the cream cheese mixture for even distribution and that authentic coffee kick. Taste the batter and adjust to 3 tablespoons for bolder taste if desired. It’s shelf-stable, making it ideal for quick prep. Brands like Medaglia d’Oro provide fine powder that blends seamlessly. This swap maintains the rich, mocha-like profile while simplifying the recipe. Pair with chocolate crust for amplified results. Always use high-quality powder to avoid bitterness.
How do I serve espresso cheesecake for best flavor?
Serve espresso cheesecake chilled, straight from the fridge, for the best creamy texture and pronounced coffee notes. Slice with a hot knife—dip in hot water and wipe dry between cuts—for clean edges. Portion into 12 servings from a 9-inch pan. Top with whipped cream, chocolate shavings, or cocoa dust to complement the espresso. Pair with fresh berries like raspberries for a tart contrast that cuts richness. For parties, garnish with espresso beans or drizzle with caramel sauce. Let slices sit 5-10 minutes at room temp if you prefer softer texture. It pairs well with black coffee or amaretto liqueur. One 9-inch cheesecake yields about 12 servings at 350 calories each. Store leftovers as noted for fridge life. Advance prep: make 1-2 days ahead for flavors to meld fully.
Espresso Cheesecake Recipe
☕🍰 Silky espresso cheesecake: bold coffee swirl in crunchy chocolate crust, ganache-glazed indulgence – ultimate caffeine dessert!
🎂 Make-ahead elegance: no-crack method, chills overnight for perfect slices & intensified flavors.
- Total Time: 9 hours 30 minutes
- Yield: 12 servings
Ingredients
Instructions
1-First Step: Prepare the pan and oven Preheat your oven to 350°F. Lightly spray a springform pan with non-stick spray so the cheesecake releases more easily after chilling. This recipe works best with a 9-inch springform pan, since that gives the filling room to bake evenly. Set out the cream cheese, eggs, and butter if they are not already at room temperature. Softened ingredients blend more smoothly, which helps give the filling its silky texture.
2-Second Step: Make the chocolate cookie crust Place the chocolate cookies in a food processor and pulse until they become fine crumbs. Use whole chocolate sandwich cookies, filling included, for the best flavor and texture. In a mixing bowl, stir the crumbs with melted butter and salt until the mixture looks evenly moistened. Press the crust mixture into the bottom of the springform pan and about 1 inch up the sides. Try to pack it firmly, but do not press so hard that it becomes dense. Bake the crust for 10 minutes, then set it aside to cool while you make the filling.
3-Third Step: Mix the cheesecake filling Beat the softened cream cheese until smooth and creamy. This step matters because any lumps will show up in the finished cheesecake. Add the granulated sugar, flour, and cooled espresso or strong coffee, then mix until combined. Next, pour in the heavy whipping cream and vanilla extract. Beat for 1 to 2 minutes, just until the mixture looks silky and even. Then add the eggs one at a time, mixing only until each egg disappears into the batter. This helps prevent too much air from getting into the cheesecake. One of the best ways to avoid cracks is simple: mix gently once the eggs go in and do not overbeat the batter.
4-Fourth Step: Fill and bake the cheesecake Pour the filling into the cooled crust. Tap the pan lightly on the counter to release air bubbles. This small step helps the cheesecake bake with a smoother top. Bake at 350°F for 15 minutes. Then reduce the oven temperature to 200°F and continue baking for 55 to 60 minutes. The center should jiggle slightly when you gently move the pan, while the sides should look set. If you have ever wondered why cheesecake cracking happens, the answer is often heat and fast cooling. This low-and-slow baking method helps the filling stay creamy instead of dry or crumbly.
5-Fifth Step: Cool the cheesecake slowly When baking is finished, turn off the oven and leave the cheesecake inside for 30 minutes. Then crack the oven door slightly and let it cool for another 15 minutes. This gradual cooling helps reduce the chance of cracks forming on the surface. After that, remove the cheesecake and place it on a wire rack until fully cool. Once it reaches room temperature, refrigerate it for at least 8 hours or overnight. The long chill is what gives the cheesecake its clean slices and rich, set texture.
6-Sixth Step: Make the chocolate ganache When the cheesecake is fully chilled, make the ganache. Heat the heavy whipping cream until it just comes to a boil, then pour it over the chopped chocolate in a bowl. Let it sit for 1 to 2 minutes, then whisk until smooth. Pour the ganache over the chilled cheesecake and spread it gently with a spatula. You can cover the whole top or leave a little cheesecake showing around the edges, depending on the look you want.
7-Seventh Step: Add the optional frosting If you want a more decorated finish, beat the softened cream cheese and butter until light and fluffy. Add the vanilla extract and powdered sugar, then mix until fully combined. Add a little more powdered sugar if you want a thicker frosting. Pipe the frosting around the edges of the cheesecake. Finish with chocolate shavings and espresso beans if you want that bakery-style touch. These toppings are optional, but they look beautiful and add extra flavor.
8-Final Step: Slice and serve For the cleanest slices, use a sharp knife dipped in hot water and wiped dry between cuts. Serve the cheesecake chilled for the best texture and strongest espresso flavor. This dessert is rich, silky, and perfect after dinner with coffee or tea.
Last Step:
Please leave a rating and comment letting us know how you liked this recipe! This helps our business to thrive and continue providing free, high-quality recipes for you.Notes
🥄 Beat cream cheese fully smooth – no lumps key.
🔥 Cool slowly in oven prevents cracks.
❄️ Chill 8+ hours minimum for perfect set.
- Prep Time: 15 minutes
- Chilling: 8 hours
- Cook Time: 1 hour 15 minutes
- Category: Desserts
- Method: Baked
- Cuisine: American
- Diet: Vegetarian
Nutrition
- Serving Size: 1 slice
- Calories: 628 kcal
- Sugar: 34 g
- Sodium: 460 mg
- Fat: 46 g
- Saturated Fat: 26 g
- Unsaturated Fat: 20 g
- Trans Fat: 1 g
- Carbohydrates: 47 g
- Fiber: 1 g
- Protein: 8 g
- Cholesterol: 160 mg





