

Why You’ll Love This Jello Divinity Recipe
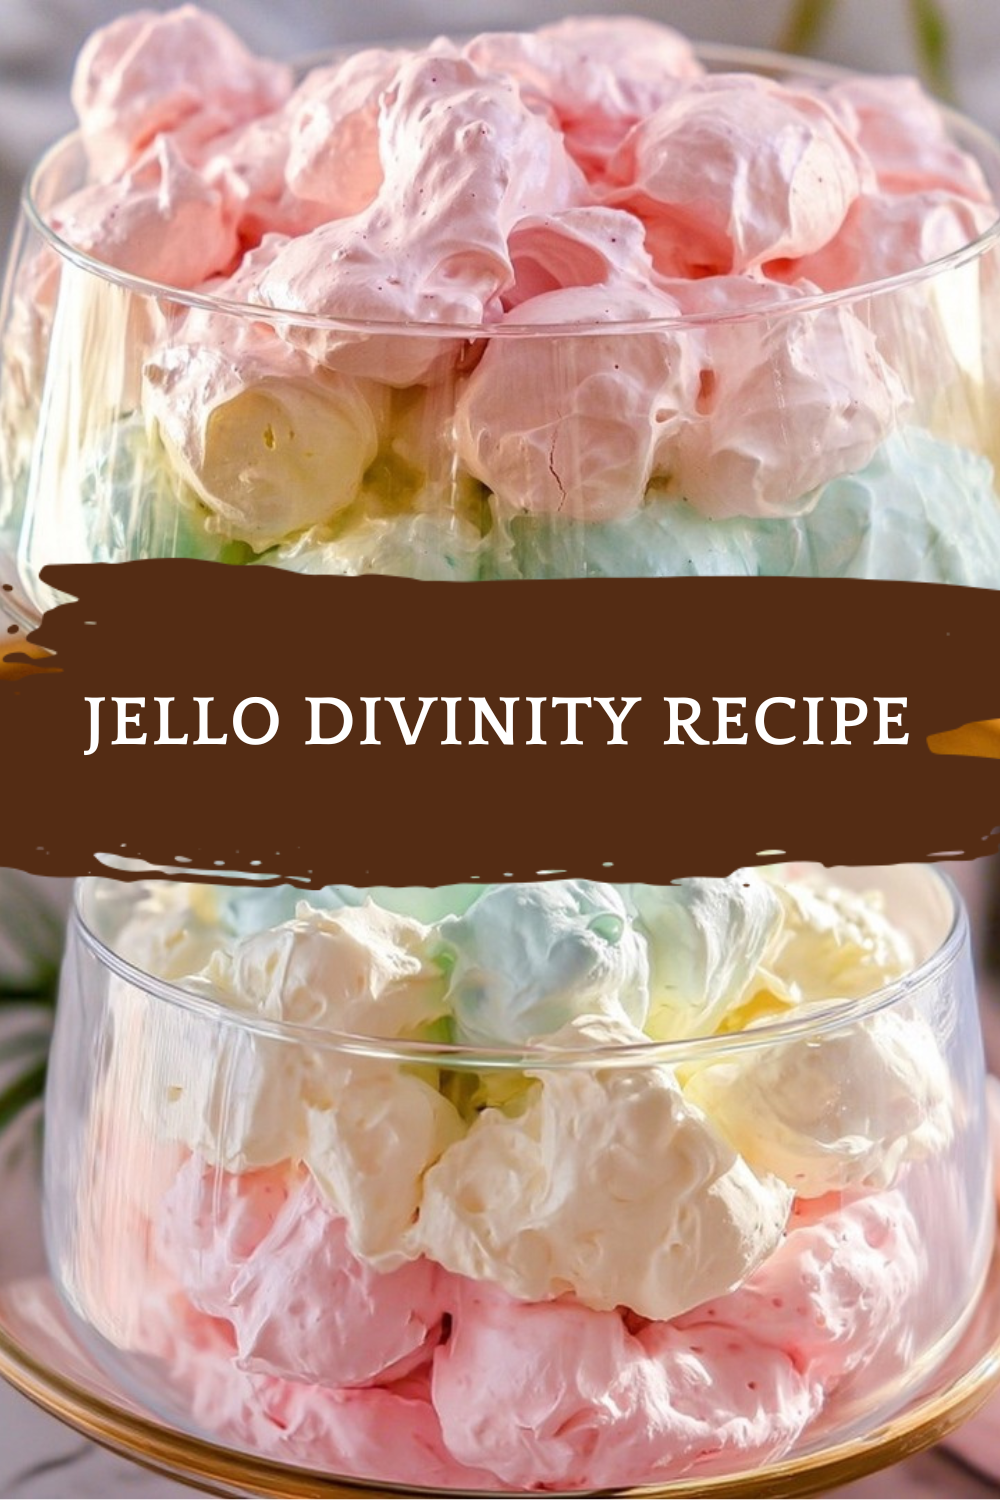
If you have ever wanted a candy that feels a little fancy but still acts like it got ready in sweatpants, this Jello Divinity Recipe is your new best friend. It is fluffy, sweet, fruity, and just weird enough to be charming. The texture lands somewhere between fudge and nougat, which sounds like a dessert having an identity crisis, but in the best possible way.
- Easy to make: This Jello Divinity Recipe is a no-bake candy with simple pantry ingredients and a hands-on process that is easier than it sounds. You cook the syrup, whip the egg whites, mix everything together, then let the candy set. No oven drama, no cookie sheet panic, no mystery timer chaos.
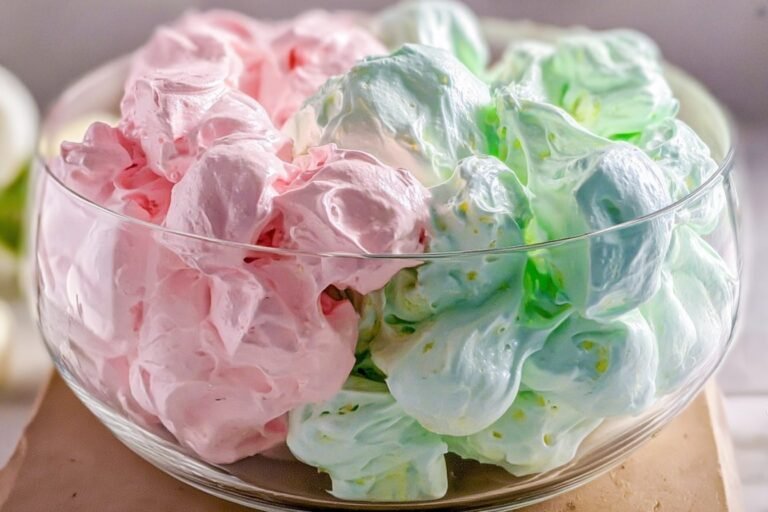
- Great for spring and Easter: Because it uses fruity flavored gelatin powder, this candy can be made in cheerful colors and flavors like strawberry, lime, orange, grape, lemon, berry blue, watermelon, strawberry banana, or black cherry. It is basically edible confetti for holiday trays and gift boxes.
- Fun for sharing: Homemade divinity is perfect for cellophane gift bags, dessert platters, and sweet little party treats. It looks homemade in the best way, like you actually tried, but not in a way that made your kitchen look like a sugar tornado passed through.
- Soft, nostalgic flavor: The candy has a melt-in-your-mouth sweetness with a fruity twist from flavored gelatin powder. It is the kind of treat that makes people ask, “Wait, you made this?” while quietly reaching for a second piece.
Quick note: the recipe is all about timing and texture, so a little patience goes a long way.
For readers who like science with their sweets, gelatin offers some interesting food benefits too. You can read more about the ingredient behind the flavor on WebMD’s guide to gelatin benefits. If you enjoy candy making, this recipe also sits nicely beside other simple sweets on Savoring Flavors.
Jump to:
- Why You’ll Love This Jello Divinity Recipe
- Essential Ingredients for Jello Divinity Recipe
- Special Dietary Options
- How to Prepare the Perfect Jello Divinity Recipe: Step-by-Step Guide
- First Step: Get your pans and tools ready
- Second Step: Cook the sugar syrup
- Third Step: Whip the egg whites and add the flavoring
- Fourth Step: Drizzle in the hot syrup
- Fifth Step: Beat until it holds its shape
- Sixth Step: Scoop and shape the candy
- Seventh Step: Let it set and store it properly
- Dietary Substitutions to Customize Your Jello Divinity Recipe
- Protein and Main Component Alternatives
- Vegetable, Sauce, and Seasoning Modifications
- Mastering Jello Divinity Recipe: Advanced Tips and Variations
- Pro cooking techniques
- Flavor variations
- Presentation tips
- Make-ahead options
- How to Store Jello Divinity Recipe: Best Practices
- FAQs: Frequently Asked Questions About Jello Divinity Recipe
- What can I use instead of Jello for divinity recipe in Australia?
- Can I use sugar-free Jello in divinity recipe?
- Can you make divinity on a rainy or humid day?
- What can I substitute for corn syrup in Jello divinity recipe?
- Are uncooked egg whites safe in divinity recipe and how long does it last?
- Jello Divinity Recipe
- Ingredients
- Instructions
- Last Step:
- Notes
- Nutrition
- Did you make this recipe?
Essential Ingredients for Jello Divinity Recipe
This recipe makes one batch and uses one flavor per batch. If you want different colors or flavors, make separate batches so each one gets its own fruity personality.
- 2 egg whites – These whip into stiff peaks and give the candy its fluffy structure.
- 2 1/4 cups granulated sugar – This is the sweet base that helps create the classic divinity texture.
- 1/2 cup water – It helps dissolve the sugar and turn the mixture into a hot syrup.
- 1/2 cup light corn syrup – This keeps the candy smooth and helps stop crystallization.
- 1/8 teaspoon salt – A tiny pinch sharpens the sweetness and balances the flavor.
- One 3-ounce box flavored gelatin powder – This gives the Jello divinity recipe its color and fruity flavor.
Special Dietary Options
- Vegan: Traditional divinity depends on egg whites, so a true vegan version is not a direct swap. For a plant-based candy, use aquafaba whipped to stiff peaks, then test carefully, since texture will differ.
- Gluten-free: This candy is naturally gluten-free as written, but always check the flavored gelatin powder label to be safe.
- Low-calorie: There is no magic trick here, because candy is candy. For a lighter approach, try smaller portions or use sugar-free gelatin powder if you want a lower sugar version.
| Ingredient | What it does | Swap ideas |
|---|---|---|
| Egg whites | Create volume and fluffiness | Pasteurized egg whites for safety |
| Granulated sugar | Builds structure and sweetness | No direct easy swap for best texture |
| Light corn syrup | Prevents crystallization | Glucose syrup, agave, or golden syrup |
| Flavored gelatin powder | Adds color and fruity taste | Flavor extracts plus food coloring |
How to Prepare the Perfect Jello Divinity Recipe: Step-by-Step Guide
First Step: Get your pans and tools ready
Line two baking sheets with parchment paper before you do anything else. This candy sets quickly, so once the mixture is ready, you will not want to be hunting for parchment like a raccoon in a pantry. If you are using a stand mixer, make sure the bowl and whisk attachment are clean and dry. Any moisture can make the candy act up, and divinity is already dramatic enough.
Second Step: Cook the sugar syrup
In a medium saucepan over medium heat, combine the sugar, water, and light corn syrup. Stir occasionally until the mixture reaches 260 degrees Fahrenheit on a candy thermometer, which usually takes about 7 to 10 minutes. This stage matters because the hot syrup is what helps the candy set properly and gives the Jello Divinity Recipe its signature texture.
Do not rush this part. If the syrup is undercooked, the candy may stay too soft. If it is overcooked, you may end up with a stiffer result that starts setting before you are ready. Candy making is a little like babysitting a tiny volcano, so keep an eye on it.
Third Step: Whip the egg whites and add the flavoring
While the syrup heats, whip the egg whites in a stand mixer bowl until stiff peaks form. This usually takes 3 to 5 minutes. Once the whites are fluffy and stand up nicely, add the flavored gelatin powder and salt, then beat until combined. The mixture will already look cheerful and a bit magical, which is always a good sign in candy land.
If you are worried about raw egg whites, use pasteurized egg whites. The hot syrup helps cook them as it is poured in.
You can also use sugar-free gelatin powder if that is your thing. The candy still gets color and flavor, and the texture can work beautifully when the rest of the process is handled properly.
Fourth Step: Drizzle in the hot syrup
With the mixer on medium-low, slowly drizzle the hot syrup mixture into the whipped egg whites over a minute or two. This slow pour helps the candy stay fluffy instead of turning into sweet scrambled chaos. The hot syrup is what brings the whole Jello divinity recipe together, so pour carefully and steadily.
If you are using a hand mixer, be careful. A strong stand mixer is the better choice because the mixture gets thick and the motor has to work hard. If you only have a hand mixer, beat the egg whites for around 4 minutes, then finish beating by hand if needed. That is a little old-school, but sometimes candy asks for teamwork.
Fifth Step: Beat until it holds its shape
Increase mixer speed to medium-high and beat until the candy is no longer glossy and holds its shape, about 6 to 10 minutes. You are looking for that classic divinity look: thick, fluffy, and scoopable. A good test is to drop a spoonful onto parchment. If it keeps its shape instead of slumping like a tired marshmallow, you are ready.
If the mixture firms up too much before you scoop it, add a teaspoon of hot tap water and mix again. That little rescue trick can save the day when the candy decides to get stubborn.
Sixth Step: Scoop and shape the candy
Grease two spoons with cooking spray, then scoop the candy onto the prepared baking sheets. Use a gentle swooping motion with your wrists to create the classic divinity shape. Each piece is usually about 2 tablespoons, but smaller blobs are perfectly fine too if you want bite-sized pieces. Work quickly here because the candy sets fast and waits for no one.
You can shape the candy into neat mounds or playful little swoops. Either way, it will look homemade and charming. Honestly, perfection is overrated when the candy tastes this good.
Seventh Step: Let it set and store it properly
Let the candy set at room temperature for 2 to 3 hours, or preferably overnight, until firm. Do not refrigerate or freeze it if you can help it, because moisture can ruin the texture. Once firm, store the candy in an airtight container at room temperature.
For holiday gifting, wrap pieces in cellophane bags. That turns a simple batch of Jello divinity into a sweet little present that says, “I made this for you, and yes, I absolutely sampled a few pieces first.”

Dietary Substitutions to Customize Your Jello Divinity Recipe
Protein and Main Component Alternatives
The classic Jello Divinity Recipe uses egg whites, but there are a few ways to adapt it if needed. For safety, pasteurized egg whites are a smart option because the hot syrup cooks them during mixing. If you want to avoid eggs altogether, aquafaba can sometimes stand in as a plant-based replacement, though the texture may be a little different and needs testing.
For the syrup component, corn syrup can sometimes be swapped with glucose syrup, agave, golden syrup, honey, brown rice syrup, maple syrup, cane syrup, tapioca syrup, or black treacle. Results vary, and some substitutes add color or flavor. Glucose syrup and golden syrup are usually the closest match if you want a smoother, more traditional candy texture.
Vegetable, Sauce, and Seasoning Modifications
There are no vegetables in this candy, because candy should be allowed to be candy without a salad sneaking in. But flavor changes are easy. If you do not want to use flavored gelatin powder, you can omit it and use flavored extracts with food coloring instead. For lemon, use lemon extract and yellow color. For lime, try lime extract and green. Cherry, orange, strawberry, grape, and other flavors work the same way.
If you are making it for a mixed crowd, try different gelatin flavors in separate batches. That way you can serve a colorful tray with a few taste options, and nobody has to argue over the last strawberry piece.
Mastering Jello Divinity Recipe: Advanced Tips and Variations
Pro cooking techniques
A few small tricks make a huge difference with a Jello Divinity Recipe. First, keep an eye on humidity. Divinity and rainy weather are not friends. If the air is sticky, the candy may refuse to set or turn soft on the outside. Dry days work best, and if you are stuck with questionable weather, a dehumidifier can help.
Use a stand mixer with a strong motor whenever possible. The mixture gets thick enough to make a weak mixer sigh in defeat. If you only have a hand mixer, let it handle the early egg white whipping and then finish by hand if needed.
Flavor variations
The fun part is that this recipe can wear many flavor hats. Strawberry, lime, orange, grape, lemon, berry blue, watermelon, strawberry banana, and black cherry all work beautifully. You can even make a seasonal candy tray with different colors for spring parties or Easter baskets.
Want a softer look? Make small divinity blobs instead of the classic swoops. Want giftable candy? Shape neat spoonfuls, let them set fully, then tuck them into cellophane bags. The candy always looks festive, even when the shapes are a little rebellious.
Presentation tips
For serving, pile the pieces on a pretty plate or arrange them in paper candy cups. The pastel colors look especially cute on a white platter. If you are making this for a party, mix several flavors in separate trays so people can play candy roulette in the best possible way.
Make-ahead options
This candy is great for planning ahead because it keeps well for several days at room temperature. Make it a day before you need it so it has time to set fully. That means less last-minute kitchen chaos, which is always a win.
How to Store Jello Divinity Recipe: Best Practices
Store Jello divinity in an airtight container at room temperature for about 5 days to 1 week. Keep it away from moisture, heat, and direct sunlight so the texture stays fluffy instead of sticky. Refrigeration is not usually a good idea because condensation can make the candy soften.
Freezing is also not recommended for this candy, since thawing can mess with the texture. If you need a holiday prep plan, make it a few days ahead and keep it sealed at room temperature. For gifting, cellophane bags work well, especially if you want each piece to stay tidy and festive.
| Storage method | Best practice | Notes |
|---|---|---|
| Room temperature | Airtight container | Best texture for 5 to 7 days |
| Refrigeration | Not recommended | Can cause stickiness |
| Freezing | Not recommended | May change the texture after thawing |
FAQs: Frequently Asked Questions About Jello Divinity Recipe
What can I use instead of Jello for divinity recipe in Australia?
In Australia, Jello isn’t commonly available as it’s a U.S. brand of flavored gelatin powder used in this divinity recipe for color and flavor. Skip the Jello entirely and replace it with 1/2 to 1 teaspoon of flavored extract plus 1-2 drops of food coloring per batch. For lemon divinity, use lemon extract and yellow coloring; for lime, try lime extract with green. This keeps the candy light and fluffy without altering texture. Mix the extract and color into the sugar syrup before whipping with egg whites. Test a small batch first to adjust intensity. This substitution works well for other flavors like cherry (cherry extract, red coloring) or orange, maintaining the signature melt-in-your-mouth quality of homemade Jello divinity. Store as usual in an airtight container. (92 words)
Can I use sugar-free Jello in divinity recipe?
Yes, sugar-free Jello works in the Jello divinity recipe and has been used successfully many times without issues like leftovers or texture problems. It provides the same vibrant flavor and color while cutting sugar content. Dissolve it into the hot sugar syrup as directed, then whip into stiff peaks with egg whites. Some users with autoimmune conditions have switched away due to potential flare-ups or joint pain from artificial sweeteners or additives—opt for natural extracts if concerned. Always use fresh sugar-free packets for best results. The candy sets quickly and holds shape for piping or dropping. Keep in an airtight container for up to a week. This makes it a great low-sugar holiday treat option. (112 words)
Can you make divinity on a rainy or humid day?
Divinity is sensitive to humidity, so rainy or very humid days can prevent it from setting properly or cause it to become sticky instead of firm. For best results, make it on dry days with humidity below 50-60%. If conditions are iffy, use a dehumidifier in your kitchen or add 1/4 teaspoon cream of tartar extra to stabilize the syrup. Cook the sugar mixture to 250°F (hard-ball stage) precisely with a candy thermometer, then beat vigorously. In high humidity, the candy may dry out on the surface but stay soft inside—let it rest 24 hours before storing. Avoid piping; drop by spoonfuls instead. Patience pays off for perfect Jello divinity texture. (108 words)
What can I substitute for corn syrup in Jello divinity recipe?
Corn syrup prevents sugar crystallization in divinity, but you can swap it with glucose syrup, golden syrup, agave nectar, honey, brown rice syrup, maple syrup, cane syrup, tapioca syrup, or black treacle. Use a 1:1 ratio, but results vary—honey or maple may darken the candy and add flavor, while golden syrup keeps it neutral. Heat to 250°F as usual. Glucose or golden syrup mimic corn syrup closest for clear, smooth divinity. Test in small batches: too much liquid syrups like honey can make it softer. In the Jello version, stir in after dissolving gelatin. This flexibility suits dietary needs without ruining the fluffy peaks. Store airtight for 5-7 days. (114 words)
Are uncooked egg whites safe in divinity recipe and how long does it last?
Yes, egg whites in divinity are safe—the hot sugar syrup (cooked to 250°F) pasteurizes them upon pouring in, killing bacteria. For extra caution, use pasteurized egg whites from cartons. Beat to stiff peaks before adding syrup. The finished Jello divinity stays fresh in an airtight container at room temperature for 5 days to 1 week; refrigerate up to 2 weeks but it may soften. Freeze portions in zip bags for 1-2 months—thaw at room temp. Avoid moisture exposure to prevent stickiness. Shape by dropping spoonfuls on parchment or spreading in a greased pan for logs, cutting once set. Perfect for gifting or holiday prep. (109 words)
Jello Divinity Recipe
🍬🌈 Fruity jello divinity: fudgy nougat candy exploding with gelatin flavor – perfect no-cook Easter treat or gift!
💖 Foolproof stovetop method: whips light & airy, sets firm fast for dozens of colorful, shareable bites.
- Total Time: 2 hours 40 minutes
- Yield: 40 pieces
Ingredients
– 2 egg whites
– 2 1/4 cups granulated sugar
– 1/2 cup water
– 1/2 cup light corn syrup
– 1/8 teaspoon salt
– One 3-ounce box flavored gelatin powder
Instructions
1-First Step: Get your pans and tools ready Line two baking sheets with parchment paper before you do anything else. This candy sets quickly, so once the mixture is ready, you will not want to be hunting for parchment like a raccoon in a pantry. If you are using a stand mixer, make sure the bowl and whisk attachment are clean and dry. Any moisture can make the candy act up, and divinity is already dramatic enough.
2-Second Step: Cook the sugar syrup In a medium saucepan over medium heat, combine the sugar, water, and light corn syrup. Stir occasionally until the mixture reaches 260 degrees Fahrenheit on a candy thermometer, which usually takes about 7 to 10 minutes. This stage matters because the hot syrup is what helps the candy set properly and gives the Jello Divinity Recipe its signature texture. Do not rush this part. If the syrup is undercooked, the candy may stay too soft. If it is overcooked, you may end up with a stiffer result that starts setting before you are ready. Candy making is a little like babysitting a tiny volcano, so keep an eye on it.
3-Third Step: Whip the egg whites and add the flavoring While the syrup heats, whip the egg whites in a stand mixer bowl until stiff peaks form. This usually takes 3 to 5 minutes. Once the whites are fluffy and stand up nicely, add the flavored gelatin powder and salt, then beat until combined. The mixture will already look cheerful and a bit magical, which is always a good sign in candy land. If you are worried about raw egg whites, use pasteurized egg whites. The hot syrup helps cook them as it is poured in. You can also use sugar-free gelatin powder if that is your thing. The candy still gets color and flavor, and the texture can work beautifully when the rest of the process is handled properly.
4-Fourth Step: Drizzle in the hot syrup With the mixer on medium-low, slowly drizzle the hot syrup mixture into the whipped egg whites over a minute or two. This slow pour helps the candy stay fluffy instead of turning into sweet scrambled chaos. The hot syrup is what brings the whole Jello divinity recipe together, so pour carefully and steadily. If you are using a hand mixer, be careful. A strong stand mixer is the better choice because the mixture gets thick and the motor has to work hard. If you only have a hand mixer, beat the egg whites for around 4 minutes, then finish beating by hand if needed. That is a little old-school, but sometimes candy asks for teamwork.
5-Fifth Step: Beat until it holds its shape Increase mixer speed to medium-high and beat until the candy is no longer glossy and holds its shape, about 6 to 10 minutes. You are looking for that classic divinity look: thick, fluffy, and scoopable. A good test is to drop a spoonful onto parchment. If it keeps its shape instead of slumping like a tired marshmallow, you are ready. If the mixture firms up too much before you scoop it, add a teaspoon of hot tap water and mix again. That little rescue trick can save the day when the candy decides to get stubborn.
6-Sixth Step: Scoop and shape the candy Grease two spoons with cooking spray, then scoop the candy onto the prepared baking sheets. Use a gentle swooping motion with your wrists to create the classic divinity shape. Each piece is usually about 2 tablespoons, but smaller blobs are perfectly fine too if you want bite-sized pieces. Work quickly here because the candy sets fast and waits for no one. You can shape the candy into neat mounds or playful little swoops. Either way, it will look homemade and charming. Honestly, perfection is overrated when the candy tastes this good.
7-Seventh Step: Let it set and store it properly Let the candy set at room temperature for 2 to 3 hours, or preferably overnight, until firm. Do not refrigerate or freeze it if you can help it, because moisture can ruin the texture. Once firm, store the candy in an airtight container at room temperature. For holiday gifting, wrap pieces in cellophane bags. That turns a simple batch of Jello divinity into a sweet little present that says, “I made this for you, and yes, I absolutely sampled a few pieces first.”
Last Step:
Please leave a rating and comment letting us know how you liked this recipe! This helps our business to thrive and continue providing free, high-quality recipes for you.Notes
🌀 Use stand mixer – hand mixers burn out on thick batter.
🌤️ Avoid humid days; divinity won’t set properly.
⚡ Work quickly scooping; add tsp hot water if too firm.
- Prep Time: 30 minutes
- Setting: 2 hours
- Cook Time: 10 minutes
- Category: Desserts
- Method: No-Bake
- Cuisine: American
- Diet: Vegetarian
Nutrition
- Serving Size: 1 piece
- Calories: 60 kcal
- Sugar: 14 g
- Sodium: 20 mg
- Fat: 0 g
- Saturated Fat: 0 g
- Unsaturated Fat: 0 g
- Trans Fat: 0 g
- Carbohydrates: 15 g
- Fiber: 0 g
- Protein: 0 g
- Cholesterol: 0 mg





