

Why You’ll Love This Turkey Gravy Recipe
This Turkey Gravy Recipe is one of those simple holiday staples that makes a big meal feel complete. It comes together fast, uses the flavorful drippings you already have, and turns basic pantry ingredients into a smooth sauce that tastes like it took all afternoon.
- Easy to make: With just 5 minutes of prep and 8 minutes of cooking time, this gravy fits right into a busy holiday kitchen. The steps are straightforward, and the whole recipe is ready in about 13 minutes.
- Budget-friendly and practical: You only need a few affordable ingredients, including butter, flour, and chicken broth. That makes it a smart choice for home cooks who want good flavor without extra fuss.
- Versatile for many meals: While it shines next to turkey, this gravy also works well with chicken or beef roast drippings. It is a handy recipe to keep for weeknight dinners, holidays, and meal prep.
- Rich, comforting flavor: Cooking the flour and fat until golden brown gives the gravy a nutty taste and a deeper color. A pinch of freshly cracked black pepper adds just enough warmth at the end.
If you like simple holiday recipes that feel special without being complicated, this one belongs in your rotation. It pairs especially well with roasted turkey, mashed potatoes, and stuffing, and it can be adjusted easily if you need a thinner or thicker sauce. For another cozy dessert to serve after dinner, you might also like this easy peach cobbler recipe.
Good gravy does not need fancy ingredients. It just needs good drippings, steady whisking, and a little patience.
For readers who want to learn more about turkey as a holiday main dish, this helpful guide to turkey nutrition and cooking offers useful background.
Jump to:
- Why You’ll Love This Turkey Gravy Recipe
- Essential Ingredients for Turkey Gravy Recipe
- Main Ingredients
- Special Dietary Options
- How to Prepare the Perfect Turkey Gravy Recipe: Step-by-Step Guide
- First Step: Collect and strain the drippings
- Second Step: Set up the roux
- Third Step: Add the liquid slowly
- Fourth Step: Simmer until thickened
- Final Step: Season and serve
- Dietary Substitutions to Customize Your Turkey Gravy Recipe
- Protein and Main Component Alternatives
- Vegetable, Sauce, and Seasoning Modifications
- Mastering Turkey Gravy Recipe: Advanced Tips and Variations
- Pro cooking techniques
- Flavor variations
- Presentation tips
- Make-ahead options
- How to Store Turkey Gravy Recipe: Best Practices
- Nutrition and Recipe Timing
- FAQs: Frequently Asked Questions About Turkey Gravy Recipe
- What ingredients do I need for homemade turkey gravy?
- How do you make turkey gravy from pan drippings?
- How can I avoid lumps in turkey gravy or fix them if they form?
- How do I thicken turkey gravy if it’s too thin or thin it if too thick?
- How do you store leftover turkey gravy and how long does it last?
- Turkey Gravy Recipe
- Ingredients
- Instructions
- Last Step:
- Notes
- Nutrition
- Did you make this recipe?
Essential Ingredients for Turkey Gravy Recipe
Before you start, gather everything you need so the cooking process stays smooth. This recipe uses turkey pan drippings as the flavor base, then builds the gravy with butter, flour, broth, and seasoning.
Main Ingredients
- 1/2 cup turkey pan drippings – This is the heart of the gravy and gives it that roasted turkey flavor.
- 2 tablespoons butter – Butter helps create enough fat for the roux if your drippings are short and adds richness.
- 1/4 cup all-purpose flour – Flour thickens the gravy and gives it the smooth, spoonable texture people expect.
- 1 1/2 cups chicken broth – Broth adds volume and savory depth. Quality chicken broth makes a noticeable difference.
- Pinch of freshly cracked black pepper – Pepper adds a gentle bite and balances the richness.
- Salt, to taste – Salt is added at the end so you can control the final flavor after the drippings and broth are mixed.
Special Dietary Options
- Vegan: Use plant-based butter, vegetable broth, and a vegan gravy base made from mushroom or onion drippings instead of turkey drippings.
- Gluten-free: Replace all-purpose flour with a gluten-free flour blend or cornstarch slurry. Add it slowly so the gravy stays smooth.
- Low-calorie: Use a little less butter and choose a lower-sodium broth. You can also thin the gravy with more broth instead of extra fat.
| Ingredient | Amount | Role in the Recipe |
|---|---|---|
| Turkey pan drippings | 1/2 cup | Provides the main roasted flavor |
| Butter | 2 tablespoons | Adds richness and helps form the roux |
| All-purpose flour | 1/4 cup | Thickens the gravy |
| Chicken broth | 1 1/2 cups | Creates the liquid base and savory taste |
| Black pepper | Pinch | Finishes the gravy with warmth |
How to Prepare the Perfect Turkey Gravy Recipe: Step-by-Step Guide
First Step: Collect and strain the drippings
Start by collecting the turkey pan drippings after roasting. Pour them through a fine mesh strainer into a liquid measuring cup to catch any bits of skin, herbs, or browned solids. Let the drippings rest for 3 to 5 minutes so the fat rises to the top.
This short resting time matters because it helps you separate the flavorful fat from the liquid. For this recipe, you want about 3 tablespoons of fat. If you do not have quite that much, simply make up the difference with butter. That little adjustment keeps the gravy smooth and balanced.
Second Step: Set up the roux
Place a medium saucepan over medium heat. Add the turkey fat you skimmed from the drippings along with the 2 tablespoons of butter. Let everything melt together fully before adding the flour. The goal here is a warm, even fat base that can coat the flour well.
Once the fat is melted, add the 1/4 cup all-purpose flour. Whisk continuously so the mixture turns into a smooth paste. It will look pale at first, but do not stop there. Keep cooking for about 1 1/2 to 2 minutes until the roux becomes golden brown and smells nutty.
The golden color is not just for looks. It helps remove the raw flour taste and gives the gravy a deeper, more homemade flavor.
Third Step: Add the liquid slowly
Now comes the part that makes or breaks a smooth gravy. Slowly pour in the strained pan drippings and the chicken broth while whisking constantly. The key is to add the liquid in a thin stream, not all at once. This keeps lumps from forming and helps the roux absorb the liquid evenly.
Aim for a total of 2 cups of liquid. In many holiday kitchens, that will be the 1/2 cup drippings plus 1 1/2 cups broth, which fits this recipe exactly. Keep whisking until the mixture looks smooth and glossy. If you do see a few small lumps, keep whisking. You can also strain the gravy at the end if needed.
Fourth Step: Simmer until thickened
Bring the gravy to a gentle boil, then lower the heat and simmer for about 5 minutes. Whisk frequently during this time so the sauce does not stick to the bottom of the pan. As it cooks, the gravy will thicken and take on a silky texture.
If the gravy seems thin at first, do not rush to add more flour. It often thickens more as it simmers and then again as it cools. Give it time before making changes. This helps you avoid a heavy or pasty texture.
Final Step: Season and serve
Once the gravy has thickened to your liking, season it with salt and a pinch of freshly cracked black pepper. Taste it before adding too much salt, especially if your broth or drippings already have seasoning. Remove the pan from the heat and serve right away.
The gravy will continue to thicken as it cools, so if it looks a little loose in the pan, that is perfectly fine. Spoon it over sliced turkey, mashed potatoes, stuffing, or biscuits. If you want more holiday comfort on the table, this gravy also pairs nicely with a slice of sweet strawberry milkshake treat for a fun family meal later in the day.
| Step | Time | What to Watch For |
|---|---|---|
| Strain drippings | 3 to 5 minutes | Fat should rise to the top |
| Cook roux | 1 1/2 to 2 minutes | Mixture turns golden and smells nutty |
| Simmer gravy | About 5 minutes | Gravy thickens and turns glossy |

Dietary Substitutions to Customize Your Turkey Gravy Recipe
Protein and Main Component Alternatives
If you do not have turkey drippings, you still have options. This recipe also works well with chicken or beef roast drippings, which makes it useful year-round. Chicken drippings give you a lighter, milder gravy, while beef drippings create a deeper and darker sauce.
For a vegetarian version, replace the drippings with a mix of plant-based butter and a rich mushroom broth. You can also use browned onions or sautéed mushrooms to build a savory base. If you need a dairy-free version, use a dairy-free butter substitute that melts well and has a neutral flavor.
Vegetable, Sauce, and Seasoning Modifications
Flavor additions can shift the gravy to match different meals. A little thyme, sage, or rosemary gives it a more classic holiday taste. If you like a stronger savory note, whisk in a spoonful of onion powder or garlic powder when you add the flour.
For a lighter sauce, choose low-sodium broth and skip extra butter unless you need it. If you are cooking for someone sensitive to gluten, use a certified gluten-free flour blend or a cornstarch slurry instead of wheat flour. For a smoother finish, strain the gravy after cooking, especially if you are serving guests and want a polished result.
Mastering Turkey Gravy Recipe: Advanced Tips and Variations
Pro cooking techniques
The best gravy starts with a well-cooked roux. Letting the flour and fat mixture turn golden brown helps build a deeper flavor and keeps the gravy from tasting flat. Whisking constantly while adding the liquid is just as important, since that steady motion creates a smoother finish.
If the gravy gets lumpy, strain it through a fine mesh sieve right away. That quick fix saves time and keeps dinner moving. You can also use an immersion blender for a very smooth texture, though I usually find straining is enough.
Flavor variations
There is room to make this recipe your own. Try a small pinch of sage for a classic holiday note, or add thyme for a more herb-forward flavor. A splash of white wine can also give the gravy a slightly brighter taste, though the recipe is already flavorful without it.
You can also switch up the broth depending on what you have on hand. Just remember that a good-quality chicken broth makes a noticeable difference in the final taste. For readers interested in the science of food and texture, this research article on sauce structure and cooking behavior offers interesting background.
Presentation tips
Serve the gravy in a warm bowl or small gravy boat so it stays hot longer. A final crack of black pepper on top gives it a nice finished look. If you are serving a holiday platter, spoon a little gravy over the turkey slices before bringing the dish to the table, then keep more on the side for guests who want extra.
Make-ahead options
This is a great recipe for busy holidays because it can be made ahead. If you know your schedule will be tight, save the drippings after roasting and make the gravy later the same day. You can also prepare it a day ahead and reheat it gently with a splash of broth before serving. This works especially well for newlyweds, students, and working professionals who want to keep holiday cooking calm.
How to Store Turkey Gravy Recipe: Best Practices
Leftover gravy stores well, which makes this recipe even more practical. Let it cool completely before packing it away. Once cooled, move it to an airtight container and place it in the refrigerator for up to 4 days. The gravy will thicken as it chills, so do not worry if it looks firm the next day.
For longer storage, freeze the gravy in a freezer-safe container or small portions. It keeps well for up to 3 months. Thaw it overnight in the refrigerator before reheating. When you warm it back up, add a little broth if needed to bring back the smooth texture.
To reheat, use low heat on the stovetop and stir often. If you use the microwave, heat in short bursts and stir between each round. Always check that the gravy is hot throughout before serving. This makes leftover turkey dinners, sandwiches, and casseroles much easier to pull together during the week.
Nutrition and Recipe Timing
| Details | Amount |
|---|---|
| Prep time | 5 minutes |
| Cook time | 8 minutes |
| Total time | 13 minutes |
| Calories per 1/4 cup | 47 |
| Carbohydrates | 4g |
| Protein | 1g |
| Fat | 3g |
| Sodium | 207mg |
| Fiber | 0.1g |
This lighter gravy fits nicely into a holiday plate without feeling too heavy. It still brings plenty of flavor, and the serving size is easy to portion for guests. For diet-conscious readers, that balance of taste and simple ingredients is part of what makes this Turkey Gravy Recipe so useful.
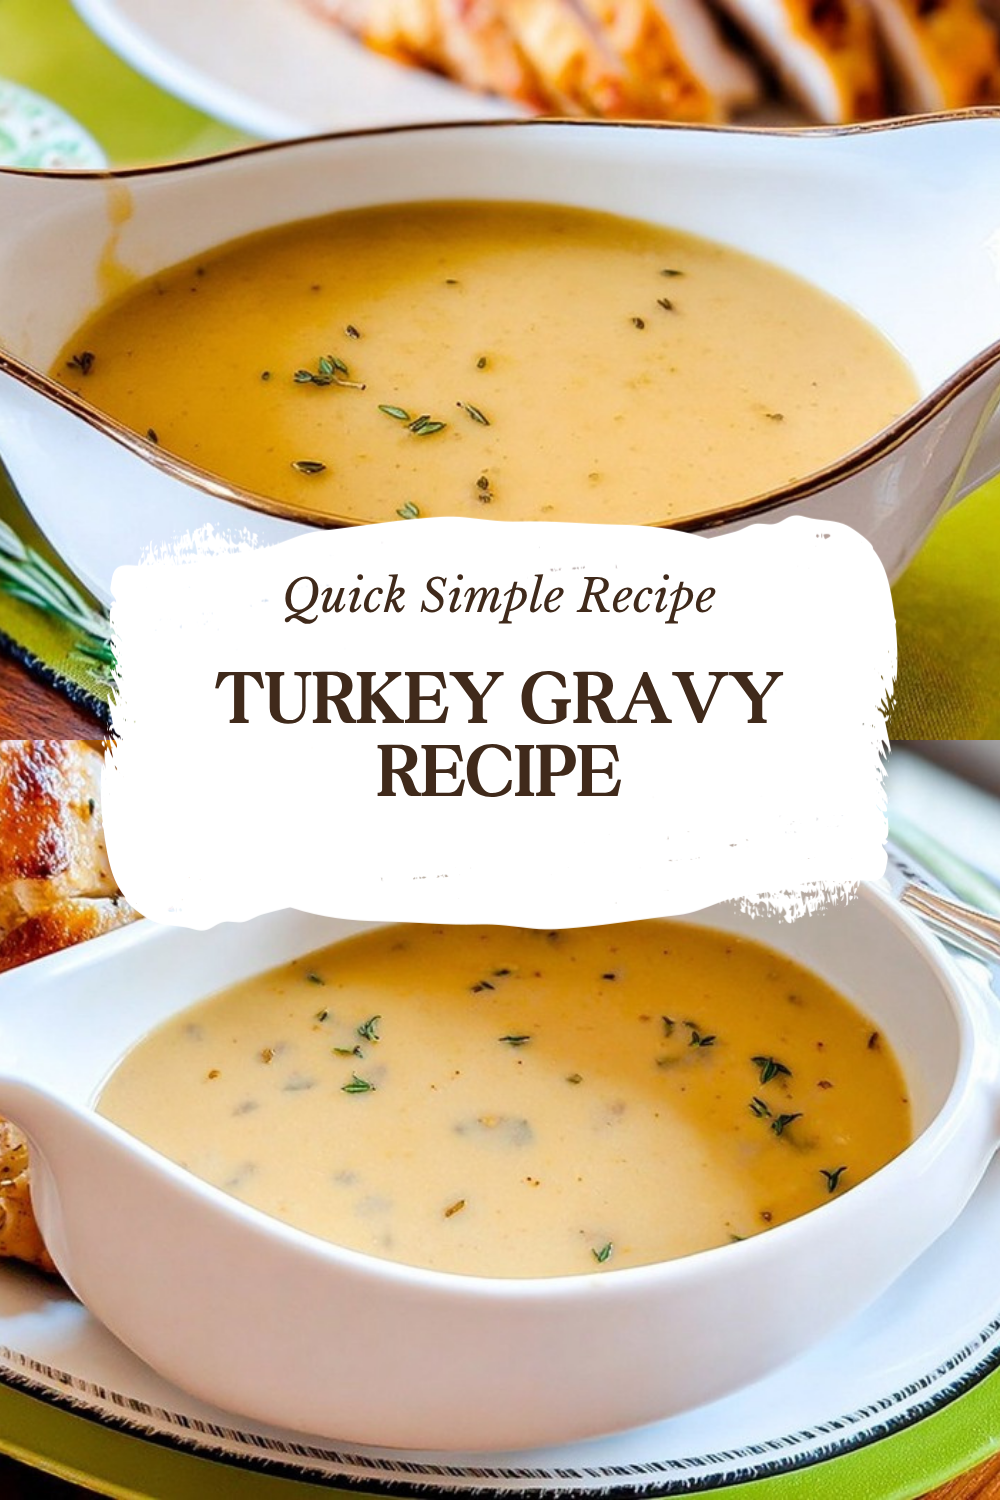
FAQs: Frequently Asked Questions About Turkey Gravy Recipe
What ingredients do I need for homemade turkey gravy?
For classic homemade turkey gravy, gather ¼ cup turkey pan drippings (or a mix of drippings and chicken broth), 2 tablespoons unsalted butter, ¼ cup all-purpose flour, 2 cups chicken or turkey broth, salt, and freshly ground black pepper to taste. Optional add-ins include minced garlic, fresh herbs like thyme or sage, or a splash of white wine for extra depth. This simple list yields about 2½ cups of rich gravy. Measure drippings after roasting your turkey; if short, supplement with broth to maintain flavor balance. Use unsalted butter and broth to control saltiness. These pantry staples come together in under 15 minutes for a smooth, savory result perfect for Thanksgiving or any roast meal. (92 words)
How do you make turkey gravy from pan drippings?
Start by collecting pan drippings from your roasted turkey, straining out solids, and skimming off excess fat (leave about ¼ cup). In a saucepan over medium heat, melt 2 tablespoons butter with the fat. Whisk in ¼ cup flour to form a roux; cook 2-3 minutes until golden. Gradually pour in 2 cups warm broth or drippings while whisking constantly to prevent lumps. Bring to a simmer, stirring until thickened (about 5-7 minutes). Season with salt, pepper, and herbs. Taste and adjust. For best results, use a flat whisk. This method creates silky gravy in 10-15 minutes. Strain if needed for smoothness. Serve hot over turkey and sides. (112 words)
How can I avoid lumps in turkey gravy or fix them if they form?
To prevent lumps, whisk the flour into melted fat slowly to make a smooth roux before adding liquids. Pour broth or drippings in a thin stream while whisking vigorously over medium heat. Use room-temperature liquids to avoid shocking the roux. If lumps appear, strain through a fine-mesh sieve or blend briefly with an immersion blender. For extra insurance, temper the roux by adding a splash of hot broth first. Common mistake: dumping everything at once. With practice, you’ll get velvety texture every time. This 10-minute fix keeps your gravy pourable and professional-looking for holiday dinners. (98 words)
How do I thicken turkey gravy if it’s too thin or thin it if too thick?
If gravy is too thin, simmer uncovered 3-5 more minutes to reduce and concentrate flavors. For faster thickening, mix 1 teaspoon flour with 1 tablespoon softened butter into a slurry; whisk into simmering gravy. Avoid overcooking to prevent graininess. If too thick, whisk in broth, milk, or water 1 tablespoon at a time until desired consistency—like heavy cream. Heat gently to blend. Test by coating the back of a spoon. These tweaks take under 5 minutes and salvage any batch. Pro tip: Note your turkey size next time for better ratios; a 12-15 lb bird yields ideal drippings. (102 words)
How do you store leftover turkey gravy and how long does it last?
Cool gravy completely, then transfer to an airtight container. Refrigerate up to 4 days; it thickens when cold, so thin with broth or water when reheating on the stovetop over low heat, stirring constantly. For longer storage, freeze in portions (ice cube trays work for small amounts) up to 3 months. Thaw overnight in fridge and reheat gently to avoid separation. Microwave in short bursts with stirring if needed. Always reheat to 165°F for safety. Label containers with dates. This preserves flavor for post-holiday meals like turkey sandwiches or casseroles. Yields versatile leftovers from your batch. (108 words)
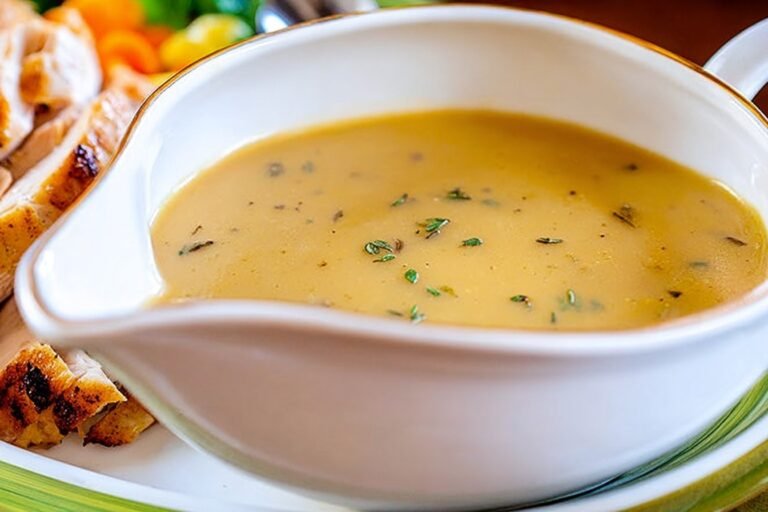
Turkey Gravy Recipe
🦃 Whip up silky, flavorful gravy from pan drippings to crown your holiday turkey and mashed potatoes with irresistible savory perfection!
🍲 Ready in just 13 minutes with simple steps, this lump-free essential works for any roast and stores easily for stress-free feasts.
- Total Time: 13 minutes
- Yield: 8 servings
Ingredients
– 1/2 cup Turkey pan drippings Provides the main roasted flavor
– 2 tablespoons Butter Adds richness and helps form the roux
– 1/4 cup All-purpose flour Thickens the gravy
– 1 1/2 cups Chicken broth Creates the liquid base and savory taste
– Pinch Black pepper Finishes the gravy with warmth
Instructions
1-First Step: Collect and strain the drippings Start by collecting the turkey pan drippings after roasting. Pour them through a fine mesh strainer into a liquid measuring cup to catch any bits of skin, herbs, or browned solids. Let the drippings rest for 3 to 5 minutes so the fat rises to the top. This short resting time matters because it helps you separate the flavorful fat from the liquid. For this recipe, you want about 3 tablespoons of fat. If you do not have quite that much, simply make up the difference with butter. That little adjustment keeps the gravy smooth and balanced.
2-Second Step: Set up the roux Place a medium saucepan over medium heat. Add the turkey fat you skimmed from the drippings along with the 2 tablespoons of butter. Let everything melt together fully before adding the flour. The goal here is a warm, even fat base that can coat the flour well. Once the fat is melted, add the 1/4 cup all-purpose flour. Whisk continuously so the mixture turns into a smooth paste. It will look pale at first, but do not stop there. Keep cooking for about 1 1/2 to 2 minutes until the roux becomes golden brown and smells nutty. The golden color is not just for looks. It helps remove the raw flour taste and gives the gravy a deeper, more homemade flavor.
3-Third Step: Add the liquid slowly Now comes the part that makes or breaks a smooth gravy. Slowly pour in the strained pan drippings and the chicken broth while whisking constantly. The key is to add the liquid in a thin stream, not all at once. This keeps lumps from forming and helps the roux absorb the liquid evenly. Aim for a total of 2 cups of liquid. In many holiday kitchens, that will be the 1/2 cup drippings plus 1 1/2 cups broth, which fits this recipe exactly. Keep whisking until the mixture looks smooth and glossy. If you do see a few small lumps, keep whisking. You can also strain the gravy at the end if needed.
4-Fourth Step: Simmer until thickened Bring the gravy to a gentle boil, then lower the heat and simmer for about 5 minutes. Whisk frequently during this time so the sauce does not stick to the bottom of the pan. As it cooks, the gravy will thicken and take on a silky texture. If the gravy seems thin at first, do not rush to add more flour. It often thickens more as it simmers and then again as it cools. Give it time before making changes. This helps you avoid a heavy or pasty texture.
5-Final Step: Season and serve Once the gravy has thickened to your liking, season it with salt and a pinch of freshly cracked black pepper. Taste it before adding too much salt, especially if your broth or drippings already have seasoning. Remove the pan from the heat and serve right away. The gravy will continue to thicken as it cools, so if it looks a little loose in the pan, that is perfectly fine. Spoon it over sliced turkey, mashed potatoes, stuffing, or biscuits. If you want more holiday comfort on the table, this gravy also pairs nicely with a slice of sweet strawberry milkshake treat for a fun family meal later in the day.
Last Step:
Please leave a rating and comment letting us know how you liked this recipe! This helps our business to thrive and continue providing free, high-quality recipes for you.Notes
🥄 Roux to golden brown eliminates raw flour taste for deeper flavor.
🔄 Add liquids slowly while whisking vigorously for smooth texture.
❄️ Thickens when cooled; thin with broth when reheating if needed.
- Prep Time: 5 minutes
- Cook Time: 8 minutes
- Category: Sauces
- Method: Stovetop
- Cuisine: American
Nutrition
- Serving Size: ¼ cup
- Calories: 47 kcal
- Sugar: 0g
- Sodium: 207mg
- Fat: 3g
- Saturated Fat: 2g
- Unsaturated Fat: 1g
- Trans Fat: 0g
- Carbohydrates: 4g
- Fiber: 0.1g
- Protein: 1g
- Cholesterol: 0mg





