

Why You’ll Love This Creamed Peas
If you are looking for a quick and comforting side dish that brings warmth to any meal, this creamed peas recipe is about to become your new go-to. With just a handful of pantry staples and 15 minutes from start to finish, you will have a velvety, satisfying dish that pairs perfectly with almost any main course. Whether you are cooking for a busy weeknight dinner or a holiday gathering, this recipe delivers every single time.
Here is why this creamed peas recipe deserves a permanent spot in your kitchen rotation:
- Ease of preparation: This recipe requires no fancy techniques or hard-to-find ingredients. With only 5 minutes of prep time and 10 minutes on the stove, you can have this dish on the table faster than you could drive to a restaurant. The straightforward steps make it perfect for beginner cooks or anyone short on time.
- Health benefits: Peas are packed with fiber, vitamins, and plant-based protein. Each serving provides 4g of fiber, 6g of protein, and a healthy dose of Vitamin A and Vitamin C. The health benefits of peas make this side dish as nutritious as it is delicious.
- Versatility: This recipe adapts easily to different dietary needs. You can make it gluten-free with a simple flour swap, lighten it up with low-fat milk, or even keep it classic with the traditional ingredients. It works beautifully alongside roasted chicken, ham, mashed potatoes, or even as part of a vegetarian spread.
- Distinctive flavor: The creamy béchamel sauce coats each sweet pea perfectly, creating a balance of savory and slightly sweet flavors. The optional garlic powder adds a subtle depth without overwhelming the natural sweetness of the peas, making every bite comforting and satisfying.
Jump to:
- Why You’ll Love This Creamed Peas
- Essential Ingredients for Creamed Peas
- Main Ingredients
- Special Dietary Options
- How to Prepare the Perfect Creamed Peas: Step-by-Step Guide
- Step One: Melt the Butter
- Step Two: Create the Roux
- Step Three: Add the Milk and Thicken
- Step Four: Add the Peas
- Step Five: Finish and Serve
- Dietary Substitutions to Customize Your Creamed Peas
- Protein and Main Component Alternatives
- Vegetable, Sauce, and Seasoning Modifications
- Mastering Creamed Peas: Advanced Tips and Variations
- Pro Cooking Techniques
- Flavor Variations
- Presentation Tips
- Make-Ahead Options
- How to Store Creamed Peas: Best Practices
- Refrigeration
- Freezing
- Reheating
- Meal Prep Considerations
- FAQs: Frequently Asked Questions About Creamed Peas
- What are creamed peas?
- What ingredients do I need for creamed peas?
- How do you make creamed peas step by step?
- Can I use canned peas for creamed peas?
- How do you store and freeze creamed peas?
- Creamed Peas
- Ingredients
- Instructions
- Last Step:
- Notes
- Nutrition
- Did you make this recipe?
Essential Ingredients for Creamed Peas
One of the best things about this creamed peas recipe is that you probably already have most of these ingredients in your kitchen. Each component plays an important role in creating that silky, comforting texture we all love.
Main Ingredients
- 4 tablespoons unsalted butter – Forms the base of your roux and adds rich, buttery flavor throughout the sauce. Unalted butter gives you complete control over the seasoning.
- 3 tablespoons all-purpose flour – Thickens the milk into a smooth, velvety sauce. The ratio of butter to flour creates the perfect consistency for coating the peas.
- 1/4 teaspoon garlic powder (optional) – Adds a gentle savory note that complements the sweetness of the peas without overpowering them. Skip it if you prefer a more traditional flavor.
- 2 cups whole milk or half-and-half – Creates the creamy foundation of your sauce. Whole milk gives a lighter result, while half-and-half makes it extra rich and indulgent. Milk brings calcium and protein to the dish as well.
- 1 teaspoon salt – Brings out all the flavors and balances the natural sweetness of the peas. Adjust to your taste preferences.
- 1/2 teaspoon white or black pepper – Adds a gentle warmth and depth. White pepper keeps the sauce looking pristine, while black pepper adds a more robust flavor.
- 4 cups frozen peas – The star of the dish. Frozen peas hold their shape beautifully and require no prep work. They bring bright color and sweet flavor to every bite.
- 1/4 cup heavy cream (optional) – Stirred in at the end for extra richness and a luxurious finish. Perfect for special occasions or when you want to treat yourself.
Special Dietary Options
This recipe is wonderfully adaptable for various dietary needs:
- Vegan: Swap the butter for vegan butter or olive oil, use plant-based milk (oat or soy work well), and skip the heavy cream or use coconut cream instead. The result is still creamy and satisfying.
- Gluten-free: Replace the all-purpose flour with a gluten-free all-purpose flour blend or cornstarch (use half the amount if using cornstarch). The sauce will thicken beautifully either way.
- Low-calorie: Use 2% milk instead of whole milk or half-and-half, reduce the butter to 2 tablespoons, and skip the optional heavy cream. You will still get a creamy result with fewer calories.
How to Prepare the Perfect Creamed Peas: Step-by-Step Guide
Making creamed peas is surprisingly simple, but a few key techniques will help you achieve the smoothest, most flavorful results. Follow these detailed steps, and you will have a restaurant-quality side dish in no time.
Step One: Melt the Butter
Start by placing 4 tablespoons of unsalted butter in a medium saucepan over medium-high heat. Let the butter melt completely and begin to foam slightly. You want the butter hot but not browning, as this creates the perfect base for your roux. Swirl the pan occasionally to ensure even melting.
The saucepan you choose matters more than you might think. A pan with a heavy bottom distributes heat evenly and prevents hot spots that could scorch your sauce. Stainless steel or enameled cast iron works beautifully for this recipe.
Step Two: Create the Roux
Once your butter has melted, whisk in 3 tablespoons of all-purpose flour and 1/4 teaspoon of garlic powder (if using). This mixture is called a roux, and it is the foundation of your creamy sauce. Whisk constantly for about 1 minute to cook out the raw flour taste.
The key here is to keep whisking until the mixture is completely smooth and has a paste-like consistency. You should not see any dry flour or lumps at this stage. The garlic powder will distribute throughout the roux, infusing the sauce with subtle savory flavor from the very beginning.
Pro Tip: A good roux should smell slightly nutty and look like wet sand. Do not let it brown, or your sauce will have a beige rather than bright white color.
Step Three: Add the Milk and Thicken
Now comes the most important step for achieving a silky sauce. Slowly whisk in 2 cups of whole milk or half-and-half, pouring in a thin, steady stream while whisking constantly. This gradual addition prevents lumps from forming and ensures your sauce stays perfectly smooth.
Continue cooking and stirring frequently for about 6 minutes, or until the sauce has thickened enough to coat the back of a spoon. You will notice it starting to bubble gently and thicken visibly around the 4-minute mark. The sauce should have the consistency of heavy cream when it is ready for the next step.
Once thickened, season with 1 teaspoon of salt and 1/2 teaspoon of white or black pepper. Taste your sauce at this point and adjust the seasoning if needed. Remember, you can always add more salt, but you cannot take it away, so start conservatively if you are unsure.
Step Four: Add the Peas
Add 4 cups of frozen peas directly to the sauce. There is no need to thaw them first. The frozen peas will cool down your sauce slightly, but it will come back up to temperature quickly.
Cook the peas in the sauce for about 4 minutes, or until they are heated through. Stir occasionally to ensure all the peas get evenly coated with that delicious creamy sauce. You will know they are done when they are hot throughout and still hold their shape with a slight bite. Avoid overcooking, as this can make the peas mushy and less vibrant.
Step Five: Finish and Serve
For an extra touch of luxury, stir in 1/4 cup of heavy cream at the end. This step is entirely optional but adds wonderful richness that takes the dish from everyday to special-occasion worthy. Taste once more and adjust your seasonings if needed.
Transfer your creamed peas to a serving dish and garnish as desired. A sprinkle of black pepper, a small pat of butter, or fresh herbs like chives or dill all make beautiful finishing touches. Serve immediately while hot and creamy.
| Timing | Duration |
|---|---|
| Prep Time | 5 minutes |
| Cook Time | 10 minutes |
| Total Time | 15 minutes |

Dietary Substitutions to Customize Your Creamed Peas
One of the things I love most about this creamed peas recipe is how easily it adapts to different dietary needs and preferences. Whether you are cooking for someone with food sensitivities or simply want to lighten things up, there are plenty of options to make this dish work for you.
Protein and Main Component Alternatives
While peas are the traditional star of this dish, you can add protein to make it a more substantial side or even a light main course. Diced ham or cooked bacon bits stirred in at the end add wonderful smoky flavor and protein. For a vegetarian protein boost, try adding sautéed mushrooms or white beans along with the peas.
If you want to make this dish even heartier, consider adding small boiled potatoes or pearl onions. These additions transform creamed peas from a simple side into a more filling comfort food, perfect for cold weather meals. Just be sure to par-cook potatoes before adding them, as they take longer than peas to become tender.
Vegetable, Sauce, and Seasoning Modifications
The creamy sauce base is incredibly versatile and pairs well with many vegetables. You can mix things up by adding diced carrots, pearl onions, or even small broccoli florets alongside the peas. A classic combination is peas and carrots, which adds extra color and a subtle sweetness to the dish.
For seasoning variations, consider these options:
- Onion powder: Add 1/4 teaspoon along with the garlic powder for extra savory depth.
- Fresh nutmeg: A tiny pinch (about 1/8 teaspoon) adds warmth and complexity to the creamy sauce.
- Fresh herbs: Stir in chopped parsley, dill, or chives just before serving for a pop of fresh flavor and color.
- Lemon zest: A small amount brightens the entire dish and balances the richness of the sauce.
If you are looking for a lighter sauce consistency, you can thin it with a little extra milk or even vegetable or chicken stock. Conversely, for an ultra-rich version, increase the butter to 5 tablespoons or add more heavy cream at the end. The beauty of this recipe is that you are in complete control of the final result.
For those watching their sodium intake, simply reduce the salt to 1/2 teaspoon and let diners season their own portions at the table. Low-sodium butter is another option for further reducing sodium content.
Mastering Creamed Peas: Advanced Tips and Variations
Once you have mastered the basic creamed peas recipe, you might want to experiment with some advanced techniques and creative variations. These tips will help you take your dish from good to absolutely memorable.
Pro Cooking Techniques
The secret to the smoothest sauce lies in your whisking technique. Always whisk in a figure-eight pattern rather than small circles. This motion catches any lumps forming on the bottom and sides of the pan, ensuring a perfectly smooth result every time. Also, invest in a good quality balloon whisk, which incorporates air and creates a lighter sauce texture.
Temperature control is another crucial factor. Keep your heat at medium or medium-low throughout the process. High heat causes the sauce to thicken unevenly and can scorch the bottom. Patient, gentle cooking yields the silkiest results.
Flavor Variations
For special occasions, try these creative twists on the classic recipe:
- Curried creamed peas: Add 1/2 teaspoon of mild curry powder to the roux for an aromatic, warming variation that pairs beautifully with roasted chicken or fish.
- Cheesy creamed peas: Stir in 1/2 cup of shredded sharp cheddar or Parmesan cheese after removing from heat. The cheese melts into the sauce for an extra indulgent side dish.
- Herbed creamed peas: Add fresh thyme, rosemary, or sage to the butter while it melts. Remove the whole sprigs before serving for a subtle herb-infused sauce.
- Smoky creamed peas: Add a diced, cooked ham steak or crumbled bacon at the end. The smoky, salty meat transforms this into a Southern-inspired comfort dish.
Presentation Tips
First impressions matter, and a few simple touches can make your creamed peas look as good as they taste. Serve in a warmed dish to keep the sauce silky longer. A sprinkle of fresh herbs or a few grinds of black pepper on top adds visual interest. For holiday meals, consider serving in a decorative ceramic bowl that complements your table setting.
Make-Ahead Options
For busy weeknights or holiday meal prep, you can make the sauce base ahead of time. Prepare the sauce through step three (before adding the peas), then cool and refrigerate for up to 2 days. When ready to serve, reheat the sauce gently, add the frozen peas, and finish the recipe as directed. This technique is especially helpful when you have multiple dishes to coordinate.
How to Store Creamed Peas: Best Practices
Proper storage ensures your leftover creamed peas stay fresh and delicious. Whether you have a small amount left over or intentionally made extra for meal prep, these guidelines will help you make the most of every batch.
Refrigeration
Transfer cooled creamed peas to an airtight container and refrigerate promptly. The dish will keep well for up to 3 days in the refrigerator. For the best quality, consume within the first 2 days, when the peas are still at their peak texture.
Freezing
Yes, you can freeze creamed peas successfully. Allow the dish to cool completely, then portion into freezer-safe containers or heavy-duty freezer bags. Label with the date and freeze for up to 3 months. Keep in mind that dairy-based sauces can separate slightly upon thawing, but a good stir during reheating usually restores the creamy consistency.
Reheating
The gentle approach is best when reheating creamed peas. For stovetop reheating, place the peas in a saucepan over low heat with a splash of milk. Stir frequently until heated through, about 5 to 7 minutes. The added milk helps restore any sauce thickness lost during storage.
For microwave reheating, use 50% power and heat in 30-second bursts, stirring between each interval. This method prevents hot spots and ensures even heating. Expect microwaving to take about 2 to 3 minutes total, depending on your portion size.
Meal Prep Considerations
If you are batch cooking, consider making just the sauce base and freezing it separately. Then you can add fresh or frozen peas when you reheat, ensuring the best possible texture. This approach works well for meal prep and gives you more flexibility with portion sizes.
FAQs: Frequently Asked Questions About Creamed Peas
What are creamed peas?
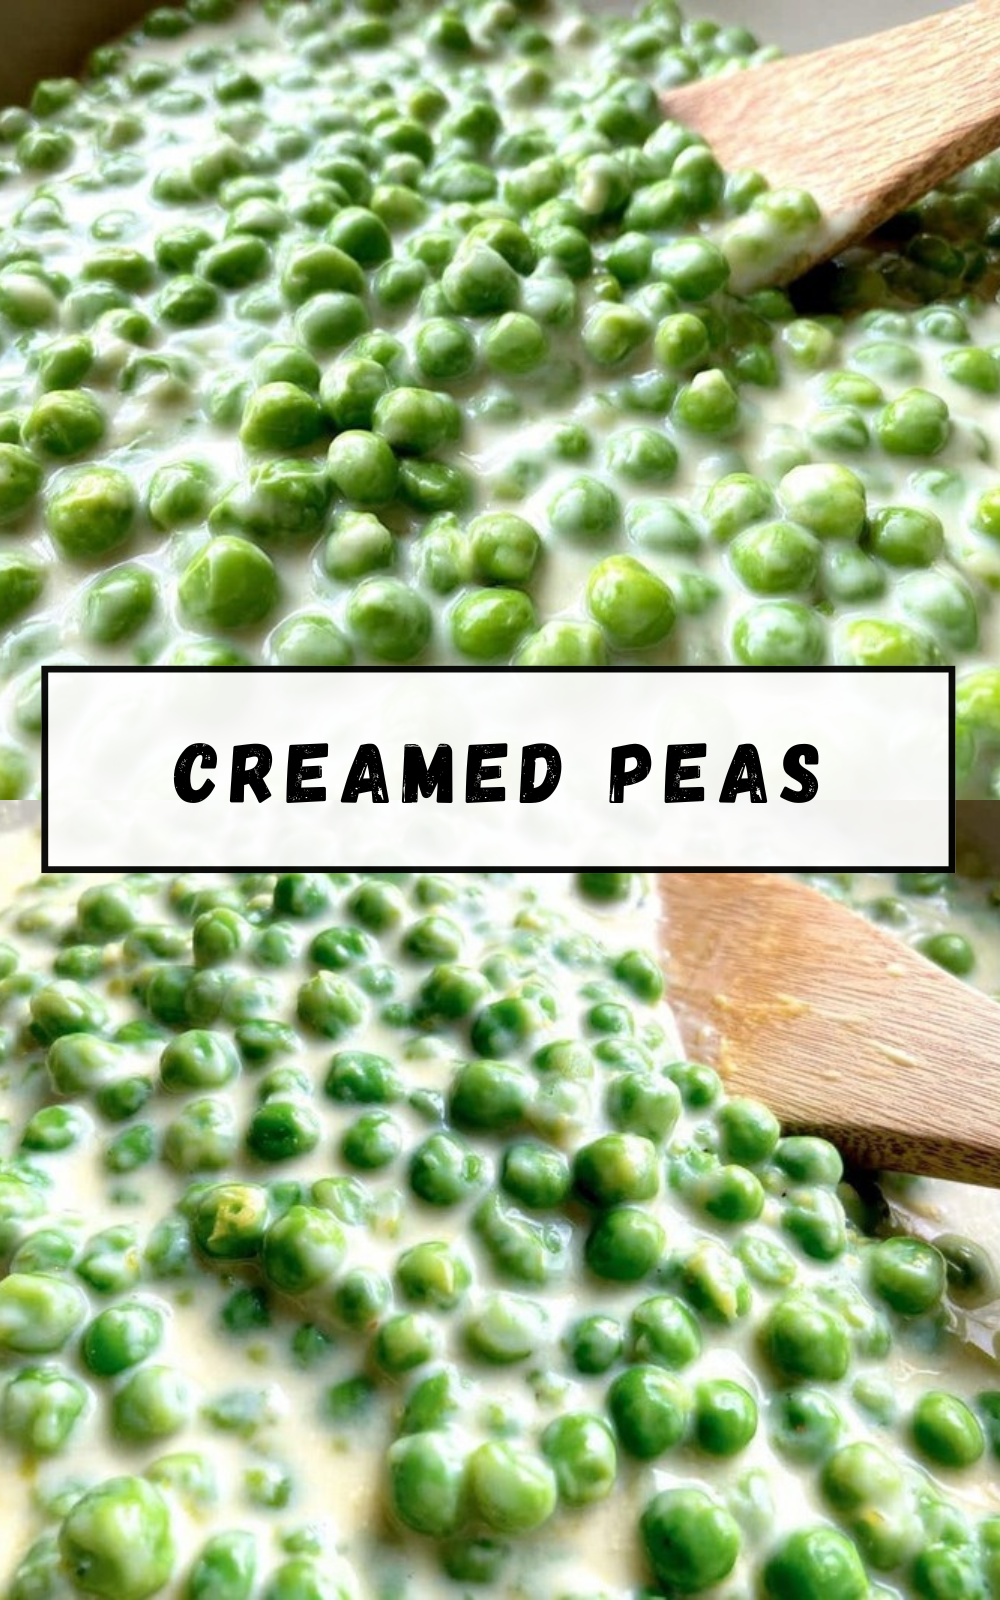
Creamed peas are a classic side dish made by combining tender peas with a creamy béchamel sauce. Start with a simple roux of butter and flour, whisk in milk until thickened, then stir in peas and heat through. Season with salt, pepper, and optional garlic powder. Finish with a splash of heavy cream for extra richness, and garnish with fresh herbs or butter. This quick recipe takes about 15 minutes and serves 4 as a side. It’s perfect alongside chicken, ham, or mashed potatoes, offering a comforting, nostalgic flavor from childhood dinners. Peas provide fiber and vitamins, while the sauce adds a velvety texture without overpowering the peas’ natural sweetness. (92 words)
What ingredients do I need for creamed peas?
For 4 servings of creamed peas, gather these basics: 2 tablespoons unsalted butter, 2 tablespoons all-purpose flour, 1 cup whole milk or half-and-half, 2 cups frozen or fresh peas, ½ teaspoon salt, ¼ teaspoon black pepper, and optional ¼ teaspoon garlic powder. Stir in 2 tablespoons heavy cream at the end for creaminess. Fresh herbs like parsley or chives make a great garnish. This short list keeps it pantry-friendly—most items are staples. Avoid overloading seasonings to let the peas shine. Double for a crowd, or swap half-and-half for a lighter version with 2% milk. Nutritional note: One serving has about 150 calories, 8g fat, and 10g carbs. (112 words)
How do you make creamed peas step by step?
Melt 2 tablespoons butter in a saucepan over medium heat. Whisk in 2 tablespoons flour to form a roux; cook 1 minute. Slowly pour in 1 cup milk, whisking constantly until thickened (3-5 minutes). Season with ½ teaspoon salt, ¼ teaspoon pepper, and optional garlic powder. Add 2 cups peas; cook 2-3 minutes until hot. Stir in 2 tablespoons heavy cream. Taste and adjust. Serve immediately. Total time: 15 minutes. Tip: Use frozen peas straight from the bag—no thawing needed. For smoothness, strain if fresh peas release extra liquid. Common mistake: High heat makes lumps—keep whisking on medium. Pairs well with roasted meats. (108 words)
Can I use canned peas for creamed peas?
Yes, canned peas work in creamed peas but add them last to avoid mushiness. Drain and rinse one 15-oz can thoroughly, then stir into the hot sauce. Heat only 1-2 minutes max, as they’re pre-cooked. Pat dry with a paper towel first for less wateriness. This saves time over fresh but may dilute flavor slightly—bump up seasonings. Frozen peas are ideal for texture, holding shape better. Concern: Sodium in cans—choose low-sodium or rinse well. Result is still creamy and tasty, ready in under 10 minutes. Objection addressed: No mush if timed right. Great for quick weeknights. (96 words)
How do you store and freeze creamed peas?
Refrigerate leftovers in an airtight container up to 3 days. Reheat gently on stovetop over low heat with a splash of milk, stirring to restore creaminess, or microwave at 50% power in 30-second bursts. For freezing, cool completely, portion into freezer bags, and freeze up to 3 months. Thaw overnight in fridge, then reheat as above—texture holds well but sauce may separate slightly; whisk in milk to fix. Label bags with date. Not ideal for meal prep beyond 3 months due to pea quality drop. Safety tip: Discard if smells off or shows mold. Links to full recipe and pea side dish ideas on site. (102 words)
Creamed Peas
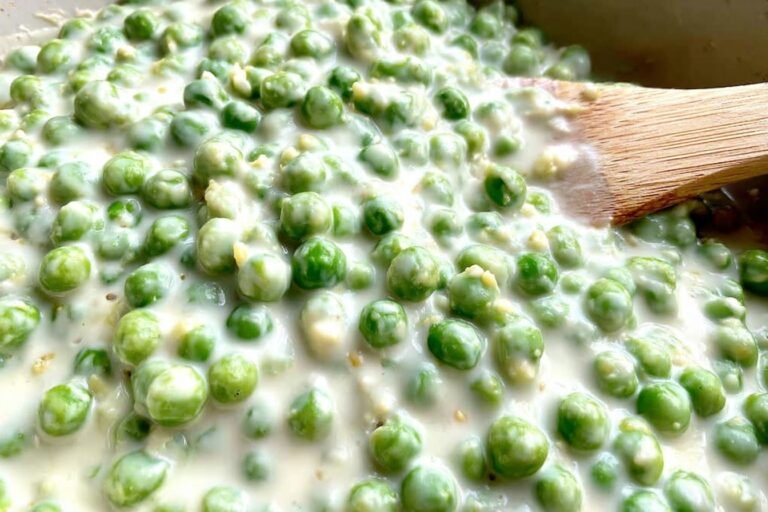
🟢 Tender frozen peas in silky garlic cream sauce—cozy 15-minute side for any meal.
🥛 Nutrient-rich comfort classic; customizable with herbs or bacon for holidays.
- Total Time: 15 minutes
- Yield: 6 servings
Ingredients
– 4 tablespoons unsalted butter
– 3 tablespoons all-purpose flour
– 1/4 teaspoon garlic powder (optional)
– 2 cups whole milk or half-and-half
– 1 teaspoon salt
– 1/2 teaspoon white or black pepper
– 4 cups frozen peas
– 1/4 cup heavy cream (optional)
Instructions
1-Step One: Melt the Butter. Start by placing 4 tablespoons of unsalted butter in a medium saucepan over medium-high heat. Let the butter melt completely and begin to foam slightly. You want the butter hot but not browning, as this creates the perfect base for your roux. Swirl the pan occasionally to ensure even melting. The saucepan you choose matters more than you might think. A pan with a heavy bottom distributes heat evenly and prevents hot spots that could scorch your sauce. Stainless steel or enameled cast iron works beautifully for this recipe.
2-Step Two: Create the Roux. Once your butter has melted, whisk in 3 tablespoons of all-purpose flour and 1/4 teaspoon of garlic powder (if using). This mixture is called a roux, and it is the foundation of your creamy sauce. Whisk constantly for about 1 minute to cook out the raw flour taste. The key here is to keep whisking until the mixture is completely smooth and has a paste-like consistency. You should not see any dry flour or lumps at this stage. The garlic powder will distribute throughout the roux, infusing the sauce with subtle savory flavor from the very beginning.
3-Step Three: Add the Milk and Thicken. Now comes the most important step for achieving a silky sauce. Slowly whisk in 2 cups of whole milk or half-and-half, pouring in a thin, steady stream while whisking constantly. This gradual addition prevents lumps from forming and ensures your sauce stays perfectly smooth. Continue cooking and stirring frequently for about 6 minutes, or until the sauce has thickened enough to coat the back of a spoon. You will notice it starting to bubble gently and thicken visibly around the 4-minute mark. The sauce should have the consistency of heavy cream when it is ready for the next step. Once thickened, season with 1 teaspoon of salt and 1/2 teaspoon of white or black pepper. Taste your sauce at this point and adjust the seasoning if needed. Remember, you can always add more salt, but you cannot take it away, so start conservatively if you are unsure.
4-Step Four: Add the Peas. Add 4 cups of frozen peas directly to the sauce. There is no need to thaw them first. The frozen peas will cool down your sauce slightly, but it will come back up to temperature quickly. Cook the peas in the sauce for about 4 minutes, or until they are heated through. Stir occasionally to ensure all the peas get evenly coated with that delicious creamy sauce. You will know they are done when they are hot throughout and still hold their shape with a slight bite. Avoid overcooking, as this can make the peas mushy and less vibrant.
5-Step Five: Finish and Serve. For an extra touch of luxury, stir in 1/4 cup of heavy cream at the end. This step is entirely optional but adds wonderful richness that takes the dish from everyday to special-occasion worthy. Taste once more and adjust your seasonings if needed. Transfer your creamed peas to a serving dish and garnish as desired. A sprinkle of black pepper, a small pat of butter, or fresh herbs like chives or dill all make beautiful finishing touches. Serve immediately while hot and creamy.
Last Step:
Please leave a rating and comment letting us know how you liked this recipe! This helps our business to thrive and continue providing free, high-quality recipes for you.Notes
🧊 Use frozen peas for perfect texture; add canned at end if subbing.
🌿 Boost with nutmeg, onion powder, or bacon bits.
❄️ Refrigerate 3 days or freeze 3 months; reheat gently with milk.
- Prep Time: 5 minutes
- Cook Time: 10 minutes
- Category: Side Dishes
- Method: Stovetop
- Cuisine: American
- Diet: Vegetarian
Nutrition
- Serving Size: ½ cup
- Calories: 183 kcal
- Sugar: 7 g
- Sodium: 324 mg
- Fat: 11 g
- Saturated Fat: 7 g
- Unsaturated Fat: 4 g
- Trans Fat: 1 g
- Carbohydrates: 16 g
- Fiber: 4 g
- Protein: 6 g
- Cholesterol: 31 mg





