

Why You’ll Love This Peach Mochi
Get ready to fall in love with this delightful Peach Mochi recipe that brings the perfect balance of chewy texture and fruity sweetness to your dessert table. Whether you’re a seasoned baker or just starting your culinary journey, this Japanese-inspired treat offers something special for everyone.
This homemade mochi stands out because it combines traditional techniques with fresh, seasonal ingredients. The soft, pillowy dough wrapped around luscious peach filling and fluffy whipped cream creates an unforgettable taste experience that will have your family and friends asking for seconds.
- Ease of preparation: This Peach Mochi recipe uses simple stovetop cooking methods that anyone can master. With just 45 minutes of prep time and 20 minutes of cooking, you can create a stunning dessert without turning on your oven. The step-by-step process walks you through creating the dough and filling with confidence-building instructions.
- Health benefits: Fresh peaches bring natural vitamins and antioxidants to this treat. According to research from health experts on peach benefits, these sweet fruits pack impressive nutritional value. At only 390 calories per serving, you can enjoy this dessert guilt-free while still satisfying your sweet tooth.
- Versatility: The recipe adapts easily to different dietary preferences. You can substitute plant-based milk for dairy milk or use coconut cream instead of heavy cream for a vegan version. The filling can also incorporate other seasonal fruits when peaches are not in season.
- Distinctive flavor: The combination of chewy mochi dough, tangy peach filling, and light whipped cream creates layers of texture and taste. The subtle sweetness from fresh peaches paired with the elastic dough makes each bite a perfect harmony of flavors.
Jump to:
- Why You’ll Love This Peach Mochi
- Essential Ingredients for Peach Mochi
- Mochi Dough Ingredients
- Peach Filling Ingredients
- Whipped Cream Ingredients
- Special Dietary Options
- How to Prepare the Perfect Peach Mochi: Step-by-Step Guide
- First Step: Prepare the Peach Filling
- Second Step: Create the Mochi Dough
- Third Step: Whip the Cream
- Fourth Step: Assemble the Mochi
- Final Step: Shape and Garnish
- Dietary Substitutions to Customize Your Peach Mochi
- Protein and Main Component Alternatives
- Vegetable, Sauce, and Seasoning Modifications
- Mastering Peach Mochi: Advanced Tips and Variations
- Pro Cooking Techniques
- Flavor Variations
- Presentation Tips
- Make-Ahead Options
- How to Store Peach Mochi: Best Practices
- Refrigeration Guidelines
- Freezing Options
- Reheating and Serving
- Meal Prep Considerations
- FAQs: Frequently Asked Questions About Peach Mochi
- Peach Mochi
- Ingredients
- Instructions
- Last Step:
- Notes
- Nutrition
- Did you make this recipe?
Essential Ingredients for Peach Mochi
Gathering the right ingredients before you start makes the cooking process smooth and enjoyable. Here is a complete list of everything you need to create this stunning Peach Mochi dessert.
Mochi Dough Ingredients
- 100g glutinous rice flour – Creates the signature chewy texture that makes mochi unique. Glutinous rice flour differs from regular rice flour and is essential for achieving that stretchy consistency.
- 30g cornstarch – Helps stabilize the dough and prevents it from becoming too sticky while adding structure to the final product.
- 45g granulated sugar – Provides just the right amount of sweetness to balance the mild flavor of the rice dough.
- 180g milk – Adds moisture and richness to create a tender dough. You can use whole milk, plant-based alternatives, or even coconut milk for different flavor profiles.
- 20g vegetable oil – Keeps the dough soft and pliable while preventing it from sticking to your hands and work surface.
- A few drops of food coloring (optional) – Gives the mochi a natural peach-like blush color for an authentic appearance.
Peach Filling Ingredients
- 500g fresh peaches (peeled and cored) – The star ingredient providing natural sweetness and fruity flavor. Fresh, ripe peaches work best for maximum flavor.
- 150g water – Used to extract additional flavor and color from peach skins for a more concentrated filling.
- 100g granulated sugar – Sweetens the peach filling to jam-like consistency while helping preserve the fruit.
- 10g lemon juice – Adds brightness to balance the sweetness and helps the filling set properly.
Whipped Cream Ingredients
- 200g heavy cream – Creates a light, airy filling that complements the chewy mochi and sweet peach filling.
- 20g sugar for whipping – Sweetens the cream just enough to hold its shape without overpowering the other flavors.
Special Dietary Options
| Dietary Need | Substitution |
|---|---|
| Vegan | Replace milk with oat or almond milk, use coconut cream instead of heavy cream |
| Gluten-free | Already gluten-free as glutinous rice flour contains no gluten |
| Low-calorie | Reduce sugar by 25%, use light whipped cream alternative |
How to Prepare the Perfect Peach Mochi: Step-by-Step Guide
Creating beautiful Peach Mochi at home is easier than you might think. Follow these detailed instructions to achieve soft, chewy mochi filled with sweet peach compote and fluffy whipped cream.
First Step: Prepare the Peach Filling
Start by preparing the peach filling, as it needs time to cool completely before assembly. Peel and core your fresh peaches, then chop them into small, even cubes about half an inch in size. Consistent cutting ensures even cooking and a pleasant texture in every bite.
Place the chopped peaches in a bowl and mix with 100g granulated sugar until every piece is well coated. Cover the bowl and place it in the refrigerator to chill for 30 minutes. This resting period draws out the natural juices from the peaches, intensifying the flavor.
While the peaches chill, place the peach skins in a small saucepan with 150g water. Bring the mixture to a boil over medium heat and let it simmer for 5 minutes. The skins release beautiful color and additional flavor into the water. Strain this peach-infused liquid and discard the skins.
Add the chilled, sugared peach cubes to the peach water in your saucepan. Cook over medium heat, stirring frequently, until the mixture thickens considerably. Add 10g lemon juice and continue cooking until the filling reaches a jam-like consistency. Remove from heat and let it cool completely before using.
Second Step: Create the Mochi Dough
In a mixing bowl, combine 100g glutinous rice flour, 30g cornstarch, and 45g granulated sugar. Whisk these dry ingredients together until well blended and free of lumps. Gradually pour in 180g milk while stirring continuously to create a smooth batter without any clumps.
Add a few drops of food coloring if you want a soft peach tint. Start with just one or two drops, as a little goes a long way. The goal is a delicate blush color that mimics the natural appearance of a peach rather than an artificial-looking bright pink.
Stir in 20g vegetable oil until fully incorporated. The oil might seem like it will not mix at first, but continue stirring and it will eventually blend into the batter smoothly.
Pour the mixture into a nonstick pan and cook over medium heat. Stir constantly with a heat-resistant spatula or wooden spoon. The mixture will start loose but gradually thicken and come together into a cohesive dough. Continue stirring until the dough forms a stretchy, translucent ball that pulls away cleanly from the sides of the pan.
Transfer the cooked dough to a lightly floured surface. Let it cool for a few minutes until you can handle it comfortably. Dust your hands with cornstarch and knead the dough until it becomes smooth and elastic. This kneading process develops the signature chewy texture that makes mochi so delightful.
Third Step: Whip the Cream
While the mochi dough cools, prepare the whipped cream filling. Pour 200g heavy cream into a chilled mixing bowl. Cold cream whips faster and holds its shape better, so consider placing your bowl and beaters in the refrigerator for 10 minutes before starting.
Add 20g sugar to the cream and begin whipping on medium speed. Gradually increase to high speed and continue until stiff peaks form. The cream should hold its shape when you lift the beaters without drooping.
Transfer the whipped cream to a piping bag fitted with a round tip. This makes filling the mochi much easier and cleaner. Place the piping bag in the refrigerator until you are ready to assemble.
Fourth Step: Assemble the Mochi
Divide the cooled mochi dough into 8 equal pieces. Use a kitchen scale for accuracy if you want perfectly uniform portions. Roll each piece into a ball, then flatten it into a circle approximately 4 inches in diameter. Keep the edges slightly thinner than the center for easier sealing.
Hold a mochi circle in your palm and pipe a generous amount of whipped cream into the center. Add a spoonful of the cooled peach filling on top of the cream. Be careful not to overfill, as this will make sealing difficult.
Gather the edges of the dough up and over the filling, pinching them together to seal completely. Work gently but firmly to ensure no gaps remain. Place each finished mochi seam-side down in a cupcake liner for easy serving and presentation.
Final Step: Shape and Garnish
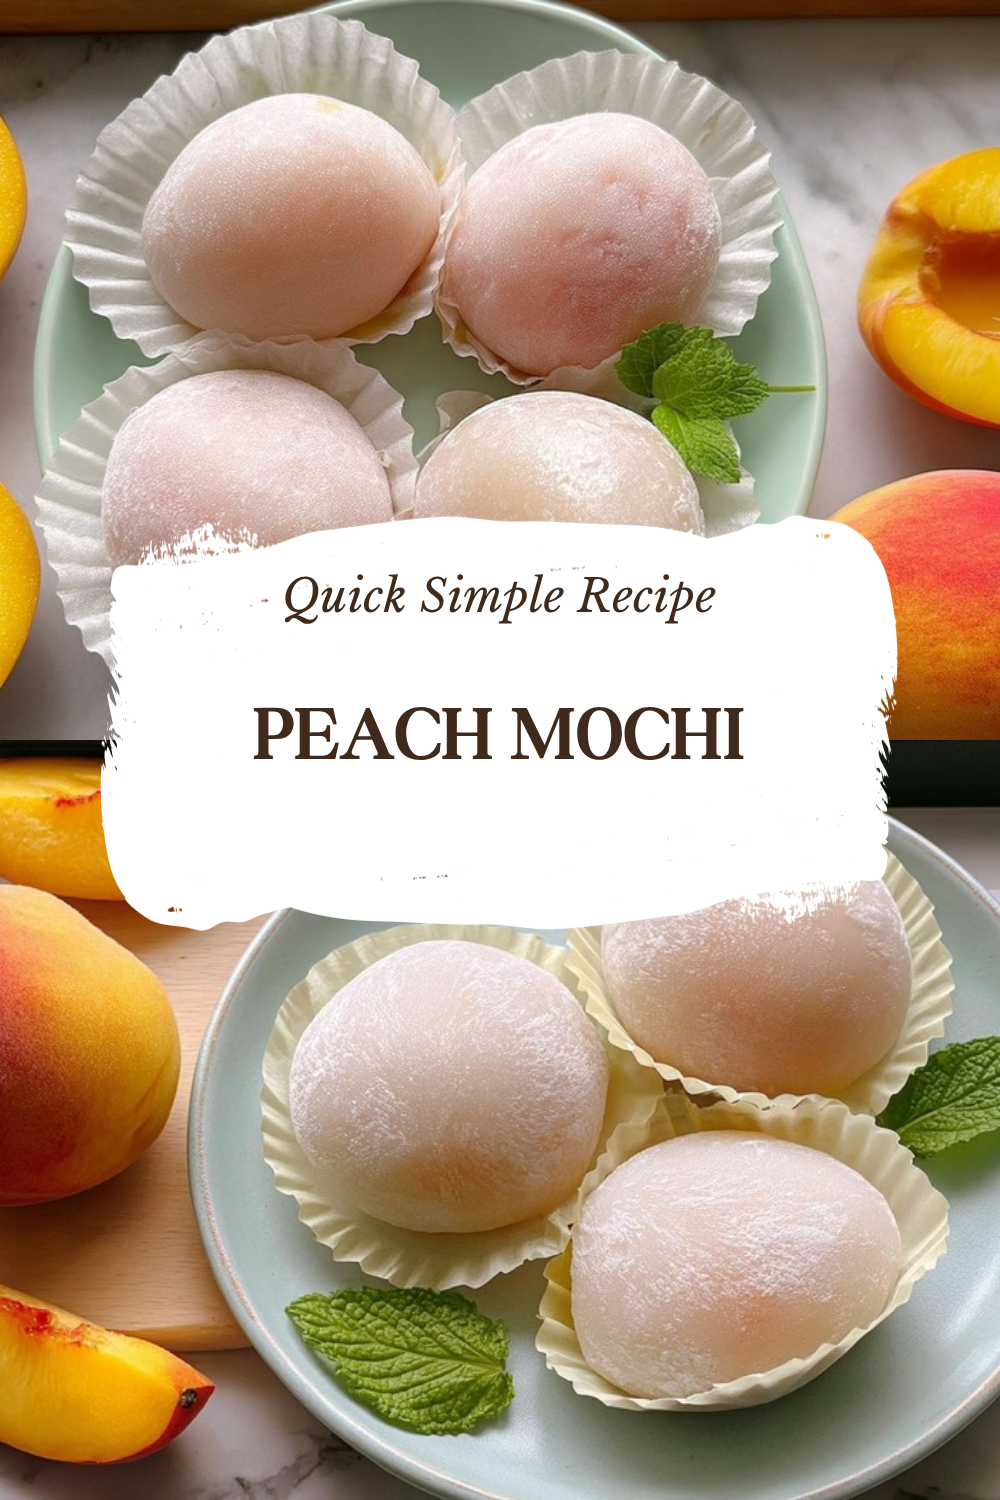
For an extra special touch, shape your mochi to resemble actual peaches. Gently pinch the top of each mochi to create a slight point, mimicking the natural shape of the fruit. Use a small piece of mint leaf as a stem garnish for an authentic presentation.
Your beautiful Peach Mochi is now ready to serve. These treats look stunning arranged on a platter and make an impressive dessert for any occasion.

Dietary Substitutions to Customize Your Peach Mochi
Protein and Main Component Alternatives
While this Peach Mochi recipe uses dairy milk and heavy cream, several substitutions work beautifully for different dietary needs. Plant-based eaters can swap the 180g milk for unsweetened almond, oat, or soy milk without significantly altering the taste or texture of the mochi dough.
For the whipped cream component, full-fat coconut cream makes an excellent substitute for heavy cream. Chill a can of coconut cream overnight, then scoop out the solid portion and whip it with a small amount of sugar. This creates a luscious, dairy-free topping that pairs wonderfully with the peach filling.
Those watching their sugar intake can reduce the granulated sugar in both the filling and dough by up to 25%. Alternatively, natural sweeteners like maple syrup or honey work well, though they may slightly change the color and moisture content of the final product.
Vegetable, Sauce, and Seasoning Modifications
The peach filling offers plenty of room for creative variations. During peach season, stick with fresh peaches for the best flavor. When peaches are not in season, frozen peaches work just as well. Thaw them completely and drain excess liquid before using.
For different flavor profiles, consider mixing the peach filling with other fruits. Strawberry-peach or mango-peach combinations create exciting taste variations. You can also add spices like cinnamon or cardamom to the filling for a warming twist.
The mochi dough itself can incorporate matcha powder, cocoa powder, or strawberry puree for colored and flavored variations. Simply replace a small portion of the milk with these additions and adjust the liquid accordingly.
Mastering Peach Mochi: Advanced Tips and Variations
Taking your Peach Mochi from good to exceptional requires attention to a few key details. These pro tips will help you achieve bakery-quality results in your home kitchen.
Pro Cooking Techniques
Temperature control matters tremendously when making mochi dough. Cooking over medium heat rather than high heat prevents the dough from becoming tough or developing lumps. The stirring motion should be consistent and confident, reaching all corners of the pan to ensure even cooking.
When kneading the dough, work quickly but gently. Overworking the dough can make it tough, while underworking leaves it lumpy. The dough should feel smooth and elastic, similar to playdough in texture. If it sticks to your hands, add small amounts of cornstarch until it becomes manageable.
Flavor Variations
Create stunning visual effects by adding gradient coloring to your mochi dough. Mix a small portion of the dough with more food coloring, then marble it through the uncolored dough for a beautiful swirled appearance. This technique creates unique, artisan-looking mochi that will impress your guests.
Experiment with different fillings beyond the classic peach. Seasonal fruits like strawberries, mangoes, or even passion fruit pulp create exciting variations. You can also incorporate cream cheese into the whipped cream for a tangy cheesecake-inspired filling.
Presentation Tips
Beautiful presentation elevates any dessert, and Peach Mochi is no exception. Use decorative cupcake liners or serve on a bed of powdered sugar for an elegant look. A light dusting of cornstarch or powdered sugar on the outside of each mochi gives them a professional appearance.
For special occasions, create a dessert platter featuring different mochi flavors alongside your Peach Mochi. The variety of colors and shapes makes an impressive centerpiece for any gathering.
Make-Ahead Options
Busy schedules often require advance preparation. The peach filling can be made up to three days ahead and stored in an airtight container in the refrigerator. The mochi dough can also be prepared a day in advance, wrapped tightly in plastic wrap to prevent drying.
Best served the same day or refrigerated up to 2 days. Bring mochi to room temperature before serving for optimal texture.
For entertaining, prepare all components separately and assemble just before serving. This approach ensures the freshest texture and appearance while allowing you to spread the work over multiple sessions.
How to Store Peach Mochi: Best Practices
Proper storage keeps your homemade Peach Mochi fresh and delicious. Because mochi contains fresh ingredients and dairy products, following the right storage methods ensures food safety and maintains quality.
Refrigeration Guidelines
Store assembled Peach Mochi in an airtight container in the refrigerator for up to 2 days. Place each mochi in its own cupcake liner or wrap individually in plastic wrap to prevent them from sticking together. The refrigerator keeps the whipped cream fresh and prevents bacterial growth.
Keep in mind that refrigerated mochi becomes firmer due to the starches retrograding in cold temperatures. For the best eating experience, remove your mochi from the refrigerator about 20-30 minutes before serving. This brings the dough back to its signature soft and chewy texture.
Freezing Options
While freezing is possible, it may affect the texture of the whipped cream filling. If you must freeze mochi, wrap each piece individually in plastic wrap, then place in a freezer-safe container. Frozen mochi keeps for up to one month.
Thaw frozen mochi in the refrigerator overnight, then bring to room temperature before serving. Note that the whipped cream may separate slightly after freezing, so fresh assembly is always preferable.
Reheating and Serving
Mochi does not typically require reheating. In fact, heating can cause the delicate structure to collapse or become gummy. Room temperature serves as the ideal serving condition for this dessert.
If you stored your mochi in the refrigerator and find it too firm, simply let it sit at room temperature for 20-30 minutes. The dough will soften and become pliable again.
Meal Prep Considerations
For efficient preparation, make the peach filling up to 3 days in advance and store refrigerated. The mochi dough can be prepared 1 day ahead, wrapped tightly, and refrigerated. Whip the cream and assemble everything on the day you plan to serve for optimal freshness.
This approach breaks the work into manageable steps and ensures the best possible texture when serving time arrives.
FAQs: Frequently Asked Questions About Peach Mochi
Print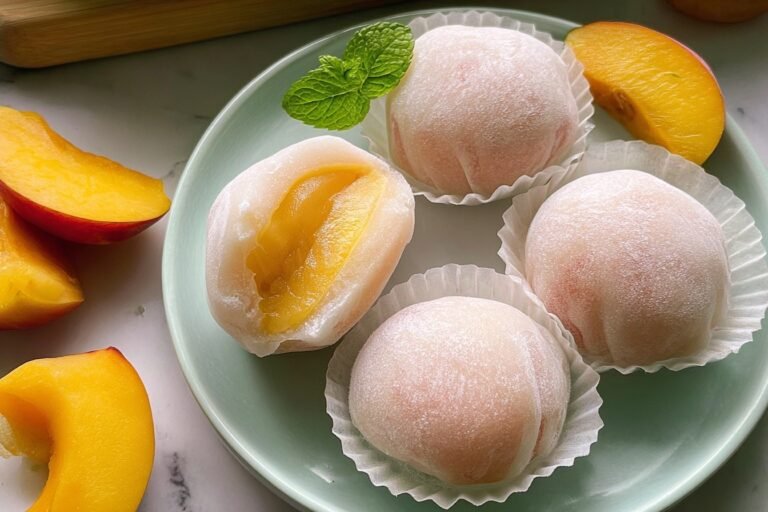
Peach Mochi
🍑 Juicy fresh peach jam and whipped cream wrapped in soft, chewy mochi—summer delight in every bite.
🥮 Easy stovetop dough, no steaming needed; homemade beats store-bought for fresh flavor.
- Total Time: 1 hour 35 minutes
- Yield: 8 mochi
Ingredients
– 100g glutinous rice flour
– 30g cornstarch
– 45g granulated sugar
– 180g milk
– 20g vegetable oil
– A few drops of food coloring (optional)
– 500g fresh peaches (peeled and cored)
– 150g water
– 100g granulated sugar
– 10g lemon juice
– 200g heavy cream
– 20g sugar for whipping
Instructions
1-First Step: Prepare the Peach Filling Start by preparing the peach filling, as it needs time to cool completely before assembly. Peel and core your fresh peaches, then chop them into small, even cubes about half an inch in size. Consistent cutting ensures even cooking and a pleasant texture in every bite. Place the chopped peaches in a bowl and mix with 100g granulated sugar until every piece is well coated. Cover the bowl and place it in the refrigerator to chill for 30 minutes. This resting period draws out the natural juices from the peaches, intensifying the flavor. While the peaches chill, place the peach skins in a small saucepan with 150g water. Bring the mixture to a boil over medium heat and let it simmer for 5 minutes. The skins release beautiful color and additional flavor into the water. Strain this peach-infused liquid and discard the skins. Add the chilled, sugared peach cubes to the peach water in your saucepan. Cook over medium heat, stirring frequently, until the mixture thickens considerably. Add 10g lemon juice and continue cooking until the filling reaches a jam-like consistency. Remove from heat and let it cool completely before using.
2-Second Step: Create the Mochi Dough In a mixing bowl, combine 100g glutinous rice flour, 30g cornstarch, and 45g granulated sugar. Whisk these dry ingredients together until well blended and free of lumps. Gradually pour in 180g milk while stirring continuously to create a smooth batter without any clumps. Add a few drops of food coloring if you want a soft peach tint. Start with just one or two drops, as a little goes a long way. The goal is a delicate blush color that mimics the natural appearance of a peach rather than an artificial-looking bright pink. Stir in 20g vegetable oil until fully incorporated. The oil might seem like it will not mix at first, but continue stirring and it will eventually blend into the batter smoothly. Pour the mixture into a nonstick pan and cook over medium heat. Stir constantly with a heat-resistant spatula or wooden spoon. The mixture will start loose but gradually thicken and come together into a cohesive dough. Continue stirring until the dough forms a stretchy, translucent ball that pulls away cleanly from the sides of the pan. Transfer the cooked dough to a lightly floured surface. Let it cool for a few minutes until you can handle it comfortably. Dust your hands with cornstarch and knead the dough until it becomes smooth and elastic. This kneading process develops the signature chewy texture that makes mochi so delightful.
3-Third Step: Whip the Cream While the mochi dough cools, prepare the whipped cream filling. Pour 200g heavy cream into a chilled mixing bowl. Cold cream whips faster and holds its shape better, so consider placing your bowl and beaters in the refrigerator for 10 minutes before starting. Add 20g sugar to the cream and begin whipping on medium speed. Gradually increase to high speed and continue until stiff peaks form. The cream should hold its shape when you lift the beaters without drooping. Transfer the whipped cream to a piping bag fitted with a round tip. This makes filling the mochi much easier and cleaner. Place the piping bag in the refrigerator until you are ready to assemble.
4-Fourth Step: Assemble the Mochi Divide the cooled mochi dough into 8 equal pieces. Use a kitchen scale for accuracy if you want perfectly uniform portions. Roll each piece into a ball, then flatten it into a circle approximately 4 inches in diameter. Keep the edges slightly thinner than the center for easier sealing. Hold a mochi circle in your palm and pipe a generous amount of whipped cream into the center. Add a spoonful of the cooled peach filling on top of the cream. Be careful not to overfill, as this will make sealing difficult. Gather the edges of the dough up and over the filling, pinching them together to seal completely. Work gently but firmly to ensure no gaps remain. Place each finished mochi seam-side down in a cupcake liner for easy serving and presentation.
5-Final Step: Shape and Garnish For an extra special touch, shape your mochi to resemble actual peaches. Gently pinch the top of each mochi to create a slight point, mimicking the natural shape of the fruit. Use a small piece of mint leaf as a stem garnish for an authentic presentation. Your beautiful Peach Mochi is now ready to serve. These treats look stunning arranged on a platter and make an impressive dessert for any occasion.
Last Step:
Please leave a rating and comment letting us know how you liked this recipe! This helps our business to thrive and continue providing free, high-quality recipes for you.Notes
🎨 Use food coloring drops sparingly for natural peach hue.
🤏 Dust extra cornstarch if dough sticks during kneading.
❄️ Refrigerate up to 2 days; serve at room temp for best chew.
- Prep Time: 45 minutes
- Chill: 30 minutes
- Cook Time: 20 minutes
- Category: Desserts
- Method: Pan-Cook
- Cuisine: Japanese
- Diet: Vegetarian
Nutrition
- Serving Size: 1 mochi
- Calories: 390 kcal
- Sugar: 35 g
- Sodium: 40 mg
- Fat: 12 g
- Saturated Fat: 6 g
- Unsaturated Fat: 5 g
- Trans Fat: 0 g
- Carbohydrates: 65 g
- Fiber: 2 g
- Protein: 4 g
- Cholesterol: 30 mg





