

Why You’ll Love This Braised Daikon Radish
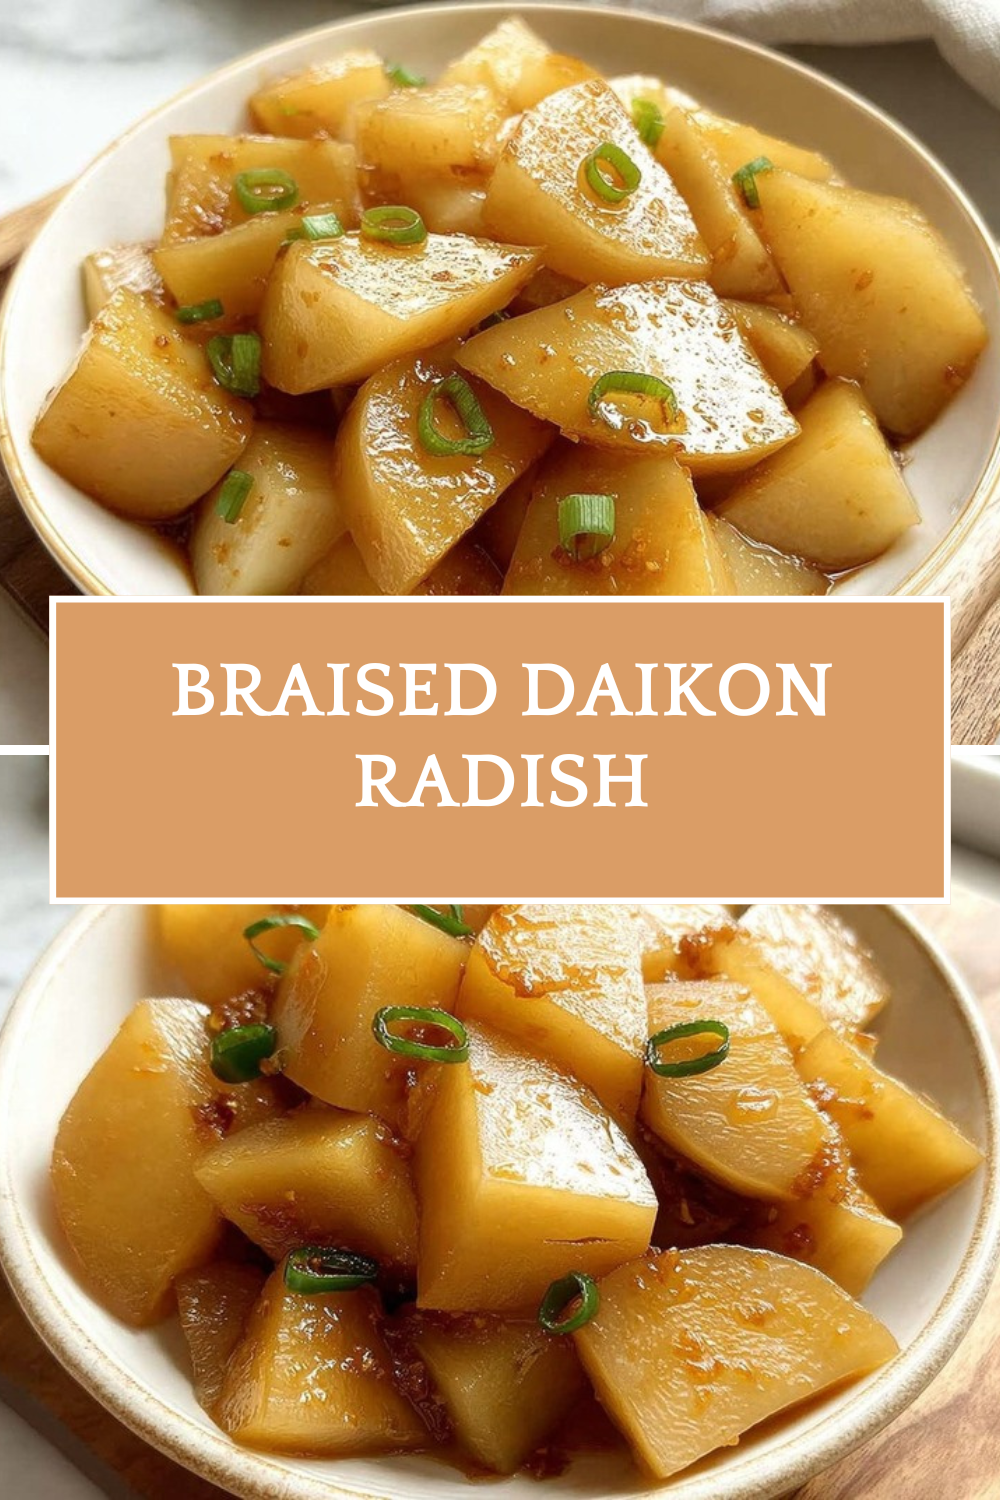
If you’re looking for a comforting, flavor-packed dish that comes together with minimal effort, this braised daikon radish recipe is about to become your new favorite. Whether you’re a seasoned home cook or just starting your culinary journey, this dish delivers restaurant-quality results right from your own kitchen.
Here’s why this braised daikon with mushrooms deserves a spot in your weekly meal rotation:
- Ease of preparation: This braised daikon radish recipe requires just one pot and about 45 minutes from start to finish. Most of that time is hands-off simmering, giving you freedom to prep other dishes or simply relax while the flavors develop.
- Health benefits: Daikon radish is incredibly nutritious, packing vitamin C, fiber, and antioxidants while remaining low in calories. Combined with shiitake mushrooms, which add B vitamins and immune-supporting compounds, this dish nourishes your body while satisfying your taste buds. For more details on the nutritional profile, check out this helpful guide on daikon radish health benefits.
- Versatility: This daikon recipe adapts beautifully to different dietary needs. It’s naturally vegan when you use vegetarian oyster sauce, and can easily be made gluten-free with tamari. Serve it as a side dish, over rice, or alongside your favorite protein for a complete meal.
- Distinctive flavor: The magic of braising transforms mild daikon into a tender, flavor-absorbing sponge. It soaks up the savory umami from shiitake mushrooms, oyster sauce, and aromatics like ginger and star anise, creating a depth of flavor that will surprise and delight everyone at your table.
Jump to:
- Why You’ll Love This Braised Daikon Radish
- Essential Ingredients for Braised Daikon Radish
- Main Ingredients List
- Special Dietary Options
- How to Prepare the Perfect Braised Daikon Radish: Step-by-Step Guide
- Step 1: Rehydrate the Shiitake Mushrooms
- Step 2: Prepare the Daikon Radish
- Step 3: Build the Flavor Base
- Step 4: Add the Daikon and Aromatics
- Step 5: Create the Braising Liquid
- Step 6: Simmer Until Tender
- Step 7: Thicken the Sauce
- Step 8: Finish and Serve
- Dietary Substitutions to Customize Your Braised Daikon Radish
- Protein and Main Component Alternatives
- Vegetable, Sauce, and Seasoning Modifications
- Mastering Braised Daikon Radish: Advanced Tips and Variations
- Pro Cooking Techniques
- Flavor Variations
- Presentation Tips
- Make-Ahead Options
- How to Store Braised Daikon Radish: Best Practices
- Refrigeration Guidelines
- Freezing for Longer Storage
- Reheating Recommendations
- Meal Prep Strategies
- FAQs: Frequently Asked Questions About Braised Daikon Radish
- What is daikon radish and how is it used in braised recipes?
- How do you pick fresh daikon radish for braising?
- How should you store daikon radish before braising?
- What are the steps for braised daikon radish with shiitake mushrooms?
- Is braised daikon radish healthy and what are its benefits?
- Braised Daikon Radish
- Ingredients
- Instructions
- Last Step:
- Notes
- Nutrition
- Did you make this recipe?
Essential Ingredients for Braised Daikon Radish
Gathering the right ingredients is the first step to creating this comforting dish. Each component plays a specific role in building the layered flavors that make braised daikon radish so memorable.
Main Ingredients List
Here’s everything you’ll need to make this daikon radish mushrooms recipe:
- ½ cup dried shiitake mushrooms These provide deep, earthy umami flavor. Dried mushrooms concentrate the taste and create a rich braising liquid when rehydrated.
- 1½ cups hot water Used to rehydrate the mushrooms, this becomes a flavorful mushroom stock that forms the base of your braising sauce.
- 1 tablespoon neutral oil (vegetable, canola, or avocado oil) A mild oil allows the other flavors to shine without competing. Choose avocado oil for a higher smoke point if you prefer.
- 1 large slice ginger Fresh ginger adds a warm, aromatic kick that cuts through the richness and brightens the overall flavor profile.
- 1¼ pounds daikon radish (halved lengthwise and cut into ½-inch thick pieces) The star of the show! Look for firm, smooth daikon without soft spots for the best texture.
- 1 star anise This warm, licorice-scented spice infuses the braising liquid with complex, aromatic depth.
- 1 bay leaf A classic aromatic that adds subtle herbal notes to round out the flavor.
- 1 tablespoon oyster sauce (or vegetarian oyster sauce for vegan option) This thick, savory sauce adds body and rich umami flavor to the braise.
- 2 teaspoons light soy sauce Provides saltiness and enhances the savory character of the dish without overpowering it.
- 1 teaspoon cornstarch (mixed with 1 tablespoon water for slurry) Creates a glossy, slightly thickened sauce that clings beautifully to each piece of daikon.
- 1 tablespoon chopped scallion (optional garnish) Adds a fresh, mild onion flavor and a pop of color when serving.
Special Dietary Options
| Dietary Need | Modification |
|---|---|
| Vegan | Use vegetarian oyster sauce (made from mushrooms) instead of traditional oyster sauce |
| Gluten-free | Substitute tamari or coconut aminos for light soy sauce |
| Low-sodium | Reduce soy sauce to 1 teaspoon and use low-sodium oyster sauce |
| Low-calorie | Skip the cornstarch slurry or use less oil for sautéing |
Pro tip: When shopping for daikon radish, choose ones that feel heavy for their size with smooth, shiny white skin. Smaller daikons tend to be sweeter and more tender, making them perfect for braising.
How to Prepare the Perfect Braised Daikon Radish: Step-by-Step Guide
Now that you have all your ingredients ready, let’s walk through the process of making this delicious braised daikon radish step by step. Don’t worry each stage is straightforward, and I’ll share plenty of tips along the way.
Step 1: Rehydrate the Shiitake Mushrooms
Start by placing your ½ cup dried shiitake mushrooms in a heatproof bowl. Pour 1½ cups hot water over them and let them soak for at least 20-30 minutes, though overnight soaking in the refrigerator yields even better results. The mushrooms will soften and plump up, while the soaking liquid transforms into a rich, flavorful stock.
Once rehydrated, remove the mushrooms from the liquid (don’t discard it!) and slice them into strips. Give the soaking liquid a gentle strain if you notice any grit, then set it aside. This mushroom stock is liquid gold it will become the foundation of your braising sauce.
Step 2: Prepare the Daikon Radish
While the mushrooms soak, prep your daikon radish. Peel the skin using a vegetable peeler or paring knife the skin can be slightly tough, so removing it ensures a tender result. Cut the daikon in half lengthwise, then slice it into ½-inch thick pieces. Try to keep the pieces uniform in size so they cook evenly.
A note on cutting: Thicker pieces hold their shape better during braising but take longer to cook. Thinner pieces cook faster but may break apart. The ½-inch thickness hits the sweet spot for tender yet intact pieces.
Step 3: Build the Flavor Base
Heat 1 tablespoon neutral oil in a large pot or Dutch oven over medium heat. Add 1 large slice ginger and let it sizzle for about 30 seconds until fragrant. This step “blooms” the ginger, releasing its aromatic oils into the cooking fat.
Now add the sliced shiitake mushrooms and cook them for 2-3 minutes, stirring occasionally. You want them to develop a slight golden color and concentrate their flavor. The kitchen should smell absolutely wonderful at this point!
Step 4: Add the Daikon and Aromatics
Add your prepared daikon radish pieces to the pot along with 1 star anise and 1 bay leaf. Stir everything together, letting the daikon get acquainted with the mushrooms and ginger for about 2 minutes. This brief sauté helps the daikon start absorbing those flavors.
Step 5: Create the Braising Liquid
Pour in the reserved mushroom soaking liquid, then add 1 tablespoon oyster sauce and 2 teaspoons light soy sauce. Stir gently to combine everything. The liquid should almost cover the daikon if it doesn’t, you can add a splash of water.
Bring the mixture to a boil, then immediately reduce the heat to low. Cover the pot with a tight-fitting lid and let everything simmer gently for 20-30 minutes.
Step 6: Simmer Until Tender
During the braising time, the magic happens. The daikon radish slowly softens and becomes translucent, absorbing all those wonderful umami flavors from the mushrooms and seasonings. Check occasionally to make sure there’s enough liquid you want a gentle simmer, not a dry pan.
After 20 minutes, test a piece of daikon with a fork or the tip of a knife. It should pierce easily with no resistance, like cutting through butter. If it’s still firm, continue braising in 5-minute increments until perfectly tender.
Step 7: Thicken the Sauce
Once the daikon is tender, remove the star anise and bay leaf. Mix 1 teaspoon cornstarch with 1 tablespoon water in a small bowl until smooth this is your slurry.
Increase the heat slightly to medium-low. Slowly pour the cornstarch slurry into the pot while stirring gently. The sauce will begin to thicken and turn glossy within 1-2 minutes. Keep stirring to prevent any lumps from forming.
Step 8: Finish and Serve
Taste your sauce and adjust the seasoning if needed. A pinch of salt or a splash more soy sauce can brighten the flavors. Transfer your braised daikon with mushrooms to a serving dish and sprinkle with 1 tablespoon chopped scallion for a fresh, colorful finish.
This dish is fantastic served hot over steamed rice, alongside stir-fried vegetables, or as part of a larger Asian-inspired spread. The tender daikon, savory sauce, and earthy mushrooms create a harmony of flavors that will have everyone reaching for seconds.
For inspiration on putting together a complete meal, browse through some of our other recipes like this comforting peach cobbler for dessert or this refreshing strawberry milkshake for a sweet treat any time of day.

Dietary Substitutions to Customize Your Braised Daikon Radish
One of the beautiful things about this braised daikon radish recipe is how easily it adapts to different dietary preferences and ingredient availability. Let’s explore some smart substitutions that keep the dish delicious.
Protein and Main Component Alternatives
While shiitake mushrooms provide wonderful umami on their own, you might want to add protein to make this a more substantial meal. Cubed firm tofu works beautifully add it during the last 10 minutes of braising so it absorbs flavor without falling apart. For meat-eaters, thin slices of pork belly or chicken thigh can be sautéed along with the ginger for extra richness.
If you can’t find dried shiitake mushrooms, fresh ones work too, though you’ll miss out on that concentrated mushroom stock. Simply sauté fresh mushrooms a bit longer to develop deeper flavor, and use vegetable broth instead of the soaking liquid.
For a different mushroom experience, try combining shiitakes with wood ear mushrooms for varied texture, or use portobello pieces for a meatier bite.
Vegetable, Sauce, and Seasoning Modifications
The daikon recipe welcomes vegetable additions. Carrots cut into similar-sized pieces add sweetness and color. Cubed winter squash or sweet potato brings natural sweetness that balances the savory sauce. Bok choy or baby corn can be added in the final 5 minutes for variety.
For the sauce, tamari makes an excellent gluten-free alternative to soy sauce. Coconut aminos offer a slightly sweeter, soy-free option. If you don’t have oyster sauce, a mixture of hoisin sauce with a touch of soy sauce can work in a pinch, though the flavor profile will be slightly different.
Seasoning variations can completely transform the dish. Try adding a cinnamon stick along with the star anise for warmer notes. A splash of Shaoxing wine or dry sherry added with the braising liquid brings sophistication. For heat lovers, a dried chili or two infuses gentle warmth throughout.
Cooking tip: This recipe is very forgiving. Feel free to adjust the ratio of seasonings to suit your taste more soy sauce for saltiness, extra oyster sauce for richness, or a pinch of sugar if you prefer sweeter notes.
Mastering Braised Daikon Radish: Advanced Tips and Variations
Ready to take your braised daikon radish to the next level? These expert techniques and creative variations will help you achieve consistently perfect results and keep this dish exciting every time you make it.
Pro Cooking Techniques
The key to perfectly braised daikon lies in the simmer. Keep the heat low and gentle vigorous boiling can break the daikon pieces apart before they’re fully tender. A slow, steady simmer allows the flavors to penetrate deeply while maintaining the vegetable’s shape.
For deeper flavor, try browning the daikon pieces before braising. After sautéing the aromatics, increase the heat to medium-high and sear the daikon pieces on both sides until lightly golden. This creates a subtle caramelized note that adds complexity to the final dish.
Another technique borrowed from traditional Chinese cooking: “flash-braise” the daikon by cutting it into thinner rounds (about ¼ inch) and cooking at a slightly higher temperature for less time. This method produces a different texture more delicate and sauce-soaked.
Flavor Variations
Create regional variations by adjusting the aromatics. For a Chinese-style braise, stick with star anise and ginger. Japanese-style might include a splash of mirin and dashi instead of mushroom stock. Korean influences could mean adding gochujang for a spicy-sweet kick.
Here are some winning combinations to try:
- Five-Spice Fusion: Add ½ teaspoon Chinese five-spice powder with the braising liquid for warm, complex notes.
- Garlic Lover’s: Add 3-4 smashed garlic cloves along with the ginger for extra aromatic punch.
- Spicy Sichuan: Include 1-2 dried Sichuan chilies and finish with a drizzle of chili oil.
- Herbed Elegance: Add fresh thyme or rosemary sprigs for an unexpected Western twist.
Presentation Tips
We eat with our eyes first, and a beautiful presentation makes this humble dish feel special. Arrange the daikon pieces in a slight overlap on a shallow serving plate. Spoon the glossy sauce generously over top, letting it pool attractively around the vegetables.
Garnishes add color and texture contrast. Beyond scallions, try a sprinkle of toasted sesame seeds, a drizzle of sesame oil, or a few cilantro leaves. For a dramatic touch, serve in individual clay pots or small bowls at the table.
Make-Ahead Options
This braised daikon radish recipe is perfect for meal prep. The flavors actually improve after a day in the refrigerator as the daikon continues to absorb the sauce. Make a double batch on Sunday, and you’ll have ready-to-heat portions for quick weeknight meals.
To reheat, simply warm gently in a saucepan over medium-low heat, adding a splash of water if the sauce has thickened too much. You can also microwave individual portions in 30-second intervals, stirring between each, until hot throughout.
How to Store Braised Daikon Radish: Best Practices
Proper storage keeps your braised daikon radish fresh and flavorful, whether you’re saving leftovers or meal prepping for the week ahead.
Refrigeration Guidelines
Allow your braised daikon with mushrooms to cool completely before storing this prevents condensation from making the sauce watery. Transfer to an airtight container and refrigerate within two hours of cooking. Properly stored, it will keep for 3-4 days in the refrigerator.
For best results, store the daikon with its sauce. The liquid protects the vegetables from drying out and maintains their tender texture. Glass containers work well since they don’t absorb odors and let you see what’s inside at a glance.
Freezing for Longer Storage
Yes, you can freeze braised daikon radish! Portion cooled leftovers into freezer-safe containers, leaving some headspace for expansion. Label with the date and freeze for up to 2-3 months.
Keep in mind that the daikon’s texture may become slightly softer after freezing and thawing. This makes it perfect for adding to soups or stews later, though it’s still delicious reheated on its own.
Reheating Recommendations
The gentlest reheating method is on the stovetop over medium-low heat. Add a tablespoon of water if needed, cover, and warm through for 5-7 minutes, stirring occasionally. This preserves the texture and prevents scorching.
For microwave reheating, use a microwave-safe dish covered with a damp paper towel. Heat in 1-minute intervals at 70% power, stirring between each, until steaming hot. The damp towel helps maintain moisture.
Meal Prep Strategies
For efficient meal prep, consider preparing components separately. Rehydrate mushrooms and slice daikon up to 2 days ahead, storing them in separate containers in the refrigerator. This cuts your active cooking time significantly when you’re ready to braise.
You can also fully prepare the dish and portion it into individual serving containers. This grab-and-go approach makes weekday lunches effortless and ensures you always have a nutritious, home-cooked meal ready.
FAQs: Frequently Asked Questions About Braised Daikon Radish
What is daikon radish and how is it used in braised recipes?
Daikon radish is a large, white root vegetable with a mild, slightly sweet flavor and crisp texture, milder than red radishes. In braised recipes like braised daikon with shiitake mushrooms, it’s cut into rounds or chunks and slowly cooked in a savory sauce. This method softens its texture, allowing it to absorb umami flavors from soy sauce, ginger, and mushrooms. Start by peeling and slicing 1-2 pounds of daikon into ½-inch thick pieces. Braising transforms its subtle taste into something rich and tender, making it a staple in Asian dishes. It’s low in calories (about 18 per 100g) and pairs well with rice or steamed greens for a complete meal. Fresh daikon ensures the best results—look for firm, shiny skins without blemishes.
How do you pick fresh daikon radish for braising?
Select daikon radishes that feel heavy for their size, with smooth, shiny white skin free of black spots, bruises, or cracks. Green leaves attached signal peak freshness, as they wilt quickly after harvest. Smaller daikons (about 1-2 inches in diameter) are ideal for braising—they’re sweeter, more tender, and slice evenly into attractive rounds that cook uniformly. Avoid shriveled, soft, or yellowing ones, which may be pithy inside. At the store, check the produce section or Asian markets for the best quality. One medium daikon (1-1.5 lbs) serves 4 people. Wash thoroughly before peeling to remove any dirt, ensuring your braised daikon turns out flavorful and visually appealing without tough spots.
How should you store daikon radish before braising?
Keep whole daikon radish in a perforated produce bag in the crisper drawer of your fridge, where it stays fresh for 1-2 weeks. Remove leaves first, as they draw moisture from the root—store them separately wrapped in a damp towel for up to 3 days if using. Avoid plastic bags that trap humidity, leading to mold. For cut pieces, submerge in water in a covered container and change daily to maintain crispness up to 4 days. Freezing peeled, sliced daikon works for longer storage (up to 10 months), but thaw before braising to prevent sogginess. Proper storage preserves its mild sweetness, crucial for absorbing braising liquid flavors from shiitake mushrooms and seasonings.
What are the steps for braised daikon radish with shiitake mushrooms?
1. Rehydrate 8-10 dried shiitake mushrooms in hot water for 2 hours or overnight; reserve 1 cup liquid and slice. 2. Heat 1 tbsp oil in a pot, fry mushrooms and 2 sliced ginger pieces for 2 minutes. 3. Add 1 lb daikon rounds, reserved liquid, 2 tbsp soy sauce, 1 tbsp oyster sauce, 1 tsp sugar, and ½ cup water; bring to boil. 4. Cover and simmer on low for 20-30 minutes until daikon is fork-tender. 5. Thicken sauce with 1 tsp cornstarch mixed in 2 tbsp water, stir 1-2 minutes. Serves 4 in 45 minutes total. Taste and adjust salt. This yields tender daikon infused with umami—garnish with green onions. Common tweak: add carrots for color.
Is braised daikon radish healthy and what are its benefits?
Yes, braised daikon radish is nutritious and low-calorie (around 80 calories per serving with shiitake). Daikon provides vitamin C (20% DV per cup), fiber for digestion, and antioxidants like glucosinolates that support detox and immunity. It’s hydrating (94% water) and aids weight management with potassium for blood pressure control. Shiitake mushrooms add B vitamins, selenium, and extra umami without many calories. The braising method retains most nutrients compared to boiling. It’s naturally vegan (use vegetarian oyster sauce) and gluten-free with tamari. Serve as a side to balance fried foods. Studies show radish compounds may reduce inflammation. Pair with lean protein for a full, heart-healthy meal—check our stir-fry recipes for more ideas.
Braised Daikon Radish
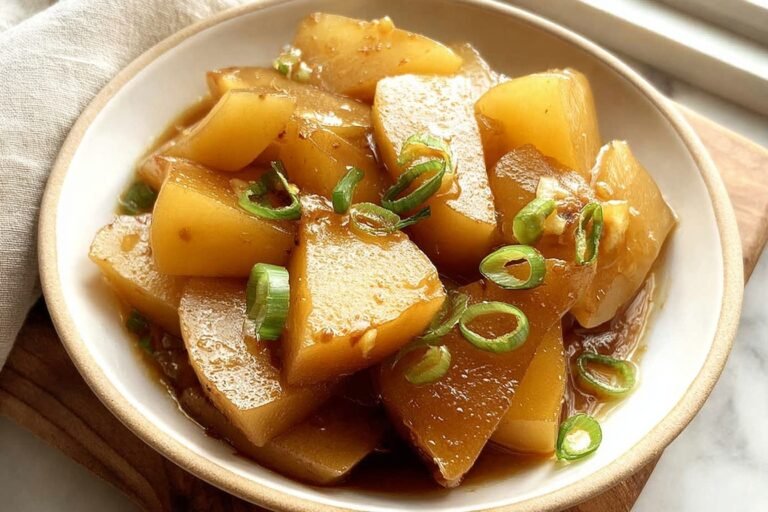
🥬 Tender daikon radish braised to melt-in-your-mouth softness with umami shiitake mushrooms—low-cal, fiber-rich veggie dish full of flavor!
🍄 Comforting Chinese side that’s vegan-friendly and simple to make—pairs perfectly with rice or proteins for balanced meals!
- Total Time: 1 hour 20 minutes
- Yield: 4 servings
Ingredients
– ½ cup dried shiitake mushrooms
– 1½ cups hot water
– 1 tablespoon neutral oil (vegetable, canola, or avocado oil)
– 1 large slice ginger
– 1¼ pounds daikon radish (halved lengthwise and cut into ½-inch thick pieces)
– 1 star anise
– 1 bay leaf
– 1 tablespoon oyster sauce (or vegetarian oyster sauce for vegan option)
– 2 teaspoons light soy sauce
– 1 teaspoon cornstarch (mixed with 1 tablespoon water for slurry)
– 1 tablespoon chopped scallion (optional garnish)
Instructions
1-Step 1: Rehydrate the Shiitake Mushrooms Start by placing your ½ cup dried shiitake mushrooms in a heatproof bowl. Pour 1½ cups hot water over them and let them soak for at least 20-30 minutes, though overnight soaking in the refrigerator yields even better results. The mushrooms will soften and plump up, while the soaking liquid transforms into a rich, flavorful stock. Once rehydrated, remove the mushrooms from the liquid (don’t discard it!) and slice them into strips. Give the soaking liquid a gentle strain if you notice any grit, then set it aside. This mushroom stock is liquid gold it will become the foundation of your braising sauce.
2-Step 2: Prepare the Daikon Radish While the mushrooms soak, prep your daikon radish. Peel the skin using a vegetable peeler or paring knife the skin can be slightly tough, so removing it ensures a tender result. Cut the daikon in half lengthwise, then slice it into ½-inch thick pieces. Try to keep the pieces uniform in size so they cook evenly. A note on cutting: Thicker pieces hold their shape better during braising but take longer to cook. Thinner pieces cook faster but may break apart. The ½-inch thickness hits the sweet spot for tender yet intact pieces.
3-Step 3: Build the Flavor Base Heat 1 tablespoon neutral oil in a large pot or Dutch oven over medium heat. Add 1 large slice ginger and let it sizzle for about 30 seconds until fragrant. This step “blooms” the ginger, releasing its aromatic oils into the cooking fat. Now add the sliced shiitake mushrooms and cook them for 2-3 minutes, stirring occasionally. You want them to develop a slight golden color and concentrate their flavor. The kitchen should smell absolutely wonderful at this point!
4-Step 4: Add the Daikon and Aromatics Add your prepared daikon radish pieces to the pot along with 1 star anise and 1 bay leaf. Stir everything together, letting the daikon get acquainted with the mushrooms and ginger for about 2 minutes. This brief sauté helps the daikon start absorbing those flavors.
5-Step 5: Create the Braising Liquid Pour in the reserved mushroom soaking liquid, then add 1 tablespoon oyster sauce and 2 teaspoons light soy sauce. Stir gently to combine everything. The liquid should almost cover the daikon if it doesn’t, you can add a splash of water. Bring the mixture to a boil, then immediately reduce the heat to low. Cover the pot with a tight-fitting lid and let everything simmer gently for 20-30 minutes.
6-Step 6: Simmer Until Tender During the braising time, the magic happens. The daikon radish slowly softens and becomes translucent, absorbing all those wonderful umami flavors from the mushrooms and seasonings. Check occasionally to make sure there’s enough liquid you want a gentle simmer, not a dry pan. After 20 minutes, test a piece of daikon with a fork or the tip of a knife. It should pierce easily with no resistance, like cutting through butter. If it’s still firm, continue braising in 5-minute increments until perfectly tender.
7-Step 7: Thicken the Sauce Once the daikon is tender, remove the star anise and bay leaf. Mix 1 teaspoon cornstarch with 1 tablespoon water in a small bowl until smooth this is your slurry. Increase the heat slightly to medium-low. Slowly pour the cornstarch slurry into the pot while stirring gently. The sauce will begin to thicken and turn glossy within 1-2 minutes. Keep stirring to prevent any lumps from forming.
8-Step 8: Finish and Serve Taste your sauce and adjust the seasoning if needed. A pinch of salt or a splash more soy sauce can brighten the flavors. Transfer your braised daikon with mushrooms to a serving dish and sprinkle with 1 tablespoon chopped scallion for a fresh, colorful finish. This dish is fantastic served hot over steamed rice, alongside stir-fried vegetables, or as part of a larger Asian-inspired spread. The tender daikon, savory sauce, and earthy mushrooms create a harmony of flavors that will have everyone reaching for seconds.
Last Step:
Please leave a rating and comment letting us know how you liked this recipe! This helps our business to thrive and continue providing free, high-quality recipes for you.Notes
🍄 Soak dried shiitake fully and reserve the flavorful soaking liquid for the braise base.
⏲️ Braise on low heat patiently for daikon to become silky tender without falling apart.
🌱 Opt for vegetarian oyster sauce to keep the dish fully vegan and inclusive.
- Prep Time: 20 minutes
- Soak: 30 minutes
- Cook Time: 30 minutes
- Category: Side Dish
- Method: Braise
- Cuisine: Chinese
- Diet: Vegan
Nutrition
- Serving Size: 1 cup
- Calories: 120 kcal
- Sugar: 4g
- Sodium: 500mg
- Fat: 4g
- Saturated Fat: 1g
- Unsaturated Fat: 3g
- Trans Fat: 0g
- Carbohydrates: 18g
- Fiber: 3g
- Protein: 3g
- Cholesterol: 0mg





