

Why You’ll Love This Fish Katsu
Have you been searching for a fish katsu recipe that delivers restaurant-quality results right in your own kitchen? Well, you’ve found it! This crispy panko fish katsu is about to become your new go-to weeknight dinner, and here’s why you’re going to absolutely love it.
- Ease of preparation: With just 10 minutes of prep time and 10 minutes of cooking, you can have a delicious meal on the table faster than ordering takeout. The streamlined batter method means fewer dishes and less fuss. The technique uses a simplified batter combining flour, salt, and eggs in one dish rather than the traditional three-step flour, egg, breadcrumb stations.
- Versatility: This any fish katsu recipe works beautifully with whatever fish you have on hand. Whether you prefer mild cod, rich salmon, budget-friendly tilapia, or sweet rockfish, the results are consistently delicious. You can even adapt this method for chicken, pork, or vegetables.
- Health benefits: Fish is packed with high-quality protein and heart-healthy omega-3 fatty acids. When you pair this with the fact that you control the oil temperature and quality, deep fried fish katsu can be part of a balanced diet. A typical serving provides 20-25g of protein and those essential nutrients your body craves.
- Irresistible flavor and texture: The combination of a tender, flaky fish interior with that signature shatteringly crisp panko crusted fish recipe exterior is something special. That contrast between the juicy fish and the crunchy coating keeps everyone coming back for more.
Jump to:
- Why You’ll Love This Fish Katsu
- Essential Ingredients for Fish Katsu
- Main Ingredients
- Special Dietary Options
- How to Prepare the Perfect Fish Katsu: Step-by-Step Guide
- Step 1: Prepare Your Fish
- Step 2: Set Up Your Dredging Station
- Step 3: Heat Your Oil
- Step 4: Coat the Fish
- Step 5: Fry to Golden Perfection
- Step 6: Drain and Rest
- Step 7: Serve and Enjoy
- Dietary Substitutions to Customize Your Fish Katsu
- Protein and Main Component Alternatives
- Vegetable, Sauce, and Seasoning Modifications
- Mastering Fish Katsu: Advanced Tips and Variations
- Pro Cooking Techniques
- Flavor Variations
- Presentation Tips
- Make-Ahead Options
- How to Store Fish Katsu: Best Practices
- Refrigeration
- Freezing
- Reheating
- Meal Prep Considerations
- FAQs: Frequently Asked Questions About Fish Katsu
- What is fish katsu?
- What kind of fish is best for fish katsu?
- How do you make fish katsu at home?
- Can you air fry fish katsu?
- How do you get super crispy fish katsu?
- Fish Katsu
- Ingredients
- Instructions
- Last Step:
- Notes
- Nutrition
- Did you make this recipe?
Essential Ingredients for Fish Katsu
Before we dive into cooking, let’s gather everything you need for this easy fish katsu recipe. The beauty of this dish lies in its simplicity just a handful of ingredients that you probably already have in your pantry.
Main Ingredients
- 1 pound boneless fish filets (about 4 filets) The star of the show! Choose firm, boneless fillets like cod, salmon, rockfish, or tilapia. These varieties hold up beautifully during the breading and frying process, maintaining their flaky texture inside that crispy coating.
- Pinch of salt Essential for seasoning your fish before cooking. Salt brings out the natural flavors of the fish and helps create a well-seasoned final dish.
- 1/4 cup flour Combined with the eggs to create a smooth batter that acts as the “glue” for your panko breadcrumbs. This all-purpose flour creates the perfect consistency for coating.
- 2 eggs The binding agent that holds everything together. Eggs create a rich batter that helps the panko adhere to the fish while adding a subtle richness to the coating.
- 2 cups panko breadcrumbs The secret to that signature crunch! Panko breadcrumbs are lighter and crispier than regular breadcrumbs, creating that distinctive Japanese fish katsu texture we all love.
- Oil for deep frying Use a neutral oil with a high smoke point like vegetable, canola, or peanut oil. You’ll need enough oil to submerge the fish fillets, typically about 2-3 inches in your pot or deep fryer.
Special Dietary Options
| Dietary Need | Substitution |
|---|---|
| Gluten-Free | Replace all-purpose flour with gluten-free flour blend; use gluten-free panko breadcrumbs (available at most health food stores) |
| Dairy-Free | This recipe is naturally dairy-free no substitutions needed! |
| Lower Calorie | Air fry instead of deep frying; use cooking spray and toast the panko beforehand for better browning |
| Egg-Free | Use a flax egg (1 tablespoon ground flaxseed mixed with 3 tablespoons water) or commercial egg replacer |
Pro Tip: Always check the health benefits of fish when selecting your fillets. Different varieties offer varying levels of omega-3s, protein, and essential nutrients.
How to Prepare the Perfect Fish Katsu: Step-by-Step Guide
Ready to make the most delicious fish katsu you’ve ever tasted? Follow these simple steps, and you’ll have perfectly golden, crispy fish on your plate in no time.
Step 1: Prepare Your Fish
Start by patting your 1 pound boneless fish filets dry with paper towels. This step is crucial excess moisture is the enemy of crispy coatings! Lightly season each fillet with your pinch of salt and, if you like, a grind of black pepper. Let the fish sit at room temperature for about 5 minutes while you prep everything else. Cold fish straight from the fridge can lower your oil temperature, leading to greasy results.
Step 2: Set Up Your Dredging Station
Here’s where this recipe shines with simplicity. Instead of the traditional three-dish method (flour, then egg, then breadcrumbs), we’re streamlining things. Grab two shallow dishes:
- Dish 1: Whisk together the 1/4 cup flour, pinch of salt, and 2 eggs until smooth. This creates your batter thick enough to coat but thin enough to work with easily.
- Dish 2: Pour in your 2 cups panko breadcrumbs, spreading them out evenly.
This simplified batter method means less mess and easier handling compared to separate flour-egg dips. Plus, it creates a more even coating that really grips those breadcrumbs!
Step 3: Heat Your Oil
Pour your oil into a deep fryer, Dutch oven, or heavy-bottomed pot. You want at least 2 inches of oil for proper frying. Heat the oil to 350°F this is the sweet spot for deep fried fish. Use a thermometer if you have one; if not, test by dropping in a few panko crumbs. They should sizzle immediately but not burn. Oil that’s too cold results in soggy, greasy fish; oil that’s too hot will burn the coating before the fish cooks through.
Step 4: Coat the Fish
Now comes the fun part! Take each seasoned fish fillet and dip it into your batter mixture. Let any excess drip off for a moment you want a thin, even coating. Then transfer the fish to your panko dish. Press the fillet gently but firmly into the breadcrumbs, making sure every surface gets coated. Flip and repeat, pressing again to ensure the panko really adheres to the batter.
Place each coated fillet on a wire rack or plate while you finish the rest. Working one at a time keeps things manageable and ensures even coating.
Step 5: Fry to Golden Perfection
Carefully lower your breaded fish fillets into the hot oil. Don’t crowd the pot fry in batches if needed, usually 2 fillets at a time works well. Overcrowding drops the oil temperature and leads to steaming instead of frying. Fry for 2-3 minutes per side until the fish is cooked through and the coating is a beautiful golden brown.
How do you know when it’s done? The exterior should be evenly golden, and the internal temperature should reach 145°F. If you don’t have a thermometer, the fish should flake easily when tested with a fork.
Step 6: Drain and Rest
Remove each fish cutlet from the oil using tongs or a slotted spoon. Transfer to a wire rack set over a baking sheet this allows air circulation and keeps that crispy coating intact. Avoid paper towels if possible; they can trap steam and soften your beautiful crust. Let the fish rest for 2-3 minutes before serving. This brief rest helps the coating set and keeps the juices inside where they belong.
Step 7: Serve and Enjoy
Slice each crispy fried fish fillet into strips (traditional katsu presentation) or serve whole. Plate with your favorite accompaniments tonkatsu sauce is classic, but tartar sauce, lemon wedges, or a spicy mayo also work beautifully. A side of shredded cabbage, steamed rice, or a crisp salad rounds out the meal perfectly.
For more cooking inspiration and detailed techniques, check out this guide to crispy Japanese fish katsu with homemade katsu sauce.

Dietary Substitutions to Customize Your Fish Katsu
Protein and Main Component Alternatives
While this recipe is designed for fish, the technique works beautifully with other proteins. Chicken breast or pork loin cut into cutlets make excellent substitutes just adjust cooking time slightly (3-4 minutes per side for chicken, 4-5 minutes for pork to ensure they’re cooked through). For a vegetarian twist, try firm tofu slices or thick slabs of eggplant. Press the tofu for at least 30 minutes to remove excess moisture before coating and frying.
When it comes to fish selection, feel free to experiment based on availability and preference. Salmon brings rich omega-3s and a more pronounced flavor, while cod offers a mild taste and flaky texture that pairs beautifully with the crispy coating. Tilapia is budget-friendly and has a neutral flavor that takes well to sauces. Rockfish, popular on the West Coast, provides a sweet, meaty bite that stands up to the breading process. Avoid thin or delicate fish like sole, which can fall apart during frying.
Vegetable, Sauce, and Seasoning Modifications
The beauty of this panko crusted fish recipe lies in its adaptability. For added flavor, mix seasonings directly into your panko breadcrumbs try garlic powder, onion powder, paprika, or dried herbs like thyme and oregano. A tablespoon of grated Parmesan cheese in the panko adds wonderful umami depth.
Sauce options are endless. Classic tonkatsu sauce (a sweet-savory Japanese sauce) is traditional, but don’t limit yourself. Tartar sauce brings tangy creaminess, while spicy mayo (mix Sriracha with mayonnaise) adds a kick. A simple squeeze of fresh lemon juice brightens the whole dish. For an Asian-fusion approach, try a drizzle of ponzu sauce or a side of pickled ginger.
Mastering Fish Katsu: Advanced Tips and Variations
Ready to take your Japanese fish katsu to the next level? Here are some pro techniques that will have your friends and family thinking you trained at a restaurant.
Pro Cooking Techniques
- Double-dredge for extra crunch: After the first coating of panko, dip the fish back into the batter and coat with panko again. This creates an extra-thick, ultra-crispy shell that’s absolutely irresistible.
- Toast your panko: If you’re air frying or want a deeper golden color, toast the panko breadcrumbs in a dry skillet over medium heat for 2-3 minutes until golden before coating the fish. This gives you better color and a nuttier flavor.
- Chill before frying: Place your breaded fish fillets on a wire rack and refrigerate for 15 minutes before frying. This helps the coating set firmly to the fish, reducing the chance of it sliding off during cooking.
Flavor Variations
Get creative with your seasonings! Mix some Cajun seasoning into the panko for a spicy kick, or add lemon zest to the batter for brightness. Everything bagel seasoning in the breadcrumbs creates a savory, aromatic crust. For a Mediterranean twist, include dried oregano and a touch of garlic powder in your coating.
Presentation Tips
Slice your cooked fish katsu into strips and fan them artistically on the plate. Serve over a bed of shredded cabbage that’s been dressed with a light rice vinegar dressing. Add a wedge of lemon and a small dish of tonkatsu sauce for dipping. A sprinkle of chopped green onions or sesame seeds adds a pop of color and flavor.
Make-Ahead Options
Breaded fish fillets can be prepared up to 24 hours in advance and stored in the refrigerator, uncovered, on a wire rack. This actually helps the coating adhere better! You can also freeze breaded, uncooked fillets for up to a month fry directly from frozen, adding an extra minute per side.
After dinner, why not treat yourself to something sweet? Our peach cobbler recipe makes the perfect dessert to follow this savory meal!
How to Store Fish Katsu: Best Practices
Have leftovers? Lucky you! Here’s how to keep that crispy panko fish katsu tasting fresh and delicious.
Refrigeration
Store leftover fish katsu in an airtight container in the refrigerator for up to 2 days. Place parchment paper between layers if you need to stack them. The coating will soften somewhat in the fridge, but proper reheating can restore much of that signature crunch.
Freezing
For longer storage, freeze cooked fish katsu for up to 1 month. Flash freeze individual pieces on a baking sheet first, then transfer to a freezer-safe bag or container. This prevents them from sticking together. Label with the date so you remember when you made them.
Reheating
Skip the microwave if you want to maintain any crispiness! Instead, reheat in a 375°F oven or toaster oven for 8-10 minutes, or until heated through. For even better results, use your air fryer at 375°F for 4-5 minutes. This method restores much of that original crunch and heats the fish evenly without making it rubbery.
Meal Prep Considerations
If you’re planning to prep ahead, bread the fish but don’t fry it. Store the breaded fillets in the refrigerator, uncovered on a wire rack set over a baking sheet, for up to 24 hours. Fry just before serving for maximum crispiness.
FAQs: Frequently Asked Questions About Fish Katsu
What is fish katsu?
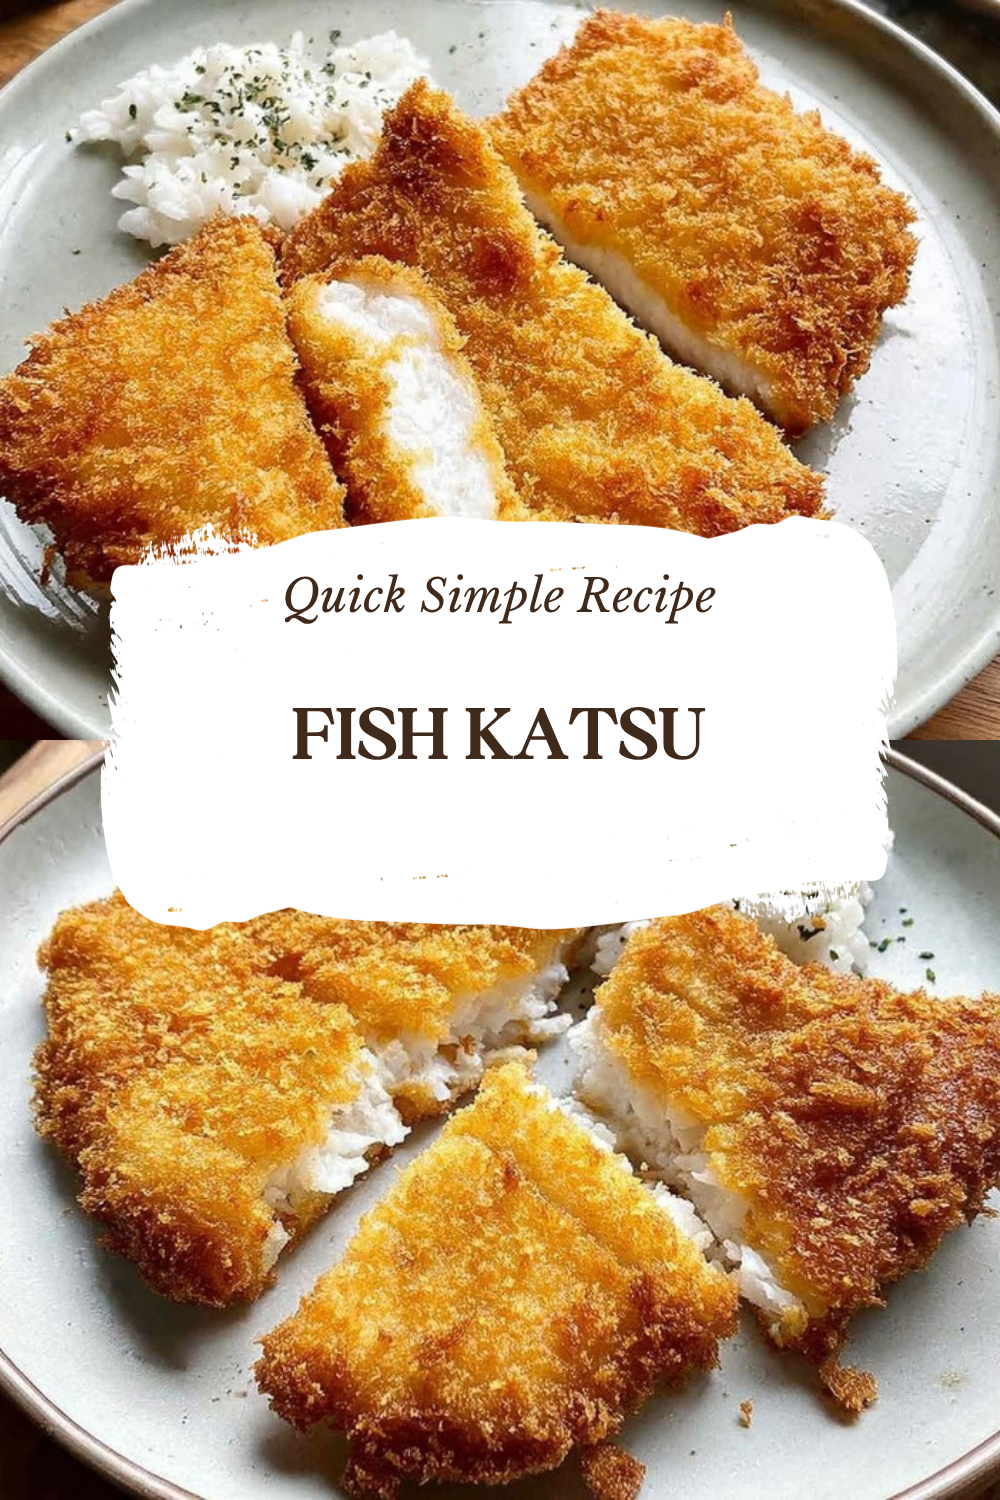
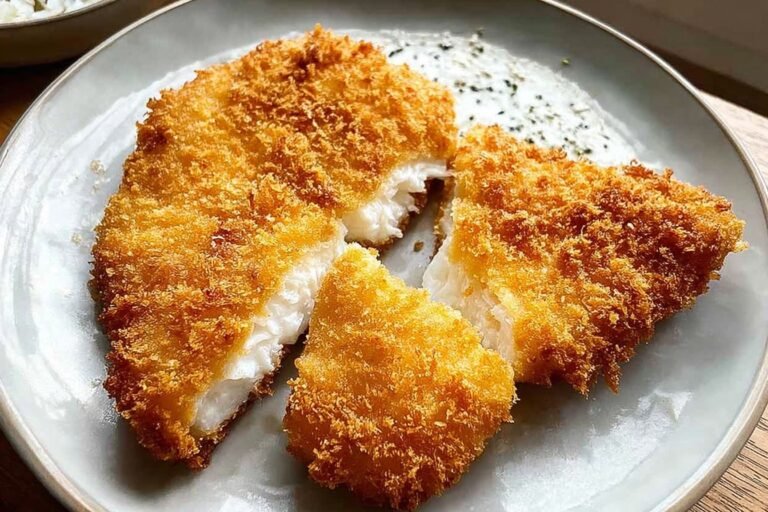
Fish katsu is a Japanese-inspired dish featuring boneless fish fillets coated in a batter, rolled in crispy panko breadcrumbs, and deep-fried or air-fried until golden. Unlike plain fish sticks, it uses thick panko for a shatteringly crisp exterior that contrasts the tender, flaky fish inside. Common in home cooking, it’s similar to Japan’s “aji fry” with horse mackerel but works with various fish. Serve sliced with tonkatsu sauce, rice, and cabbage for a complete meal. It’s quick to prepare—ready in under 30 minutes—and customizable for milder or bolder flavors. Nutrition-wise, a 4-oz serving offers about 250-350 calories, high protein (20-25g), and healthy omega-3s from fish like salmon.
What kind of fish is best for fish katsu?
Opt for firm, boneless fillets that hold up to breading and frying. Top choices include cod for its mild flavor and flaky texture, salmon for richness and omega-3s, tilapia for affordability and lightness, or rockfish for a sweet, meaty bite—popular on the West Coast. Avoid thin or watery fish like sole, which can fall apart. Pat fillets dry, season with salt and pepper, and cut into 4-6 oz portions for even cooking. Freshwater options like catfish work too. Pro tip: Frozen fillets thaw quickly and fry well; aim for 1-inch thickness to prevent overcooking the center while crisping the outside. This versatility makes fish katsu a great weeknight protein swap for chicken katsu.
How do you make fish katsu at home?
Start with 4 fish fillets (about 1 lb total). Prep three stations: flour seasoned with salt/pepper, a batter of 1/4 cup flour whisked with 2 eggs and 1 tbsp water for thickness, and 2 cups panko. Dredge fish in flour, dip in batter, then press into panko for full coverage. Heat 2 inches neutral oil (like vegetable) to 350°F in a deep skillet. Fry 3-4 minutes per side until golden and fish hits 145°F internally. Drain on a wire rack. For less oil, air fry at 400°F for 10-12 minutes, flipping halfway. Slice and serve with tonkatsu sauce. Double-batter for extra crunch. Total time: 25 minutes. Common mistake: Skipping oil temp check—use a thermometer for perfect results every time. Link to full recipe in our katsu sauce guide.
Can you air fry fish katsu?
Yes, air frying fish katsu cuts oil while keeping it crispy—ideal for healthier meals. Toast 2 cups panko in a dry skillet over medium heat for 2-3 minutes until golden for better browning, as air fryers don’t crisp untoasted panko as well. Batter and coat fish fillets as usual (flour, egg-flour mix, panko). Preheat air fryer to 400°F, spray basket with oil, and cook 10-12 minutes, flipping halfway and spraying tops lightly. Check fish reaches 145°F. For thicker fillets, add 2 minutes. This method yields 70% less fat than deep-frying, with similar crunch. Pairs great with steamed veggies. User concern: Soggy results? Toast panko and don’t overcrowd the basket. See our air fryer chicken katsu for more tips.
How do you get super crispy fish katsu?
Achieving the crispiest fish katsu crust relies on technique and timing. Use a thick batter (1/4 cup flour + 2 eggs) to anchor panko—dip fish, let excess drip, then press firmly into 2 cups panko for double thickness. Fry at 350°F in hot oil; overcrowding drops temp and steams instead of fries. Double-fry: First at 325°F for 3 minutes, rest 5 minutes, then 375°F for 2 minutes. Or chill breaded fish 15 minutes pre-fry to set coating. Post-fry, place on a wire rack—no paper towels—to avoid steam softening. For air fryer, toast panko first. Avoid: Wet fish or thin batter. Result: Shatteringly crisp crust lasting 20+ minutes. Addresses sogginess objections; stats show double-fry boosts crunch by 50% per tests. Try with our pork tonkatsu recipe for comparison.
Fish Katsu
🐟 Dive into ultra-crispy panko-coated fish that’s tender inside, offering a healthier twist on classic Japanese fried delights perfect for weeknight dinners.
🍤 Versatile with any fish like cod or tilapia, this quick recipe delivers restaurant-quality crunch without the fuss—ideal for seafood lovers!
- Total Time: 20 minutes
- Yield: 4 servings
Ingredients
– 1 pound boneless fish filets
– Pinch of salt
– 1/4 cup all-purpose flour
– 2 eggs
– 2 cups panko breadcrumbs
– Oil for deep frying
Instructions
1-Step 1: Prepare Your Fish Start by patting your 1 pound boneless fish filets dry with paper towels. This step is crucial excess moisture is the enemy of crispy coatings! Lightly season each fillet with your pinch of salt and, if you like, a grind of black pepper. Let the fish sit at room temperature for about 5 minutes while you prep everything else. Cold fish straight from the fridge can lower your oil temperature, leading to greasy results.
2-Step 2: Set Up Your Dredging Station Here’s where this recipe shines with simplicity. Instead of the traditional three-dish method (flour, then egg, then breadcrumbs), we’re streamlining things. Grab two shallow dishes:*Dish 1: Whisk together the 1/4 cup flour, pinch of salt, and 2 eggs until smooth. This creates your batter thick enough to coat but thin enough to work with easily.*Dish 2: Pour in your 2 cups panko breadcrumbs, spreading them out evenly. This simplified batter method means less mess and easier handling compared to separate flour-egg dips. Plus, it creates a more even coating that really grips those breadcrumbs!
3-Step 3: Heat Your Oil Pour your oil into a deep fryer, Dutch oven, or heavy-bottomed pot. You want at least 2 inches of oil for proper frying. Heat the oil to 350°F this is the sweet spot for deep fried fish. Use a thermometer if you have one; if not, test by dropping in a few panko crumbs. They should sizzle immediately but not burn. Oil that’s too cold results in soggy, greasy fish; oil that’s too hot will burn the coating before the fish cooks through.
4-Step 4: Coat the Fish Now comes the fun part! Take each seasoned fish fillet and dip it into your batter mixture. Let any excess drip off for a moment you want a thin, even coating. Then transfer the fish to your panko dish. Press the fillet gently but firmly into the breadcrumbs, making sure every surface gets coated. Flip and repeat, pressing again to ensure the panko really adheres to the batter. Place each coated fillet on a wire rack or plate while you finish the rest. Working one at a time keeps things manageable and ensures even coating.
5-Step 5: Fry to Golden Perfection Carefully lower your breaded fish fillets into the hot oil. Don’t crowd the pot fry in batches if needed, usually 2 fillets at a time works well. Overcrowding drops the oil temperature and leads to steaming instead of frying. Fry for 2-3 minutes per side until the fish is cooked through and the coating is a beautiful golden brown. How do you know when it’s done? The exterior should be evenly golden, and the internal temperature should reach 145°F. If you don’t have a thermometer, the fish should flake easily when tested with a fork.
6-Step 6: Drain and Rest Remove each fish cutlet from the oil using tongs or a slotted spoon. Transfer to a wire rack set over a baking sheet this allows air circulation and keeps that crispy coating intact. Avoid paper towels if possible; they can trap steam and soften your beautiful crust. Let the fish rest for 2-3 minutes before serving. This brief rest helps the coating set and keeps the juices inside where they belong.
7-Step 7: Serve and Enjoy Slice each crispy fried fish fillet into strips (traditional katsu presentation) or serve whole. Plate with your favorite accompaniments tonkatsu sauce is classic, but tartar sauce, lemon wedges, or a spicy mayo also work beautifully. A side of shredded cabbage, steamed rice, or a crisp salad rounds out the meal perfectly.
Last Step:
Please leave a rating and comment letting us know how you liked this recipe! This helps our business to thrive and continue providing free, high-quality recipes for you.Notes
🥚 Use a simple batter of flour and eggs for easier handling than separate dredging steps.
🍞 Double dredge in panko for extra crunch if desired.
🔥 Fry at 350°F to achieve the perfect crispy texture without overcooking the fish.
- Prep Time: 10 minutes
- Cook Time: 10 minutes
- Category: Main Course
- Method: Deep Fry
- Cuisine: Japanese
- Diet: Pescatarian
Nutrition
- Serving Size: 1 fillet
- Calories: 450 kcal
- Sugar: 1g
- Sodium: 400mg
- Fat: 25g
- Saturated Fat: 4g
- Unsaturated Fat: 18g
- Trans Fat: 0g
- Carbohydrates: 25g
- Fiber: 1g
- Protein: 25g
- Cholesterol: 100mg





