

Why You’ll Love This Matcha Milk Tea Tiramisu
If you’re searching for a dessert that combines the trendy flavors of a boba shop with the classic appeal of Italian tiramisu, this Matcha Milk Tea Tiramisu is exactly what you need. This no-bake dessert brings together earthy matcha, fragrant milk tea, and a luscious cream filling that will have everyone asking for seconds.
Here’s why this recipe deserves a spot in your regular rotation:
- Ease of preparation: With just 35 minutes of active prep time and no oven required, this recipe fits perfectly into busy schedules. The steps are straightforward, making it accessible even for those new to baking. You can prep it in the morning and have a stunning dessert ready for dinner guests by evening.
- Family-friendly recipe: Unlike traditional tiramisu, this version contains no eggs and no alcohol, making it completely safe for children, pregnant women, and anyone avoiding those ingredients. It’s a dessert the whole family can enjoy together without any worries.
- Budget-conscious ingredients: Instead of expensive mascarpone cheese, this recipe uses a clever combination of cream cheese and sour cream that delivers the same velvety texture at a fraction of the cost. Most ingredients are pantry staples or easy to find at any grocery store.
- Unique flavor profile: The combination of grassy matcha and aromatic milk tea creates a sophisticated flavor that feels both familiar and exciting. Each bite offers layers of creamy sweetness balanced by the gentle bitterness of green tea.
Jump to:
- Why You’ll Love This Matcha Milk Tea Tiramisu
- Essential Ingredients for Matcha Milk Tea Tiramisu
- Base and Assembly Ingredients
- Milk Tea Soak
- Cream Filling
- Special Dietary Options
- How to Prepare the Perfect Matcha Milk Tea Tiramisu: Step-by-Step Guide
- Step 1: Prepare the Milk Tea Soak
- Step 2: Create the Creamy Filling
- Step 3: First Layer Assembly
- Step 4: Second and Third Layers
- Step 5: Chill and Set
- Step 6: Final Touches and Serving
- Dietary Substitutions to Customize Your Matcha Milk Tea Tiramisu
- Cream Cheese and Dairy Alternatives
- Tea and Flavor Modifications
- Sweetener Adjustments
- Mastering Matcha Milk Tea Tiramisu: Advanced Tips and Variations
- Pro Techniques for Perfect Results
- Creative Flavor Variations
- Presentation Ideas
- Make-Ahead Strategies
- How to Store Matcha Milk Tea Tiramisu: Best Practices
- Refrigeration Guidelines
- Freezing Options
- Serving Leftovers
- FAQs: Frequently Asked Questions About Matcha Milk Tea Tiramisu
- How is matcha milk tea tiramisu different from traditional tiramisu?
- Can you make matcha milk tea tiramisu without mascarpone cheese?
- How long do you need to chill matcha milk tea tiramisu before serving?
- What type of tea should I use for milk tea in matcha milk tea tiramisu?
- How do you keep ladyfingers from getting soggy in matcha milk tea tiramisu?
- Matcha Milk Tea Tiramisu
- Ingredients
- Instructions
- Last Step:
- Notes
- Nutrition
- Did you make this recipe?
Essential Ingredients for Matcha Milk Tea Tiramisu
Gathering the right ingredients is key to achieving the perfect balance of flavors in this Matcha Milk Tea Tiramisu. Here’s everything you’ll need, organized by component:
Base and Assembly Ingredients
- 2 packages Ladyfingers (200g each, approximately 48 pieces total) – These crisp Italian biscuits form the structural foundation of the dessert. Look for dry, crisp savoiardi style rather than soft cake-type ladyfingers for best results.
- 3 tablespoons Matcha powder (plus extra for dusting) – High-quality ceremonial grade matcha provides the signature green tea flavor and vibrant color. The extra powder creates a beautiful finish on top.
Milk Tea Soak
- 5 tea bags or 3 tablespoons tea leaves – Ceylon or Assam black tea works beautifully, providing robust flavor that complements the matcha.
- 1½ cups water – Used for brewing the concentrated tea base.
- ½ cup evaporated milk – Adds creamy richness to the soaking liquid, creating that authentic milk tea flavor.
Cream Filling
- 1 pound cream cheese, softened – Forms the tangy, creamy base that replaces traditional mascarpone.
- 2 tablespoons sour cream – Adds subtle tanginess and helps achieve that silky texture.
- 2 cups heavy cream – Whipped into the mixture for lightness and stability.
- 1½ cups powdered sugar – Provides sweetness and helps stabilize the cream filling.
- 2 teaspoons vanilla extract – Rounds out the flavors with warm, aromatic notes.
Special Dietary Options
For those with dietary restrictions, this recipe offers flexibility:
- Gluten-free: Substitute gluten-free ladyfingers or a thin layer of gluten-free sponge cake cut to fit the dish.
- Lower sugar: Reduce powdered sugar to 1 cup or use a sugar alternative that measures 1:1.
- Lighter version: Use reduced-fat cream cheese and light evaporated milk for fewer calories.
How to Prepare the Perfect Matcha Milk Tea Tiramisu: Step-by-Step Guide
Creating this impressive dessert is easier than you might think. Follow these detailed steps for foolproof results every time.
Step 1: Prepare the Milk Tea Soak
Begin by brewing a concentrated milk tea that will infuse the ladyfingers with aromatic flavor. Place 1½ cups water in a small saucepan over medium heat. Add 5 tea bags or 3 tablespoons loose tea leaves and bring the mixture to a gentle simmer. Once simmering, remove from heat and let the tea steep for 8-10 minutes to develop a robust flavor profile.
Carefully remove the tea bags or strain out the loose leaves, then stir in ½ cup evaporated milk until well combined. Pour this fragrant liquid into a shallow container that will make dipping easy. Allow the milk tea to cool completely before using, as warm liquid can make ladyfingers too soft.
Pro tip: Ceylon black tea is ideal for its bold, malty character that pairs beautifully with matcha. According to matcha iced latte recipes, the quality of your tea makes a noticeable difference in the final flavor.
Step 2: Create the Creamy Filling
The cream filling is where the magic happens. Start by placing 1 pound of softened cream cheese in a large mixing bowl. Beat with an electric mixer on medium speed for about 2 minutes until the cream cheese becomes light and fluffy with no lumps remaining.
Add 2 tablespoons sour cream, 2 cups heavy cream, 1½ cups powdered sugar, and 2 teaspoons vanilla extract to the bowl. Increase the mixer speed to medium-high and beat for approximately 3 more minutes until the mixture is completely smooth and holds soft peaks when the beaters are lifted.
The filling should be spreadable but not runny. If it seems too loose, continue beating for another minute. If too stiff, add a tablespoon of milk to loosen.
Step 3: First Layer Assembly
Now comes the fun part – building your Matcha Milk Tea Tiramisu! Have your 8×10 baking dish ready. Working quickly, dip each ladyfinger into the cooled milk tea for just 1-2 seconds per side. Do not soak them – a quick dip is all they need to absorb flavor without becoming soggy.
Arrange the dipped ladyfingers in a single layer in the bottom of your baking dish. You may need to break some pieces to fit the corners. Once the first layer is complete, spread exactly one-third of your cream filling evenly over the ladyfingers using an offset spatula for smooth coverage.
Sift 1 tablespoon of matcha powder evenly over the cream layer using a fine mesh sieve. This prevents clumps and ensures even distribution of that gorgeous green tea flavor.
Step 4: Second and Third Layers
Repeat the assembly process for your second layer. Dip more ladyfingers in the milk tea and arrange them over the matcha-dusted cream. Spread another third of the cream filling over this layer and dust with another tablespoon of matcha powder.
For the third and final layer, dip the remaining ladyfingers and arrange them in the dish. Spread the last third of cream filling over the top. This time, skip the matcha dusting – you’ll add that just before serving for a fresh, vibrant finish.
Step 5: Chill and Set
Cover your assembled dessert tightly with plastic wrap or a lid. Place it in the refrigerator and let it chill for at least 4 hours, though overnight is even better. This resting time allows the flavors to meld together and the cream to set firmly for clean, beautiful slices.
Step 6: Final Touches and Serving
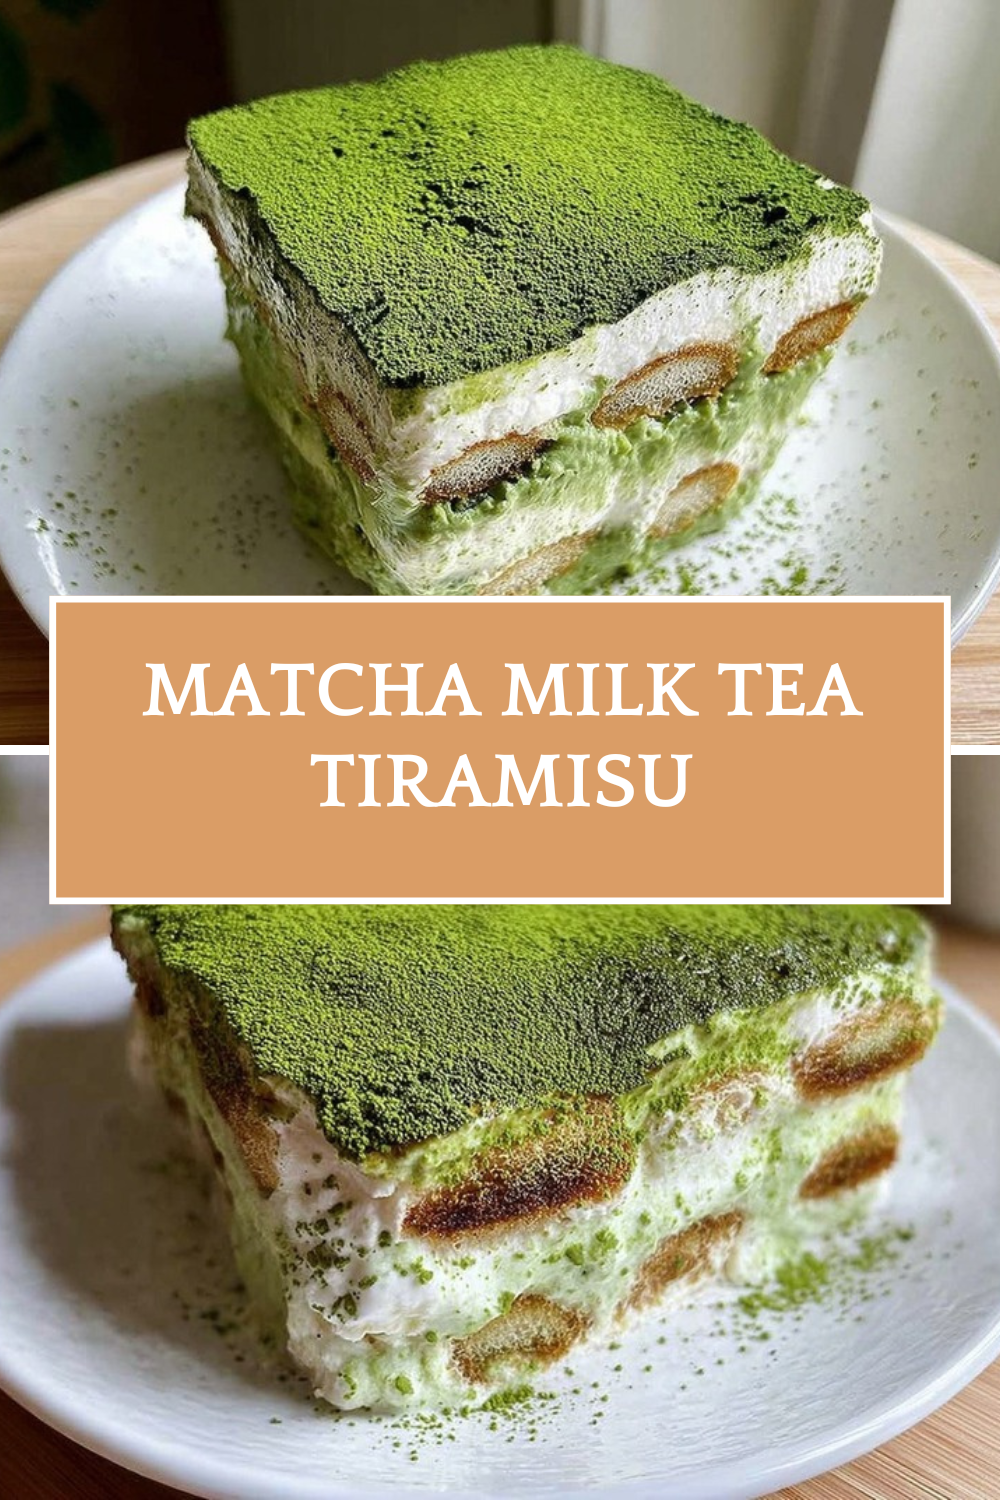
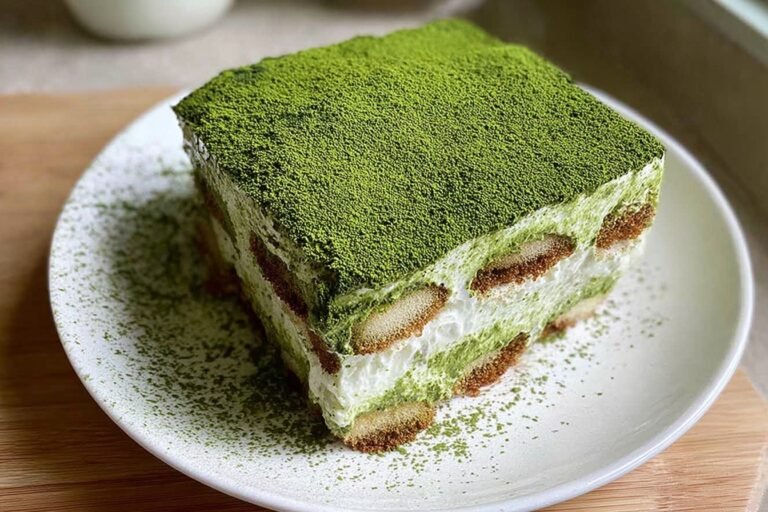
When you’re ready to serve, remove the dessert from the refrigerator. Using a fine mesh sieve, dust the top generously with the remaining matcha powder. The bright green powder against the white cream creates a stunning presentation that will impress your guests.
Slice with a sharp knife, wiping the blade clean between cuts for the neatest portions. Serve immediately and enjoy the layers of creamy, tea-infused goodness.
According to research from Harvard Health Publishing, matcha contains beneficial compounds called catechins that act as antioxidants, making this dessert a treat you can feel good about enjoying in moderation.

Dietary Substitutions to Customize Your Matcha Milk Tea Tiramisu
One of the best things about this recipe is how easily it adapts to different dietary needs and ingredient availability. Here’s how to make it work for you.
Cream Cheese and Dairy Alternatives
The combination of cream cheese and sour cream serves as an excellent mascarpone substitute, but you have options:
For a lighter version, try using Neufchâtel cheese in place of regular cream cheese. It has about one-third less fat while maintaining a similar taste and texture. Greek yogurt can replace the sour cream for added protein.
If mascarpone is available and fits your budget, you can certainly use 1 pound of mascarpone instead of the cream cheese mixture. However, many home cooks find the cream cheese version just as delicious and more affordable.
For those avoiding dairy entirely, plant-based cream cheese and coconut cream can work, though the flavor profile will shift slightly. The texture may also be softer, so consider refrigerating longer before serving.
Tea and Flavor Modifications
The milk tea component can be customized based on your preferences and what you have on hand:
- Stronger tea flavor: Increase steeping time to 12-15 minutes or add an extra tea bag.
- Sweeter soak: Add 1-2 tablespoons of sweetened condensed milk to the brewed tea for a richer milk tea flavor.
- Caffeine-free option: Use decaf black tea or replace with rooibos for a similar flavor without the caffeine.
- Earl Grey twist: Try Earl Grey tea for subtle citrus notes from the bergamot.
Sweetener Adjustments
The powdered sugar can be modified to suit your taste and dietary needs. Reduce it to 1 cup if you prefer less sweetness, or use a natural alternative like maple sugar for a different flavor profile. Keep in mind that powdered sugar contains cornstarch, which helps stabilize the cream, so reducing it too much may affect the filling’s consistency.
Mastering Matcha Milk Tea Tiramisu: Advanced Tips and Variations
Ready to take your dessert to the next level? These expert tips and creative variations will help you master this impressive treat.
Pro Techniques for Perfect Results
Temperature matters more than you might think. Always use room temperature cream cheese for the smoothest filling without lumps. Cold cream cheese will not beat properly and will leave you with an uneven texture.
When dipping ladyfingers, work in small batches of 6-8 at a time. This prevents them from sitting in the liquid too long and becoming oversaturated. A quick 1-2 second dip per side is truly all you need.
Always sift your matcha powder before dusting. Matcha tends to clump, and those clumps will create bitter spots in your otherwise smooth cream layers. A fine mesh sieve is your best friend here.
For the cleanest slices, run your knife under hot water and wipe it dry between each cut. This simple step transforms your presentation from homey to bakery-quality.
Creative Flavor Variations
Once you’ve mastered the classic version, try these exciting twists:
- Chocolate matcha: Add a layer of chocolate ganache between the cream and ladyfingers for a mocha-inspired variation.
- Berry matcha: Top with fresh strawberries or raspberries for a pop of color and fruity contrast to the earthy tea flavors.
- Coconut milk tea: Replace evaporated milk with coconut milk for a tropical twist that pairs beautifully with matcha.
- Matcha-hojima combo: Dust alternate layers with roasted green tea (hojicha) for deeper, toasty notes.
Presentation Ideas
Transform your Matcha Milk Tea Tiramisu into a showstopping centerpiece with these presentation tips:
Instead of one large dish, assemble individual portions in small mason jars or clear cups. This creates beautiful layered desserts that are perfect for parties and eliminates the need for slicing.
For an extra-special finish, pipe whipped cream rosettes on top before dusting with matcha. Add a few white chocolate shavings or edible flowers for an elegant touch that photographs beautifully.
Make-Ahead Strategies
This dessert is perfect for entertaining because it actually improves with time. Assemble it up to 24 hours before your event. The flavors will continue to develop and meld together for an even more delicious result.
You can also prep components ahead of time. Brew the milk tea up to 3 days in advance and store it in the refrigerator. The cream filling can be made a day ahead and kept chilled, then briefly rewhipped before assembling.
How to Store Matcha Milk Tea Tiramisu: Best Practices
Proper storage ensures your dessert stays fresh and delicious for as long as possible. Here’s everything you need to know.
Refrigeration Guidelines
Your assembled Matcha Milk Tea Tiramisu will keep beautifully in the refrigerator for 3-4 days when stored properly. Cover the dish tightly with plastic wrap, pressing it gently against the surface to prevent air exposure. Alternatively, use an airtight container with a secure lid.
Keep the dessert away from strong-smelling foods in the refrigerator, as the cream can absorb odors. The back of the middle shelf typically offers the most consistent temperature.
Freezing Options
Believe it or not, this dessert freezes surprisingly well for longer storage. Wrap the entire dish tightly in plastic wrap, then cover with aluminum foil. Label with the date and freeze for up to 1 month.
For individual portions, slice the dessert first, wrap each piece separately, and freeze on a baking sheet until solid. Then transfer to a freezer-safe container. This method lets you thaw only what you need.
To serve frozen slices, transfer them to the refrigerator the night before. The texture will be nearly identical to freshly made.
Serving Leftovers
This dessert is best served cold, straight from the refrigerator. Let it sit at room temperature for no more than 15 minutes before serving. Any longer and the cream may become too soft and weepy.
Avoid reheating this dessert, as it is meant to be served chilled. The texture is designed for cold enjoyment, and warming would compromise both the structure and food safety.
FAQs: Frequently Asked Questions About Matcha Milk Tea Tiramisu
How is matcha milk tea tiramisu different from traditional tiramisu?
Matcha milk tea tiramisu swaps out the classic coffee and alcohol soak for a fragrant milk tea dip infused with Ceylon black tea, adding earthy notes alongside vibrant matcha powder in the cream layers. It’s completely egg-free and alcohol-free, making it family-friendly and lighter. Instead of pricey mascarpone, it uses a mix of cream cheese and sour cream for a tangy, creamy filling that’s easier to find and more affordable while mimicking that rich texture. Ladyfingers get a quick matcha-milk tea dip for subtle green tea flavor without sogginess. This creates a refreshing, Asian-fusion twist—think boba shop vibes in dessert form. Prep is no-bake, ready in 30 minutes plus chilling, serving 8-10 people. Perfect for matcha lovers seeking a caffeine-kissed treat without the boozy edge of the Italian original. (92 words)
Can you make matcha milk tea tiramisu without mascarpone cheese?
Absolutely— this recipe skips mascarpone entirely for a budget-friendly combo of full-fat cream cheese and sour cream. Blend 8 oz softened cream cheese with 1 cup sour cream, 1/4 cup powdered sugar, and 2 tbsp matcha powder until smooth and fluffy. Whip 1.5 cups heavy cream separately to stiff peaks, then fold it in for lightness. This duo delivers the same velvety mouthfeel and tang at half the cost, without compromising taste. It’s stable for layering with quick-dipped ladyfingers in milk tea. Pro tip: Use room-temp ingredients to avoid lumps, and taste-test matcha for green tea intensity. Result? A creamy, no-fuss filling that’s scoopable after 4+ hours chilling. Ideal if mascarpone is unavailable or too expensive. (112 words)
How long do you need to chill matcha milk tea tiramisu before serving?
Chill for at least 4 hours in the fridge, but overnight (8-12 hours) is best for peak flavor melding. Cover the dish tightly with plastic wrap to prevent drying out or absorbing fridge odors. The wait lets matcha infuse the cream, milk tea soften ladyfingers just right, and layers set firmly for clean slices. After 4 hours, it’s sliceable but softer; overnight firms it up like classic tiramisu. Serve straight from fridge at 40°F for best texture—avoid room temp or it may weep. Serves 8-10; leftovers keep 3-4 days chilled. Quick check: Edges should pull away slightly from dish when ready. Patience pays off for that perfect balance of creamy, tea-infused bliss. (104 words)
What type of tea should I use for milk tea in matcha milk tea tiramisu?
Ceylon black tea is ideal for its bold, malty flavor that pairs seamlessly with matcha’s grassy notes without overpowering. Brew 2 strong bags or 2 tsp loose leaf in 2 cups hot water, steep 5 minutes, then mix with 1 cup milk and 2 tbsp sugar or condensed milk for sweetness. Cool completely before dipping ladyfingers—warm liquid makes sogginess. Alternatives like Assam or English Breakfast work for similar robustness; avoid green or herbal teas as they clash with matcha. For authenticity, use whole milk or oat milk. This soak adds subtle caffeine (about 40mg per serving from tea + matcha) and boba-inspired aroma. Dip ladyfingers 1-2 seconds only. Yields enough for two 9×9-inch layers. (108 words)
How do you keep ladyfingers from getting soggy in matcha milk tea tiramisu?
Dip each ladyfinger (savoiardi) in cooled milk tea for just 1-2 seconds per side—quick swipe, no lingering—to absorb flavor without saturation. Work fast in batches: line up 12-15 fingers, dip and place immediately in a 9×9-inch dish for the first layer, then repeat. Press gently to fit snugly. If tea’s too hot, it melts them; fridge-cool it first. Use crisp, dry ladyfingers, not soft cake slices. Build layers: fingers, cream, dust matcha, repeat. Chilling firms everything up. This method keeps them tender-crisp, like the original, enhancing matcha tea taste. Mistake to avoid: double-dipping. Result: Structured slices that hold up 3-4 days in fridge. Pro move: Freeze extra fingers for next batch. (114 words)
Matcha Milk Tea Tiramisu
🍵 Savor the earthy matcha and soothing milk tea flavors in this creamy, no-bake tiramisu that’s perfect for a refreshing twist on a classic dessert.
🎂 Enjoy an egg-free, alcohol-free treat ideal for kids, families, and anyone with dietary restrictions—easy to make and irresistibly delicious!
- Total Time: 4 hours 45 minutes
- Yield: 12 servings
Ingredients
– 2 packages Ladyfingers (200g each, approximately 48 pieces total)
– 3 tablespoons Matcha powder (plus extra for dusting)
– 5 tea bags or 3 tablespoons tea leaves
– 1½ cups water
– ½ cup evaporated milk
– 1 pound cream cheese, softened
– 2 tablespoons sour cream
– 2 cups heavy cream
– 1½ cups powdered sugar
– 2 teaspoons vanilla extract
Instructions
1-Step 1: Prepare the Milk Tea Soak Begin by brewing a concentrated milk tea that will infuse the ladyfingers with aromatic flavor. Place 1½ cups water in a small saucepan over medium heat. Add 5 tea bags or 3 tablespoons loose tea leaves and bring the mixture to a gentle simmer. Once simmering, remove from heat and let the tea steep for 8-10 minutes to develop a robust flavor profile. Carefully remove the tea bags or strain out the loose leaves, then stir in ½ cup evaporated milk until well combined. Pour this fragrant liquid into a shallow container that will make dipping easy. Allow the milk tea to cool completely before using, as warm liquid can make ladyfingers too soft.
2-Step 2: Create the Creamy Filling The cream filling is where the magic happens. Start by placing 1 pound of softened cream cheese in a large mixing bowl. Beat with an electric mixer on medium speed for about 2 minutes until the cream cheese becomes light and fluffy with no lumps remaining. Add 2 tablespoons sour cream, 2 cups heavy cream, 1½ cups powdered sugar, and 2 teaspoons vanilla extract to the bowl. Increase the mixer speed to medium-high and beat for approximately 3 more minutes until the mixture is completely smooth and holds soft peaks when the beaters are lifted. The filling should be spreadable but not runny. If it seems too loose, continue beating for another minute. If too stiff, add a tablespoon of milk to loosen.
3-Step 3: First Layer Assembly Now comes the fun part – building your Matcha Milk Tea Tiramisu! Have your 8×10 baking dish ready. Working quickly, dip each ladyfinger into the cooled milk tea for just 1-2 seconds per side. Do not soak them – a quick dip is all they need to absorb flavor without becoming soggy. Arrange the dipped ladyfingers in a single layer in the bottom of your baking dish. You may need to break some pieces to fit the corners. Once the first layer is complete, spread exactly one-third of your cream filling evenly over the ladyfingers using an offset spatula for smooth coverage. Sift 1 tablespoon of matcha powder evenly over the cream layer using a fine mesh sieve. This prevents clumps and ensures even distribution of that gorgeous green tea flavor.
4-Step 4: Second and Third Layers Repeat the assembly process for your second layer. Dip more ladyfingers in the milk tea and arrange them over the matcha-dusted cream. Spread another third of the cream filling over this layer and dust with another tablespoon of matcha powder. For the third and final layer, dip the remaining ladyfingers and arrange them in the dish. Spread the last third of cream filling over the top. This time, skip the matcha dusting – you’ll add that just before serving for a fresh, vibrant finish.
5-Step 5: Chill and Set Cover your assembled dessert tightly with plastic wrap or a lid. Place it in the refrigerator and let it chill for at least 4 hours, though overnight is even better. This resting time allows the flavors to meld together and the cream to set firmly for clean, beautiful slices.
6-Step 6: Final Touches and Serving When you’re ready to serve, remove the dessert from the refrigerator. Using a fine mesh sieve, dust the top generously with the remaining matcha powder. The bright green powder against the white cream creates a stunning presentation that will impress your guests. Slice with a sharp knife, wiping the blade clean between cuts for the neatest portions. Serve immediately and enjoy the layers of creamy, tea-infused goodness.
Last Step:
Please leave a rating and comment letting us know how you liked this recipe! This helps our business to thrive and continue providing free, high-quality recipes for you.Notes
🧀 Use cream cheese and sour cream as easy mascarpone substitutes for authentic flavor.
⚡ Quick-dip ladyfingers in milk tea to keep them from getting soggy.
🔍 Sieve matcha powder to avoid clumps and ensure even dusting.
❄️ Chill overnight for the best flavor and texture.
- Prep Time: 35 minutes
- Chill: 4 hours
- Cook Time: 10 minutes
- Category: Dessert
- Method: No Bake
- Cuisine: Fusion
- Diet: Vegetarian, Egg-Free, Alcohol-Free
Nutrition
- Serving Size: 1 slice
- Calories: 517 kcal
- Sugar: 18g
- Sodium: 208mg
- Fat: 33g
- Saturated Fat: 19g
- Unsaturated Fat: 11g
- Trans Fat: 0g
- Carbohydrates: 46g
- Fiber: 0.4g
- Protein: 11g
- Cholesterol: 184mg





