

Why You’ll Love This Garlic Butter Shrimp
If you’re looking for a weeknight dinner that feels fancy without the fuss, this garlic butter shrimp is about to become your go-to recipe. It delivers restaurant-quality flavor in just 10 minutes from start to finish, making it perfect for busy families, last-minute guests, or anyone who wants something delicious without spending hours at the stove.
Here’s why this dish stands out:
- Ease of preparation: With only 5 minutes of prep and 5 minutes of cook time, this recipe comes together faster than ordering takeout. Everything cooks in one pan, which means less cleanup and more time to enjoy your meal with family or friends.
- Health benefits: Shrimp is a fantastic source of lean protein, packing 23g per serving while staying relatively low in calories. According to health experts, shrimp provides essential nutrients like selenium, vitamin B12, and omega-3 fatty acids that support immune function and heart health.
- Versatility: Serve this garlic butter shrimp on its own, over pasta, alongside rice, or tucked into tacos. It adapts easily to whatever you have on hand, making it a reliable option for using up pantry staples.
- Distinctive flavor: The combination of rich butter, aromatic garlic, bright lemon juice, and fragrant Italian seasoning creates a sauce that coats each shrimp perfectly. Fresh parsley adds a pop of color and a subtle herbal finish that brings everything together.
Whether you’re new to cooking seafood or a seasoned home chef, this recipe offers consistent, satisfying results every single time.
Jump to:
- Why You’ll Love This Garlic Butter Shrimp
- Essential Ingredients for Garlic Butter Shrimp
- Complete Ingredient List
- Special Dietary Options
- How to Prepare the Perfect Garlic Butter Shrimp: Step-by-Step Guide
- Step 1: Prepare Your Shrimp
- Step 2: Season Your Shrimp
- Step 3: Heat the Butter
- Step 4: Cook the Shrimp
- Step 5: Add the Garlic
- Step 6: Finish with Lemon and Parsley
- Step 7: Serve Immediately
- Dietary Substitutions to Customize Your Garlic Butter Shrimp
- Protein and Main Component Alternatives
- Vegetable, Sauce, and Seasoning Modifications
- Mastering Garlic Butter Shrimp: Advanced Tips and Variations
- Pro Cooking Techniques
- Flavor Variations to Try
- Presentation Tips
- Make-Ahead Options
- How to Store Garlic Butter Shrimp: Best Practices
- Refrigeration Guidelines
- Freezing Options
- Reheating Best Practices
- Meal Prep Considerations
- FAQs: Frequently Asked Questions About Garlic Butter Shrimp
- What size shrimp works best for garlic butter shrimp?
- How long do you cook garlic butter shrimp?
- Should you remove tails from shrimp before making garlic butter shrimp?
- Is garlic butter shrimp healthy?
- Do you need to pat dry thawed shrimp for garlic butter shrimp?
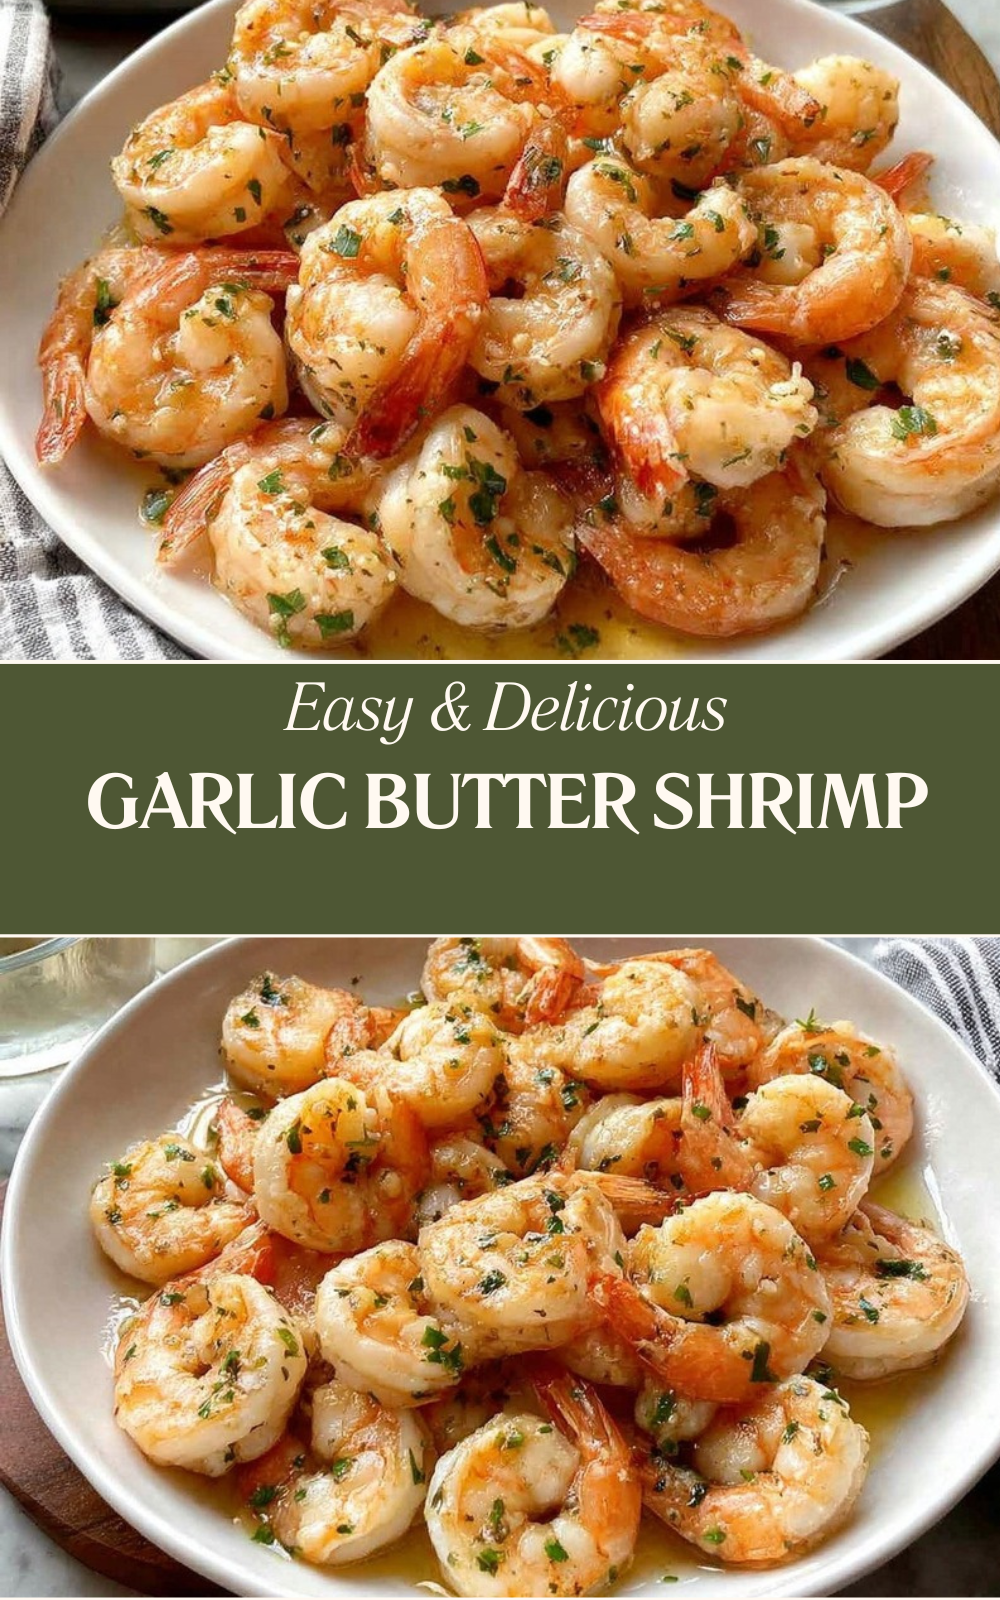
- Garlic Butter Shrimp
- Ingredients
- Instructions
- Last Step:
- Notes
- Nutrition
- Did you make this recipe?
Essential Ingredients for Garlic Butter Shrimp
Gathering your ingredients beforehand makes the cooking process smooth and stress-free. This recipe uses simple, everyday items that you likely already have in your kitchen, yet the final result tastes anything but ordinary.
Complete Ingredient List
- 4 tablespoons butter Forms the rich, silky base of the sauce and helps the seasonings adhere to the shrimp. Use unsalted butter if you prefer controlling the sodium level yourself.
- 1 pound large shrimp (16-20 count), peeled and deveined, tails removed if desired The star of the dish. Extra jumbo shrimp (16-20 per pound) offer the best texture and absorb the garlic butter sauce beautifully.
- Salt and pepper to taste Essential seasonings that bring out the natural sweetness of the shrimp and balance the richness of the butter.
- 1 teaspoon Italian seasoning A blend of dried herbs like oregano, basil, and thyme that adds depth and Mediterranean flair without extra effort.
- 2-3 teaspoons minced garlic Provides that signature aromatic punch. Fresh garlic is preferred over jarred for the most vibrant flavor.
- Juice of 1 lemon Brightens the dish with acidity that cuts through the butter and ties all the flavors together.
- 1 tablespoon chopped parsley Adds fresh color and a mild herbal note as a finishing touch.
Special Dietary Options
| Dietary Need | Substitution |
|---|---|
| Vegan | Replace butter with vegan butter or olive oil; substitute shrimp with king oyster mushrooms or plant-based shrimp alternatives |
| Gluten-free | This recipe is naturally gluten-free when using pure butter and checking that Italian seasoning contains no additives |
| Low-calorie | Use 2 tablespoons butter instead of 4, or swap half the butter for olive oil to reduce saturated fat |
| Dairy-free | Substitute butter with olive oil or ghee (if tolerated) for a similar cooking experience |
Having these simple ingredients ready means you can whip up this dish any night of the week without a special grocery run.
How to Prepare the Perfect Garlic Butter Shrimp: Step-by-Step Guide
Making garlic butter shrimp is straightforward, but a few key techniques ensure the best results every time. Follow these steps carefully, and you’ll have perfectly cooked, flavorful shrimp in minutes.
Step 1: Prepare Your Shrimp
Start by ensuring your shrimp are properly prepared. If using frozen shrimp, thaw them overnight in the refrigerator or place the sealed bag under cold running water for 10-15 minutes. Once thawed, pat the shrimp completely dry with paper towels. This step is crucial because excess moisture causes the shrimp to steam rather than sear, resulting in a soggy texture and less browning.
Check that each shrimp is peeled and deveined. If you purchased shrimp with shells, remove them by pulling the legs and peeling back the shell. To devein, make a shallow cut along the back and pull out the dark vein with the tip of your knife or a deveining tool. Whether to remove the tails is entirely up to you leaving them on looks elegant for serving, while removing them makes eating more convenient for casual weeknight dinners.
Step 2: Season Your Shrimp
Place your dried shrimp in a bowl and season them evenly with salt, pepper, and Italian seasoning. Toss gently to coat each piece. Pre-seasoning helps the flavors penetrate the shrimp rather than just sitting on the surface. Let them sit for a minute or two while you prepare your pan.
Step 3: Heat the Butter
Place a large skillet or frying pan over medium-high heat. Add the 4 tablespoons of butter and let it melt completely. Wait until the butter starts to bubble slightly and foam this indicates it’s hot enough for cooking. The butter should be melted but not browned at this stage.
Pro tip: Use a pan large enough to hold all the shrimp in a single layer. Overcrowding causes uneven cooking and prevents proper browning.
Step 4: Cook the Shrimp
Once the butter is hot and bubbly, add the seasoned shrimp to the pan in a single layer. Cook for 3-5 minutes total, stirring occasionally. The shrimp will start to turn pink and opaque on the bottom side within 2-3 minutes. Flip or stir them to cook the other side.
You’ll know the shrimp are done when they’re fully pink, opaque throughout, and curled into a loose “C” shape. Avoid cooking until they form a tight “O” shape this indicates overcooking and results in tough, rubbery shrimp. The internal temperature should reach 145°F if you’re using a meat thermometer.
Step 5: Add the Garlic
When the shrimp are nearly done (pink and just turning opaque), add the minced garlic to the pan. Cook for about 1 minute, stirring constantly. Adding the garlic at this stage prevents it from burning garlic cooks much faster than shrimp and can become bitter if added too early. The garlic should become fragrant and slightly golden but not brown.
Step 6: Finish with Lemon and Parsley
Remove the pan from the heat and immediately stir in the juice of one lemon and the chopped parsley. The residual heat will warm these final ingredients without cooking away the bright, fresh flavors. Toss everything together so the shrimp are well-coated with the garlic butter sauce.
Step 7: Serve Immediately
Transfer your garlic butter shrimp to a serving platter or individual plates. Spoon any remaining sauce from the pan over the top. Serve right away while hot the texture and flavor are best fresh from the stove. This dish pairs beautifully with crusty bread for soaking up the sauce, over pasta, alongside steamed vegetables, or simply on its own as a protein-rich main course.
If you’re looking for a sweet treat to follow this savory dish, check out this classic peach cobbler recipe that makes a perfect dessert pairing.

Dietary Substitutions to Customize Your Garlic Butter Shrimp
One of the best things about this garlic butter shrimp recipe is how easily it adapts to different dietary preferences and ingredient availability. Whether you’re cooking for someone with specific restrictions or simply want to switch things up, these substitutions keep the dish delicious.
Protein and Main Component Alternatives
If shrimp isn’t available or you prefer a different protein, several options work well with the same garlic butter technique:
- Scallops: Sea scallops cook beautifully in garlic butter and offer a similar delicate sweetness. Sear them for 2-3 minutes per side.
- Chicken: Cut chicken breast into bite-sized pieces and increase cooking time to 6-8 minutes until cooked through.
- White fish: Cod, halibut, or tilapia fillets can be cooked the same way just adjust timing based on thickness (about 3-4 minutes per side for thin fillets).
- Vegetarian option: King oyster mushrooms, sliced thick, provide a surprisingly similar texture and absorb the garlic butter sauce beautifully.
For those watching their budget, smaller shrimp (such as 51/60 count) work fine but reduce cooking time by half to prevent overcooking. The recipe is forgiving and still delivers great flavor.
Vegetable, Sauce, and Seasoning Modifications
The basic garlic butter sauce welcomes countless variations depending on your mood and pantry:
- Add vegetables: Sauté sliced bell peppers, zucchini, or asparagus alongside the shrimp for a complete one-pan meal.
- Spice it up: Add red pepper flakes or a dash of cayenne when seasoning the shrimp for a Cajun-inspired version.
- Herb variations: Fresh basil, chives, or cilantro can replace or complement the parsley for different flavor profiles.
- Sauce enhancements: A splash of white wine added with the garlic creates a more complex pan sauce.
- Asian twist: Replace Italian seasoning with ginger and soy sauce, and finish with green onions instead of parsley.
These modifications let you customize the dish to your taste while maintaining the quick, easy preparation that makes this recipe so appealing.
Mastering Garlic Butter Shrimp: Advanced Tips and Variations
Once you’ve mastered the basic recipe, these expert techniques and creative variations will take your garlic butter shrimp to the next level.
Pro Cooking Techniques
The difference between good garlic butter shrimp and great ones often comes down to technique. First, always start with a hot pan preheating your skillet before adding butter ensures better searing. Second, resist the urge to stir constantly during the first minute of cooking. Letting the shrimp develop a slight sear on one side adds depth and color.
Another professional tip involves the butter itself. Consider browning the butter slightly before adding the shrimp. Brown butter has a nutty, caramelized flavor that complements seafood beautifully. Just watch carefully butter can go from browned to burned in seconds.
Flavor Variations to Try
| Variation | How to Make It |
|---|---|
| Lemon Garlic Herb | Doubling the lemon juice and adding fresh thyme and rosemary |
| Spicy Cajun | Replace Italian seasoning with Cajun seasoning and add hot sauce |
| Garlic Parmesan | Stir in 2 tablespoons grated Parmesan cheese at the end |
| Mediterranean | Add sun-dried tomatoes, olives, and crumbled feta |
| Coconut Curry | Replace half the butter with coconut oil and add curry powder |
Presentation Tips
For an impressive dinner party presentation, serve the shrimp in individual cast iron skillets or shallow bowls. Garnish with extra fresh parsley and lemon wedges on the side. A light sprinkle of red pepper flakes adds color contrast. Serve with crusty bread arranged around the platter for an inviting, rustic look.
Make-Ahead Options
While this dish cooks quickly, you can prep components in advance. Peel and devein shrimp up to a day ahead, storing them covered in the refrigerator. Mince garlic and chop parsley the morning of cooking. Having everything ready means the actual cooking takes just 5 minutes perfect for entertaining.
For more seafood inspiration with bold garlic butter flavors, you might enjoy this garlic butter seafood boil that takes the concept to a larger scale.
How to Store Garlic Butter Shrimp: Best Practices
Although garlic butter shrimp tastes best fresh from the pan, proper storage lets you enjoy leftovers safely and maintain quality for future meals.
Refrigeration Guidelines
Allow cooked shrimp to cool to room temperature (but no longer than 2 hours) before refrigerating. Transfer to an airtight container and store in the refrigerator for up to 3 days. The garlic butter sauce may solidify when cold this is normal and melts back down when reheated.
Freezing Options
For longer storage, garlic butter shrimp can be frozen, though the texture may change slightly. Place cooled shrimp in a freezer-safe container or heavy-duty freezer bag, removing as much air as possible. Label with the date and freeze for up to 2 months. Thaw overnight in the refrigerator before reheating.
Reheating Best Practices
Reheating requires gentle heat to avoid toughening the shrimp. Warm a skillet over medium-low heat and add the leftover shrimp with its sauce. Cook for 2-3 minutes, turning occasionally, until heated through. Alternatively, microwave at 50% power in 30-second intervals. Avoid high heat, which causes shrimp to become rubbery quickly.
Meal Prep Considerations
For meal prep, cook the shrimp but store the sauce separately. This prevents the shrimp from becoming soggy. When ready to eat, reheat the sauce in a pan and add the shrimp just until warmed. This method maintains better texture throughout the week.
And if you’re planning a complete meal with dessert, this creamy strawberry milkshake makes a refreshing finish to a savory seafood dinner.
FAQs: Frequently Asked Questions About Garlic Butter Shrimp
What size shrimp works best for garlic butter shrimp?
For garlic butter shrimp, choose extra-large or jumbo shrimp, ideally 16-20 per pound (U16-U21 size). These hold up well to quick sautéing without overcooking, staying juicy and tender. Smaller shrimp (like 51/60 count) cook faster but can become rubbery. Buy them peeled and deveined for ease, or do it yourself. Fresh shrimp offer the best flavor, but thawed frozen ones work fine if patted dry. Aim for 1 pound to serve 4 people as a main dish. This size allows even cooking in 2-3 minutes per side, absorbing the garlic butter sauce perfectly. (78 words)
How long do you cook garlic butter shrimp?
Cook garlic butter shrimp for 2-3 minutes per side over medium-high heat in a skillet. Start by heating butter and minced garlic until fragrant, then add shrimp in a single layer. Flip when the bottoms turn pink. They’re done when fully pink, opaque, and curled into a loose “C” shape—avoid tight “O” curls, which mean overcooked. Total time is about 4-6 minutes depending on size. Use a meat thermometer if unsure: internal temp should hit 145°F. Remove from heat immediately to prevent toughness. Serve right away with lemon wedges. (92 words)
Should you remove tails from shrimp before making garlic butter shrimp?
Removing tails before cooking garlic butter shrimp is optional and depends on preference. Tails-on shrimp look more elegant for dinner parties and are easier to eat as an appetizer. For quick weeknight meals, peel them off beforehand to speed up eating—no fumbling at the table. If leaving tails on, hold them for dipping in the sauce. Always devein and pat dry regardless. Pro tip: After cooking, you can pull tails off easily if needed. This keeps the dish versatile for casual or formal serving. (85 words)
Is garlic butter shrimp healthy?
Garlic butter shrimp can be a nutritious choice in moderation. A 3-ounce serving of shrimp provides about 85 calories, 20g protein, and key nutrients like selenium (for immune support), vitamin B12, and omega-3s for heart health—without much fat. However, the butter adds saturated fat and calories (around 200-300 per serving total). Balance it with veggies like asparagus or zucchini. Shrimp has cholesterol (about 160mg per serving), but studies show it doesn’t raise blood cholesterol much for most people. Opt for grass-fed butter or a lighter oil blend to cut fat. Pairs well with quinoa for a complete meal. (102 words)
Do you need to pat dry thawed shrimp for garlic butter shrimp?
Yes, always pat thawed shrimp dry with paper towels before cooking garlic butter shrimp. Excess moisture from thawing steams the shrimp instead of searing them, leading to soggy results and less flavorful browning. Dry them thoroughly inside and out, then season with salt and pepper. This step takes 2 minutes but ensures a crispy sear in the hot butter-garlic mix. For frozen shrimp, thaw overnight in the fridge or under cold water for 10-15 minutes, then dry. Skip this, and your sauce won’t thicken properly. Store dried shrimp in the fridge up to 1 day before cooking. (94 words)
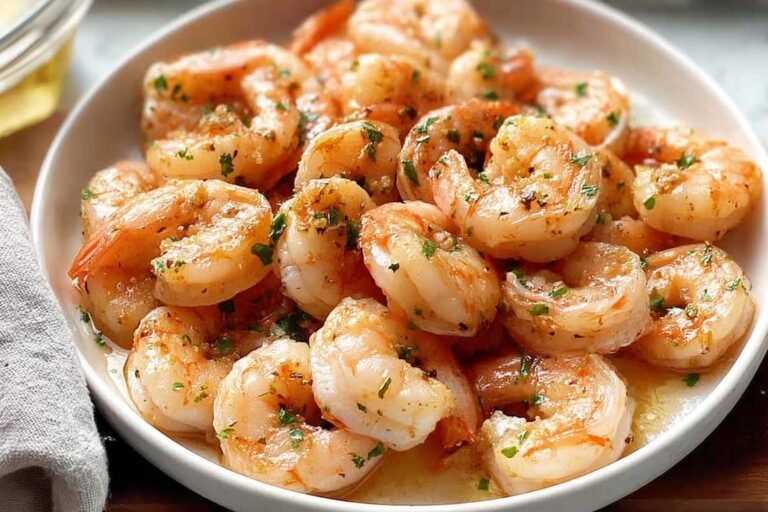
Garlic Butter Shrimp
🦐 Sizzle up this Garlic Butter Shrimp in just 10 minutes for a juicy, flavor-packed meal bursting with garlic, lemon, and herbs – ideal for busy nights or impressive appetizers!
🧈 Buttery tenderness meets zesty freshness, low-carb and high-protein to satisfy without the wait, perfect over rice or pasta.
- Total Time: 10 minutes
- Yield: 4 servings
Ingredients
– 4 tablespoons butter for the rich, silky base of the sauce and helps the seasonings adhere to the shrimp
– 1 pound large shrimp (16-20 count), peeled and deveined, tails removed if desired as the star of the dish
– Salt and pepper to taste for essential seasonings
– 1 teaspoon Italian seasoning for depth and Mediterranean flair
– 2-3 teaspoons minced garlic for signature aromatic punch
– Juice of 1 lemon to brighten the dish
– 1 tablespoon chopped parsley as a finishing touch
Instructions
1-Step 1: Prepare Your Shrimp Start by ensuring your shrimp are properly prepared. If using frozen shrimp, thaw them overnight in the refrigerator or place the sealed bag under cold running water for 10-15 minutes. Once thawed, pat the shrimp completely dry with paper towels. This step is crucial because excess moisture causes the shrimp to steam rather than sear, resulting in a soggy texture and less browning. Check that each shrimp is peeled and deveined. If you purchased shrimp with shells, remove them by pulling the legs and peeling back the shell. To devein, make a shallow cut along the back and pull out the dark vein with the tip of your knife or a deveining tool. Whether to remove the tails is entirely up to you leaving them on looks elegant for serving, while removing them makes eating more convenient for casual weeknight dinners.
2-Step 2: Season Your Shrimp Place your dried shrimp in a bowl and season them evenly with salt, pepper, and Italian seasoning. Toss gently to coat each piece. Pre-seasoning helps the flavors penetrate the shrimp rather than just sitting on the surface. Let them sit for a minute or two while you prepare your pan.
3-Step 3: Heat the Butter Place a large skillet or frying pan over medium-high heat. Add the 4 tablespoons of butter and let it melt completely. Wait until the butter starts to bubble slightly and foam this indicates it’s hot enough for cooking. The butter should be melted but not browned at this stage.
4-Step 4: Cook the Shrimp Once the butter is hot and bubbly, add the seasoned shrimp to the pan in a single layer. Cook for 3-5 minutes total, stirring occasionally. The shrimp will start to turn pink and opaque on the bottom side within 2-3 minutes. Flip or stir them to cook the other side. You’ll know the shrimp are done when they’re fully pink, opaque throughout, and curled into a loose “C” shape. Avoid cooking until they form a tight “O” shape this indicates overcooking and results in tough, rubbery shrimp. The internal temperature should reach 145°F if you’re using a meat thermometer.
5-Step 5: Add the Garlic When the shrimp are nearly done (pink and just turning opaque), add the minced garlic to the pan. Cook for about 1 minute, stirring constantly. Adding the garlic at this stage prevents it from burning garlic cooks much faster than shrimp and can become bitter if added too early. The garlic should become fragrant and slightly golden but not brown.
6-Step 6: Finish with Lemon and Parsley Remove the pan from the heat and immediately stir in the juice of one lemon and the chopped parsley. The residual heat will warm these final ingredients without cooking away the bright, fresh flavors. Toss everything together so the shrimp are well-coated with the garlic butter sauce.
7-Step 7: Serve Immediately Transfer your garlic butter shrimp to a serving platter or individual plates. Spoon any remaining sauce from the pan over the top. Serve right away while hot the texture and flavor are best fresh from the stove. This dish pairs beautifully with crusty bread for soaking up the sauce, over pasta, alongside steamed vegetables, or simply on its own as a protein-rich main course.
Last Step:
Please leave a rating and comment letting us know how you liked this recipe! This helps our business to thrive and continue providing free, high-quality recipes for you.Notes
🦐 Pat shrimp dry before cooking for superior browning and flavor adhesion.
🧄 Use fresh minced garlic for the best, most vibrant aroma and taste.
⚡ Avoid overcooking – shrimp are done when pink and opaque, about 2-3 minutes per side.
- Prep Time: 5 minutes
- Cook Time: 5 minutes
- Category: Main Dish
- Method: Stovetop
- Cuisine: American
- Diet: Pescatarian
Nutrition
- Serving Size: 1/4 pound
- Calories: 215 kcal
- Sugar: 1 g
- Sodium: 481 mg
- Fat: 12 g
- Saturated Fat: 7 g
- Unsaturated Fat: 4 g
- Trans Fat: 0 g
- Carbohydrates: 3 g
- Fiber: 0 g
- Protein: 23 g
- Cholesterol: 315 mg





