

Why You’ll Love This Pumpkin Protein Balls
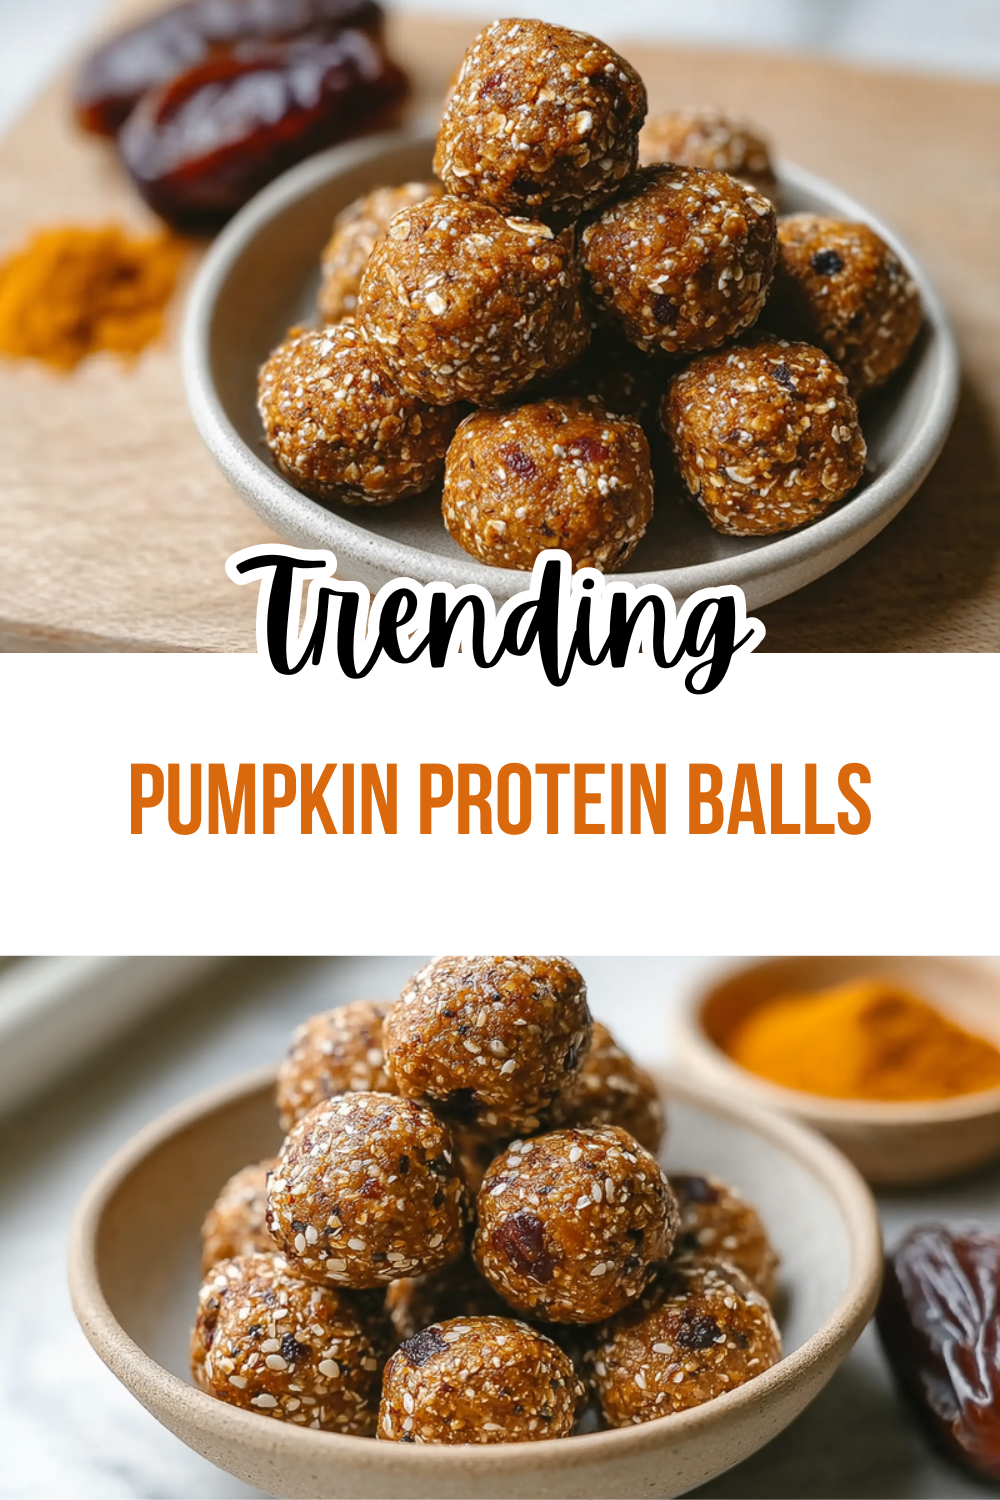
Hey there, fellow food lovers! If you’re on the hunt for a quick and tasty snack that’s packed with goodness, pumpkin protein balls are about to become your new best friend. These little bites combine the warm, cozy taste of pumpkin with a protein punch, making them perfect for busy days when you need a boost. Let’s dive into why these pumpkin protein balls, or as I like to call them, pumpkin energy balls, will have you hooked from the first bite!
Ease of Preparation
One of the best things about pumpkin protein balls is how simple they are to make. You can whip up a batch in just 10 minutes with minimal effort, which is a lifesaver for busy parents and working professionals. No oven required means less cleanup and more time to enjoy your day, am I right? This ease makes pumpkin protein balls a go-to choice for anyone wanting a healthy snack without the hassle.
Health Benefits
Pumpkin protein balls are loaded with nutrients that support your wellness goals. Each ball delivers a solid dose of protein, fiber, and vitamins, helping you feel full and energized. With ingredients like oats and pumpkin puree, you’re getting carbs that fuel your body along with healthy fats from nut butter. Pumpkin protein bites are great for diet-conscious folks, offering around 104 calories per serving while packing 5 grams of protein to keep hunger at bay.
Versatility
These pumpkin snack balls adapt to all sorts of dietary needs, making them ideal for vegans, gluten-free eaters, or anyone watching their calories. You can tweak the recipe for different preferences, like using gluten-free oats or plant-based protein powder. Serve them as a quick breakfast, a post-workout treat, or even a dessert alternative the options are endless! Whether you’re a student grabbing a bite on the go or a senior enjoying something light, pumpkin protein balls fit right in.
Distinctive Flavor
What sets pumpkin protein balls apart is their unique blend of spices and textures that scream fall vibes. The pumpkin pie spice adds a warm, inviting flavor that’s balanced with just the right sweetness from maple syrup. These pumpkin energy balls have a chewy center with a hint of crunch from add-ins like chocolate chips, making every bite exciting. Trust me, once you try these, you’ll want to make them all year round!
Jump to:
- Why You’ll Love This Pumpkin Protein Balls
- Ease of Preparation
- Health Benefits
- Versatility
- Distinctive Flavor
- Essential Ingredients for Pumpkin Protein Balls
- How to Prepare the Perfect Pumpkin Protein Balls: Step-by-Step Guide
- First Step: Mise en Place
- Second Step: Combine Dry Ingredients
- Third Step: Mix Wet Ingredients
- Fourth Step: Test and Tweak Texture
- Fifth Step: Shape the Balls
- Sixth Step: Chill to Set
- Seventh Step: Optional Coating and Finishing
- Final Step: Serve and Store
- Dietary Substitutions to Customize Your Pumpkin Protein Balls
- Protein and Main Component Alternatives
- Vegetable, Sauce, and Seasoning Modifications
- Mastering Pumpkin Protein Balls: Advanced Tips and Variations
- Pro Cooking Techniques
- Flavor Variations
- Presentation and Make-Ahead Options
- How to Store Pumpkin Protein Balls: Best Practices
- FAQs: Frequently Asked Questions About Pumpkin Protein Balls
- What are pumpkin protein balls and why should I try them?
- How do I make pumpkin protein balls at home?
- Are pumpkin protein balls good for weight loss?
- How should I store pumpkin protein balls to keep them fresh?
- Can pumpkin protein balls be made vegan or allergy-friendly?
- Pumpkin Protein Balls
- Ingredients
- Instructions
- Last Step:
- Notes
- Nutrition
- Did you make this recipe?
Essential Ingredients for Pumpkin Protein Balls
Gathering the right ingredients is key to making delicious pumpkin protein balls. Each one plays a specific role to ensure the perfect texture and taste. Below is a detailed list of everything you need, pulled straight from the recipe, with precise measurements and a quick note on why they’re important.
- ¾ cup old fashioned rolled oats (gluten-free if needed) Acts as a binder and adds fiber for a hearty base.
- ¼ cup almond butter or cashew butter Provides healthy fats and helps hold the balls together for a creamy texture.
- ¼ cup pumpkin puree Brings moisture, flavor, and nutrients like beta-carotene for a vitamin boost.
- 1 scoop (25 grams) vanilla protein powder Delivers a protein punch and improves the overall texture of your pumpkin protein bites.
- ½ tablespoon ground flaxseed Adds omega-3s and extra binding power for better cohesion.
- ½ teaspoon pumpkin pie spice Infuses warm, seasonal flavors that make these pumpkin snack balls irresistible.
- 1 teaspoon chia seeds Offers a crunchy element and more fiber, plus they’re great for gut health.
- 3 tablespoons maple syrup Sweetens the mix naturally and keeps everything moist and delicious.
- Pinch of cinnamon Balances the sweetness and adds a cozy spice note to enhance the pumpkin taste.
- 1 tablespoon chocolate chips Provides a fun, melty contrast and a bit of indulgence in your pumpkin protein balls.
For special dietary options, go vegan by opting for plant-based protein powder and maple syrup. If you’re gluten-free, just use certified gluten-free oats. For low-calorie versions, swap in a lower-sugar nut butter or reduce the maple syrup it’s all about making these pumpkin energy balls work for you!
How to Prepare the Perfect Pumpkin Protein Balls: Step-by-Step Guide
Ready to make some amazing pumpkin protein balls? This guide walks you through every step, so even if you’re new to the kitchen, you’ll nail it on the first try. We’re talking simple ingredients mixed into tasty bites that take just 10 minutes total what could be easier? Let’s get started and turn those pantry staples into your favorite quick snack!
First Step: Mise en Place
Begin by measuring out all your ingredients to make the process smooth. Drain any excess moisture from the pumpkin puree if it’s too wet, and line a tray with parchment paper for easy cleanup. Grab a large mixing bowl, a spatula, and a kitchen scale if you have one this prep helps avoid mistakes and keeps things organized for your pumpkin protein balls.
Second Step: Combine Dry Ingredients
Now, whisk together the dry items in a large bowl. That means mixing the protein powder, rolled oats, pumpkin pie spice, and a pinch of salt. This step ensures even distribution and prevents clumping, especially if you’re using whey or plant-based protein powder plant-based ones might need a tad more liquid later. Stir for about a minute until it’s all blended nicely for your pumpkin energy balls.
Third Step: Mix Wet Ingredients
Next, add the wet components to the dry mix. Pour in the pumpkin puree, nut butter, and maple syrup, then stir everything until you get a uniform dough. If the mixture seems too dry, add a tablespoon of milk dairy or plant-based works fine. Keep stirring for 3-5 minutes; this is where the magic happens for your delicious pumpkin snack balls!
Fourth Step: Test and Tweak Texture
Take a small amount and press it together to check the consistency. If it’s too crumbly, mix in 1-2 teaspoons of liquid like nut butter or milk. If it’s sticky, add a tablespoon of oats or more protein powder. Aim for a dough that’s easy to handle this tweak ensures your pumpkin protein balls hold their shape perfectly.
Fifth Step: Shape the Balls
Using a small cookie scoop or tablespoon, portion out 1-1.5 tablespoons of the mixture and roll it between your palms into compact balls. This makes about 12 balls, and for consistent sizes, the scoop is a game-changer. If you’re making a vegan version, double-check that your protein powder and sweetener are plant-based it’s super adaptable for different needs!
Sixth Step: Chill to Set
Place the shaped balls on your prepared tray and pop them in the refrigerator for 20-30 minutes to firm up. For a faster option, freeze them for 10-15 minutes. This step is crucial for that perfect texture in your pumpkin protein bites, so don’t skip it!
Seventh Step: Optional Coating and Finishing
If you want to get fancy, roll the chilled balls in something fun like toasted coconut or chopped nuts for extra flavor. This adds a nice touch to your pumpkin snack balls and makes them look amazing. Remember, for low-sugar preferences, you can skip sweeteners or use alternatives here.
Final Step: Serve and Store
Now you’re ready to enjoy your pumpkin protein balls! Serve them with yogurt for a creamy twist or pack them as a lunchbox snack they’re perfect on the go. If you prefer baked bites, preheat your oven to 325°F and bake for 8-10 minutes until lightly firm, then let them cool. Adaptations for allergies are easy; just swap ingredients as needed to keep things safe and tasty.

Dietary Substitutions to Customize Your Pumpkin Protein Balls
Protein and Main Component Alternatives
Swapping ingredients in your pumpkin protein balls is a breeze and lets you tailor them to your needs. For vegan options, switch whey protein with pea, rice, or soy protein and adjust ratios since plant proteins absorb more moisture add a bit of extra liquid if needed. If nuts are a no-go, use sunflower seed butter instead of almond butter to keep things allergen-free, and for grain-free versions, replace rolled oats with almond flour, noting it might change the texture slightly.
Vegetable, Sauce, and Seasoning Modifications
Shake things up by changing the veggies and flavors in your pumpkin energy balls. Swap pumpkin puree for sweet potato puree or mashed banana to mix up the taste, especially for different seasons. For lower-sugar diets, use agave or stevia instead of maple syrup, and add tahini for a creamier twist. Try spices like ginger or cardamom for a new vibe, and for sodium-sensitive folks, go with unsweetened puree and skip extra salt your pumpkin snack balls will still shine!
Mastering Pumpkin Protein Balls: Advanced Tips and Variations
Pro Cooking Techniques
To take your pumpkin protein balls to the next level, try toasting the oats or seeds first for a deeper flavor. Warm the nut butter a bit to make mixing easier, and chill the dough if it’s hard to roll. Adjust binder amounts based on your protein powder, and remember humidity can affect texture store batches in a cool spot for the best results.
Flavor Variations
Get creative with flavors like pumpkin-maple-pecan or pumpkin-chocolate-sea-salt for exciting twists on your pumpkin bites. Add mix-ins such as dried cranberries or cacao nibs, keeping them to 10-20% of the dough. These changes make your pumpkin protein balls feel fresh every time!
Presentation and Make-Ahead Options
For a wow factor, dust your balls with cinnamon or drizzle melted chocolate, and package them for gifting in parchment. Make ahead by refrigerating for up to 7 days or freezing for 3 months just flash-freeze first. If you run into issues like crumbly dough, add liquid a teaspoon at a time to fix it quickly.
How to Store Pumpkin Protein Balls: Best Practices
Keeping your pumpkin protein balls fresh is simple with the right storage tips. For short-term, put them in an airtight container with parchment layers to avoid sticking, and they’ll last 5-7 days in the fridge. Freezing is great for longer storage; lay them out on a tray for 1-2 hours, then move to a bag for up to 3 months.
To thaw, leave them in the fridge overnight or at room temperature for 20-30 minutes. For meal prep, portion into packs they firm up when chilled, so bring them to room temp before eating. These pumpkin protein bites storage methods keep them tasty and ready for snacks on the go!
FAQs: Frequently Asked Questions About Pumpkin Protein Balls
What are pumpkin protein balls and why should I try them?
Pumpkin protein balls are bite-sized snacks made from pumpkin puree, protein powder, nuts or seeds, and natural sweeteners like honey or maple syrup. They offer a convenient way to enjoy a nutrient-rich treat packed with fiber, vitamins, and protein. These balls provide sustained energy, making them ideal for post-workout recovery or a healthy snack between meals.
How do I make pumpkin protein balls at home?
To make pumpkin protein balls, mix 1 cup of pumpkin puree with 1 cup of protein powder, 1/2 cup of oats, 1/4 cup of nut butter, and 2 tablespoons of honey. Add spices like cinnamon or nutmeg for flavor. Combine all ingredients thoroughly, form into 1-inch balls, and refrigerate for at least 30 minutes before eating. This no-bake recipe is quick, simple, and customizable.
Are pumpkin protein balls good for weight loss?
Yes, pumpkin protein balls can support weight loss when eaten in moderation. They are high in protein and fiber, which promote fullness and reduce appetite. However, because they also contain calories from nuts and sweeteners, it’s important to control portion size and incorporate them into a balanced diet.
How should I store pumpkin protein balls to keep them fresh?
Store pumpkin protein balls in an airtight container in the refrigerator, where they will stay fresh for up to one week. For longer storage, freeze them in a single layer on a baking sheet, then transfer to a freezer bag; frozen balls can last for up to three months. Thaw in the refrigerator before eating.
Can pumpkin protein balls be made vegan or allergy-friendly?
Yes, pumpkin protein balls can easily be made vegan and allergy-friendly. Replace honey with maple syrup or agave nectar, and choose plant-based protein powders like pea or rice protein. Use nut-free butters, such as sunflower seed or tahini, to accommodate nut allergies. Always check ingredient labels to avoid common allergens.
Pumpkin Protein Balls
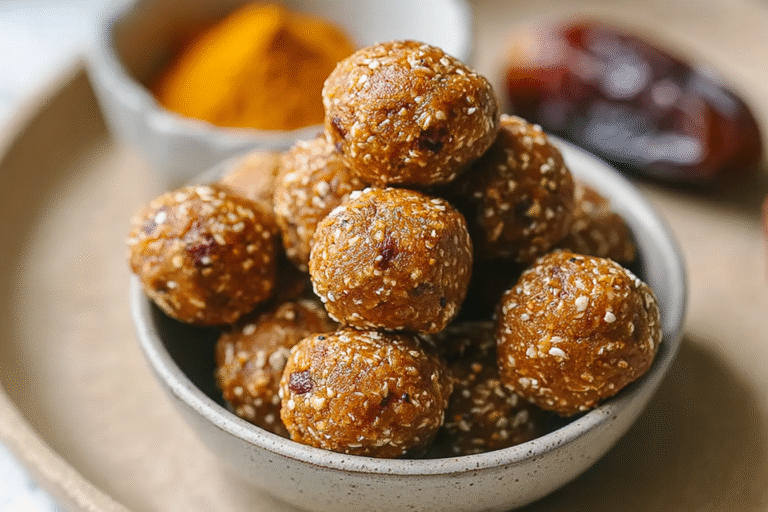
🎃 Pumpkin Protein Balls are a quick and healthy snack packed with protein and natural ingredients.
🍫 These easy-to-make balls combine the goodness of pumpkin with a touch of sweetness, perfect for on-the-go energy boosts.
- Total Time: 10 minutes
- Yield: 12 balls
Ingredients
– ¾ cup old fashioned rolled oats (gluten-free if needed) Acts as a binder and adds fiber for a hearty base.
– ¼ cup almond butter or cashew butter Provides healthy fats and helps hold the balls together for a creamy texture.
– ¼ cup pumpkin puree Brings moisture, flavor, and nutrients like beta-carotene for a vitamin boost.
– 1 scoop (25 grams) vanilla protein powder Delivers a protein punch and improves the overall texture of your pumpkin protein bites.
– ½ tablespoon ground flaxseed Adds omega-3s and extra binding power for better cohesion.
– ½ teaspoon pumpkin pie spice Infuses warm, seasonal flavors that make these pumpkin snack balls irresistible.
– 1 teaspoon chia seeds Offers a crunchy element and more fiber, plus they’re great for gut health.
– 3 tablespoons maple syrup Sweetens the mix naturally and keeps everything moist and delicious.
– Pinch of cinnamon Balances the sweetness and adds a cozy spice note to enhance the pumpkin taste.
– 1 tablespoon chocolate chips Provides a fun, melty contrast and a bit of indulgence in your pumpkin protein balls.
Instructions
1-First Step: Mise en Place: Begin by measuring out all your ingredients to make the process smooth. Drain any excess moisture from the pumpkin puree if it’s too wet, and line a tray with parchment paper for easy cleanup. Grab a large mixing bowl, a spatula, and a kitchen scale if you have one this prep helps avoid mistakes and keeps things organized for your pumpkin protein balls.
2-Second Step: Combine Dry Ingredients: Now, whisk together the dry items in a large bowl. That means mixing the protein powder, rolled oats, pumpkin pie spice, and a pinch of salt. This step ensures even distribution and prevents clumping, especially if you’re using whey or plant-based protein powder plant-based ones might need a tad more liquid later. Stir for about a minute until it’s all blended nicely for your pumpkin energy balls.
3-Third Step: Mix Wet Ingredients: Next, add the wet components to the dry mix. Pour in the pumpkin puree, nut butter, and maple syrup, then stir everything until you get a uniform dough. If the mixture seems too dry, add a tablespoon of milk dairy or plant-based works fine. Keep stirring for 3-5 minutes; this is where the magic happens for your delicious pumpkin snack balls!
4-Fourth Step: Test and Tweak Texture: Take a small amount and press it together to check the consistency. If it’s too crumbly, mix in 1-2 teaspoons of liquid like nut butter or milk. If it’s sticky, add a tablespoon of oats or more protein powder. Aim for a dough that’s easy to handle this tweak ensures your pumpkin protein balls hold their shape perfectly.
5-Fifth Step: Shape the Balls: Using a small cookie scoop or tablespoon, portion out 1-1.5 tablespoons of the mixture and roll it between your palms into compact balls. This makes about 12 balls, and for consistent sizes, the scoop is a game-changer. If you’re making a vegan version, double-check that your protein powder and sweetener are plant-based it’s super adaptable for different needs!
6-Sixth Step: Chill to Set: Place the shaped balls on your prepared tray and pop them in the refrigerator for 20-30 minutes to firm up. For a faster option, freeze them for 10-15 minutes. This step is crucial for that perfect texture in your pumpkin protein bites, so don’t skip it!
7-Seventh Step: Optional Coating and Finishing: If you want to get fancy, roll the chilled balls in something fun like toasted coconut or chopped nuts for extra flavor. This adds a nice touch to your pumpkin snack balls and makes them look amazing. Remember, for low-sugar preferences, you can skip sweeteners or use alternatives here.
8-Final Step: Serve and Store: Now you’re ready to enjoy your pumpkin protein balls! Serve them with yogurt for a creamy twist or pack them as a lunchbox snack they’re perfect on the go. If you prefer baked bites, preheat your oven to 325°F and bake for 8-10 minutes until lightly firm, then let them cool. Adaptations for allergies are easy; just swap ingredients as needed to keep things safe and tasty.
Last Step:
Please leave a rating and comment letting us know how you liked this recipe! This helps our business to thrive and continue providing free, high-quality recipes for you.Notes
🎯 If the mixture is too dry or crumbly, add more pumpkin puree or a splash of water or milk.
❄️ Chill the mixture in the refrigerator for about 30 minutes if it’s difficult to shape into balls.
🌰 Nut butter can be swapped for peanut butter, sunflower seed butter, or other nut/seed butters for variety.
- Prep Time: 10 minutes
- Category: Snack
- Method: No-bake mixing
- Cuisine: American
- Diet: Vegetarian
Nutrition
- Serving Size: 1 ball
- Calories: 104 kcal
- Sugar: 6 g
- Sodium: 40 mg
- Fat: 6 g
- Saturated Fat: 1 g
- Trans Fat: 0 g
- Carbohydrates: 11 g
- Fiber: 2 g
- Protein: 5 g
- Cholesterol: 0 mg





