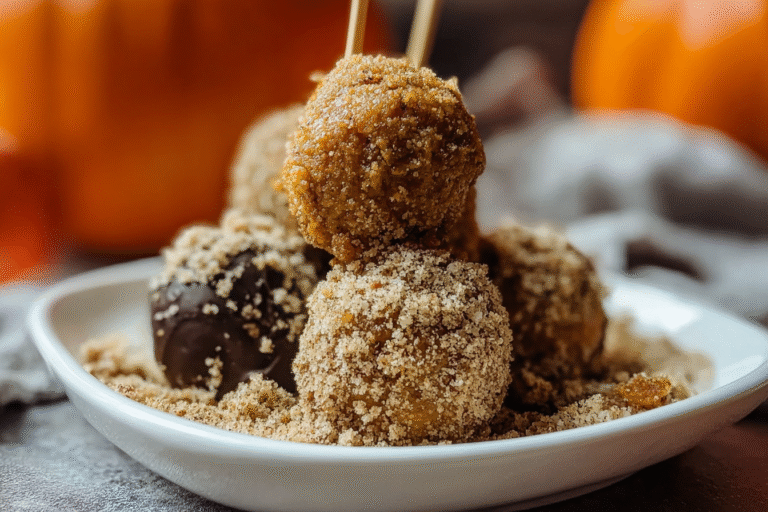
Ingredients
– ½ cup pumpkin puree
– 8 ounces cream cheese (fat free, reduced fat, or full fat)
– 1 teaspoon vanilla extract for flavoring
– 2 scoops protein powder
– 4 tablespoons cocoa powder
– 2 tablespoons coconut flour
– 1 ½ teaspoons pumpkin pie spice
– 1 tablespoon sweetener
– 1 tablespoon coconut oil
– Pecans (optional)
– Graham cracker crumbs (optional for rolling)
Instructions
1-First Step: Gather and Prepare Your Ingredients Begin by pulling together all the ingredients on your list to ensure smooth sailing. Measure out ½ cup pumpkin puree, 8 ounces cream cheese, 1 teaspoon vanilla extract, 2 scoops protein powder, 4 tablespoons cocoa powder, 2 tablespoons coconut flour, 1 ½ teaspoons pumpkin pie spice, 1 tablespoon sweetener, and 1 tablespoon coconut oil. If you’re adding pecans or graham cracker crumbs, have them ready too. This prep takes just a minute and helps avoid any mid-recipe rushes, making your pumpkin cheesecake protein balls come together effortlessly. For a healthy protein snacks like this, organization is key to keeping things fun and stress-free.
2-Second Step: Mix the Ingredients Combine all the main ingredients in a large bowl, starting with the pumpkin puree, cream cheese, and vanilla extract. Stir them together until they form a creamy base, then add the protein powder, cocoa powder, coconut flour, pumpkin pie spice, sweetener, and coconut oil. Mix everything thoroughly with a spoon or your hands until the mixture is smooth and well-blended; this usually takes about 1-2 minutes. If the mix feels too sticky, you can adjust with a bit more coconut flour for better handling, ensuring your pumpkin cheesecake protein balls turn out just right for various dietary tweaks.
3-Third Step: Add Optional Ingredients and Shape the Balls Fold in any optional additions like pecans if you’re using them, giving the mixture a gentle stir to distribute evenly without over-mixing. Once everything is incorporated, use your hands to shape the dough into small balls, aiming for about 1-inch sizes to get around 10 balls from the batch. If things stick, dampen your hands with a little water to make rolling easier; this step adds a fun, hands-on element while keeping your pumpkin cheesecake protein balls uniform and ready for the next part.
4-Fourth Step: Roll and Chill the Balls Optionally, roll each ball in graham cracker crumbs for a tasty coating that enhances the cheesecake flavor and adds crunch. Place the shaped balls on a plate or baking sheet, then pop them into the refrigerator for about one hour to firm up and improve texture; this chilling time is crucial for the best results. While they cool, you can prepare for storage or enjoy one as a quick taste test, adapting this step for vegan options by skipping the crumbs if needed.
5-Final Step: Serve and Enjoy After chilling, your pumpkin cheesecake protein balls are ready to eat! Serve them as a snack, dessert, or post-workout boost, savoring that creamy pumpkin cheesecake protein balls goodness. They store well for later, but if you’re sharing with family or friends, plate a few for an instant hit. Remember, this whole process fits into a 5-minute prep with just one hour of wait, making it perfect for busy parents or baking enthusiasts looking for quick wins. For more ideas, check out our guide on easy no-bake recipes to expand your snack options.
Last Step:
Please leave a rating and comment letting us know how you liked this recipe! This helps our business to thrive and continue providing free, high-quality recipes for you.Notes
🍫 Add chocolate chips, nuts, or dried fruits to enhance flavor.
🤲 Use damp hands when shaping balls to prevent sticking.
❄️ Store in the refrigerator for 4-5 days or freeze for longer storage.
- Prep Time: 5 minutes
- Refrigeration: 1 hour
- Category: Snack
- Method: Mixing and shaping
- Cuisine: American
- Diet: High Protein
Nutrition
- Serving Size: 1 ball
- Calories: 81
- Sugar: 1.9g
- Sodium: 120.4mg
- Fat: 2.4g
- Saturated Fat: 1.4g
- Carbohydrates: 9g
- Fiber: 3.8g
- Protein: 6g