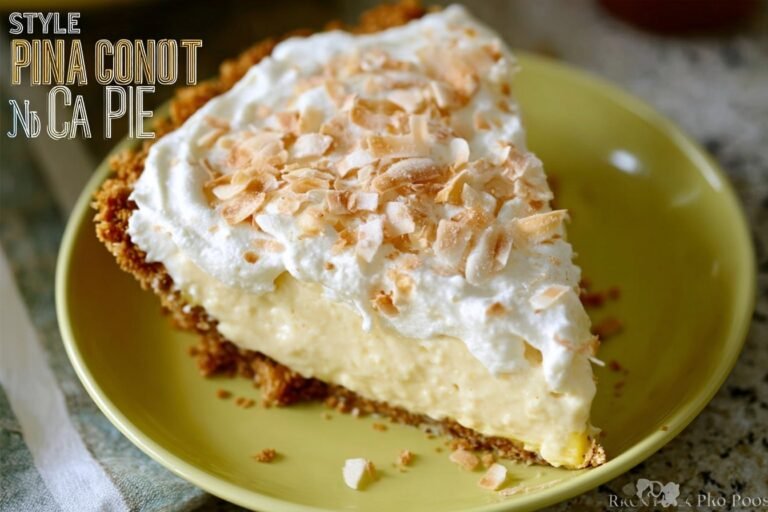
Ingredients
– 1 1/3 cup graham cracker crumbs forms the sweet, sturdy base for the crust.
– 1/4 cup granulated sugar adds a little sweetness to the crust.
– 8 tablespoons melted butter helps bind the crust together so it presses firmly into the pan.
– 1 cup heavy whipping cream whips into stiff peaks for a fluffy filling.
– 8 ounces softened cream cheese gives the pie a smooth, creamy body.
– 1/4 cup granulated sugar sweetens the filling.
– 1 teaspoon rum extract gives the pie its signature pina colada flavor.
– 1/2 teaspoon vanilla extract rounds out the flavor and adds warmth.
– 1 20-ounce can crushed pineapple, well drained brings bright tropical flavor without making the filling watery.
– 1 cup sweetened shredded coconut adds chew, sweetness, and that classic island-style taste.
– Whipped cream, optional a light and pretty topping.
– Toasted coconut, optional adds texture and a deeper coconut flavor.
Instructions
1-First Step: Make the graham cracker crust Start by combining 1 1/3 cup graham cracker crumbs, 1/4 cup granulated sugar, and 8 tablespoons melted butter in a small bowl. Mix with a fork until the crumbs are evenly coated and the texture looks like damp sand. This crust is the base of your No Bake Pina Colada Cream Pie, so take a moment to press it firmly and evenly. Lightly grease an 8 to 9.5 inch pie pan. Press the crust mixture into the bottom and up the sides of the pan, using the back of a spoon or measuring cup to help it pack down. A firm crust holds the filling better and makes slicing much easier later. Once the crust is in place, refrigerate it while you make the filling.
2-Second Step: Whip the cream Pour 1 cup heavy whipping cream into a mixer bowl and whisk it until stiff peaks form. This usually takes just a few minutes, and it helps create the light, fluffy texture that makes the pie feel dreamy. When the cream holds its shape, stop mixing so it stays airy. Place the whipped cream in the refrigerator while you work on the rest of the filling. Keeping it cold helps it hold volume when folded into the cream cheese mixture. If you are making this for a warm-weather gathering, this step is especially helpful because chilled cream keeps the dessert feeling cool and fresh.
3-Third Step: Mix the cream cheese filling In another bowl, beat 8 ounces of softened cream cheese until it looks smooth and fluffy. Soft cream cheese blends much more easily, so let it sit at room temperature first if you can. Add 1/4 cup granulated sugar, 1 teaspoon rum extract, and 1/2 teaspoon vanilla extract, then mix until everything is well combined. This is where the classic pina colada flavor really starts to show up. The rum extract gives a tropical flavor without needing actual alcohol, and the vanilla helps soften the sharpness of the cream cheese. If you prefer an alcohol-free version, you can still enjoy the flavor by keeping the rum extract very light or using coconut extract instead.
4-Fourth Step: Fold in the fruit and coconut Now gently fold the whipped cream into the cream cheese mixture. Use a spatula and light movements so the filling stays fluffy. After that, add the well-drained crushed pineapple and 1 cup sweetened shredded coconut. Mix just until the ingredients are evenly spread through the filling. The pineapple gives the pie its juicy tropical sweetness, while the coconut adds flavor and a pleasant bite. This combination is what makes No Bake Pina Colada Cream Pie feel so different from a standard cream pie. It is creamy, fruity, and just a little playful.
5-Fifth Step: Fill the crust and chill Spoon the filling into the prepared crust and smooth the top with a spatula. Try to spread it evenly so every slice looks neat. Once the filling is in place, cover the pie and refrigerate it for at least 4 hours. If you have time, letting it chill overnight gives even better texture and cleaner slices. This is a great make-ahead dessert because the pie can rest in the fridge while you focus on the rest of your meal. It is especially helpful for holidays, potlucks, birthdays, and summer dinners when you want dessert ready before guests arrive.
6-Final Step: Add toppings and serve Right before serving, add whipped cream and toasted coconut if you like. These toppings are optional, but they make the pie look extra pretty and add a little more texture. To toast coconut, place it in a dry skillet or oven and watch closely until it turns golden. A little goes a long way, and toasted coconut adds a nice warm flavor that pairs beautifully with the cool filling. Slice the pie with a sharp knife, wiping the blade between cuts if you want tidy pieces. Serve it chilled for the best texture. It is a lovely dessert for travelers missing tropical flavors, newlyweds hosting friends, or anyone who wants a cheerful treat without turning on the oven.
Last Step:
Please leave a rating and comment letting us know how you liked this recipe! This helps our business to thrive and continue providing free, high-quality recipes for you.Notes
🛒 Store-bought crust saves time – instant shortcut.
🔥 Toast coconut briefly – amps nutty flavor pop.
⏰ Make ahead: fridge 4-5 days, freeze 2-3 months.
- Prep Time: 15 minutes
- Chilling: 4 hours
- Cook Time: 0 minutes
- Category: Desserts
- Method: No-Bake
- Cuisine: American
- Diet: Vegetarian
Nutrition
- Serving Size: 1 slice
- Calories: 509 kcal
- Sugar: 32 g
- Sodium: 326 mg
- Fat: 38 g
- Saturated Fat: 23 g
- Unsaturated Fat: 15 g
- Trans Fat: 0 g
- Carbohydrates: 42 g
- Fiber: 2 g
- Protein: 4 g
- Cholesterol: 102 mg