Ingredients
– ¼ cup oil
– 2 large onions, chopped
– 4 cloves garlic, minced
– 1 tablespoon ginger, minced
– 2 Fuji apples, grated
– 2 carrots, chopped
– 6 cups chicken stock
– 1 teaspoon soy sauce
– 1 block (200-230g) Japanese curry roux
– 1 cup all-purpose flour
– 2 large eggs, beaten
– 2 cups panko breadcrumbs
– 6 boneless skinless chicken thighs, pounded to ½-inch thickness
– Steamed jasmine rice (or store-bought)
Instructions
1-Step 1: Build the Flavor Base for Your Curry Heat ¼ cup of oil in a large pot over medium heat. Once the oil is shimmering, add your chopped onions, minced garlic, and minced ginger. Sauté these aromatics for about 5 minutes, stirring occasionally, until the onions have softened and become translucent. This step is crucial for developing the savory foundation of your curry sauce. You want the onions to release their natural sweetness without browning too much. The garlic and ginger will become fragrant and infuse the oil with their aromatic qualities, creating the first layer of flavor in your Hawaii Chicken Katsu Curry.
2-Step 2: Add the Sweet Vegetables Increase the heat to medium-high and add your grated Fuji apples and chopped carrots to the pot. Cook these together for another 5 minutes, allowing the apples to break down slightly and the carrots to begin softening. The grated apple is what sets this Hawaiian-style curry apart from traditional versions. As the apples cook, they release their natural sugars and create a subtle fruity undertone in the sauce. Stir frequently to prevent any sticking, and watch as the mixture becomes more aromatic and the vegetables begin to caramelize slightly around the edges.
3-Step 3: Create the Curry Sauce Pour in 6 cups of chicken stock and add 1 teaspoon of soy sauce. Bring the mixture to a rolling boil, then remove the pot from the heat source. Add the block of Japanese curry roux cubes and stir continuously until they are completely dissolved. The roux contains flour and curry spices that will thicken the sauce as you stir. Once dissolved, return the pot to low heat and simmer for 5-10 minutes until the curry reaches your desired thickness. If the sauce becomes too thick, simply add a splash of water to loosen it up. The finished sauce should coat the back of a spoon and have a rich, glossy appearance.
4-Step 4: Prepare the Chicken Katsu Coating Station While the curry sauce simmers, set up your breading station. Prepare three shallow dishes: place 1 cup of all-purpose flour in the first dish, 2 beaten eggs in the second dish, and 2 cups of panko breadcrumbs in the third. This classic breading technique ensures the coating adheres properly to the chicken. Season your pounded chicken thighs with salt and pepper before beginning the coating process. Working with one piece at a time, coat each chicken thigh in flour, shaking off any excess. Dip it into the beaten eggs, allowing the extra egg to drip off, then press it firmly into the panko breadcrumbs. The pressing motion helps the breadcrumbs stick and creates a more even, crispy coating. Place each breaded chicken piece on a baking sheet as you work through them.
5-Step 5: Fry the Chicken Katsu Heat about 1 inch of oil in a large pot or Dutch oven to 350°F. Use a kitchen thermometer to check the temperature, as this ensures the chicken cooks evenly without absorbing too much oil. Carefully lower 1-2 pieces of chicken into the hot oil at a time, being careful not to overcrowd the pot. Fry for 4-5 minutes per side until the coating is a deep golden brown and the chicken is cooked through. The internal temperature should reach 165°F for food safety. Transfer the fried chicken to a wire rack to drain excess oil. This keeps the coating crispy rather than soggy. Let the chicken rest for a couple of minutes before slicing.
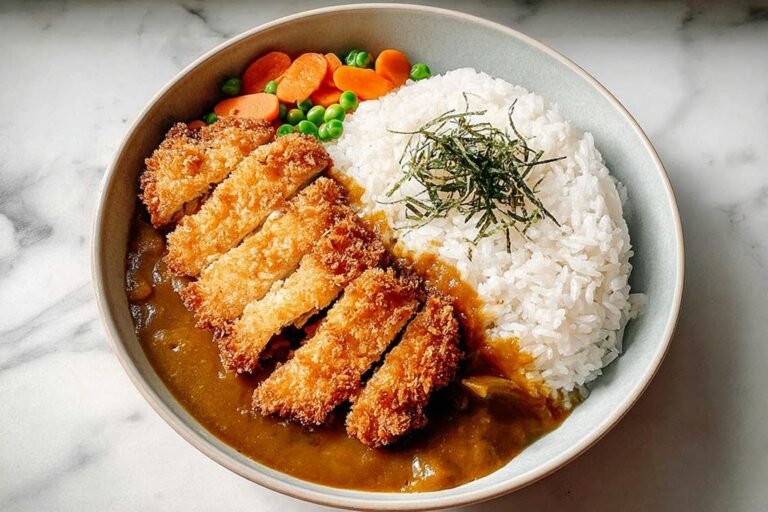
6-Step 6: Assemble and Serve Your Hawaii Chicken Katsu Curry To serve, place a generous portion of steamed jasmine rice on each plate. Slice the chicken katsu into strips and arrange it alongside or on top of the rice. Ladle the warm curry sauce over the chicken and rice, being sure to include plenty of the softened carrots and onions from the sauce. The curry should generously coat the chicken pieces while leaving plenty for dipping and soaking into the rice. Serve immediately while everything is hot and the chicken coating is at its crispiest. This dish pairs wonderfully with simple sides like pink popcorn for a fun snack-style appetizer or a fresh green salad to balance the meal.
Last Step:
Please leave a rating and comment letting us know how you liked this recipe! This helps our business to thrive and continue providing free, high-quality recipes for you.Notes
🍎 Add grated apple to the curry for natural sweetness and fruity depth.
🔥 Air fry breaded chicken at 400°F for 6-8 minutes per side brushed with oil to skip deep-frying.
🍚 Swap rice for udon noodles for a chewy, alternative serving style.
- Prep Time: 15 minutes
- Cook Time: 45 minutes
- Category: Poultry
- Method: Deep-Frying
- Cuisine: Japanese
Nutrition
- Serving Size: 1 serving
- Calories: 657 kcal
- Sugar: 15 g
- Sodium: 671 mg
- Fat: 34 g
- Saturated Fat: 7 g
- Unsaturated Fat: 24 g
- Trans Fat: 0.1 g
- Carbohydrates: 55 g
- Fiber: 4 g
- Protein: 32 g
- Cholesterol: 173 mg